[5th Gen : 08+]: DTC 942D Trouble Code


Thread Starter
|
Registered User
Joined: Apr 2016
Posts: 2
Likes: 0
Hey guys,
New here on the forum. I just purchased a 2015 GC R/T with 44K on the odometer, and loving it so far.
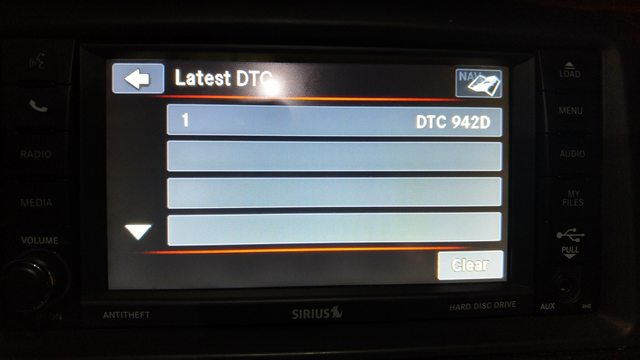
I was playing around with the radio, and came across a previous DTC code of 942D. I've searched everywhere and can't come up with any information on the code. Does anyone know what this code means?
Thanks,
Mike
New here on the forum. I just purchased a 2015 GC R/T with 44K on the odometer, and loving it so far.
I was playing around with the radio, and came across a previous DTC code of 942D. I've searched everywhere and can't come up with any information on the code. Does anyone know what this code means?
Thanks,
Mike

Mike, I need more information like B0942D or something like that. I did how ever came up with this code that maybe close enough.
28 - DTC-Based Diagnostics/RADIO/Diagnosis and Testing
B142D-AUDIO ANTENNA NOT CONNECTED
Special Tools: Click to display a list of tools used in this procedure
For a complete wiring diagram, refer to the Wiring Information.
• When Monitored:
With the ignition on and the Radio in seek mode.
• Set Condition:
With the Radio in seek mode for two loops around the band. The Radio does not detect an Antenna connection or does not receive a Radio station signal.
Possible Causes
BAD ANTENNA CONNECTION
OPEN ANTENNA CABLE
RADIO
1. CHECK THE ANTENNA CONNECTIONS
1. Turn the ignition off.
2. Disconnect the Radio Antenna connector.
3. Inspect the Radio Antenna connection.
Was the Antenna connection clean and secure?
Yes
• Go To 2
No
• Repair the Antenna connection as needed.
• Perform the BODY VERIFICATION TEST. (Refer to 28 - DTC-Based Diagnostics/MODULE, Totally Integrated Power (TIPM) - Standard Procedure).
2. CHECK THE ANTENNA AND CABLE
1. Connect the Radio Diagnostic Tool 9977-6-FM to the antenna connection on the back of the Radio.
2. Make sure one of the front doors is still open.
3. Using the scan tool, erase the DTCs.
4. Turn the ignition on.
5. Turn the Radio on.
6. Using the scan tool, read the active Radio DTCs.
Does the scan tool read: B142D- AUDIO ANTENNA NOT CONNECTED as active?
Yes
• Repair or replace the Radio in accordance with the Service Information.
• Perform the BODY VERIFICATION TEST. (Refer to 28 - DTC-Based Diagnostics/MODULE, Totally Integrated Power (TIPM) - Standard Procedure).
No
• Go To 3
3. TEST THE ANTENNA CABLE
1. Turn the ignition off.
2. Disconnect the Antenna cable at the base.
3. Connect the appropriate Radio Diagnostic Tool 9977-6-1 or 9977-6-3 to the Antenna cable at the back of the Radio.
4. Connect the appropriate Radio Diagnostic Tool 9977-6-4 or 9977-6-2 to the Antenna cable at the Antenna base.
5. Measure the Resistance across the tool terminals.
Is the resistance above 52.5 Ohms?
Yes
• Use the Radio Diagnostic Tool 9977-6
to locate the open circuit, repair or replace the Antenna cable as necessary.
• Perform the BODY VERIFICATION TEST. (Refer to 28 - DTC-Based Diagnostics/MODULE, Totally Integrated Power (TIPM) - Standard Procedure).
No
• Replace the Antenna base in accordance with the Service Information.
• Perform the BODY VERIFICATION TEST. (Refer to 28 - DTC-Based Diagnostics/MODULE, Totally Integrated Power (TIPM) - Standard Procedure).