


Valve adjustment DIY


Registered User
Joined: Apr 2009
Posts: 1
Likes: 0
Can some one help illustrate that.
Also I thought TDC would be in relation (inline) with the cam position sensor that is at the 10 o'clock position. So TDC is 12 o'clock. Right On!


Registered User
Joined: Jun 2011
Posts: 2
Likes: 0
Fabulous, a real time saver. Hadn't done this in 35 years so it was nice to have a blow by blow description. 150k and sounds like new again. A 5mm allen and a long 14mm box wrench made it easy. Also if you are working alone mark the bal wheel with a pencil on the bottom before turning it over for step 2. That way you don't have to get up to ck the tdc on top. Also protect your evap fins with one of those cheap snap together fatigue mats. I also tek screwed the firewall insul up out of the way (where it is supposed to be but had dropped a few inches) 3 hrs at a very casual, fix everything else in site at the same time, find all the tools on the fly pace. NICE:-)


Registered User
Joined: Apr 2006
Posts: 1
Likes: 0
Any way someone could further explain this. Mine seems to start ticking after about 30 seconds from startup and continues. I do have 68k and was thinking its time to adjust valves, but now a little concerned.

Registered User
Joined: Feb 2012
Posts: 1
Likes: 0
Now rotate the crankshaft 1 revolution and put the mark back on top. You are now ready to adjust the intake valves on # 3, 5, & 6 and the exhaust valves on # 2, 4, & 6.
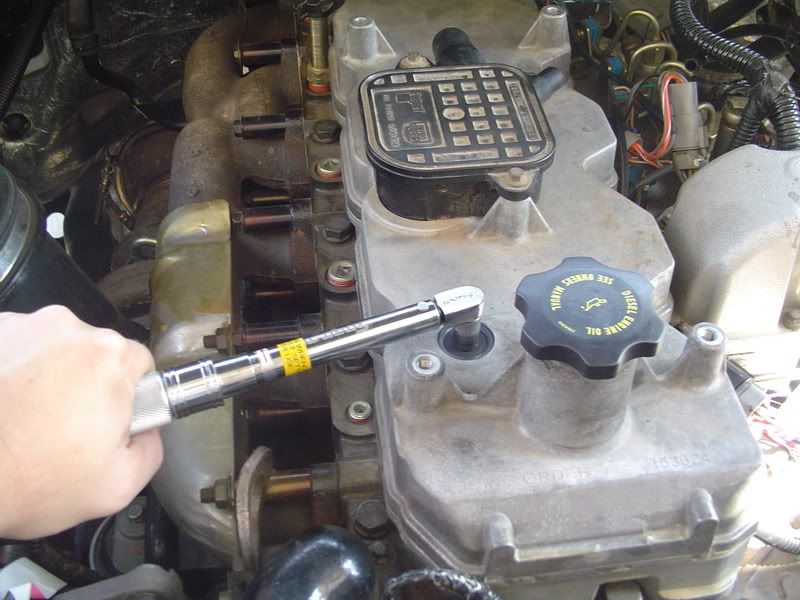
Once you are done checking/adjusting the valves, double check that all of the jamb nuts are torqued to 18 ft lbs.
Put the cover back on and tighen down the 6 bolts evenly. If you tighten them unevenly, you may inadverntantly crack the cover. Torque the bolts to 18 ft lbs.
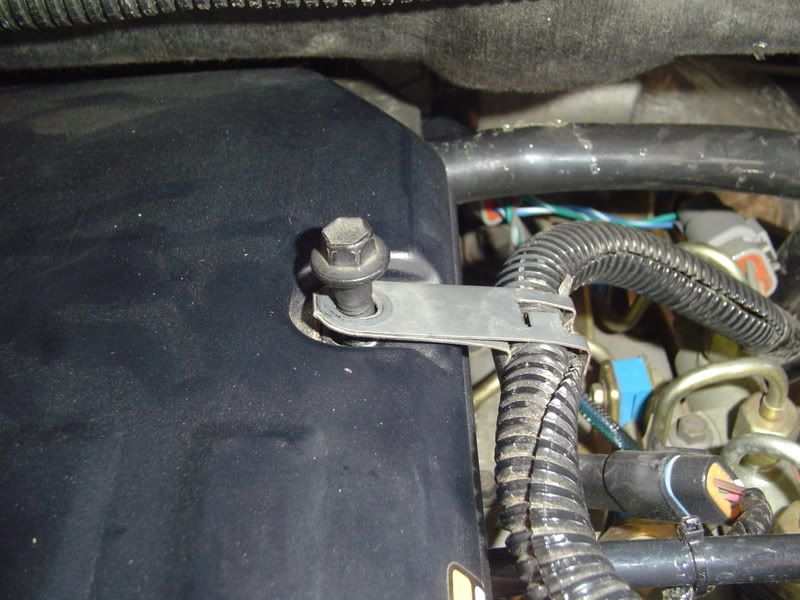
Reconnect the breather hoses and put the top cover back on. Torque the 4 bolts to 18 ft lbs and make sure to put the wire harness support under the aft drivers side bolt.
Put the oil cap back on and you shouldn't have to touch your valves for another 100K miles.
Once you are done checking/adjusting the valves, double check that all of the jamb nuts are torqued to 18 ft lbs.
Put the cover back on and tighen down the 6 bolts evenly. If you tighten them unevenly, you may inadverntantly crack the cover. Torque the bolts to 18 ft lbs.
Reconnect the breather hoses and put the top cover back on. Torque the 4 bolts to 18 ft lbs and make sure to put the wire harness support under the aft drivers side bolt.
Put the oil cap back on and you shouldn't have to touch your valves for another 100K miles.

Registered User
Joined: Jul 2010
Posts: 9
Likes: 0
From: Pennsylvania
Dave its been 5 years since you posted this article on adjusting the valves on the ISB 24V 5.9 Cummins. Thanks for the tips on TDC, that is what I was mainly looking for. The 153624 has been in bedded in my head for 39 years. And the 16258374 (Buick 320 Straight Eight Engine) has been in bedded in my head for 37 years. It use to be years ago that 8 in a row make them go! I can honestly say, 6 in a row makes them go, as well I love the 5.9 Cummins, it really can pull when the grades get challenging. When I first bought my Dodge almost 3 years ago, I thought something was wrong with my Buick! I realized that this Cummins was the reason! When pulling hills, the Buick is all about it because of the 320 Straight Eight. I never realized how well the Cummins really pulls, it flattens out the hills! Excellent writeup, and photos Thanks again Dave
Last edited by Anthony C; Aug 10, 2012 at 04:49 PM.
Registered User
Joined: Oct 2013
Posts: 1
Likes: 0
Hi: I'm a new guy and I like this thread .... but I have one serious concern.
Say you have a valve that is "acceptable" in a range from .015" to .030". Why in the WORLD would you just check it with a .015 and a .030 feeler gauge, and call it good, instead of just adjusting it to the ideal .020"? You went to all the trouble to get to the valves, and they are super easy to adjust..... just go ahead and set them all to the best value, a slight drag on a .020 leaf....
Am I missing something here? I can understand not wanting to mess with a head that required cam removal and shim swapping - what a royal PITA - but this engine is soooo easy to work on. IMHO you should do them all exactly right and not part way.
BTW, I like to measure and record all valve clearances in any engine, to within .001", both before and after adjustment. I record them in the maintenance records. When I do another adjustment, I can check and see what the trend is - how quickly they are opening up, for example, and that gives me a good idea about when I next need to re-check, if ever. Numbers like this are very useful in the long term. Plus they make your maintenance log look cool for a prospective buyer.
I personally would be pissed if I paid a tech to adjust all my valves, and the clearances were all over the place when he returned the truck to me.
Comments?
John Davies
Spokane WA USA
