

'04 Stratus Blower Motor Resistor Replacement (Picture Tutorial)


Thread Starter
|
Rookie
Joined: Jan 2011
Posts: 51
Likes: 0
From: East Coast | New Jersey
The symptoms of a bad Blower Motor Resistor is one or more of your fan speed settings not working. In my case settings 1-3 would not work and 4 would, therefor I could only have the Heat/A.C. on high or not at all.
I called and price checked this item with a few local parts stores including Advanced, Autozone, Napa and the Dodge Dealer. Advanced Auto Parts had it for the cheapest so I picked it up their for around $30.
First I'd like to inform you that this piece is not in a convenient location. But then again I am 6'2 and 250lbs. Cramming myself under the glovebox and in front of the passenger seat was not an easy task.. But it got done.
The only tools I needed for this fix was a socket set and a flathead screwdriver. You will also need something to cut/enlarge the opening at the harness. This is necessary because the replacement resistor is a little bit larger than the OEM and is too big for the gap.. A dremel would work perfect for this task but I simply used a razor to cut it and a wrench to bang it out.
Let's Get To It !!
First you will need to go below/underneath your glovebox, you will find an easily removable piece of vinyl. Carefully take that off and place to the side.
Underneath the Vinyl you will see this..
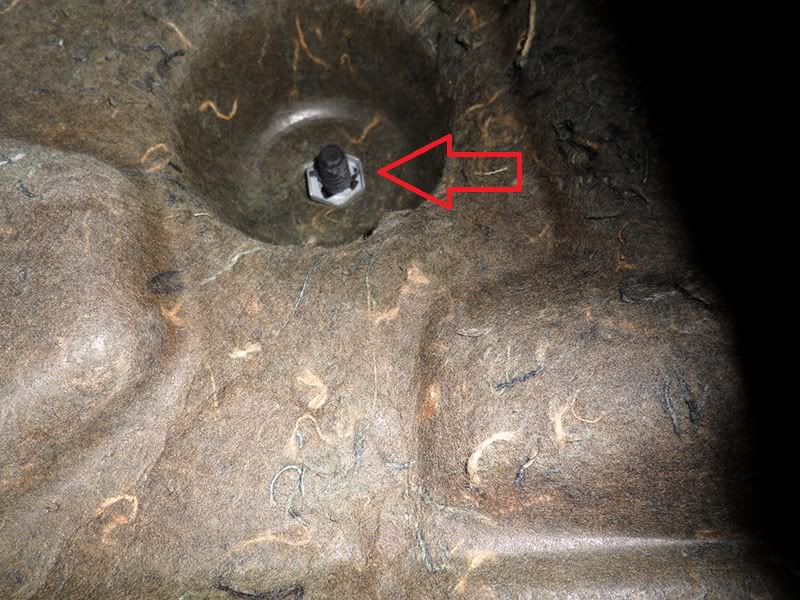
With the applicable socket, remove the silver piece indicated with the red arrow in the picture above. Then remove the insulation and place it to the side.
You will now see an abundance of hard plastic and wires. This is where your resistor is located.. Reference the picture below.
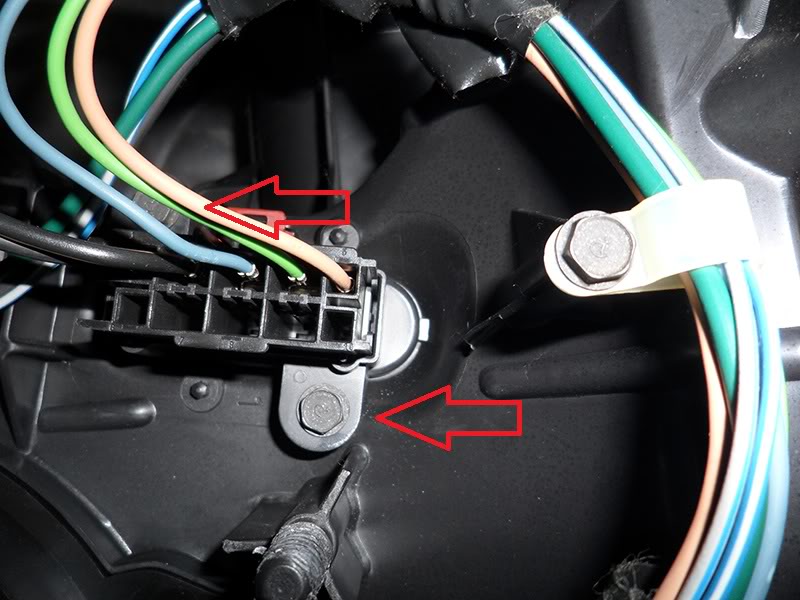
After you've located the resistor.. Remove the two screws indicated with the red arrows in the picture above. After you've done this, the resistor should just pull right out.
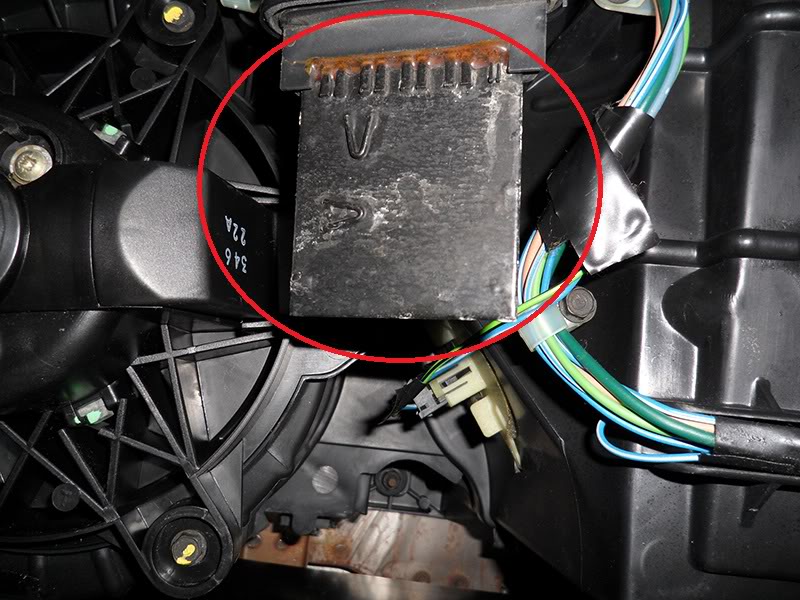
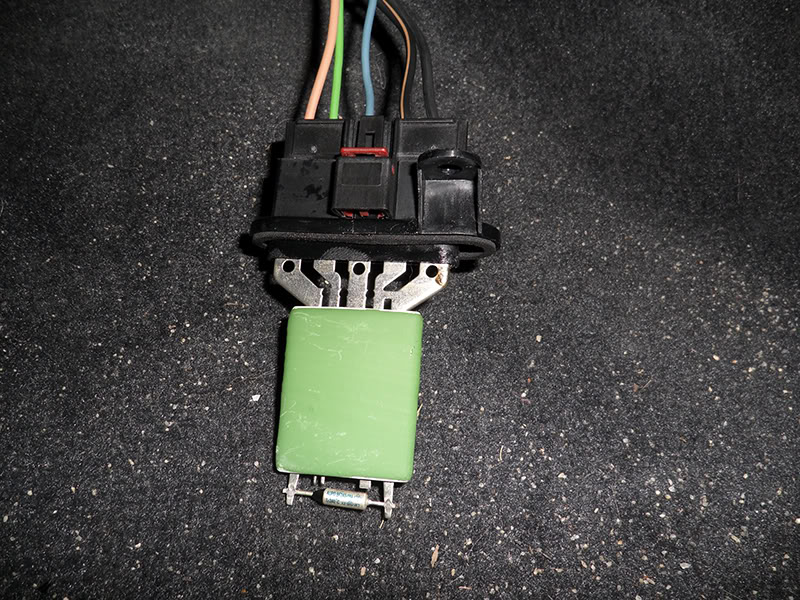
This is the stock/OEM resistor and what you will see after you unscrew it and pull it out of the harness. This is also the reason that my 1-3 settings are not working.
Remove the Faulty Resistor !!
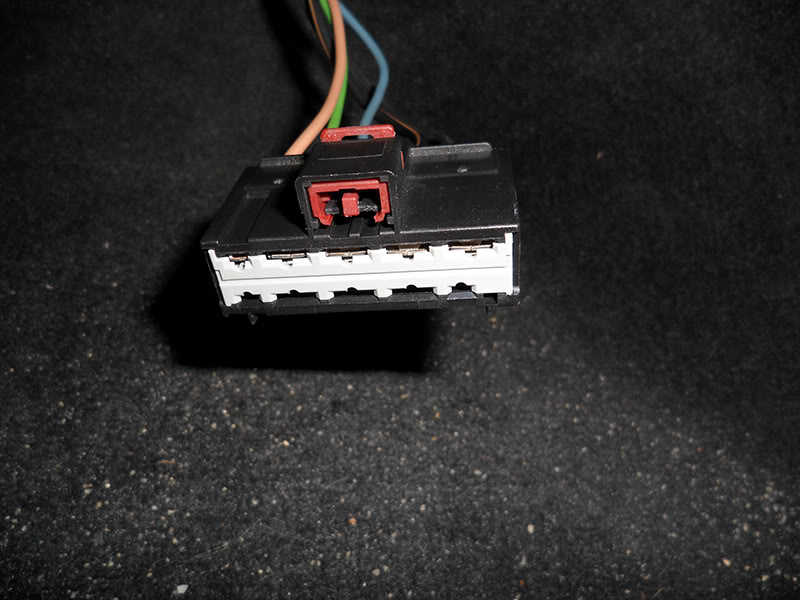
This gave me a little trouble. (Just a Little) This is also where the flathead screwdriver came into play. I used it to pry up a little under the red square tab in the middle. Then it came off with no problems..
Next.. Install the new Resistor and prepare for installation.
You will notice as you go to put the resistor back in the harness.. Ut Oh.. it doesn't fit. This is where a Dremel would be a perfect solution. I do not own one (yet).. So I broke out the good old fashioned box cutter and commenced slicing away at it.. Eventually I started pushing straight through the plastic in various spots. After I pushed straight through the plastic enough times and in enough spots, I grabbed a wrench and knocked away at it. Pretty ghetto but it worked.
Now your new Blower Motor Resistor should slip back in with no obstruction. Put both screws in finger tight and then fix the gasket that most likely fell out during the process. After that tighten everything back up.
Congrats.. Your Done !!
All fan speed settings should now be fully functional as mine are.
If anyone has any comments, tips or tricks to add.. Please feel free !
I called and price checked this item with a few local parts stores including Advanced, Autozone, Napa and the Dodge Dealer. Advanced Auto Parts had it for the cheapest so I picked it up their for around $30.
First I'd like to inform you that this piece is not in a convenient location. But then again I am 6'2 and 250lbs. Cramming myself under the glovebox and in front of the passenger seat was not an easy task.. But it got done.
The only tools I needed for this fix was a socket set and a flathead screwdriver. You will also need something to cut/enlarge the opening at the harness. This is necessary because the replacement resistor is a little bit larger than the OEM and is too big for the gap.. A dremel would work perfect for this task but I simply used a razor to cut it and a wrench to bang it out.
Let's Get To It !!
First you will need to go below/underneath your glovebox, you will find an easily removable piece of vinyl. Carefully take that off and place to the side.
Underneath the Vinyl you will see this..
With the applicable socket, remove the silver piece indicated with the red arrow in the picture above. Then remove the insulation and place it to the side.
You will now see an abundance of hard plastic and wires. This is where your resistor is located.. Reference the picture below.
After you've located the resistor.. Remove the two screws indicated with the red arrows in the picture above. After you've done this, the resistor should just pull right out.
This is the stock/OEM resistor and what you will see after you unscrew it and pull it out of the harness. This is also the reason that my 1-3 settings are not working.
Remove the Faulty Resistor !!
This gave me a little trouble. (Just a Little) This is also where the flathead screwdriver came into play. I used it to pry up a little under the red square tab in the middle. Then it came off with no problems..
Next.. Install the new Resistor and prepare for installation.
You will notice as you go to put the resistor back in the harness.. Ut Oh.. it doesn't fit. This is where a Dremel would be a perfect solution. I do not own one (yet).. So I broke out the good old fashioned box cutter and commenced slicing away at it.. Eventually I started pushing straight through the plastic in various spots. After I pushed straight through the plastic enough times and in enough spots, I grabbed a wrench and knocked away at it. Pretty ghetto but it worked.
Now your new Blower Motor Resistor should slip back in with no obstruction. Put both screws in finger tight and then fix the gasket that most likely fell out during the process. After that tighten everything back up.
Congrats.. Your Done !!
All fan speed settings should now be fully functional as mine are.
If anyone has any comments, tips or tricks to add.. Please feel free !
Last edited by ModernDayCaesar; Feb 1, 2011 at 10:47 PM.