
'85 D150 project truck
#21
 09-22-2012, 07:08 PM


It is a Nippondenso alternator. They typically have 4 wires. This might help.
http://www.autoshop101.com/forms/h8.pdf
This one is a little different plug but it might help.
http://forums.turbobricks.com/showthread.php?t=71311
http://www.autoshop101.com/forms/h8.pdf
This one is a little different plug but it might help.
http://forums.turbobricks.com/showthread.php?t=71311
#22
09-25-2012, 07:42 PM

Join Date: Oct 2011
Posts: 112
Likes: 0
Received 0 Likes
on
0 Posts
Havin a hard time following the wires back, he sure didnt make it easy to get into :/ I may give him a call tonight and see if he remembers where he ran the too.
Thanks for the links seal. It sounds like this alternator is internally regulated, so im thinking ill probably have to get an external voltage regulator, and re-wire the 400 alternator back to stock, either using the wires from the /6 alternator (depending on where they go) or just run new ones. I might be able to steal the regulator off my '83.
Thanks for the links seal. It sounds like this alternator is internally regulated, so im thinking ill probably have to get an external voltage regulator, and re-wire the 400 alternator back to stock, either using the wires from the /6 alternator (depending on where they go) or just run new ones. I might be able to steal the regulator off my '83.
#23
09-28-2012, 10:58 PM
Join Date: Oct 2011
Posts: 112
Likes: 0
Received 0 Likes
on
0 Posts
For the wiring on the denso alternator: 4 wires, 1 battery, 1 key switched 12v, 1 "sense" wire for internal regulator (key switched and sense were run together somehow with a relay), and 1 "lamp" which wasnt connected anywhere, just ran back to the firewall should it ever be needed. So for the mopar alternator ill use the batt wire, run the switched 12v to the voltage regulator of my '83, hook the field wires to that, then just leave the sense and lamp wires from the denso alone for now.
Got my bellhousing from mopar truck parts on wednesday (only took a week to get from california to alberta.not bad.) so shes all going together now. Engine is sitting on the mounts, gonna get the shifter fork for the bellhousing this weekend then shes all going in next week. Gettin excited now
Got my bellhousing from mopar truck parts on wednesday (only took a week to get from california to alberta.not bad.) so shes all going together now. Engine is sitting on the mounts, gonna get the shifter fork for the bellhousing this weekend then shes all going in next week. Gettin excited now
#24
10-04-2012, 09:21 PM
Join Date: Oct 2011
Posts: 112
Likes: 0
Received 0 Likes
on
0 Posts
Hit a couple speed bump. Spent about 6 hrs on Monday and Tuesday trying to get the tranny in, only to find that it seamed that the input shaft was about 3/4" too long, so the decision was that we'd have to cut it down to fit. Now, before getting hasty, we tried to get it in without the clutch on just to make sure. The discovery was that the pilot bushing is too small to fit on the input shaft :P It was for the engine, but it originally had the NP435 tranny behind it, so were thinking thats where the trouble is coming in. we checked the /6 just to see, but it has a bigger outside diameter. So the question is, what would I look for the get a bushing with the right inside/outside DIA to fit the 400 and 833?
Also I got my brake parts for the rear axle and it looks like they will all fit, except for the wheel studs. I got some 2 1/2" studs to fit the hub, but the knurl is too short to go through the hub and rotor. They are a papco stud. Any ideas on the right stud for the knurl to go through the rotor and hub, while still being longer than stock?
Also I got my brake parts for the rear axle and it looks like they will all fit, except for the wheel studs. I got some 2 1/2" studs to fit the hub, but the knurl is too short to go through the hub and rotor. They are a papco stud. Any ideas on the right stud for the knurl to go through the rotor and hub, while still being longer than stock?
#25
10-12-2012, 10:57 PM
Join Date: Oct 2011
Posts: 112
Likes: 0
Received 0 Likes
on
0 Posts
On the wheel studs: found one at the local Bumper to Bumper to try and it works, so I ordered 15 more and nuts to match. Now apparently they put the wrong part # on the receipt so the 15 that came were these long friggin things for a chev dually.  So gotta go back and match em up again.
On the bushing: Went back and ordered another one. The specs for the OD and ID would fit. I got it and it slips onto the input shaft pretty good. Pound it into the crank and then its too small. So I took a little grinder and "adjusted" the ID. Transmission and clutch went in ok, and now the tranny mount doesnt line up with the crossmember.
  Read a post online and is it possible that the engine isnt far enough back on the mounts (tranny mount needs to go rearward about 2 1/2 inches)?
On the bushing: Went back and ordered another one. The specs for the OD and ID would fit. I got it and it slips onto the input shaft pretty good. Pound it into the crank and then its too small. So I took a little grinder and "adjusted" the ID.
#26
10-13-2012, 09:17 AM

#27
10-13-2012, 08:04 PM
Join Date: Oct 2011
Posts: 112
Likes: 0
Received 0 Likes
on
0 Posts
So it's pobably not a good thing that when I climbed into the engine bay I had room to spare to get my hands in to get at the bellhousing bolts :/ I think there was prolly 2-3 inches it could go back. Dammit. I'll look again on monday when I'm at the shop. Is there anyway to move the engine back with out taking the tranny back out?
#28
10-14-2012, 10:53 AM
I suspect you will have to relocate the engine mounts. dodge stopped making big blocks in 77 so your 85 wont have the proper mounting setup for the 400 but you should be able to figure out a way to slide the engine mounts so everything lines up sorry dont know how though tho you might check out a set of engine mounts from a 77 pickup and see if they are different then what you have. We needed special mounts to cram a 400 in our 84 ramcharger but i forget what all it took good luck to you though if you have other problems let me know
Last edited by rabbit62; 10-14-2012 at 04:39 PM.
#29
10-18-2012, 12:24 AM
Join Date: Oct 2011
Posts: 112
Likes: 0
Received 0 Likes
on
0 Posts
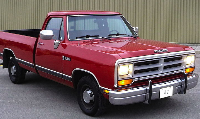
Heres some pics of where the engine was sitting when the tranny wouldnt line up.
Valve cover by firewall.
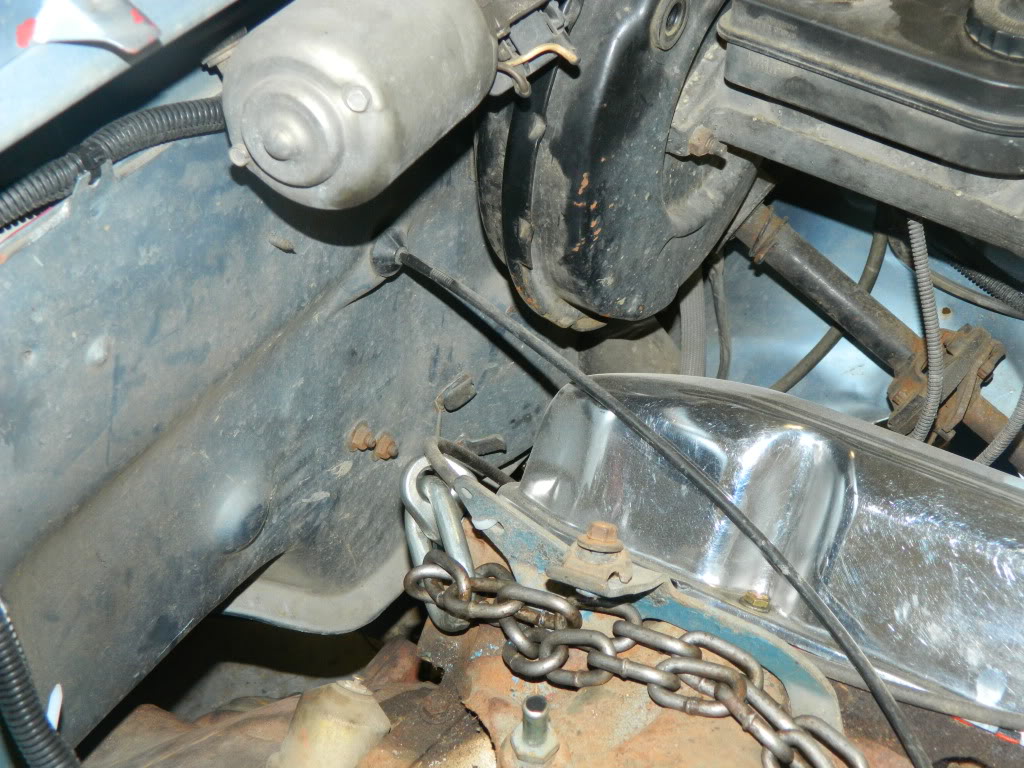
Rear of engine.
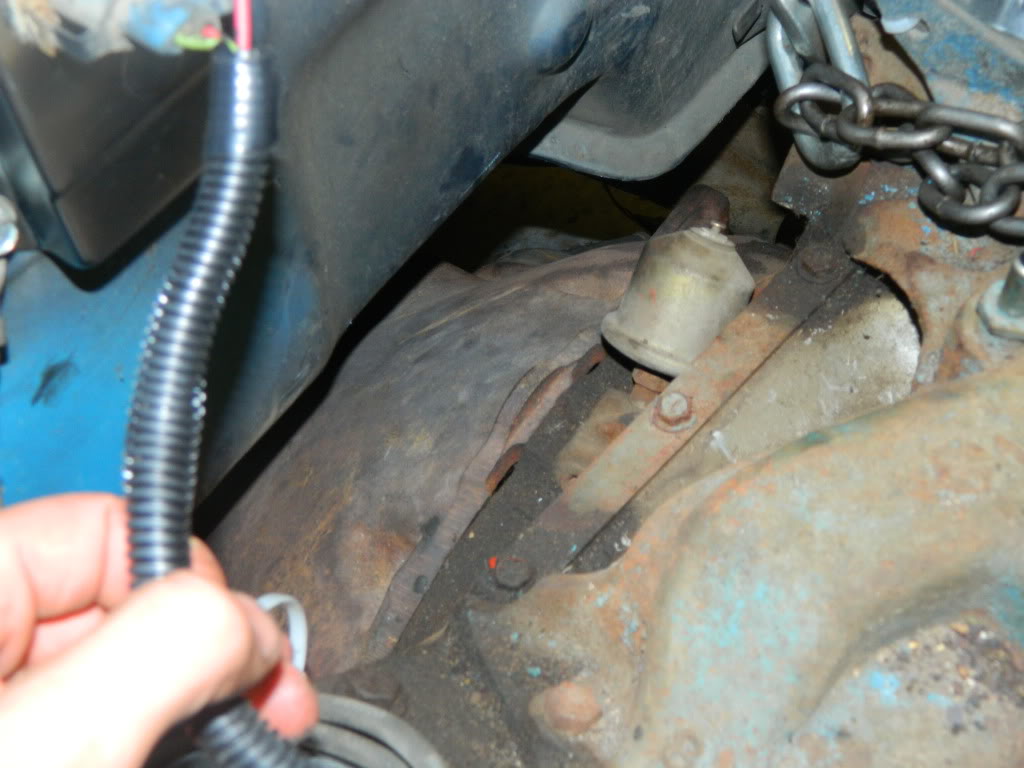
So I obviously have too much room. I pulled the engine again and this is what I found.
Pass side frame mount.
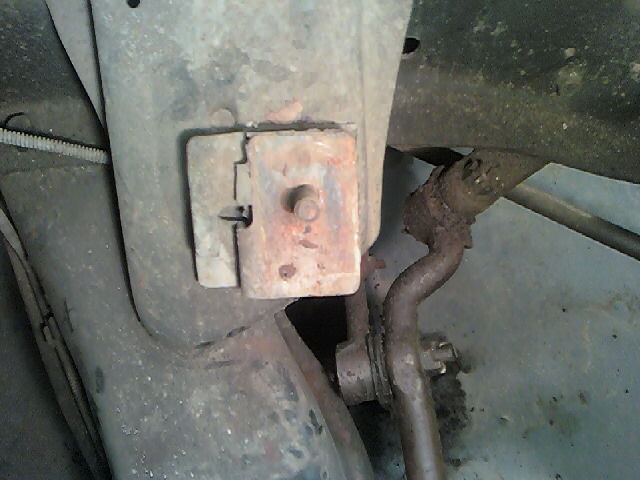
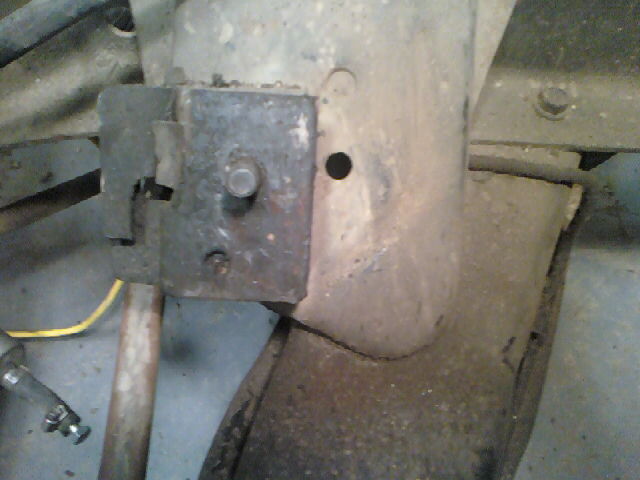
Drivers side frame mount.
So my question is, can I just move the mounts to the rear hole in the frame, like this?
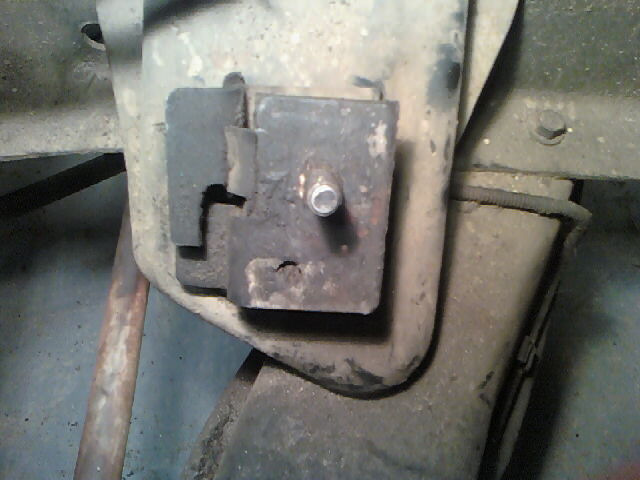
Pass side.
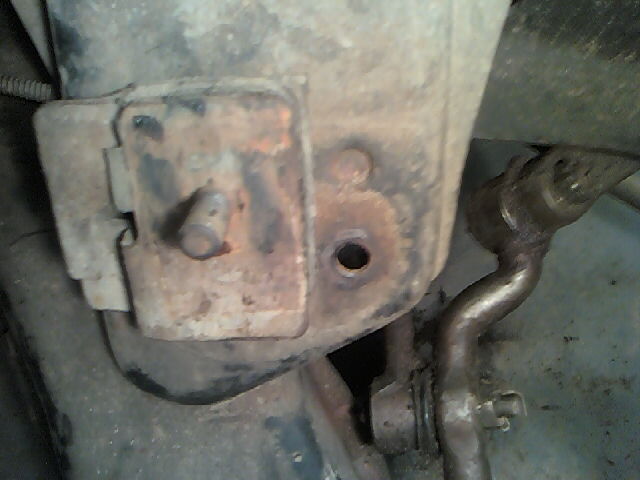
drivers side.
Will try to put it in tomorrow and see how it looks. Hopefully I wont have to change the brake booster, though I have one if I do.
Valve cover by firewall.
Rear of engine.
So I obviously have too much room. I pulled the engine again and this is what I found.
Pass side frame mount.
Drivers side frame mount.
So my question is, can I just move the mounts to the rear hole in the frame, like this?
Pass side.
drivers side.
Will try to put it in tomorrow and see how it looks. Hopefully I wont have to change the brake booster, though I have one if I do.
#30
10-18-2012, 12:40 AM
Legend
i don't see why you could not move the the motor mount to the other hole. that is probably what the other hole is for. now i think you may have to move the bracket on the passenger side if possible. if it is on the back of the ears and can be moved to the front then that is what i think you have to do.