

'93 Dakota V6 getting a '94 Dakota V8 engine - Build Thread

Thread Starter
|
All Star
Joined: Apr 2013
Posts: 941
Likes: 22
From: Connecticut
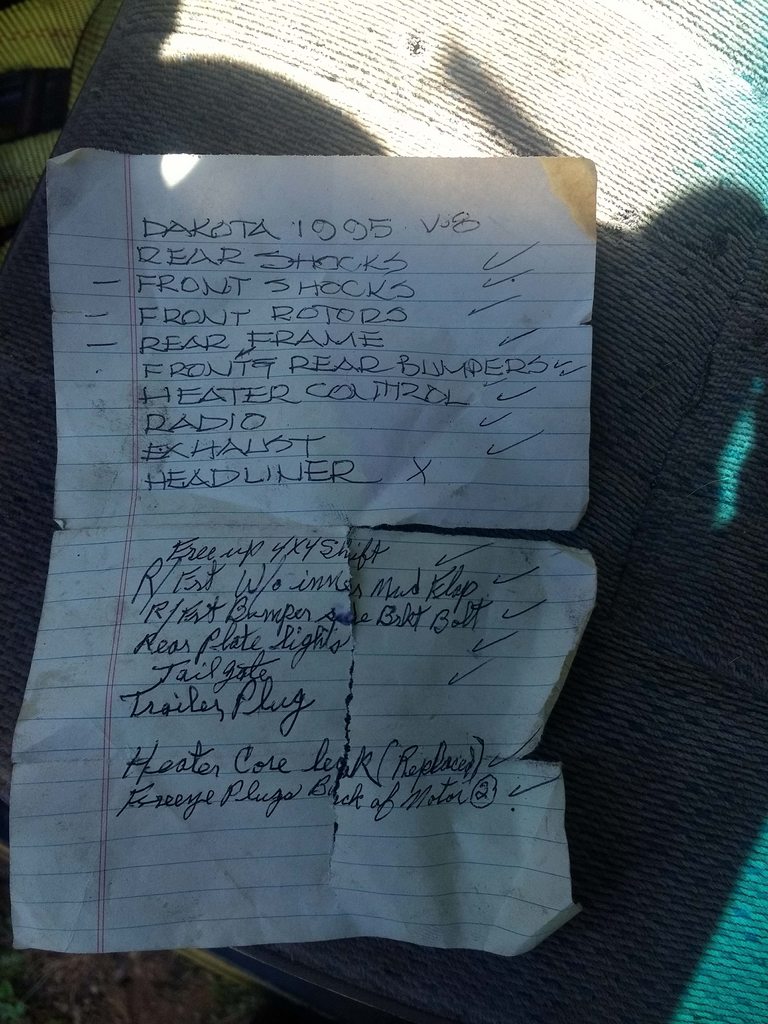
Also some "documentation" I found in the truck was a to-do list by somebody with freeze plugs crossed off. Course that's no guarantee (and it doesn't say which freeze plugs) but some of the other things crossed off on the to-do list have indeed been done.
Edit! I was wrong, they did say the rear of the motor plugs were done!
In any case, I have to get this thing moving ASAP...if I have to drop the tranny again in the future, oh well, but right now it's crunch time, unfortunately.

Last edited by tbugden; Jul 6, 2018 at 03:25 PM.

Champion
Joined: Jan 2013
Posts: 4,737
Likes: 374
From: Northwest Louisiana
Hee!
Understand the "crunch time" - that's one reason to have the motor built instead of rebuilding it. And also why I'm getting the LA rebuilt instead of converting to Magnum 3.9 power.

RwP
Understand the "crunch time" - that's one reason to have the motor built instead of rebuilding it. And also why I'm getting the LA rebuilt instead of converting to Magnum 3.9 power.
RwP

Thread Starter
|
All Star
Joined: Apr 2013
Posts: 941
Likes: 22
From: Connecticut
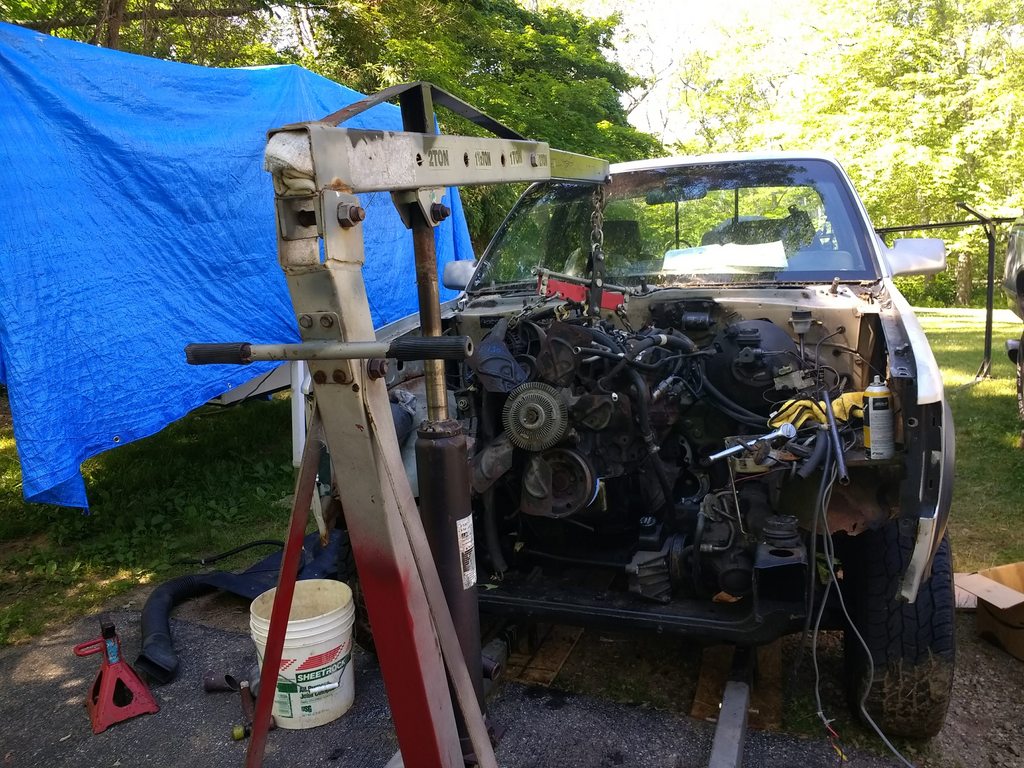
Made some more progress, got the engine dropped in and all the bolts installed. Tomorrow there's a bunch of wiring and the fuel lines to tackle. Until now I did not realize that the fuel pump outlet is 3/8" and the fuel rail inlet is 5/16". Neat. Thanks Dodge. I also forgot that I now have an in-tank fuel filter (my '93 had it frame mounted), which makes this easy! I'm going to run full nylon from the tank to the fuel rail, and best of all, I already have all the fittings and lines I need! It'll be a shame to trash all the hard lines I painstakingly bent and formed along the frame rail during my frame replacement, but it will be simpler, so that's nice.
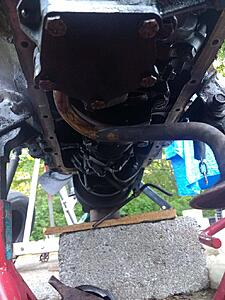
I replaced the rear main. Here's a couple pics. The rear main is a split seal, and the bottom half resides in the main bearing, so it's cake to replace once you remove the main bearing. The top half is a little more difficult but not so bad if you loosen the main bearing directly forward from the rear main bearing. Then take a thing (I used a roll pin punch) and a hammer, place the thing on the end of the seal and hit the thing with a hammer. Be VERY careful not to slip and gouge any part of the crankshaft or block.

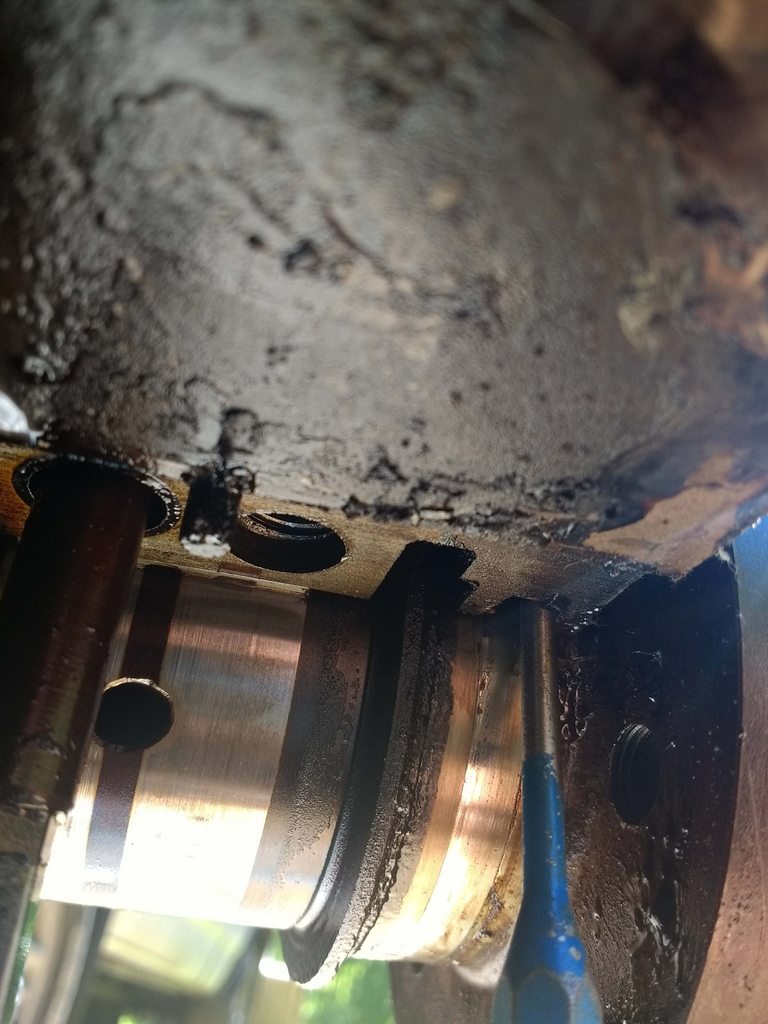
You only need to smack the seal a couple times, just until you can grab the other end with some pliers. And pull it the rest of the way out.

Installation is the reverse, the upper seal can be pushed in by hand but be VERY VERY careful not to shave off any part of the seal on the block. You can avoid this by pressing the seal into the crankshaft while pushing it around the crankshaft. I still managed to shave the tiniest sliver but I think it will be fine. If not you know I will report back...lol.
Block all nice and clean where the oil pan goes up. This is very simple by carefully using a flat razor to scrape crud and gasket material off. I scraped around the perimeter maybe 5 times. Then sprayed with brake cleaner and wiped with a rag about 3 times.
Seal laid onto oil pan.

Oil pan installed.

I replaced the rear main. Here's a couple pics. The rear main is a split seal, and the bottom half resides in the main bearing, so it's cake to replace once you remove the main bearing. The top half is a little more difficult but not so bad if you loosen the main bearing directly forward from the rear main bearing. Then take a thing (I used a roll pin punch) and a hammer, place the thing on the end of the seal and hit the thing with a hammer. Be VERY careful not to slip and gouge any part of the crankshaft or block.
You only need to smack the seal a couple times, just until you can grab the other end with some pliers. And pull it the rest of the way out.
Installation is the reverse, the upper seal can be pushed in by hand but be VERY VERY careful not to shave off any part of the seal on the block. You can avoid this by pressing the seal into the crankshaft while pushing it around the crankshaft. I still managed to shave the tiniest sliver but I think it will be fine. If not you know I will report back...lol.
Block all nice and clean where the oil pan goes up. This is very simple by carefully using a flat razor to scrape crud and gasket material off. I scraped around the perimeter maybe 5 times. Then sprayed with brake cleaner and wiped with a rag about 3 times.
Seal laid onto oil pan.

Oil pan installed.
Thread Starter
|
All Star
Joined: Apr 2013
Posts: 941
Likes: 22
From: Connecticut
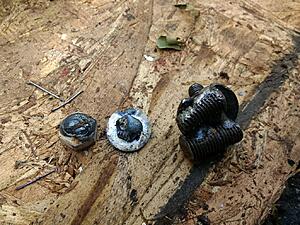
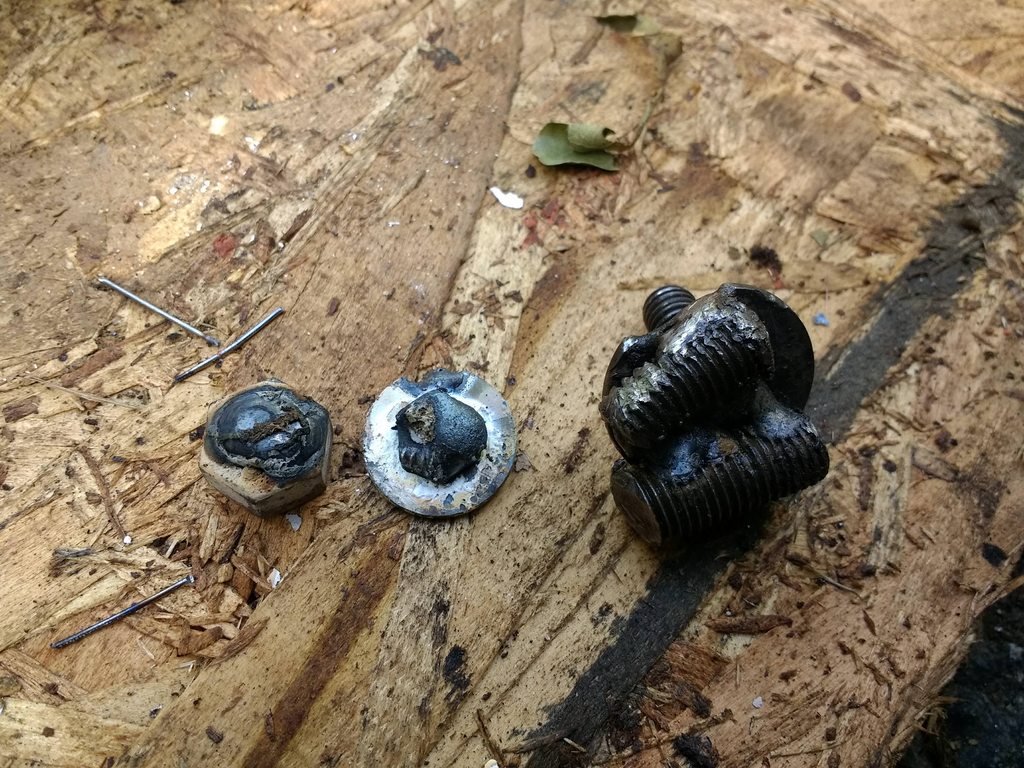
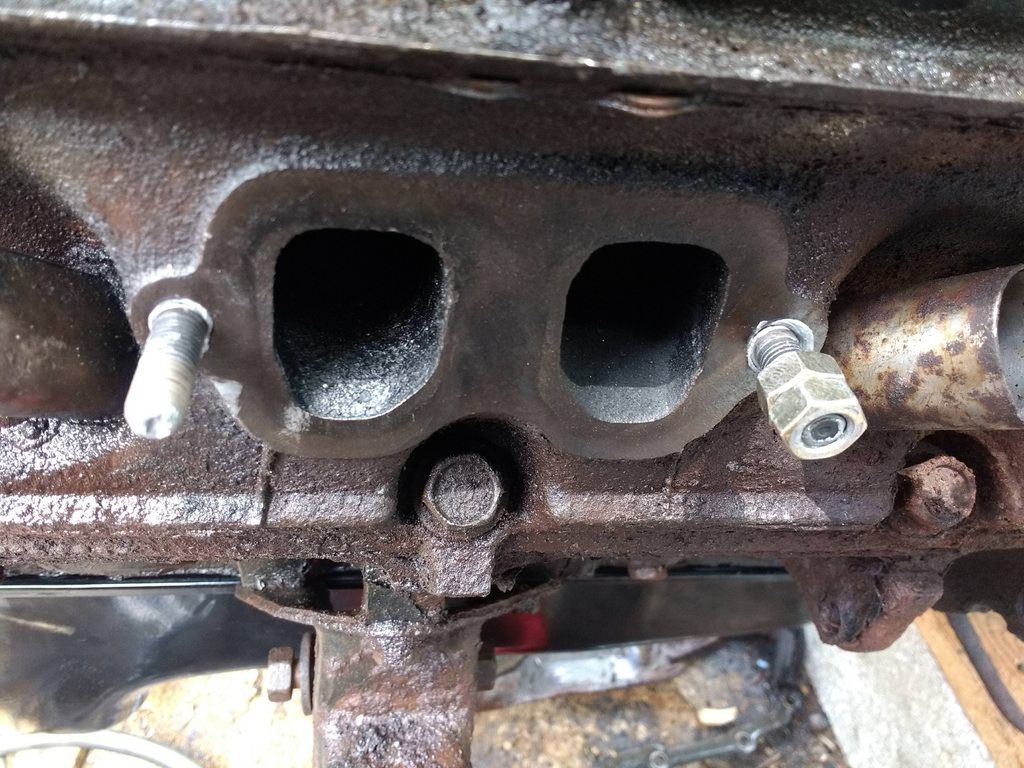
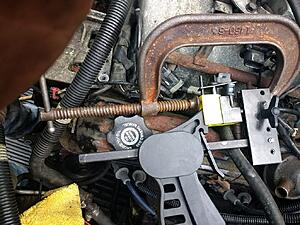
Remember that one seized exhaust stud I mentioned? Turns out it was cross-threaded, almost certainly from the factory. I welded a nut on it, broke it. Another nut, broke it. So I wised up and pulled out all the stops - first welded a washer to the stud, then welded a nut into oblivion on top , then a bolt to smack with a hammer. Quickly realized I should not have used a grade 0 bolt as it bent and broke immediately. A metric 10.9 Subaru bellhousing bolt (very important lol) did a much better job.
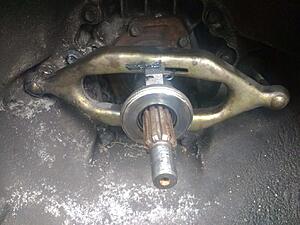
Ran a tap through the ****ed up threads and installed new studs, with the all-important anti-seize.
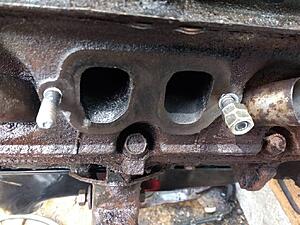
Now my favorite part! Clutch stuff! This is the pilot bearing and here is a crucial note. If you're doing this swap make sure you have the bearing and the outer shell as shown here.

My Luk clutch kit only came with the tiny needle bearing (middle portion of above) which is useless if you don't have the outer shell, which you won't if the engine was in front of an automatic. Good news is that Advance had the full bearing and shell in stock for $16. Not too bad. Now, my advice is don't be tempted to try to remove the bearing/shell from another motor (as I was with my manual-equipped V6). As I see it, it's impossible to remove the shell without cutting it. YMMV, of course.
My freshly resurfaced flywheel...well it was fresh 3 years ago haha. A bit of surface rust on part, no big deal. I used ARP bolts. I bought them with the flywheel. Not sure why, but meh, nice bolts.

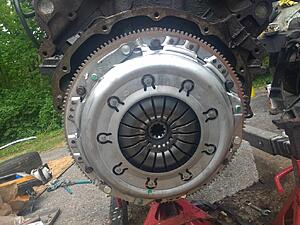
Oversized (12") Luk clutch kit installed. Again, not sure why I went with the oversized clutch. Absolutely unnecessary.
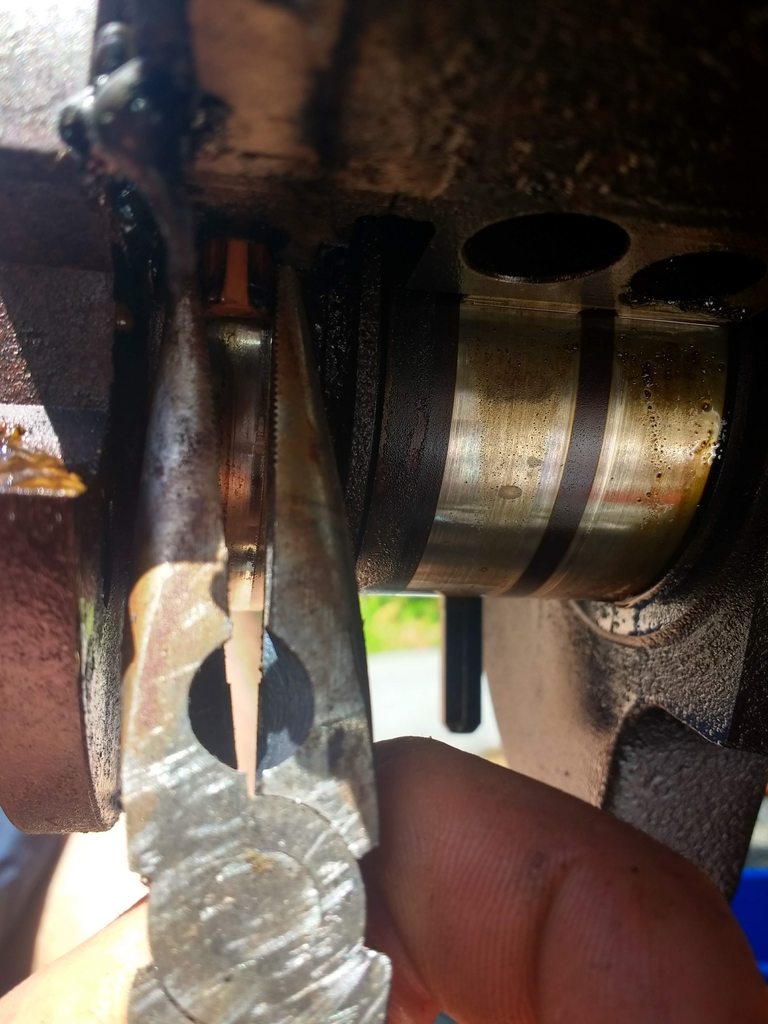
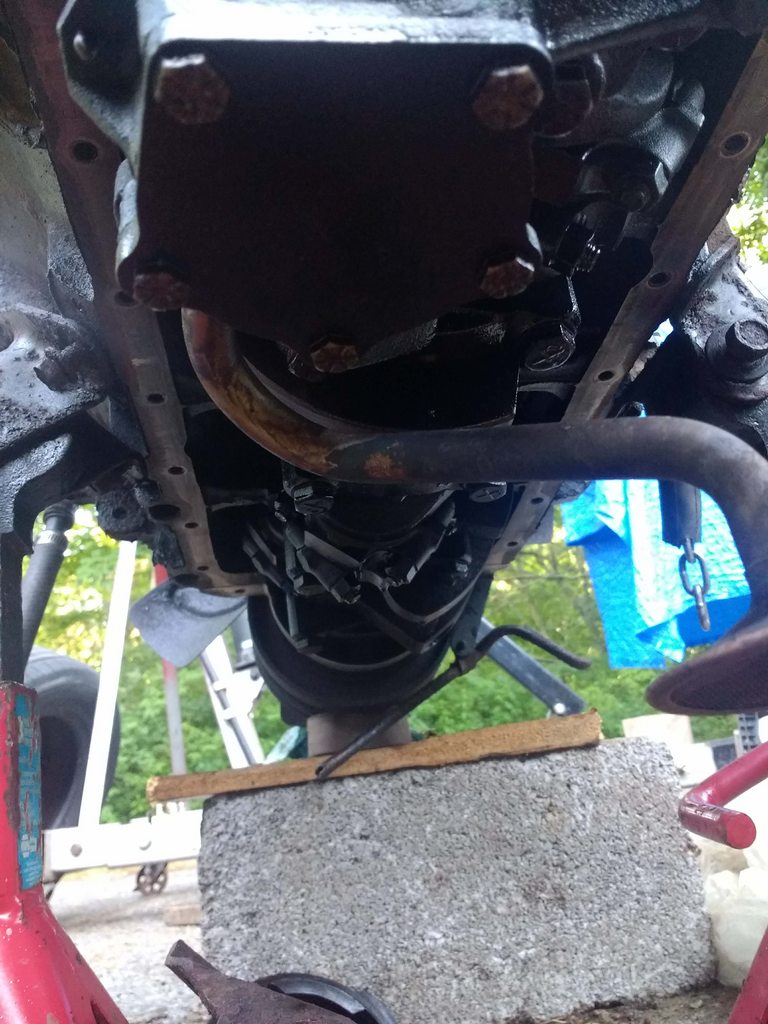
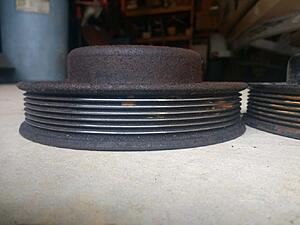
And finally the crank pulley. Mine was warped so I pulled the one off my parts 318 and used that. See the small "arc" between the concrete and the pulley there in the middle. Seems small, it was a lot more noticeable when the motor was spinning at 500 RPM.
I reused my Timken throw-out bearing instead of using the Luk because the Timken has a metal center and the Luk supplied one is plastic. Not that it necessarily means anything, but the Timken only has about 8k miles on it and I really like Timken bearings. But I sure didn't reuse the grease! took the fork off, cleaned all contact points and regreased using some high performance caliper grease that I'm quite fond of.
And then... I guess I'm done. See ya later AX-15...hopefully not too soon, but I know what ya'll say about a V8 in front of the AX.

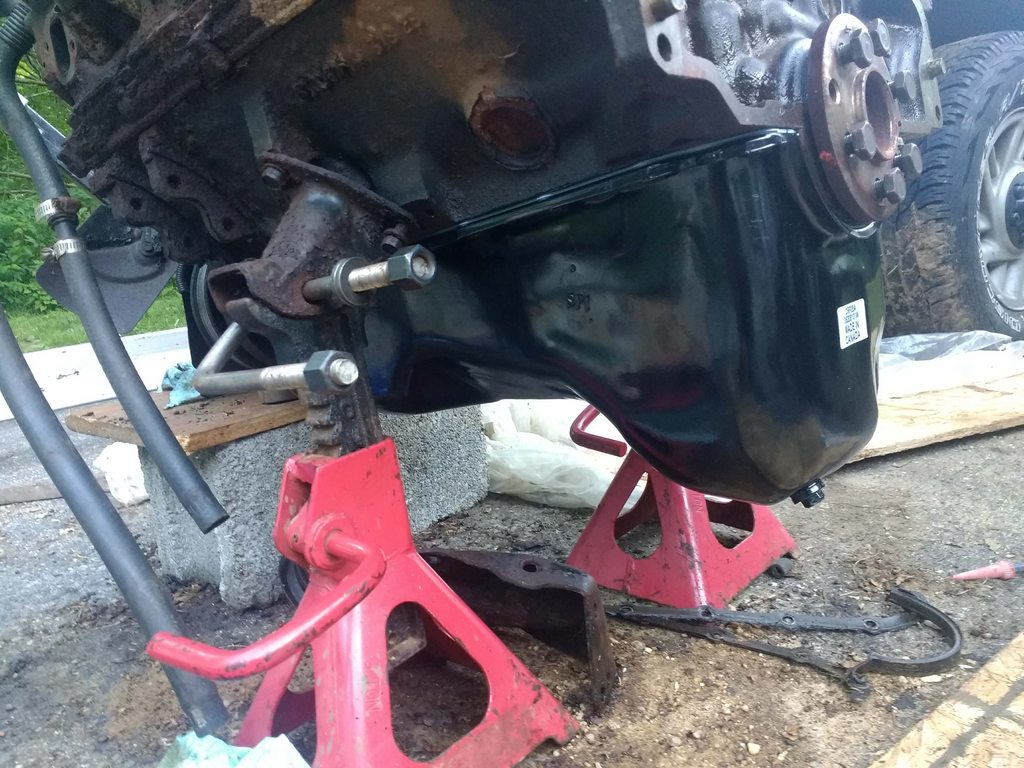
Here she goes...I recommend leaving the headers for last because it makes it SOO much easier to get all the bellhousing and brace bolts on.

She's all bolted in now. Hope to finish enough tomorrow to be able to start it...we'll see.
Ran a tap through the ****ed up threads and installed new studs, with the all-important anti-seize.
Now my favorite part! Clutch stuff! This is the pilot bearing and here is a crucial note. If you're doing this swap make sure you have the bearing and the outer shell as shown here.
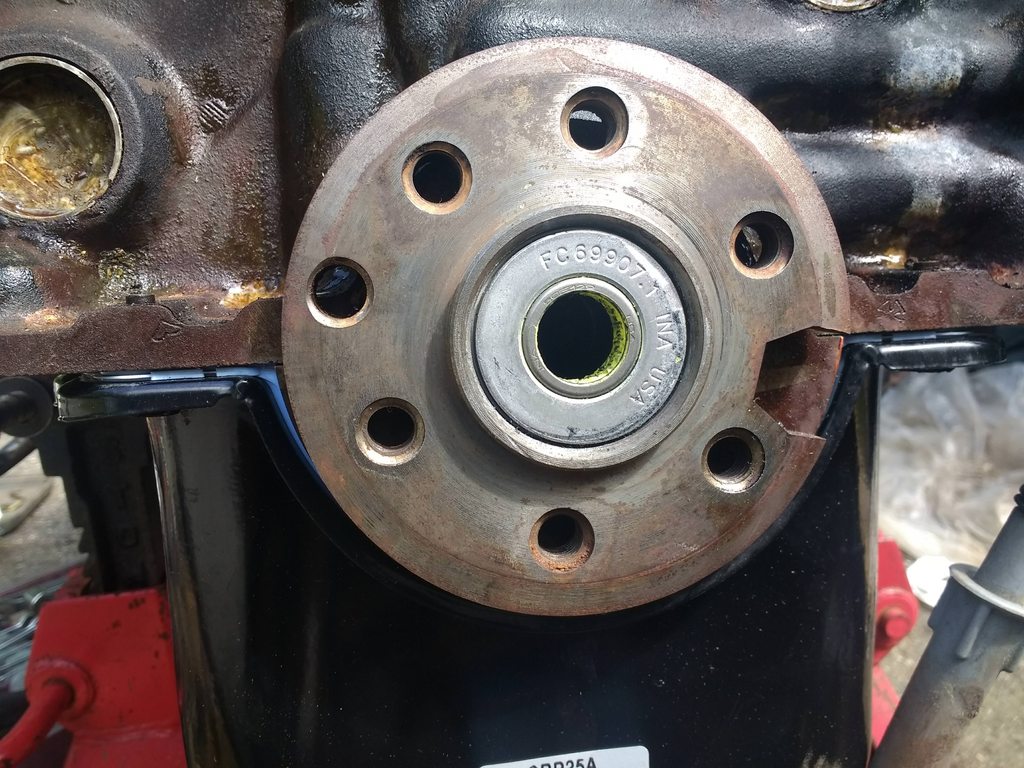
My Luk clutch kit only came with the tiny needle bearing (middle portion of above) which is useless if you don't have the outer shell, which you won't if the engine was in front of an automatic. Good news is that Advance had the full bearing and shell in stock for $16. Not too bad. Now, my advice is don't be tempted to try to remove the bearing/shell from another motor (as I was with my manual-equipped V6). As I see it, it's impossible to remove the shell without cutting it. YMMV, of course.
My freshly resurfaced flywheel...well it was fresh 3 years ago haha. A bit of surface rust on part, no big deal. I used ARP bolts. I bought them with the flywheel. Not sure why, but meh, nice bolts.
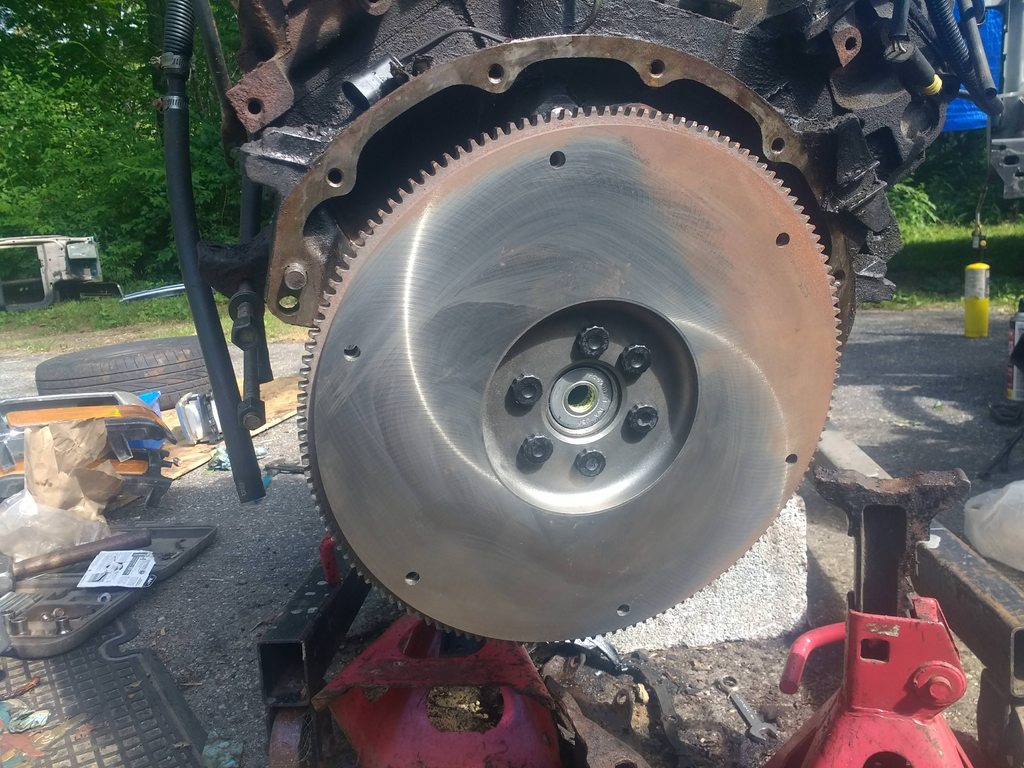
Oversized (12") Luk clutch kit installed. Again, not sure why I went with the oversized clutch. Absolutely unnecessary.

And finally the crank pulley. Mine was warped so I pulled the one off my parts 318 and used that. See the small "arc" between the concrete and the pulley there in the middle. Seems small, it was a lot more noticeable when the motor was spinning at 500 RPM.

I reused my Timken throw-out bearing instead of using the Luk because the Timken has a metal center and the Luk supplied one is plastic. Not that it necessarily means anything, but the Timken only has about 8k miles on it and I really like Timken bearings. But I sure didn't reuse the grease! took the fork off, cleaned all contact points and regreased using some high performance caliper grease that I'm quite fond of.

And then... I guess I'm done. See ya later AX-15...hopefully not too soon, but I know what ya'll say about a V8 in front of the AX.
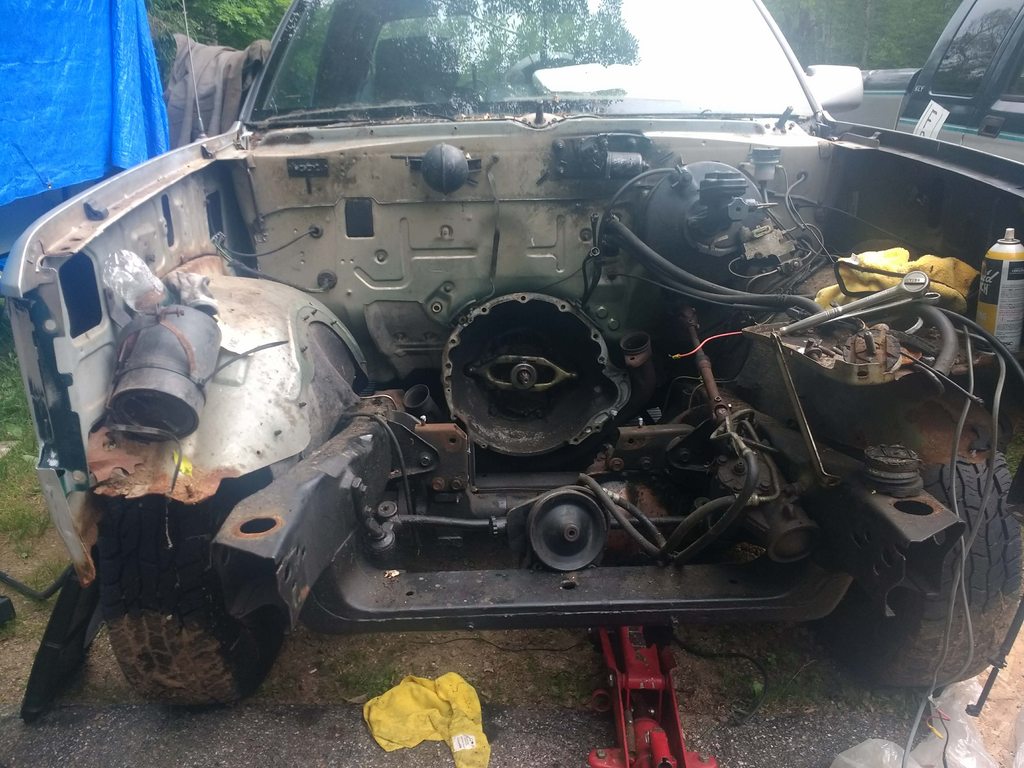
Here she goes...I recommend leaving the headers for last because it makes it SOO much easier to get all the bellhousing and brace bolts on.
She's all bolted in now. Hope to finish enough tomorrow to be able to start it...we'll see.

Record Breaker


Joined: Jan 2014
Posts: 1,852
Likes: 109
From: Va
Tbugden, I always enjoy your post!! Lots of pictures, and lots of good pointers! Unless you are really beating on the truck alot, I would not be too worried about the AX15.
I may have missed the post, but what headers are you using?
BTW, that is a unique engine mount!!
I may have missed the post, but what headers are you using?
BTW, that is a unique engine mount!!
Thread Starter
|
All Star
Joined: Apr 2013
Posts: 941
Likes: 22
From: Connecticut
Hey ragtop. I'm actually using the stock headers, I have some pictures on the first page about adapting them to the larger y-pipe. But I don't plan this to be a permanent solution; eventually I might get some eBay stainless or perhaps nicer ones.
Yeah, I have an engine stand but the ****ty 318 is sitting on it now and I'm too lazy to take it off.
I'm not gonna be doing burnouts or towing a ton or wheeling with it, so I hope the AX lasts. I know it's not heavy duty but I actually really like it. It shifts pretty slick and fast and never grinds synchros.
Thread Starter
|
All Star
Joined: Apr 2013
Posts: 941
Likes: 22
From: Connecticut
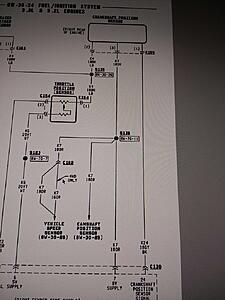
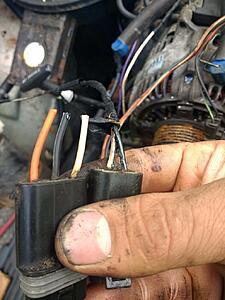
No test start today but really close! All essential connections made except for the crank sensor. As many of you know, the crank sensor is specific to the transmission. No big deal, just swap the sensor, right? Wrongggggg, the connector is different. And it's not completely different, as often happens between years. In fact, the connectors look exactly the same from the exterior. But from the inside, you can see that one of the little ridges (that prevent accidentally plugging in another connector) is in a slightly different location..I hope that makes some sense. EDIT!!!: I found that this is not a '93 vs '94 difference. This is an automatic vs manual difference! So I'm swapping the connector from the V6 harness to my V8 harness. The only other thing is that my V6 crank sensor pigtail is too short, so gotta lengthen the wires first.
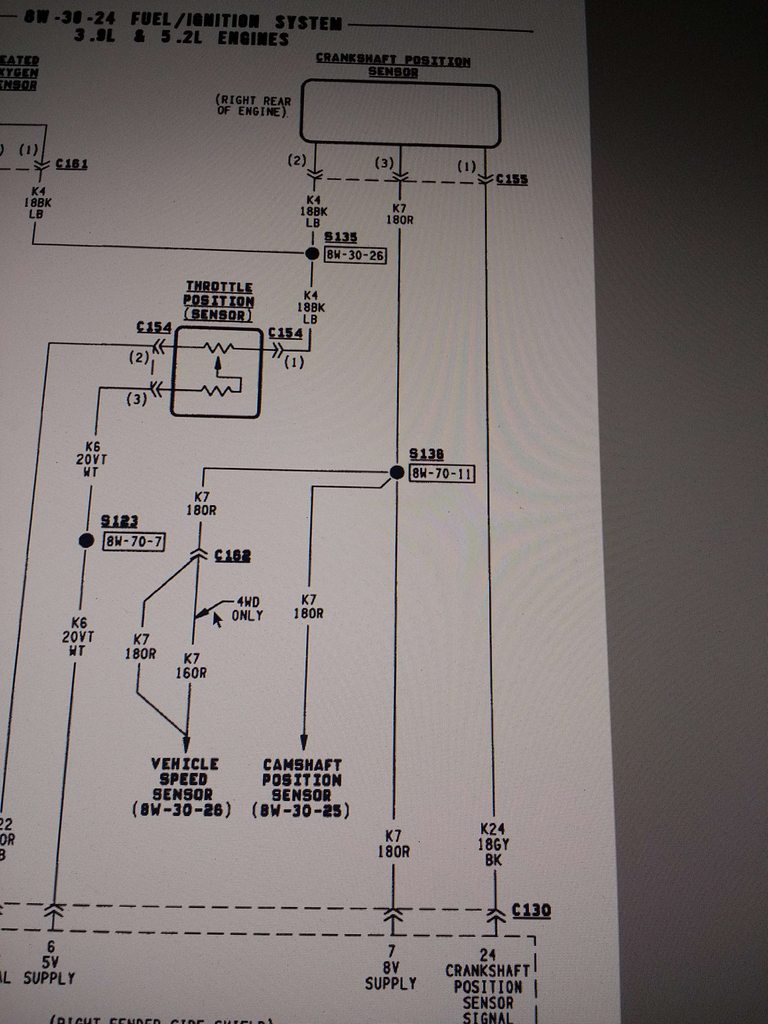
First, here's the wiring diagram to help you find the crank sensor connector if you've neglected to label it...like uhhh...my friend did. Definitely not me. No way.
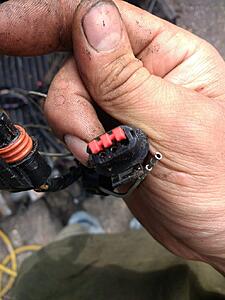
*R-RATED FILTHY HANDS BELOW!*
And swapping connectors is very easy. Unclip the little backing plastic from the connector, pull the red pin lock out the front with a little screwdriver, then use a little pick to release the plastic springs and pull the pins out. Swap them over to the new connector, just remember where they go...like uhhh...I definitely did. I definitely remembered and certainly didn't have to refer back to the wiring diagram...
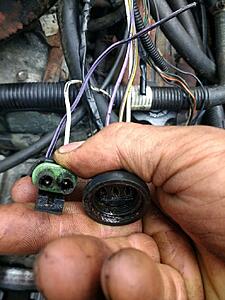
One other easy wiring deal to take care of is getting the back-up lights to work. The 3-wire plug for the automatic is on the right and the 2-wire for the manual is on the left. The violet/black and white wires are for the backup lights on both plugs; the brown/yellow wire on the automatic plug is for the Park/Neutral safety switch. What you need to do is cut the auto plug off and discard it, then solder/crimp the manual plug to the harness wires: white to white, violet/black to violet/black. Then the brown/yellow wire must be grounded. Ground it where you please, but I suggest not grounding it down at the transmission where you'll forget about it; instead, pull enough of the brown/yellow wire out of the harness to attach it to a firewall ground.
This is how I grounded it. It's the one with the spade connector. So if I'm ever worried about my truck getting jacked, I just open the hood and unplug it No, the real reason I used the spade connector is...well...I didn't have any ring terminals the right size! How lazy is that...

Finally, you want to get the vehicle speed sensor to work. The auto has three wires, the manual has two. I cut the automatic connector off, orphaned the solid orange wire, then spliced the manual connector onto the harness wires, matching up the colors (white/orange and black/light blue). Note!!! THERE IS AN ISSUE! The speedo works perfect in all forward gears, but in reverse the needle tries to go backwards. It doesn't really bother me but keep in mind that there is something wrong with my procedure.
First, here's the wiring diagram to help you find the crank sensor connector if you've neglected to label it...like uhhh...my friend did. Definitely not me. No way.
*R-RATED FILTHY HANDS BELOW!*
And swapping connectors is very easy. Unclip the little backing plastic from the connector, pull the red pin lock out the front with a little screwdriver, then use a little pick to release the plastic springs and pull the pins out. Swap them over to the new connector, just remember where they go...like uhhh...I definitely did. I definitely remembered and certainly didn't have to refer back to the wiring diagram...

One other easy wiring deal to take care of is getting the back-up lights to work. The 3-wire plug for the automatic is on the right and the 2-wire for the manual is on the left. The violet/black and white wires are for the backup lights on both plugs; the brown/yellow wire on the automatic plug is for the Park/Neutral safety switch. What you need to do is cut the auto plug off and discard it, then solder/crimp the manual plug to the harness wires: white to white, violet/black to violet/black. Then the brown/yellow wire must be grounded. Ground it where you please, but I suggest not grounding it down at the transmission where you'll forget about it; instead, pull enough of the brown/yellow wire out of the harness to attach it to a firewall ground.

This is how I grounded it. It's the one with the spade connector. So if I'm ever worried about my truck getting jacked, I just open the hood and unplug it
No, the real reason I used the spade connector is...well...I didn't have any ring terminals the right size! How lazy is that...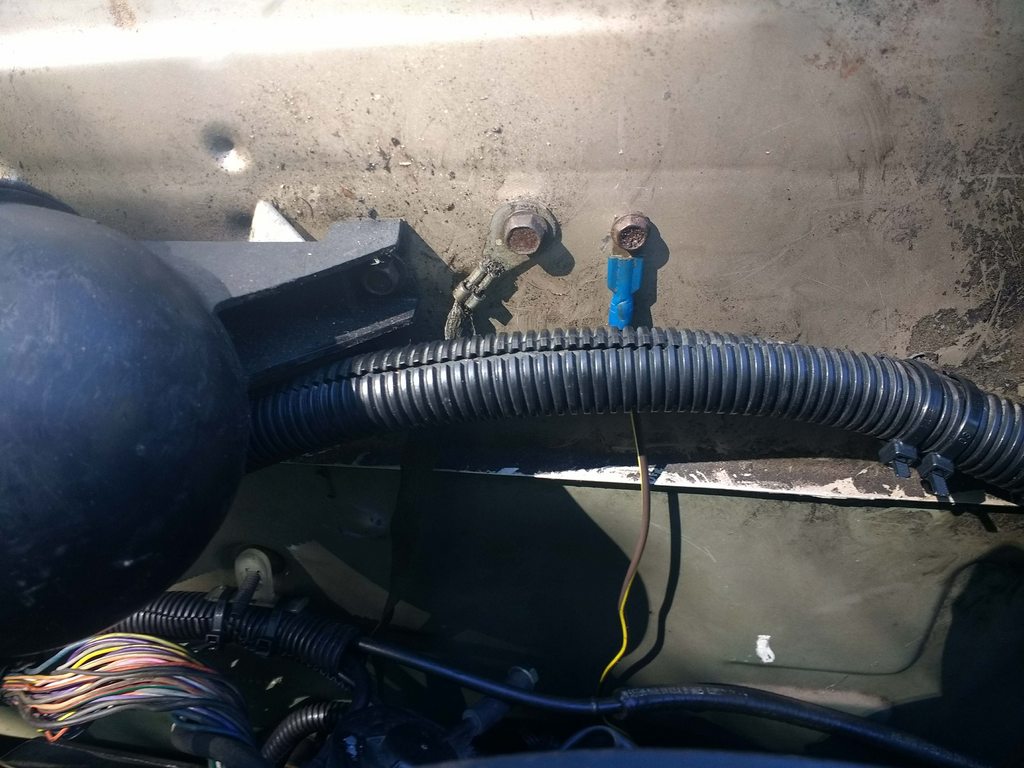
Finally, you want to get the vehicle speed sensor to work. The auto has three wires, the manual has two. I cut the automatic connector off, orphaned the solid orange wire, then spliced the manual connector onto the harness wires, matching up the colors (white/orange and black/light blue). Note!!! THERE IS AN ISSUE! The speedo works perfect in all forward gears, but in reverse the needle tries to go backwards. It doesn't really bother me but keep in mind that there is something wrong with my procedure.

Last edited by tbugden; Jul 6, 2018 at 03:44 PM.
Thread Starter
|
All Star
Joined: Apr 2013
Posts: 941
Likes: 22
From: Connecticut
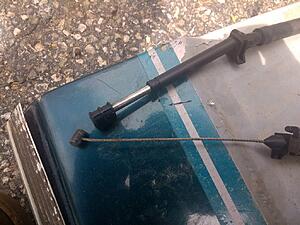
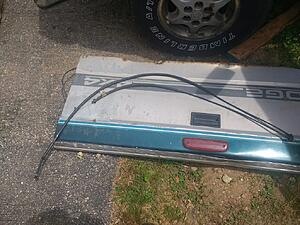
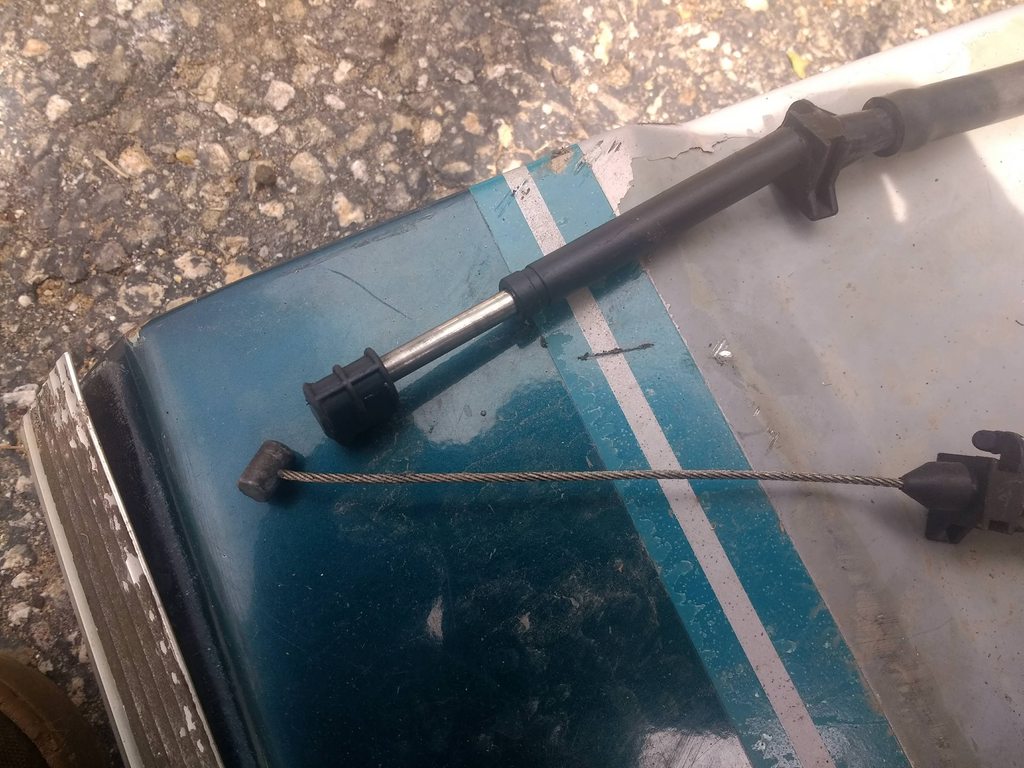
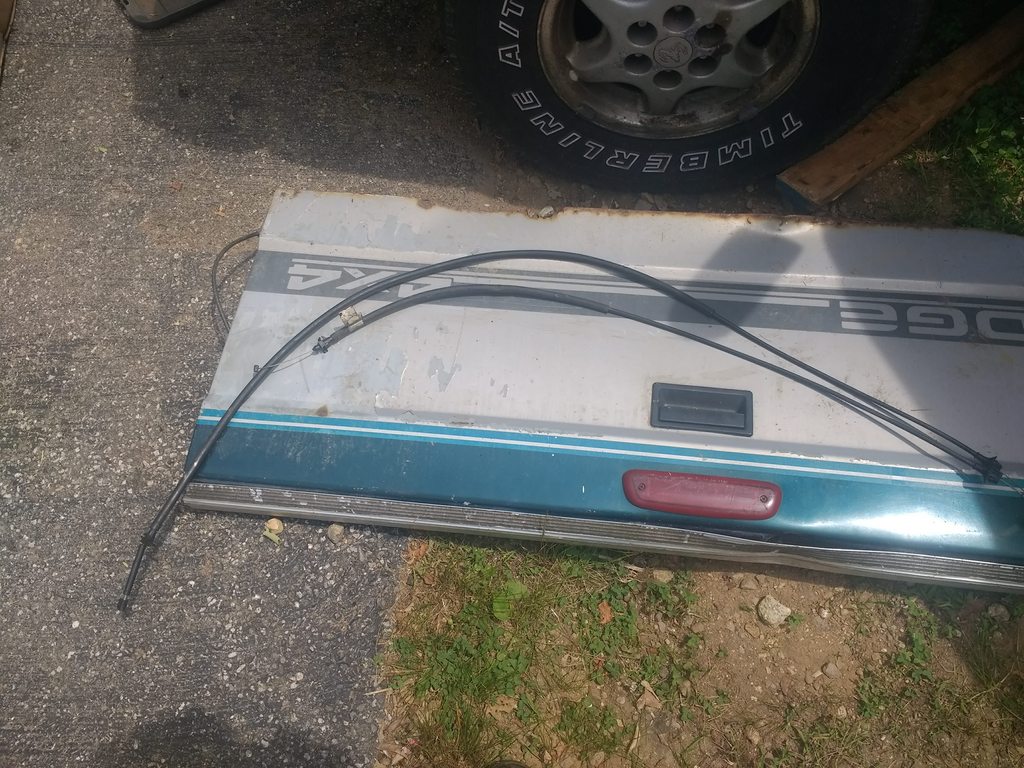
Another difference is the throttle cable. The '94 V8 cable is shorter and has a typical cable end on it, while the '93 V6 cable has an end to snap onto a small ball joint. Swapping the cable literally takes 2 minutes. Just pull the cable end off the accelerator pedal and then depress the clips on the thing that holds the housing to the firewall and push the cable through the firewall.
'93 Top, '94 Bottom
'93 Top, '94 Bottom
Thread Starter
|
All Star
Joined: Apr 2013
Posts: 941
Likes: 22
From: Connecticut
The fuel line is as simple as could be. Connector at pump, connector at rail, uninterrupted nylon hose in between. As I posted before, The pump connector is a 3/8", and the fuel rail is 5/16". This was simply dealt with by using a 3/8" quick disconnect to 5/16" barbed connector at the pump.
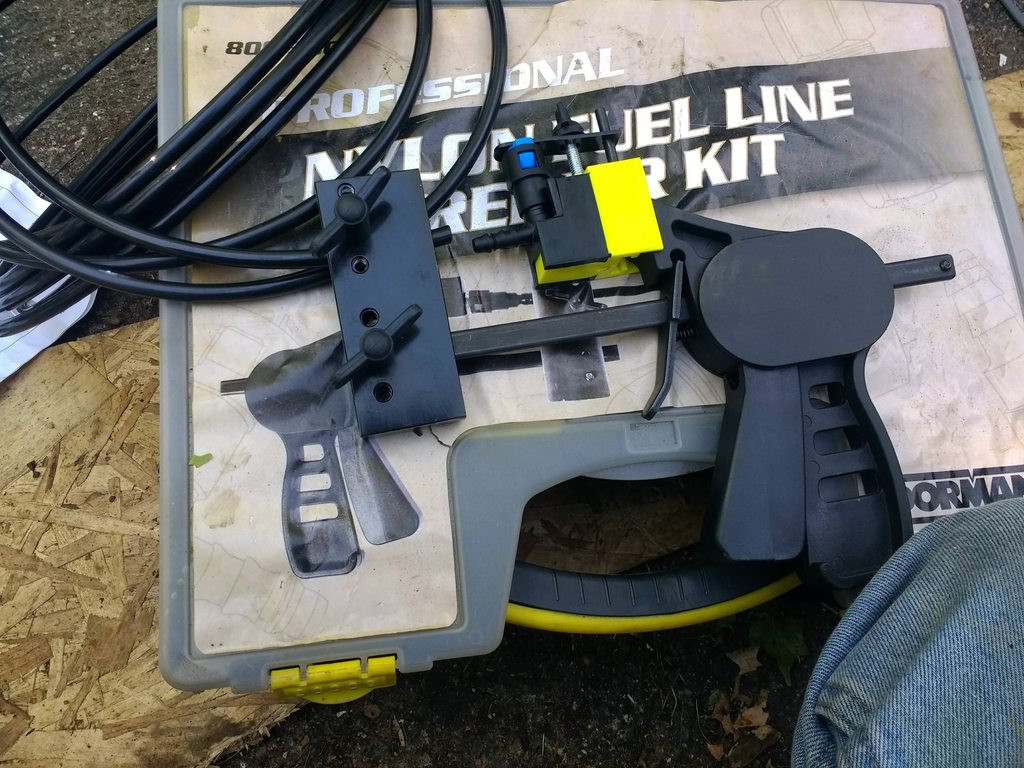
This is my Dorman nylon fuel kit. Pretty awesome kit though the clamp/press is pretty subpar. Doesn't have the power to press some of the less ductile nylon lines onto the barbed connectors. Here I am pressing the 5/16" line onto the 3/8" quick disconnect adapter. This 90 degree connector is not necessary for the tank, but it was all I had.

A 90 degree connector IS necessary for the rail if you want to have it look halfway decent. Here I am pressing the fuel rail connector onto the nylon. Notice the c-clamp I'm using to assist because the Dorman clamp is simply not up to the task (does a great job of holding everything securely and keeping the pressure going straight though!).
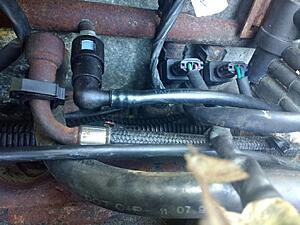
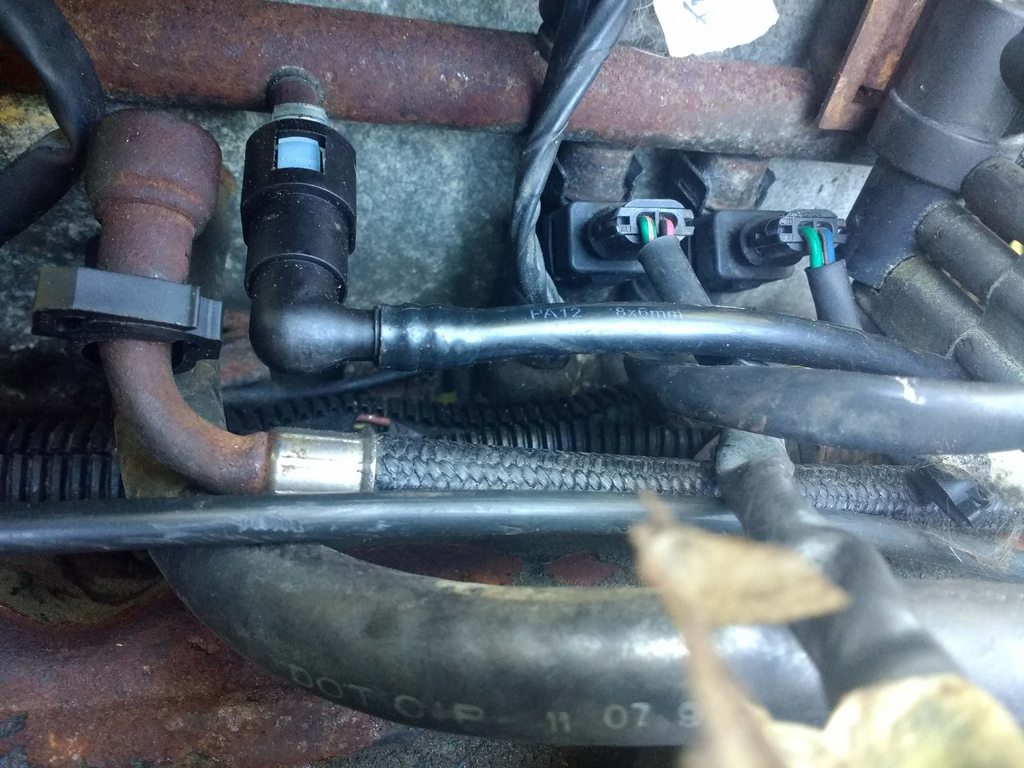
Edit: Here's what it looks like installed! For connections in the engine bay I would prefer metal for strength purposes, but as long as I don't step on the connector, it'll be fine.
And here is the uber-simple fuel line. Straight nylon from the tank to the rail. It's just ziptied to the old lines for now, it'll be properly attached soon. But look at those beautifully bent steel lines that I did all for the return system! Took me hours! What a waste...haha.

This is my Dorman nylon fuel kit. Pretty awesome kit though the clamp/press is pretty subpar. Doesn't have the power to press some of the less ductile nylon lines onto the barbed connectors. Here I am pressing the 5/16" line onto the 3/8" quick disconnect adapter. This 90 degree connector is not necessary for the tank, but it was all I had.
A 90 degree connector IS necessary for the rail if you want to have it look halfway decent. Here I am pressing the fuel rail connector onto the nylon. Notice the c-clamp I'm using to assist because the Dorman clamp is simply not up to the task (does a great job of holding everything securely and keeping the pressure going straight though!).

Edit: Here's what it looks like installed! For connections in the engine bay I would prefer metal for strength purposes, but as long as I don't step on the connector, it'll be fine.
And here is the uber-simple fuel line. Straight nylon from the tank to the rail. It's just ziptied to the old lines for now, it'll be properly attached soon.
But look at those beautifully bent steel lines that I did all for the return system! Took me hours! What a waste...haha.
Last edited by tbugden; Jul 6, 2018 at 03:30 PM.