


Replaced engine fan with electric fan

Thread Starter
|
Captain
Joined: Mar 2007
Posts: 632
Likes: 1
From:
I wanted to replace my engine fan to reduce noise, free up some hp, and hopefully get better gas mileage. I don't think I have the original fan clutch. I think someone installed a new fan clutch recently before I bought it because the clutch looks like the one I bought from Autozone for my Dakota. Anyway, the clutch is engaged when I leave home in the morning and as the engine warms up, the clutch disengages. So, until it disengages I get that loud fan noise and it feels like I'm driving with the brakes on. It can sometimes take 8-10 minutes for the clutch to disengage. I have had 5 Dodge trucks since 1992 and most of them did the same thing so replacing the clutch won't fix that. A new clutch will actually be worse.
I did some shopping and it appears that 16" is the biggest standard size fan. I didn't expect the electric fan to provide as much cooling as the original engine fan but I was hoping the efan would be good enough. Time will tell only after I sit in traffic in the hottest period this summer. I'm controlling the fan with the Flexalite VSC.
I'm leaving the factory electric fan unmodified. It comes on automatically when the AC is on. It will be providing the majority of cooling because it is closest to the radiator.
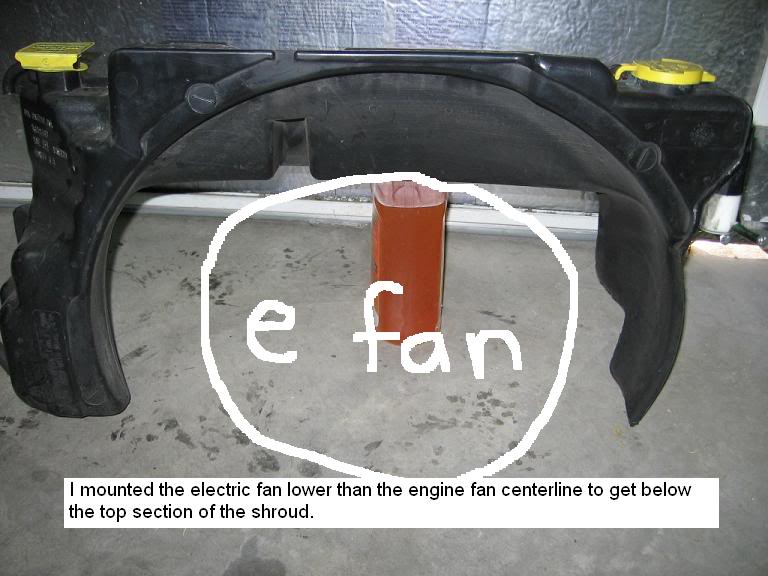
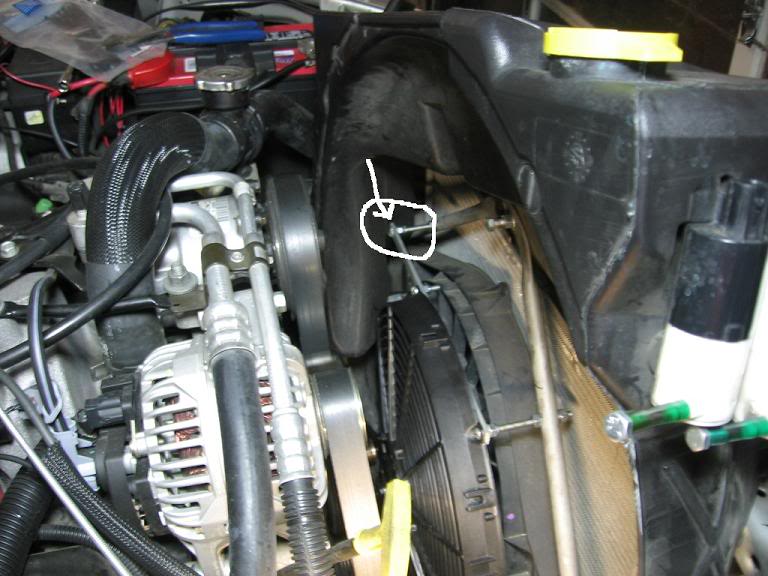
Here is the fan shroud removed - showing the engine fan and factory efan.
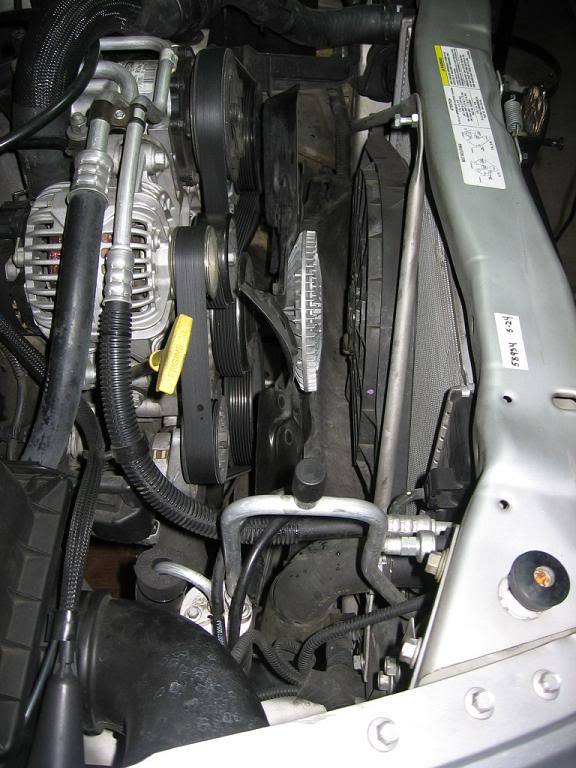
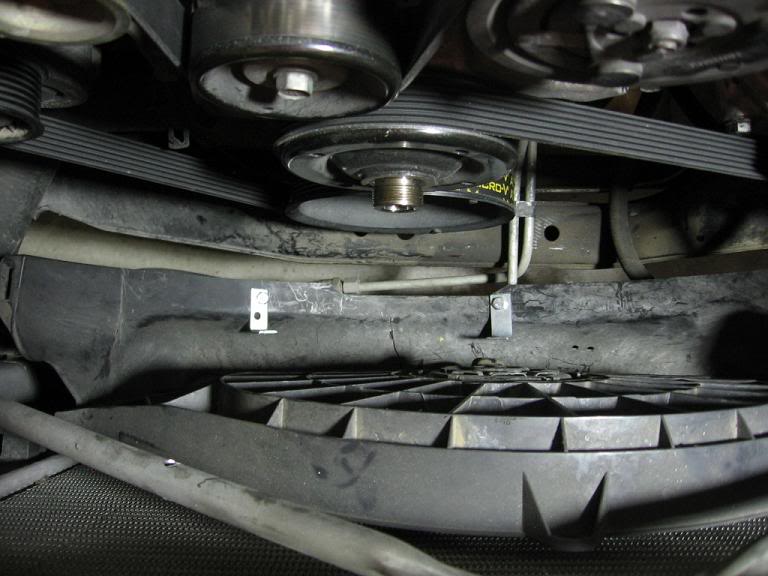
Here the engine fan has been removed to show the space available.
I originally planned to mount the new efan on the centerline of the engine fan but later realized that the new efan needed to be mounted lower to be under the top section of the shroud.
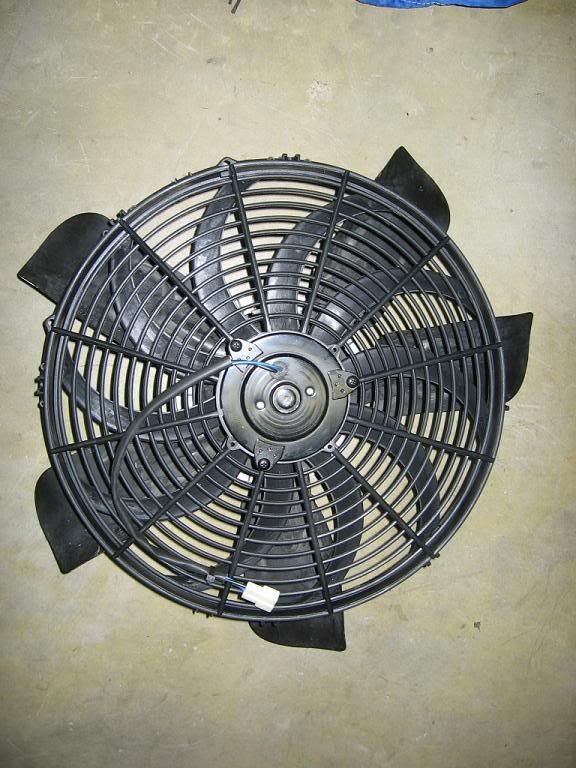
The new efan is smaller diameter than the engine fan and so it won't provide as much cooling.
Mounting the top of the fan appears simple but it took me several hours to finalize it. All the nuts are nyloks. Notice the engine is offset from the center of the radiator. The new efan is centered in the shroud like the engine fan was.
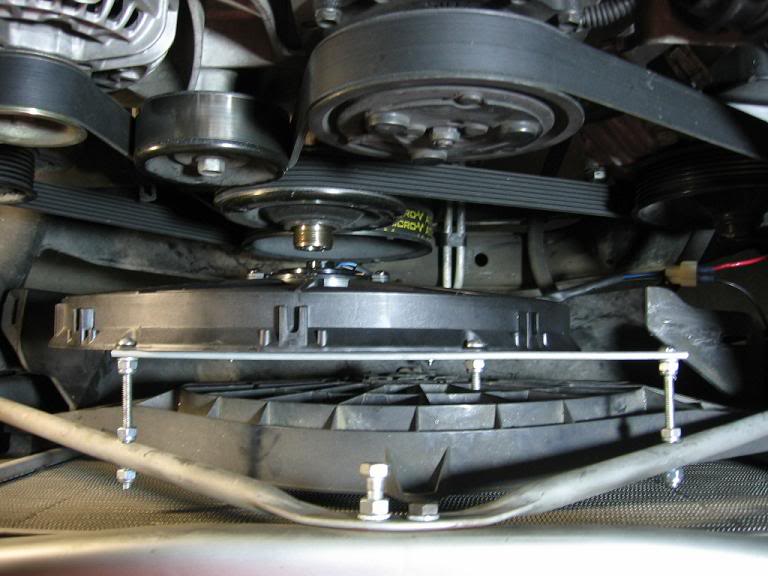
I used L brackets to attach the bottom of the fan to the lower shroud.
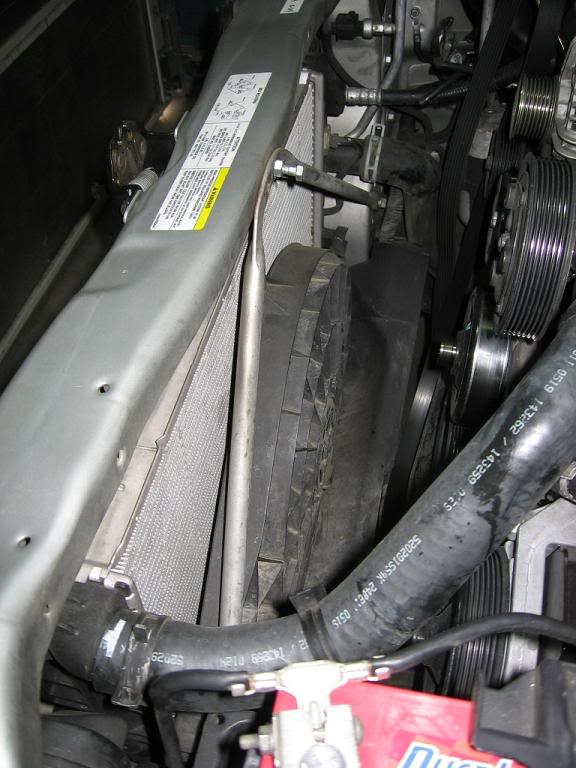
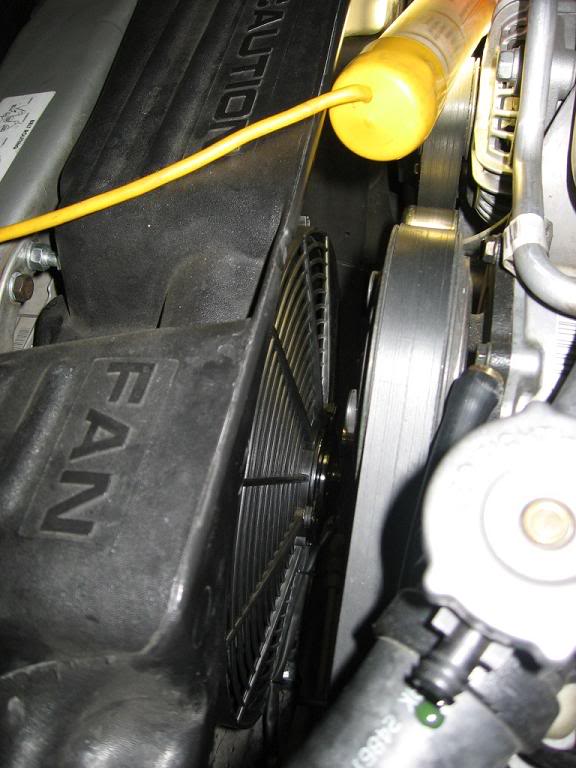
I was aware the upper shroud would have to fit over the new efan but I have to admit that I got lucky that there was enough room and I didn't have to remove the radiator hose. I was able to drop the shroud in place past the upper mounting bracket.
The shroud is very close to the engine but this last pic shows the new fan in place of the factory engine fan.
My D is much funner to drive now. The engine revs quicker and the acceleration improvement is noticable. There is a lot less noise from the engine compartment so now my exhaust is definitely louder which is about the only noise I hear when I push on the gas.
I did some shopping and it appears that 16" is the biggest standard size fan. I didn't expect the electric fan to provide as much cooling as the original engine fan but I was hoping the efan would be good enough. Time will tell only after I sit in traffic in the hottest period this summer. I'm controlling the fan with the Flexalite VSC.
I'm leaving the factory electric fan unmodified. It comes on automatically when the AC is on. It will be providing the majority of cooling because it is closest to the radiator.
Here is the fan shroud removed - showing the engine fan and factory efan.
Here the engine fan has been removed to show the space available.
I originally planned to mount the new efan on the centerline of the engine fan but later realized that the new efan needed to be mounted lower to be under the top section of the shroud.
The new efan is smaller diameter than the engine fan and so it won't provide as much cooling.
Mounting the top of the fan appears simple but it took me several hours to finalize it. All the nuts are nyloks. Notice the engine is offset from the center of the radiator. The new efan is centered in the shroud like the engine fan was.
I used L brackets to attach the bottom of the fan to the lower shroud.
I was aware the upper shroud would have to fit over the new efan but I have to admit that I got lucky that there was enough room and I didn't have to remove the radiator hose. I was able to drop the shroud in place past the upper mounting bracket.
The shroud is very close to the engine but this last pic shows the new fan in place of the factory engine fan.
My D is much funner to drive now. The engine revs quicker and the acceleration improvement is noticable. There is a lot less noise from the engine compartment so now my exhaust is definitely louder which is about the only noise I hear when I push on the gas.
Hall Of Fame


Joined: Jun 2005
Posts: 14,228
Likes: 19
From: Riverton, UT
Need a parts list for this write up and thank you for all your documentory time spent. Please be careful not to move the pictures in your hosting site because I am going to put this in the DIY section.
If you could provide the part name and numbers that would be great? Also I take it this is a 5.9L and what year are we working on?
If you could provide the part name and numbers that would be great? Also I take it this is a 5.9L and what year are we working on?
Last edited by hydrashocker; Jun 9, 2009 at 12:02 AM.
Champion
Joined: Jun 2006
Posts: 4,822
Likes: 4
From: Indiana
You mounted a fan behind a fan? When the little (stocker) fan is on it WILL limit the air you are getting to the replacement fan. It will be acting as the source fan feeding the 14 incher. The 14 may drive the air harder onto the motor and it may pull air through the radiator albeit limited due to the distance from the fins however I would be concerned when they are both on (when the AC is on for sure.) It will not b able to do much over what it is fed by the stocker.
Where did you mount you VSC? Pix of that install? I love that thing. I found it both interesting and exciting to wire and see how it worked. I ran my setting screw all the way cool and then worked it back to hotter. How about yours?
I'll post up my install stuffs soon. I took a totally different path and I think it turned out nice. I am in Cleveland in a hotel room this evening. LOL
LOL
IndyD
Where did you mount you VSC? Pix of that install? I love that thing. I found it both interesting and exciting to wire and see how it worked. I ran my setting screw all the way cool and then worked it back to hotter. How about yours?
I'll post up my install stuffs soon. I took a totally different path and I think it turned out nice. I am in Cleveland in a hotel room this evening.
LOLIndyD
Hall Of Fame
Joined: Jun 2005
Posts: 14,228
Likes: 19
From: Riverton, UT
Trending Topics
Thread Starter
|
Captain
Joined: Mar 2007
Posts: 632
Likes: 1
From:
Yes, just like the factory setup. My only goal here was to remove the engine fan, not to provide additional cooling. In fact by removing the engine fan and replacing it with the 16" electric, I knew I would have LESS cooling. Again, only time will tell if I have enough cooling. If I don't then I will be removing the factory electric fan and installing dual side by side fans with an integral shroud (probably a Flexalite setup). It will cost several hundred dollars but I ain't going back to using the engine fan.
Thread Starter
|
Captain
Joined: Mar 2007
Posts: 632
Likes: 1
From:
I had to drill the holes in the v brace and I was relieved when I finished drilling and there were no holes in the radiator.
