

2nd interior swap.
#1
 02-18-2009, 09:14 PM

#2
02-19-2009, 12:21 AM

Rookie
Join Date: Feb 2009
Location: citrus heights
Posts: 55
Likes: 0
Received 0 Likes
on
0 Posts
How To: Install 2000+ center console in 1995-99 Neon.
Parts required:
gen2 center console
gen2 e-brake handle (you can get by with gen1)
gen2 shifter boot (you can get by with gen1)
2 1.5" long cap-head metal screws
2 2" long cap-head metal screws
Tools required:
15mm socket
13mm socket
12" socket extension sure makes things easier.
No. 2 Phillips screwdriver
Advanced:
Dremel and cutting tip (to slot one hole on the gen2 e-brake handle a bit)
Note: I did not have to trim the console itself any whatsoever.
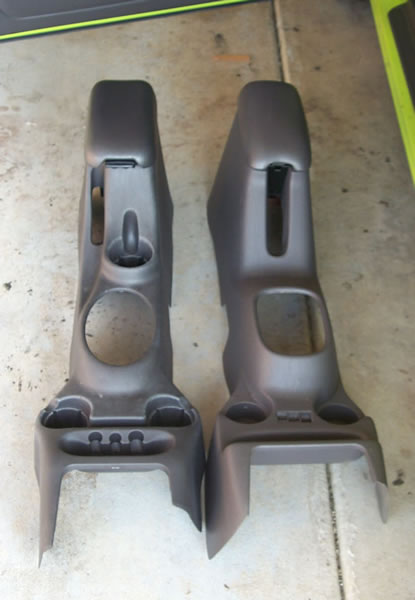
Gen2 on the Left, gen1 (original) on the right.
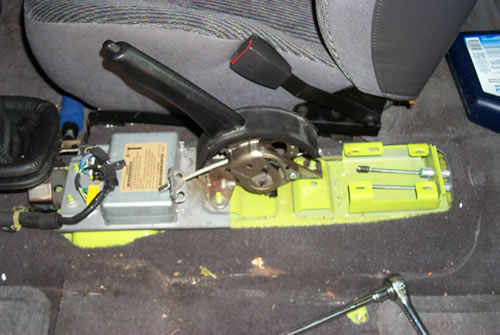
Original E-brake handle. Note bolts it attaches to.
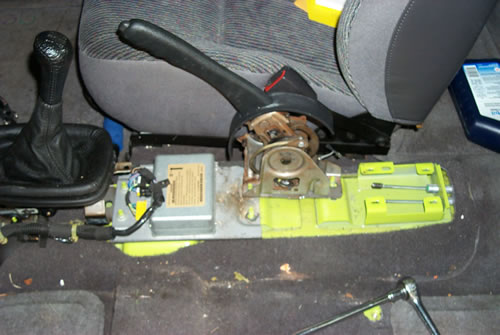
Gen2 e-brake handle. Note bolts it attaches to (result is it's closer to the passenger seat, which is required)
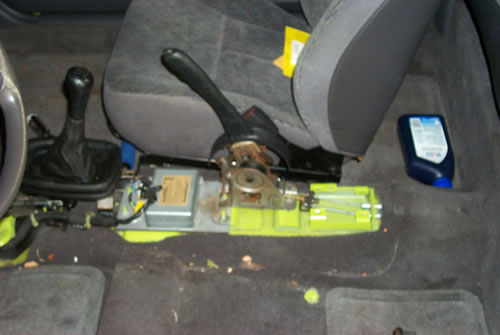
Cables attached.
Console in place. Note it lines up perfectly with the ridge in the floor.
Install complete.
Parts required:
gen2 center console
gen2 e-brake handle (you can get by with gen1)
gen2 shifter boot (you can get by with gen1)
2 1.5" long cap-head metal screws
2 2" long cap-head metal screws
Tools required:
15mm socket
13mm socket
12" socket extension sure makes things easier.
No. 2 Phillips screwdriver
Advanced:
Dremel and cutting tip (to slot one hole on the gen2 e-brake handle a bit)
Note: I did not have to trim the console itself any whatsoever.
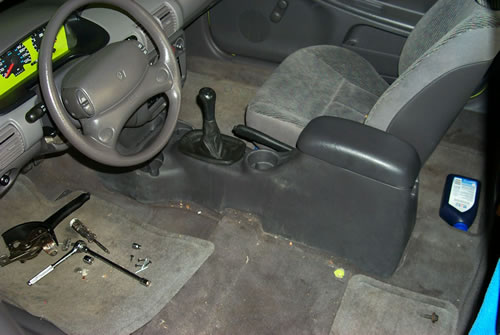
- Block rear tires
- Remove drivers side seat. 15mm socket, four bolts
- Remove old center console.
- Remove 4 screws on the bottom of the compartment at the back
- Remove one screw from each cup-holder
- Put shifter in R (I found that worked best)
- Pull up as far as you can on e-brake handle.
- Pick center console up from back, *pop* over e-brake handle, then move back and up to get around shifter.
- Remove old e-brake handle (Skip 4 and 5a and see 5b if you're using gen1 handle). Two 13mm nuts.
- Remove 13mm nuts holding it down.
- Remove wire for idiot light - it clips on, carefull or you can brake the switch (the one on my gen2 handle was broken, so I swapped switches)
- Lift up over bolts, and disconnect cables.
- Pick 5.a or 5.b
- Install gen2 handle.
- Remove third 13mm nut holding down tray the airbag computer is on.
- Attach cables to handle. Make sure the cable on the handle passes down through the bottom around the cam on the handle.
- Attach idiot light wire
- Put handle bracket over bolts - use the bolt towards the pass. side of the car for this.
- Put the three 13mm nuts back on.
- Test action to make sure it works.
- Advanced:
- Before 5a.a slot the bolt that will be towards the front of the car about 1/16" towards the drivers side of the hole (you want to be able to slide the handle a bit towards the passenger side of the car once installed.
- Move gen1 handle (I have not done this, so I do not know if it requires other changes/mods to work.)
- Remove nut towards front of car securing e-brake handle, as well as the nut holding down the tray the airbag computer is on that's right next to it.
- Loosen rear nut holding e-brake handle down.
- Move front mount point on the e-brake to the pass. side bolt from drivers side.
- Tighten rear bolt, reinstall front bolts.
- Install gen2 handle.
- Switch shift-boots. (I got a console off an ATX so I'm using my gen1 boot... doesn't quite line up but it works well enough.)
- remove old one
- install new one.
- Install console
- Pull up as far as you can on e-brake handle.
- Reverse process to removing console, slide it over the shifter, and *pop* over the e-brake handle.
- Pull shift-boot through hole
- Reinstall cup-holder screws. They line up perfectly, though you may need to shimmy the console around a bit to find the lineup right.
- Reinstall rear compartment screws. 1.5" for front holes, 2" for rear. I'm only using two of the four. You may have to push down some to get the screw to start.
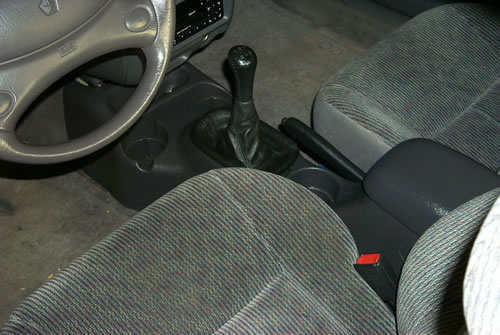
Gen2 on the Left, gen1 (original) on the right.
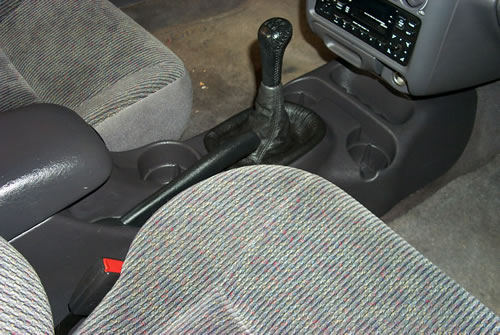
Original E-brake handle. Note bolts it attaches to.
Gen2 e-brake handle. Note bolts it attaches to (result is it's closer to the passenger seat, which is required)
Cables attached.
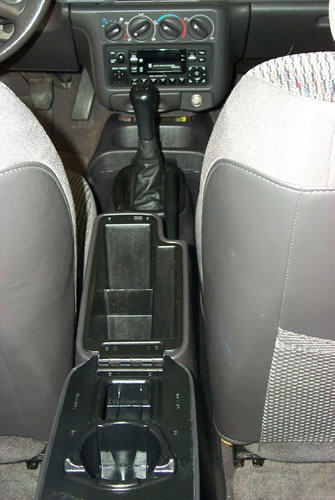
Console in place. Note it lines up perfectly with the ridge in the floor.
Install complete.
#3
02-19-2009, 12:38 AM
#4
02-19-2009, 12:49 AM
Rookie
Join Date: Feb 2009
Location: citrus heights
Posts: 55
Likes: 0
Received 0 Likes
on
0 Posts
#6
02-19-2009, 12:59 PM

All Star
Join Date: Jul 2008
Location: Cullman,Al
Posts: 816
Likes: 0
Received 0 Likes
on
0 Posts
#7
02-19-2009, 02:02 PM
Trending Topics
#8
02-19-2009, 02:08 PM
All Star
Join Date: Jul 2008
Location: Cullman,Al
Posts: 816
Likes: 0
Received 0 Likes
on
0 Posts
#10
05-25-2010, 11:53 AM

Professional
Join Date: May 2008
Location: Albany, GA
Posts: 146
Likes: 0
Received 0 Likes
on
0 Posts