When you click on links to various merchants on this site and make a purchase, this can result in this site earning a commission. Affiliate programs and affiliations include, but are not limited to, the eBay Partner Network.
1st Gen Ram Tech'93 & older Rams: This section is for TECHNICAL discussions only, that involve 1993 Rams and older. For any non-tech discussions, please direct your attention to the "General discussion/NON-tech" sub sections.
While posting on this thread and looking back at photos I feel I need to explain the timeline better. This is going back a while. I ordered the parts well before tearing the truck down. The terminator x max was one of the biggest hold ups as I ordered it in Dec of 21 and it didn’t show up till July in 22. I started pulling the motor in august 22. And only really feel like I’m about done with it now. I will try and keep the timeline correct while making a coherent thread.
I sure hope so heyyou, I swear the mag felt like it was getting 10 or so. I put straight up rat poison under it for a week ol grouch. I had a nibbler problem back in 17 when I first got the truck but these 2 have been the only instances.
this was the OG 318. Sucker had mowed down my dissy like a hungry beaver.
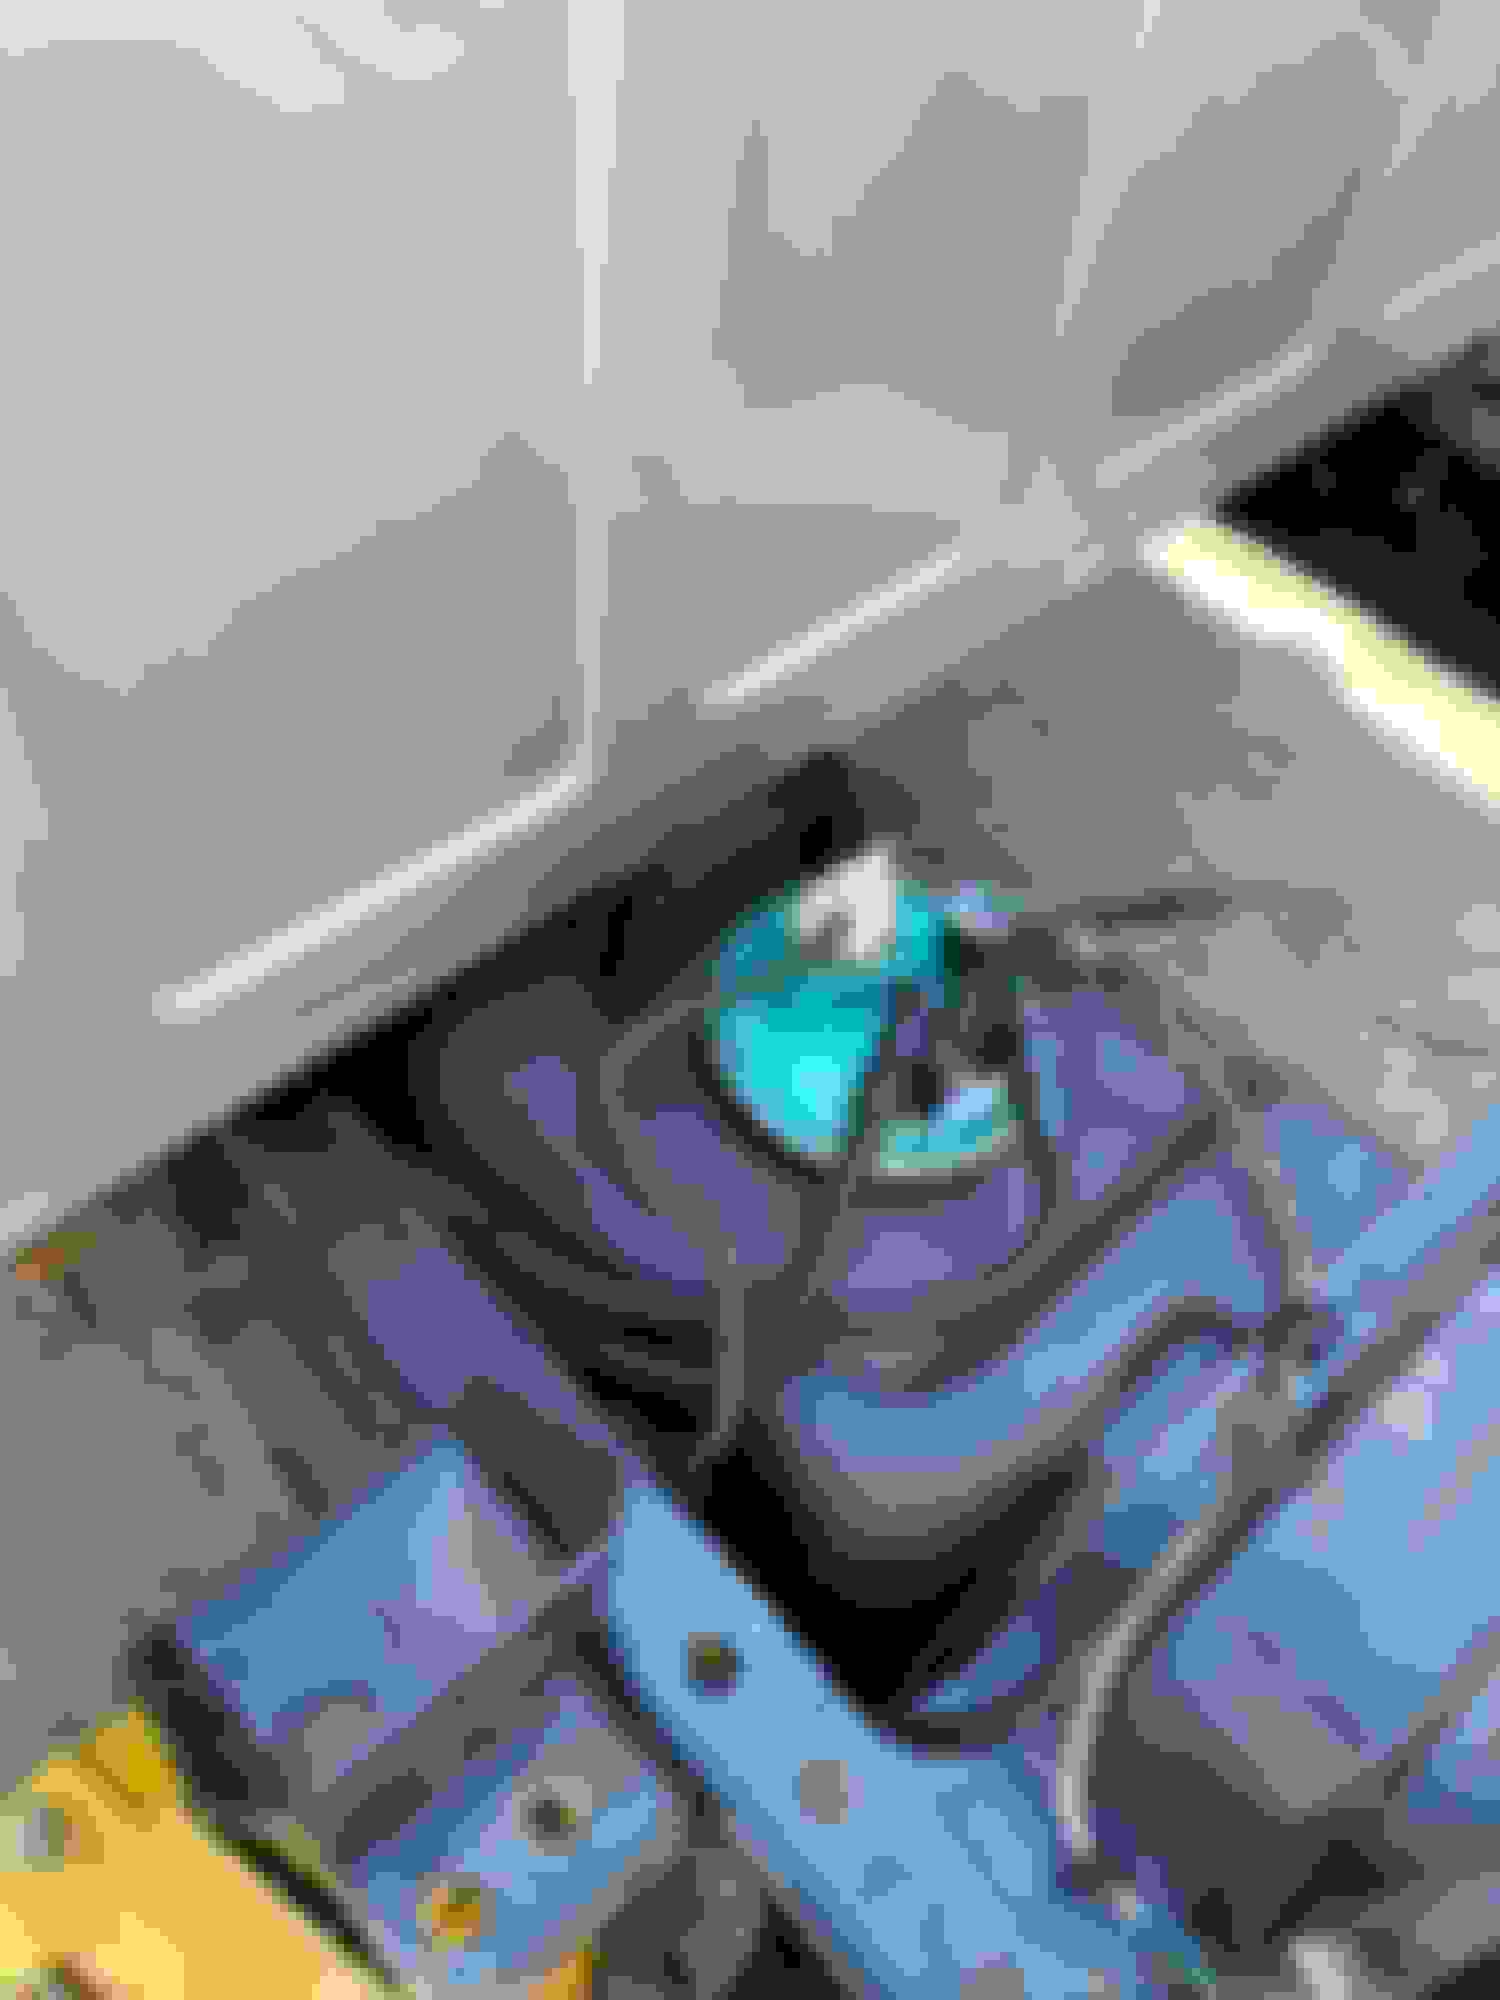
I got the 5.7 on the stand and flipped it to put a new pan on.
Drained and flipped. Damage close up Pan off
It’s worse than I thought - small piece of metal in the pan and the crank has been dragging on the windage tray part. Seller is covering the pan as well as a new srv actuator as these were the identified damaged parts. It didn’t include power steering (was electric) and no AC comp either so I will have to source those.Plan is to seal it and just send it !
I don't use poison. You never know where they are going to die. Then you have that smell and it is persistent. Another concern is what if your cat or dog kills and eats the mouse before it dies? Now you have poison in your pet.
The holley kit I got for my motor was part # 550-1425. That is a x max kit- it has the option for trans control if I change plans down the road (it happens).It also comes with the drive by wire (DBW) harness but can also run drive by cable (DBC) since I’m not 100% sure what route I’m going. The SRV/VVT harness is separate part # 550-132. The truck motors have the short runner valve (SRV) in the back of the intake to optimize air delivery throughout the rpm range.A nice feature the car intakes don’t have. It’s my understanding all the newer motors are variable valve timing (VVT) and by holley controlling it means I don’t have to worry about what it even does 😂 or more motor mods. While the motor is on the stand I got the harnesses and mocked them up to see what worked and what didn’t. The instructions show you the correct crank sensor to use and of course my motor had the wrong one. Correct Chrysler part on the right 514-9230-AA.
My knock sensors were the wrong style as well. While most people (tuners) say they are obsolete for an aftermarket swap like this, I still wanted to have them connected. In fact I wanted as much sensor info as I could get. Need the square style connector ends. Best deal I could find was standard part # KS168 at approx $20 each.
Fuel pressure sensor and oil pressure sensor won’t work either Starting to wonder if the harness is even correct for this motor.
Best bet is to hit up “lowdollar motor sports” for these sensors as they are plug and play with the terminator #8990100-0-100 psi. One for fuel and one for oil. Oil pressure sensor replaced.
After that there is coolant temp/cam/manifold air pressure/coils/injectors and those all worked with the factory sensors. Throttle position sensor and the Idle air control didn’t need to be hooked up if running DBW. Some of all this is in the manual - I suggest reading over a few times even highlighting or making your own notes if you are doing an install.There are more harnesses like power,DBW and SRV/VVT that are either pretty straightforward or I will cover more later. Seems like alot but really isn’t too bad especially for someone who’s not a fan of wiring. Oh also while the motors out I’m striping the trucks engine bay of all wiring that’s not used anymore and cleaning up what I can.
Part #
Everything thing looks good. Also replaced the motor mounts on the frame where the old ones were. Might have made a mistake with this as holley instructions say “use the rearward frame holes for the oe rubber mounts. If not available on your frame you may be required to drill a new hole on each side for correct mounting”. No other instructions on where too tho. From what I understand is the older trucks have these holes and I didn’t really catch that on my install as I was under the impression the adapters bolted to the stock mount locations. Making things worse is also what I have learnt that my 88 is a 1 or 2 year only that came with an extra brace/bracket for the motor mounts on the driver side frame. This gave me clearance problems with headers on the last swap as well as you will see with this one. The holley system is supposed to move the engine forward ~2”to reduce some clearance issues with larger transmissions (8speed for example) and brake booster/coil clearance. I believe I should have mounted the motor mounts back an inch (if possible) but that will become more clearer later in the install. New mounts.
Also removed all of the crossmember puzzle. Still yet to wrangle the exhaust off as it won’t bolt up anymore either.
Fuel pump time. Obviously the stock setup ain’t gonna cut it for a new hemi. I kinda followed diyhemi (youtube channel) approach on their d100 swap for the fuel delivery. Check them out - a great resource for 3G hemi swaps. Pulled the bed as that seemed easiest.
Bed up and truck rolled out to work on.
I got the tank and sending unit cleaned up before removing.
Bed off. Cleaned up.
First time dealing with AN lines and I gotta say I’m a fan. Super easy to make and seem like very strong connections. I got all evil energy stuff from Amazon. A kit with 6AN line and a bunch of fittings and also the quick fitting 90s needed for the fuel pump. The next pic shows some of the hardware I got but there were some extra fittings not pictured that I got for the pressure sensor 1/8npt adapter, ends and fuel rail 90.
Some of the fittings ordered.
The plan was pull the pump and upgrade as well as the lines retaining the original sending unit and wiring since that it was in decent shape. Tbi trucks have a unique fuel pump unit (what I call sending unit) that is not reproduced so if I were to change/damage it possibly the whole tank would need changing or mods. I changed out the pump with a walbro 255 and new filter sock no problem.
Fuel pump upgrade.
now this comes to bite me later not replacing the hose as well inside the tank. I honestly can’t remember if I looked for a new piece of hose and it wasn’t readily available or I just said it looked good and didn’t replace it. I’m just saying while you’re in there swap out the pumps hoses as the pressures will be well over the stock pump while relying on 35yr old fuel soaked rubber. I got the evil energy (corvette style) filter reg as well since It is rated at a pressure (58 psi) to run a modern FI motor. I also wanted to be consistent with the other hardware and was impressed with the quality I had seen from the fittings. I put this in the place that I had the old fuel regulator and mounted the new bracket and line as such.
Evil energy fuel filter/reg install.
I left the fuel line end long enough into the motor side as I didn’t exactly know where it would be cut off for the pressure sensor that I was planning on putting in line.
6AN fittings and lines.
the kit came with a dual line clamp that I used right where it wedged between the tank and frame to prevent any rubbing/damage. The one (rollover? Not really sure what it does) vent line remained stock and I retained the charcoal canister line as I still had that somewhat hooked up allowing the tank to breathe.
Forgot to mention I removed the factory fuel hard lines to clean up the frame when doing the fuel pump work. They were also in the way of the new AN lines.
Fuel Lines removed.
So once the parts all got here and I really started wrenching on the truck again the decision was made to rebuild the 46rh that had been sitting in the garage for years. I knew it worked fine for the couple days I had the 95 1500 running around but the guy who sold it to me did say he had slipping issues with it. Why risk it after all this work will be done. I also already had the pressure switch kit from PATC to run the OD/TC on the shelf. The shop who I got the motor from recommended a local place to rebuild the trans. I looked em up and reviewed the reviews they had and all seemed good. I had already called around and prices ranged from 1500-2500 for the rebuild from legit businesses- maybe cheaper from a home garage type guy. I discussed the build and what goals I had for the trans and got a quote. These guys said it would be 1700 and about 2 weeks to do. Sounds good so I dropped it off and waited. Well as my luck with shops go it ended up being 2 months later and a $2900 price tag. We were in communication during this time and there was no mention of added cost and just excuses about the timeframe. I was so ticked off and annoyed by this point I just let them keep it. So new plan - I decided to get a 46re. The main reason to use the rh was I actually had it but the Holley can control the re and they are more easily available. I found a junkyard trans an hr away from a place that takes wrecks so I know it was at least on a running truck. It was $650 and had a 30 day warranty 😂 crossed my fingers and went and got it.
Flying trans out of the jeep.
yup it’s a nasty mess of a trans but after a good cleaning it looks like it’s been rebuild at some time. Maybe I have a gem 🤣.
46re cleaned up.
I know those are the junkyards markings in green, but it also had some other older pen writing “R-R TM” and looked like non factory seal on the tail end. Let me know if anyone knows R R TM builders in the South Carolina area. This is the point I should have had another shop rebuild it or at least maybe I could have gone through some of the outer seals but I was still probably still trans ticked and just ran with it. It had a ding in the pan and I knew it needed a filter (yard removes them) and why not a gasket. It had a lot of dirt and oil on it but couldn’t see any major damage. The plan was to do filter/gasket after the install as it will be then up off the ground. Harbor freight dolly once again had a familiar load.
Pic of the other markings.
So incredibly the gen 3 hemis have the same bolt pattern as the old 727 / 46re etc transmissions. You do need a different flex plate as the starter ring gear is on the torque converter in the older style trans.
For this I got l Bouchillon part # 727904SF. Holley makes one too but this one lets you use the stock bolts to the TC. Holley sells one but I’m unsure if that would work with my stock TC.
Original below and Bouchillon A727/A904 hemi gen 3 flex plate
The back of the crank also need to have a bushing removed so there is space for the nose of the TC. This thing was quite a pain to remove. I tried the bread trick but that didn’t work. Ended up renting a bunch of different pullers and finally one worked.
Flex plate removed. Slide hammering the bushing/sleeve. Finally removed.
That was tough but got it by cranking it down way too hard and slightly modifying the ends of the bearing puller (sorry oreillys). Bread biscuit will come out later.

 05-21-2023, 01:14 PM