When you click on links to various merchants on this site and make a purchase, this can result in this site earning a commission. Affiliate programs and affiliations include, but are not limited to, the eBay Partner Network.
1st Gen Ram Tech'93 & older Rams: This section is for TECHNICAL discussions only, that involve 1993 Rams and older. For any non-tech discussions, please direct your attention to the "General discussion/NON-tech" sub sections.
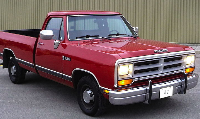
Erm, snow???? Is that a current pic?? Where are you at? (I see West Texas..... I had no idea they got snow in Texas.... Certainly didn't when I was there. )
Erm, snow???? Is that a current pic?? Where are you at? (I see West Texas..... I had no idea they got snow in Texas.... Certainly didn't when I was there. )
Exactly .... The picture is a few years old .... one of those things where they say it is going to snow ...... Yeah right I will believe that when I see it! Why I got caught without the truck not covered.
When we came here the first time in January 2018 and were house shopping we stayed in a centrally located motel .... we had a ice storm that caught everyone by surprise.
The Dodge Caravan was covered in ice 1/4"-1/2" thick .... We were stuck in the motel for almost a week before the roads were cleared for travel.
I do not remember how many days I-20 was shut down, there was so many wrecks everywhere .... We do not salt the roads or prepare for it. We just do not have the budget for the equipment since it is maybe needed once every 3 years.
At least 2 weeks after the ice storm, driving down the freeway you would see semi trucks off the road rolled over waiting their turn to get towed in .... it was a mess.
So yeah West Texas, we get our weather but never believe it til we see it.
Erm, snow???? Is that a current pic?? Where are you at? (I see West Texas..... I had no idea they got snow in Texas.... Certainly didn't when I was there. )
Texas gets snow fairly often. Usually just flurries and more towards the Austin area. I got caught in some heavy snow in Texas though back in the 70's. I had just come out of Minnesota so I didn't have any trouble but everyone else on the road did.
I got the carburetor put back on .... I should try to start it and see how things go, I do not have a choke cable connected and she does like some choke when cold.
The existing installed choke cable is old and I have a new one to install, I also need to install the throttle cable .... would be nice to give it a fast idle while sitting and running for awhile to mimic driving conditions. ..... Everything I have done in the past was just temporary ... now I want final products installed, final cleaning and proper paint.
I need to get under the dash and wire everything, work on the wiper motor ..... basically everything in the cab needs to come out .... just premature to install a new choke cable now.
Its a dirty girl inside, been over a year since I finished welding in the floor .... one favor I did do for my self is make the seat base removable.
They are brazed into the floor from the factory permanently. ..... I did not have the bottom of the seat and picked up some Chebby Silverado buckets for $50 to get the truck on the road.
Newer Silverado seats have a 3 point seat belt built into them and they will bolt to this existing base I built. These seats will work for now.
So the original base is now installed upside down and flipped left to right. Upside down gave me a nice wide flange to use 14, 3/8" grade 5 bolts to bolt the base down to the cab.
Left to right made the base slope forward, while the slope in the seat risers slope backwards .... just makes for a very comfortable seating situation.
I also like the little shelf created on each side under the seat, passenger side will mount a emergency first aid kit, drivers side gets a fire extinguisher, under the seats is a ton of storage space for whatever .... I will have to build a console for drinks holder in between and thinking a stereo mounted in it. .... future problems.
All I'm saying, is connecting a choke cable means first I have to gut out the existing interior pieces pressure wash, I need some heat under the dash to free up the cowl vent, I need to prep for paint and paint everything .... Then I can install a choke cable along with everything else .... The fun just never ends with a old truck.
I want to mention I did try to start the truck with no choke cable, that was a failure ... seemed like a no spark issue.
I did get fuel pumped into the carburetor and I have a strong stream of fuel coming from the accelerator pump .... the carb is fine.
I did start a different thread on the new condenser situation when I switched to a ballast resistor and 12V and was getting random starts .... for example I started it and drove it into the work area .... I let it run and a 1/2 hour later it died, I have not been able to get it to run again.
I have done some good troubleshooting on the system I think. I know I'm getting 6.7 volts at the coil when sitting with the points closed, getting 9.7 V when the starter is cranking.
So the ballast resistor is doing what it should going in and out of the coil to the distributor .....
I have put a brand new NOS condenser into the distributor and have good spark to the plugs.
What I'm worried about is the coil is brand new .... Is it supplying proper voltage to the plugs? .... I can install my old known working 6V coil to test that theory.
Also the standard ballast resistor install has 2 power wires going to the distributor.
1 wire is connected to the start position of the ignition switch and bypasses the ballast resistor. ..... it sends a full 12V to the points to start ... once started you release the key to run position and it runs off of the variable ballast resistor at 8-9 V.
While that sounds simple enough to wire in ..... I have a stomp starter or a pedal on the floor to push and that activates the starter ....
The only way I can send 12V to the points temporarily to start is by a toggle switch .... turn it on to start, off when started. What a hassle.
I'm just saying I do have a couple ideas to try here .... I'm also wondering if now might be the proper time to switch to electronic ignition and bypass all the BS.
So I'm going to move forward with the interior work and work on the engine running in my spare time. .... I'm not worried about it not running .... just need a long term solution for now and a new coil may be all I need.
You still will need the ballast resistor if you keep the present coil. You could get a coil that doesn't need a ballast. You could wire in a relay so it bypasses the ballast when cranking the motor.
Ok I spent a few days on it, the carburetor turned out perfect and is a non issue.
I removed the distributor and went through it as normal and I checked everything but spark at the plugs.
I have a spark tester that goes in between the plug and plug wire .... I found now I had no spark to the plugs. ..... I think I found the intermittent problem.
Seems it is my 75 year old distributor lost a insulator to the points. While it is connected exactly like it always is .... I got voltage to the points, but when the points closed .... the spark went to ground.
I think this will explain how it worked and after a few years it worked sometimes and now it does not work at all.
With the distributor installed and the points closed, the electricity went to the engine block .... the easiest path.
With it on the bench and connected to a battery, the points took the brunt oh the electricity ..... I connected it and the points literally caught on fire and had a 2" tall flame.
My best guess is the insulator between the coil wire to the distributor is bad .... I can fix this issue.
I found a wrecking yard on carpart.com in NM that has the electronic distributor I need for the conversion .... it is on it's way here to me in TX ..... $47 with shipping.
So time to move on to the interior and get back to that later. ....... These old trucks are tons of fun .....
I saved ya all from the fiasco of removing the steering wheel .... The bearing splitter pulled it easily.
Just one itsy bitsy goof I made .... The column is hollow for the horn wire to pass through .... The shaft of the bearing splitter was just the right size to go into the hole but not come out.
I tried everything to remove the tool and got nowhere.... I spent about 4 days trying different things to get it out. ..... This was my final try and it failed.
This is where I threw in the towel and cut the tool, got the wheel out of the way then cut the threaded shaft flush and ground it out using a carbide bit on a Dremel. Hardened steel I could not drill it.
All said and done, only thing damaged was the tool and can repair it.
Now it is time to start working on the rear fenders .... I really want to get them painted before the weather turns cold .... going to take a lot of work. .... I should have started last year in order to paint them this year.
Going to start with the best fender first.
My plan was to just tack the mounting flange in place and beat the fender into shape to make a cardboard template.
These things are ripped and torn in so many places, I have looked for years for some better replacements to start with .... I have not found them so off we go.
This corner was all ripped out, just good enough now I can do some major hammer & dolly work and then finish welding and bodywork it.
Next I will start here tomorrow and see if I can get it close enough for hammer & dolly.
Closer to the front the better it is, still has plenty of welding to do up there also ..... Did I mention this is the best fender of the two? It will be fine with a bunch of hours spent on it.
Need to remember the whole body of the truck was like this since it was a company truck for a commercial concrete company and was on the job site everyday hauling materials and getting banged up.
This is where the truck is today, all the body panels are loose including the complete bed is not bolted down.
I need to set the rear fenders in place, then center them over the rear tires to bolt the bed down, then the running boards bolt to the rear fenders, the front fenders bolt to the running boards, then the core support and nose cap gets bolted in place and finally can bolt and adjust the hood .... I need fenders and this is what I'm stuck with.


 )
)


