

My Dodge Ram...

Thread Starter
|
Rookie
Joined: Aug 2013
Posts: 84
Likes: 0
From: Columbia, South Carolina.
well.. figured out i'd need to update.
today went to Clemson SC to pickup a set of black side step bars with all Hardware. Made it a day trip with a buddy.. we had an epic day, by getting the bars, touring clemson and its campus, and then stopped at a random car show, the Palmetto moonshine company, and then to greenville where we stopped at Palmetto State Armory's newest store, and had a late lunch at Twin Peaks resturant and bar, before we headed home. It was a very successful trip, and a lot of fun. Im estatic i got the step bars for her. its been a major want for the truck.
now i just gotta figure out what i gotta do to put them on the truck. lol have no idea where to start with the install lol


Thread Starter
|
Rookie
Joined: Aug 2013
Posts: 84
Likes: 0
From: Columbia, South Carolina.
well guys i actually figured it out today by getting out there and doing it.
I watched some videos online last night about installing westin step bars on a 06 and up.. and hoped it was the same. it was.. for the most part.
this is what i bought :

as you can see, it has the two bars. 2 long brackets, 2 short brackets. 4 body mount bushings. 4 long body mount bolts. 4 shorter bolts same 15mm head size as the long, 4 10mm bolts 4 13mm bolts. 2 long braces, 2 short braces.
it went together very smoothly.
this is how i did it. The 4 body bushings i put away.. didnt use. idk if i should have or not, but i didnt.
took the 4 body mount bolts out.. put them in a bag with the 4 rubber/steel body bushings.
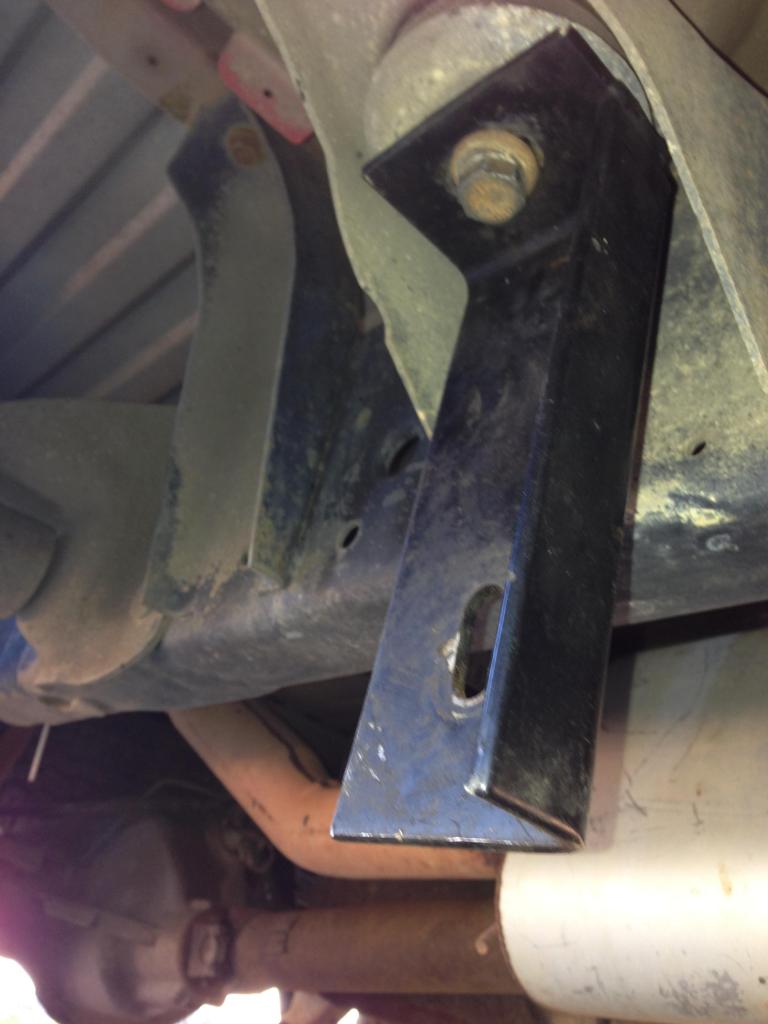
took the long bracket.. mounted it in the rear body mount. used the long body bolt with the lock washer,flat washer.. the pic below shows the bracket backwards, but you get to see where i put it in respect to the body mount. :
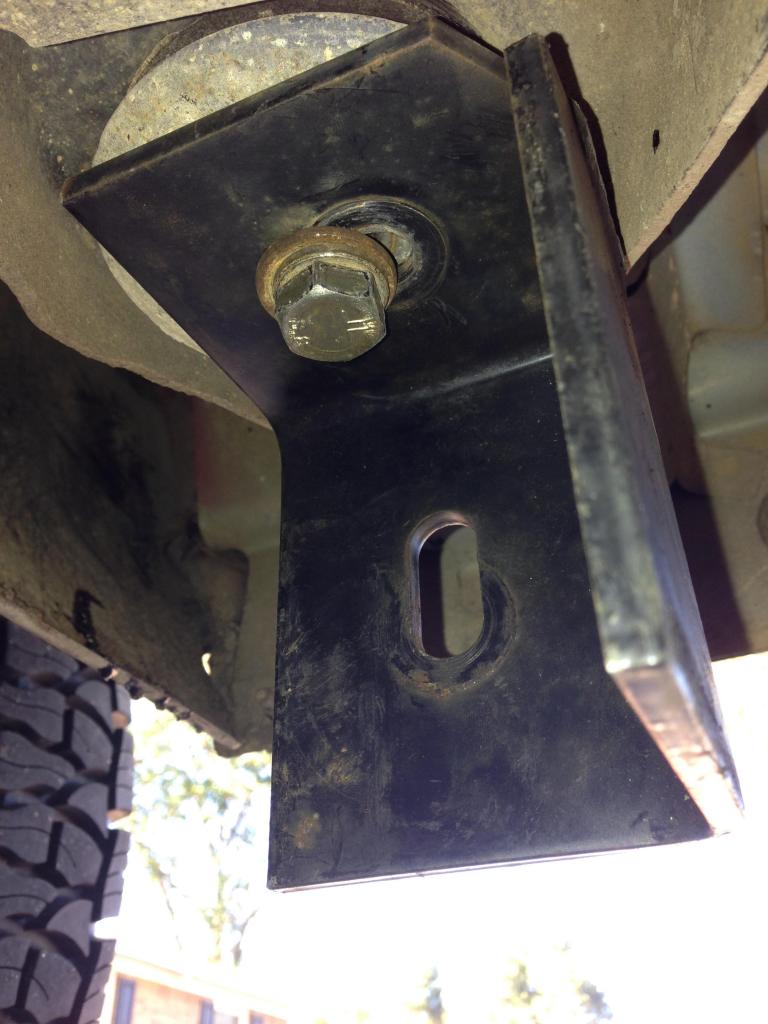
this image shows it facing the right way :

then i did the same up front, but i used the short bracket like so:
then i simply mocked up the bar itself to the two brackets and snugged it up :

after that.. i proceeded to tighten the bolts on the mounts to the brackets, then the brackets to the frame body mounts.
once that was done i used these :
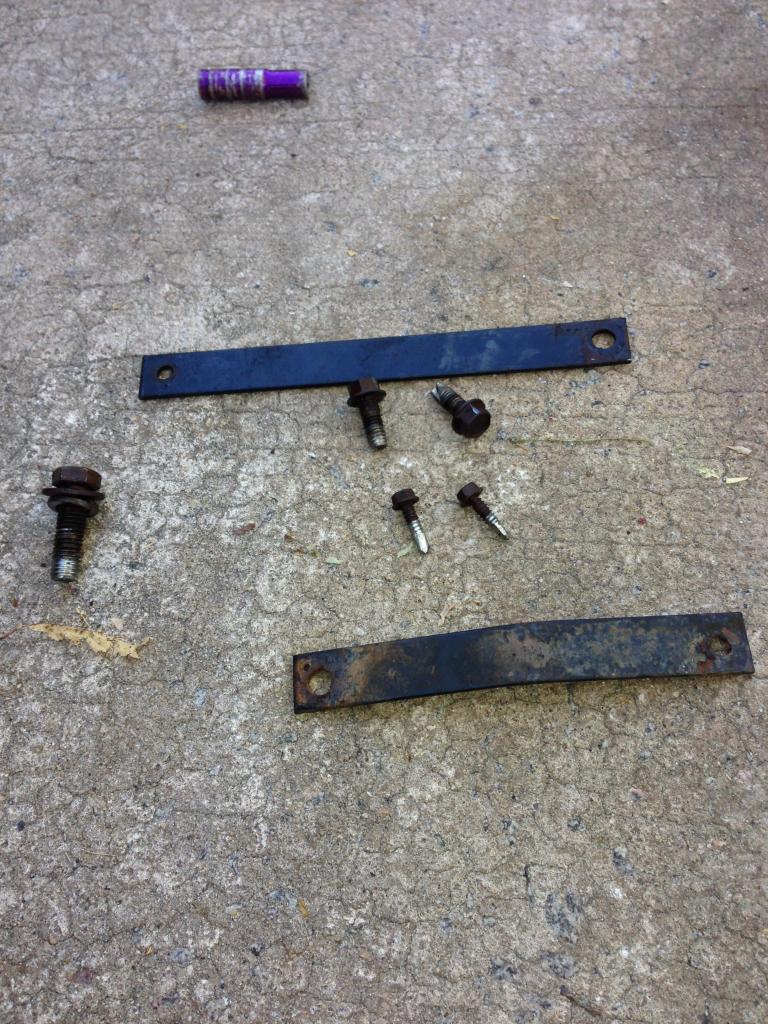
and secured the step bars using the fat bolts to the brackets and bars, and then the small thinner ones to the frame. I had to drill 4 holes, 2 on either side, for the small bolts to the frame.
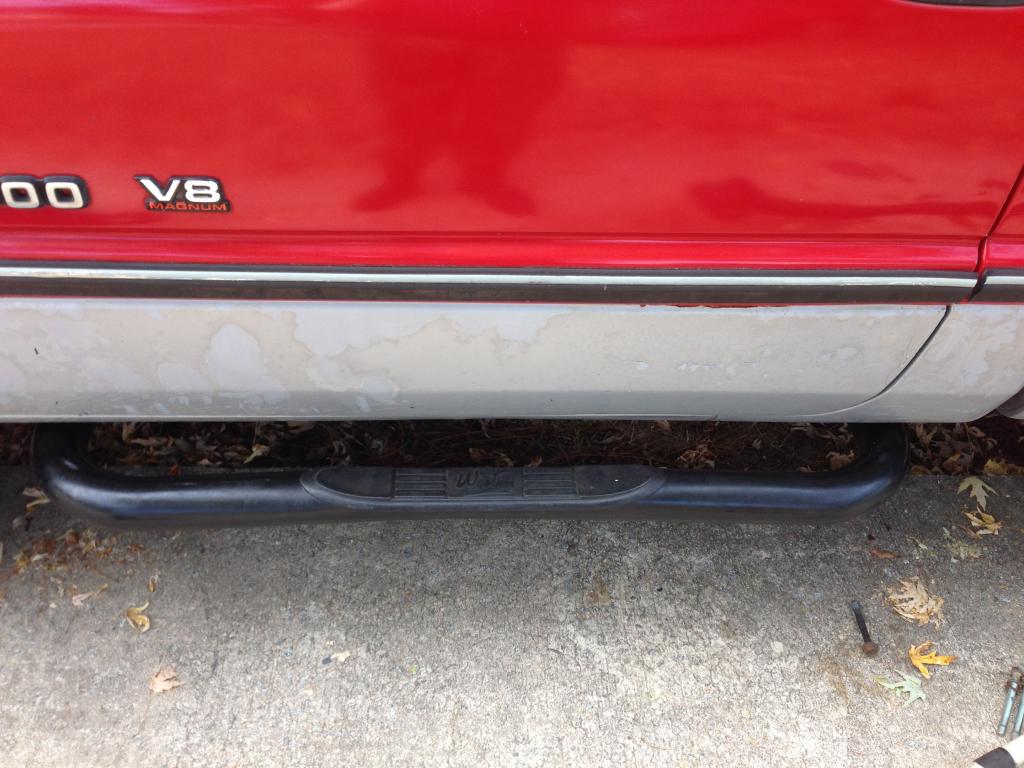
Final Products look like this :


there you go.. any thoughts?
Thanks for the willingness to help though guys. i do really appreciate it.
I watched some videos online last night about installing westin step bars on a 06 and up.. and hoped it was the same. it was.. for the most part.
this is what i bought :

as you can see, it has the two bars. 2 long brackets, 2 short brackets. 4 body mount bushings. 4 long body mount bolts. 4 shorter bolts same 15mm head size as the long, 4 10mm bolts 4 13mm bolts. 2 long braces, 2 short braces.
it went together very smoothly.
this is how i did it. The 4 body bushings i put away.. didnt use. idk if i should have or not, but i didnt.
took the 4 body mount bolts out.. put them in a bag with the 4 rubber/steel body bushings.
took the long bracket.. mounted it in the rear body mount. used the long body bolt with the lock washer,flat washer.. the pic below shows the bracket backwards, but you get to see where i put it in respect to the body mount. :

this image shows it facing the right way :

then i did the same up front, but i used the short bracket like so:

then i simply mocked up the bar itself to the two brackets and snugged it up :

after that.. i proceeded to tighten the bolts on the mounts to the brackets, then the brackets to the frame body mounts.
once that was done i used these :

and secured the step bars using the fat bolts to the brackets and bars, and then the small thinner ones to the frame. I had to drill 4 holes, 2 on either side, for the small bolts to the frame.
Final Products look like this :


there you go.. any thoughts?
Thanks for the willingness to help though guys. i do really appreciate it.
Champion
Joined: Feb 2007
Posts: 3,103
Likes: 109
From:
I have Westin four door bars. I barely remember installing them except laughing as I drilled into the body to attach the straps recalling the description that said "no drill installation." But they have worked several years now and still look good. Since my lift and 285s, I have to use them all the time.
Thread Starter
|
Rookie
Joined: Aug 2013
Posts: 84
Likes: 0
From: Columbia, South Carolina.
thats good to know. I was not too sure about how solid theyd be with those puny support straps.
the no-drill was true with the exception of those 4 holes for hte straps.. but otherwise not bad at all. Overall i am really pleased with the end result
the no-drill was true with the exception of those 4 holes for hte straps.. but otherwise not bad at all. Overall i am really pleased with the end result
Thread Starter
|
Rookie
Joined: Aug 2013
Posts: 84
Likes: 0
From: Columbia, South Carolina.
interesting issue.. had a tail lamp bulb fall out of the plug.. so put it back in but it doesnt seem too stable.. thoughts?
while at the parts store, i also ran into the issue that i tried to start the truck.. it didnt catch.. and then she wouldnt start for like 2-3 min..a nd when it did she had a hard time turning over.. i almost think it was too much fuel flooding it out or something.. anyone else have an issue like that?
while at the parts store, i also ran into the issue that i tried to start the truck.. it didnt catch.. and then she wouldnt start for like 2-3 min..a nd when it did she had a hard time turning over.. i almost think it was too much fuel flooding it out or something.. anyone else have an issue like that?