2nd Gen RAM general discussion/NON-tech This section is for general discussions about your 2nd gen RAM. Non tech related RAM threads belong here.

schmidtp's Work Truck Thread

Thread Tools
 
Search this Thread
 
  #51  
Old 03-21-2016, 02:16 PM
schmidtp's Avatar
schmidtp
schmidtp is offline
Veteran
Thread Starter
Join Date: Mar 2007
Location: Madison, WI
Posts: 345
Likes: 0
Received 0 Likes on 0 Posts
Default

Small update: Spliced in and installed some LED licence plate lights. Factory ones were in rough shape and one would not consistently light up. I like the piece of mind knowing I won't randomly get pulled over for these lights out.

Name:  20160311_201608.jpg
Views: 54
Size:  89.8 KB
 
  #52  
Old 03-22-2016, 01:17 PM
scottw99's Avatar
scottw99
scottw99 is offline
Amateur
Join Date: Mar 2016
Location: Ontario, Canada
Posts: 37
Likes: 0
Received 0 Likes on 0 Posts
Default

Awesome thread! I've been deciding whether or not to get a new box for my 94 but I think I might try a fiberglass repair over the rear wheel wells like you've done. Do you have any more pictures of how you did the repair or a similar guide you could recommend? If not I'll head to the old google!

Cheers,
Scott
 
  #53  
Old 03-22-2016, 09:44 PM
Mechanical_Tree's Avatar
Mechanical_Tree
Mechanical_Tree is offline
Rookie
Join Date: Mar 2016
Location: Connecticut
Posts: 73
Received 0 Likes on 0 Posts
Default

This is an awesome thread and a beautiful truck!!!
 
  #54  
Old 03-23-2016, 03:52 PM
schmidtp's Avatar
schmidtp
schmidtp is offline
Veteran
Thread Starter
Join Date: Mar 2007
Location: Madison, WI
Posts: 345
Likes: 0
Received 0 Likes on 0 Posts
Default

Originally Posted by scottw99
Awesome thread! I've been deciding whether or not to get a new box for my 94 but I think I might try a fiberglass repair over the rear wheel wells like you've done. Do you have any more pictures of how you did the repair or a similar guide you could recommend? If not I'll head to the old google!

Cheers,
Scott
I would say it depends on the size of rust holes that you are trying to repair. If they are a quarter size or smaller after you grind it down to bare metal you would probably get away with just smearing some Bondo in the hole, letting it dry then put another coat over the top. I just used fiberglass screening from a screen door, glued it over some of the larger holes then spread the bondo over the screen. Using actual fiberglass would make an even better repair!

Originally Posted by Mechanical_Tree
This is an awesome thread and a beautiful truck!!!
Thanks! Much appreciated. Going to get a fresh coat of paint on the lower section with the new flares and it will be like new(ish)
 
  #55  
Old 04-19-2016, 12:57 PM
schmidtp's Avatar
schmidtp
schmidtp is offline
Veteran
Thread Starter
Join Date: Mar 2007
Location: Madison, WI
Posts: 345
Likes: 0
Received 0 Likes on 0 Posts
Default

Here is a before teaser. Really happy with the outcome and will get some after pics posted once I clean off some of the overspray and give it a wash.

Name:  20160416_112134.jpg
Views: 49
Size:  214.4 KB
 
  #56  
Old 04-21-2016, 09:30 AM
1997JollyGreenGiant's Avatar
1997JollyGreenGiant
1997JollyGreenGiant is offline
Record Breaker
Join Date: Mar 2013
Location: Somewhere in Kentucky
Posts: 1,130
Received 15 Likes on 15 Posts
Default

Nice! What paint did you use?

You going to paint the top section too?
 
  #57  
Old 04-22-2016, 09:26 AM
schmidtp's Avatar
schmidtp
schmidtp is offline
Veteran
Thread Starter
Join Date: Mar 2007
Location: Madison, WI
Posts: 345
Likes: 0
Received 0 Likes on 0 Posts
Default

Originally Posted by 1997JollyGreenGiant
Nice! What paint did you use?

You going to paint the top section too?
I used Rustoleum Hammered Black out of a friends electric sprayer. It covers thick and hides lots of imperfections. Even though its "black" it turns out a bit more grey but I am fine with that. Leaving to top section purple, the hood and roof have pretty bad oxidation but I kinda like the look and just put some sealant over it. Just finished up cleaning it last night, ready for another summer.

Name:  20160421_163716.jpg
Views: 73
Size:  201.8 KB
 
  #58  
Old 04-22-2016, 11:48 AM
Ramman18's Avatar
Ramman18
Ramman18 is offline
Champion
Join Date: Feb 2007
Location:
Posts: 3,103
Received 108 Likes on 93 Posts
Default

Ooo, put a 2" level kit up front and that truck will look perfect from the side!
 
  #59  
Old 07-13-2016, 10:19 AM
schmidtp's Avatar
schmidtp
schmidtp is offline
Veteran
Thread Starter
Join Date: Mar 2007
Location: Madison, WI
Posts: 345
Likes: 0
Received 0 Likes on 0 Posts
Default

A few pretty rough roads around my place that they are in the process of replacing. One of them took my leaf spring shackle out. The other side seems solid still but I bought another one and plan on replacing that side when I have an open weekend.

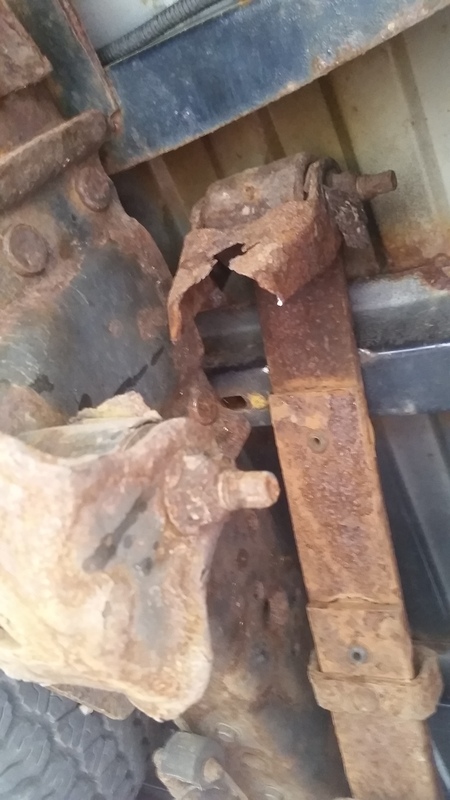
One bolt I had to sawzall off and the other just needed a BFH. 1.5hrs to get the bolts off, 10 minutes to install the new one.

Name:  20160629_174413.jpg
Views: 46
Size:  137.4 KB

Name:  20160630_141330.jpg
Views: 45
Size:  107.2 KB
 
  #60  
Old 07-18-2016, 10:55 PM
schmidtp's Avatar
schmidtp
schmidtp is offline
Veteran
Thread Starter
Join Date: Mar 2007
Location: Madison, WI
Posts: 345
Likes: 0
Received 0 Likes on 0 Posts
Default

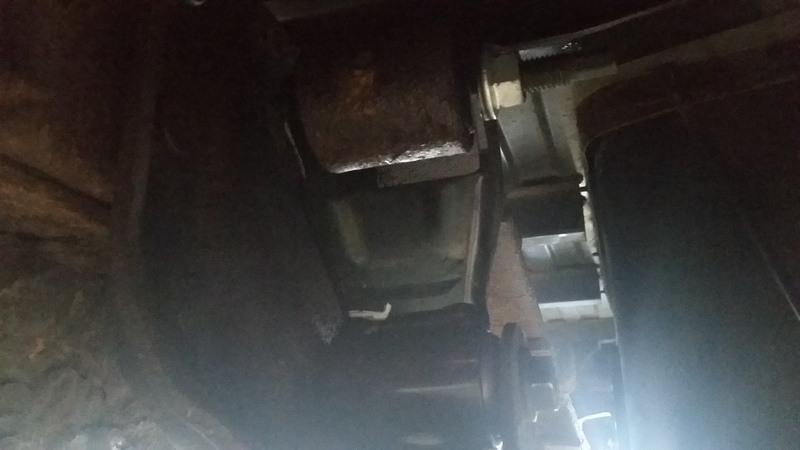
Finished off a few more projects today. Installed the T Case Saver, my snap ring was still in place but I already had the replacement on hand so went and replaced it.

Name:  20160718_181940.jpg
Views: 39
Size:  134.2 KB
Name:  20160718_184142.jpg
Views: 53
Size:  111.9 KB

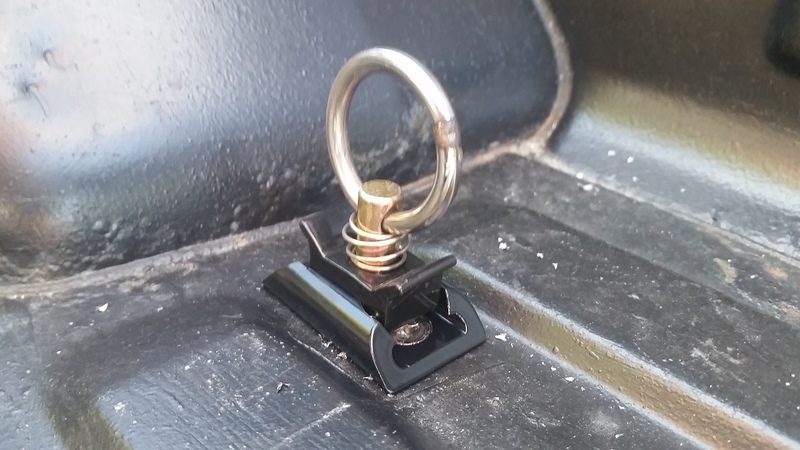
Also installed 4 tie downs. They came with a backing plate that is on the underside of the bed. Going to test them out this weekend.
Name:  20160718_173948.jpg
Views: 36
Size:  176.4 KB
Name:  20160718_192205.jpg
Views: 47
Size:  152.3 KB


Quick Reply: schmidtp's Work Truck Thread


All times are GMT -4. The time now is 06:01 PM.