


Cracked Dash. My turn.
#31
 01-07-2012, 10:44 PM


Join Date: Jun 2006
Posts: 132
Likes: 0
Received 0 Likes
on
0 Posts
To get glovee box out:
Open glove box.
If it is like mine, take 12 pouinds of crap out of glove box.
Pull sides inward and back toward inside. This will bow the back of glove box allowing end stops to clear opening.
Pull open farther. It should be out of opening.
Lift straight out.
Done.
Open glove box.
If it is like mine, take 12 pouinds of crap out of glove box.
Pull sides inward and back toward inside. This will bow the back of glove box allowing end stops to clear opening.
Pull open farther. It should be out of opening.
Lift straight out.
Done.
I went ahead and starting prepping and took out whatever wasn't needed to operate the vehicle over the next week or so.
I also saw another crack under where the cracked dash was connected in the front.

I guess I need to take care of this sometime this week before the new dash goes in. What would be best to put on this? Epoxy????
Also, is the black wire that goes into the white connecter the one I am supposed to disconnect before I drop the steering column?
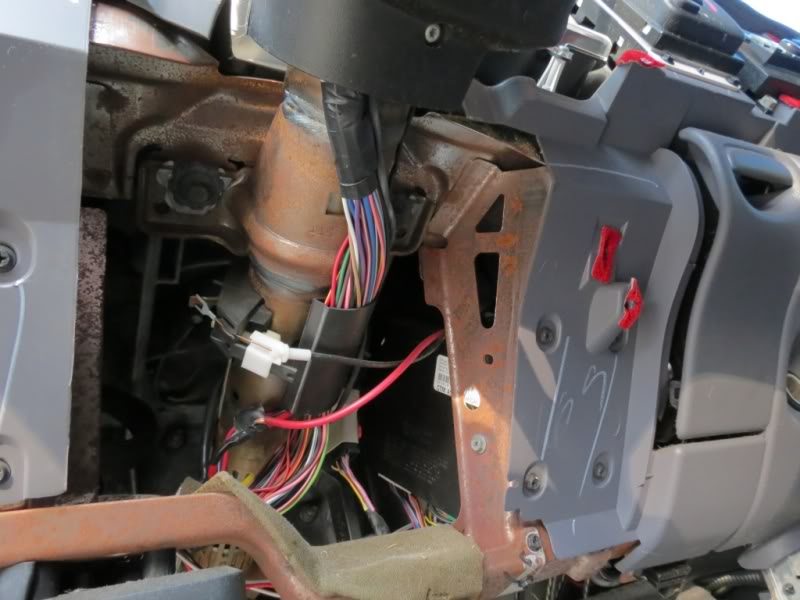
If so, how is that thing disconnected?
#32
01-08-2012, 12:09 AM
Thanks gd, I got it out today.
I went ahead and starting prepping and took out whatever wasn't needed to operate the vehicle over the next week or so.
I also saw another crack under where the cracked dash was connected in the front.
I guess I need to take care of this sometime this week before the new dash goes in. What would be best to put on this? Epoxy????
Also, is the black wire that goes into the white connecter the one I am supposed to disconnect before I drop the steering column?

If so, how is that thing disconnected?
I went ahead and starting prepping and took out whatever wasn't needed to operate the vehicle over the next week or so.
I also saw another crack under where the cracked dash was connected in the front.
I guess I need to take care of this sometime this week before the new dash goes in. What would be best to put on this? Epoxy????
Also, is the black wire that goes into the white connecter the one I am supposed to disconnect before I drop the steering column?
If so, how is that thing disconnected?
On the white "connector" there is a ****. Turn it (don't remember which way) and the small cable will get some slack. The end of the cable has a termination with a hole. Turn it slightly and lift off the pin and the connector part will slip out of its bracket. Just let it hang loose underneath. If you drop column without disconnecting, you will damage it and have to replace. That thing adjusts the gear selection indicator on the dash. So when you go back together, you will have to adjust with the know and move selector through all gears and see if the orange indicator lines up correctly. I had to go throught the range about twice to get it right in all positions.
#34
01-08-2012, 09:24 AM

Depending on how long u let the dash stay in there cracked will be a tell tale sign of the bottom half being cracked. I was going to replace mone like u are but defided to pull das and inspect b4 buying the top. Glad i did, the plastic tue top mounts too was just as bad and was not able to mount the top to it if i had bought it. I had to find a decent one in the jy. Be really careful undoing the screws that moint the top and during the install, the lower portion tends to still be brittle..
#35
01-08-2012, 09:29 AM
Join Date: Jun 2006
Posts: 132
Likes: 0
Received 0 Likes
on
0 Posts
Good point, solo. i looked over the rest of it to see how bad it was and I didn't see anything else. but, of course, the top dash isn't removed yet so i'm hoping I'm good.
The crack that is there still seems very strong. Unlike the top portion that when you touch it just crumbles in your hand. hopefully the rest is Ok.
The crack that is there still seems very strong. Unlike the top portion that when you touch it just crumbles in your hand. hopefully the rest is Ok.
#36
01-10-2012, 09:06 AM
Join Date: Jun 2006
Posts: 132
Likes: 0
Received 0 Likes
on
0 Posts
Planning on tackling this thing Saturday if all goes well.
So, I have removed the glove box, the small plastic cover under the cup holder, both kick panels, panel under steering wheel, and bezel. So, next i will remove the 5 or so screws on the top near the windshield, the airbag (and I guess there are screws attaching it to the dash?), the 2 bolts in the area under the cupholder, the two bolts for the steering column, the two screws on the sides of the dash (that you have to use a thin open end wrench to get to, and the 2 larger bolts that are under the kickpanels.
Actually do the bolts under the kick panels need to be removed or just loosened in order to rotate the dash forward?
After all that the dash should come forward so I can get a hand behind there and remove the other screws that are on the backside of the top dash?
Anything I left out? my worst fear is doing all of this and the thing still won't move.
#37
01-11-2012, 08:03 PM
Planning on tackling this thing Saturday if all goes well.
So, I have removed the glove box, the small plastic cover under the cup holder, both kick panels, panel under steering wheel, and bezel. So, next i will remove the 5 or so screws on the top near the windshield, the airbag (and I guess there are screws attaching it to the dash?), the 2 bolts in the area under the cupholder, the two bolts for the steering column, the two screws on the sides of the dash (that you have to use a thin open end wrench to get to, and the 2 larger bolts that are under the kickpanels.
Actually do the bolts under the kick panels need to be removed or just loosened in order to rotate the dash forward?
After all that the dash should come forward so I can get a hand behind there and remove the other screws that are on the backside of the top dash?
Anything I left out? my worst fear is doing all of this and the thing still won't move.
So, I have removed the glove box, the small plastic cover under the cup holder, both kick panels, panel under steering wheel, and bezel. So, next i will remove the 5 or so screws on the top near the windshield, the airbag (and I guess there are screws attaching it to the dash?), the 2 bolts in the area under the cupholder, the two bolts for the steering column, the two screws on the sides of the dash (that you have to use a thin open end wrench to get to, and the 2 larger bolts that are under the kickpanels.
Actually do the bolts under the kick panels need to be removed or just loosened in order to rotate the dash forward?
After all that the dash should come forward so I can get a hand behind there and remove the other screws that are on the backside of the top dash?
Anything I left out? my worst fear is doing all of this and the thing still won't move.
Only from memory, pretty sure I got everything.. Disconnect battery first.
 I only have driver airbag..
#38
01-11-2012, 09:44 PM

#39
01-13-2012, 01:54 PM
Join Date: Jun 2006
Posts: 132
Likes: 0
Received 0 Likes
on
0 Posts
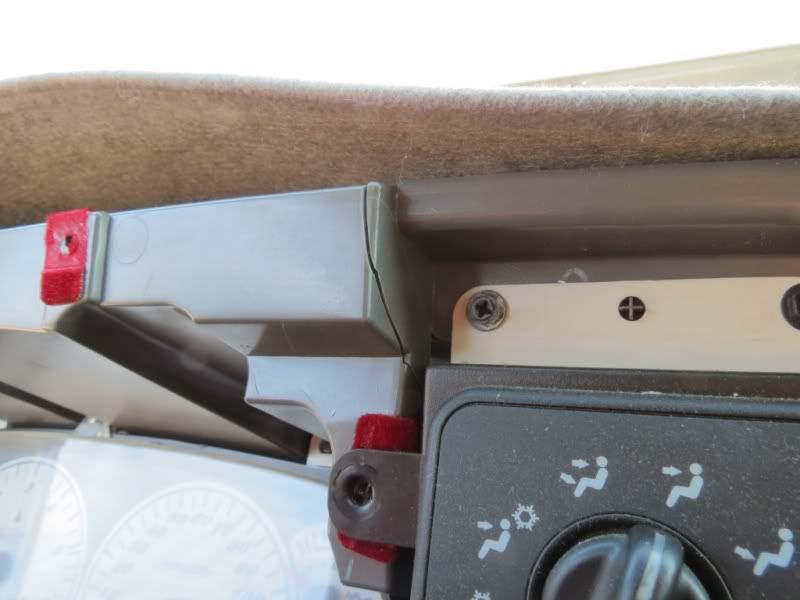
Only bolts I removed were the 5 screws at the top of the dash by windshield, panel under the steering column and metal crossmember behind it, remove drink tray, ashtray, remove bezel, remove cluster including the cable from the cluster to the column, lower steering column, loosen the two pivot nuts on each side of the cab to pivot the dash toward the seat, lift up remove all cables and pull out..
Only from memory, pretty sure I got everything.. Disconnect battery first. I only have driver airbag..
Only from memory, pretty sure I got everything.. Disconnect battery first.
I only have driver airbag..
#40
01-13-2012, 10:08 PM
Join Date: Jun 2006
Posts: 132
Likes: 0
Received 0 Likes
on
0 Posts
Me again.
So I decided to go ahead and get a jump start. Removed the airbag and the majority of the dash top (it was pretty much falling apart so it was easy to do now).
As of now I still have to take the two bolts out from the steering column and the little connector for the PRND linkage. Also I need to take the two bolts out under the cup holder. Lastly (I think) I need to loosen the bolts that are under the side kickpanels.
Once I remove those bolts under the kick panels how do I support the weight of the dash? I think I have seen others do it with a ratchet strap (need to search and find the pics) but if someone can tell me exactly what they attach the straps to????
And does the drivers side need to be strapped? I think the pics I saw just showed the weight of the drivers side being supported by the steering wheel/column dropped to the front seat. Is that enough?
Lastly (for now) I know I saw mention of the best way to reconnect air ducts. Anyone care to tell me the easiest way to do so?
Thank guys!!!!