


posi-lok installed

Thread Starter
|
Hall Of Fame
Joined: Jul 2006
Posts: 12,204
Likes: 10
From: Gainesville, Ga.
my cad engagement has always been sort of mysterious and sluggish, and i figured it would probably fail when i needed it the most. also i wanted to have 2wd low. for my 01 i bought PSL400 for $178 (157 plus 21 shipping) from amazon.com. i was expecting a dinky lawnmower throttle cable but its an extremely beefy cable, which makes it real hard to route/manage, plus its about 3 feet TOO LONG. the instrucions are very brief and not very good. i had to keep stopping and backing up to get it mostly right. it took me most of the day. this is not a step by step, just some things not in the instructions.
also see this.. http://www.pavementsucks.com/tech/posilock.php
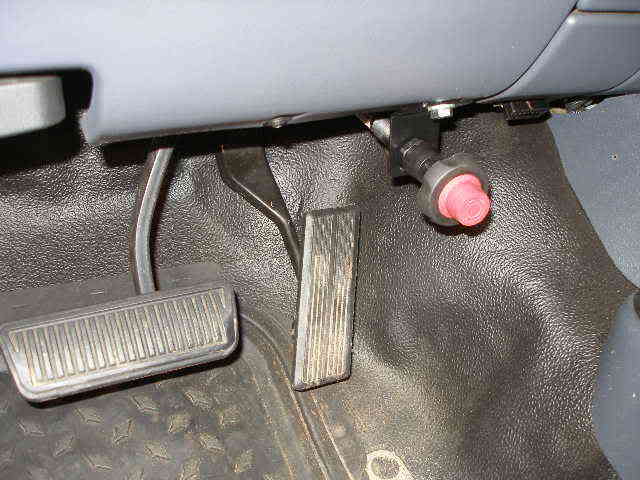
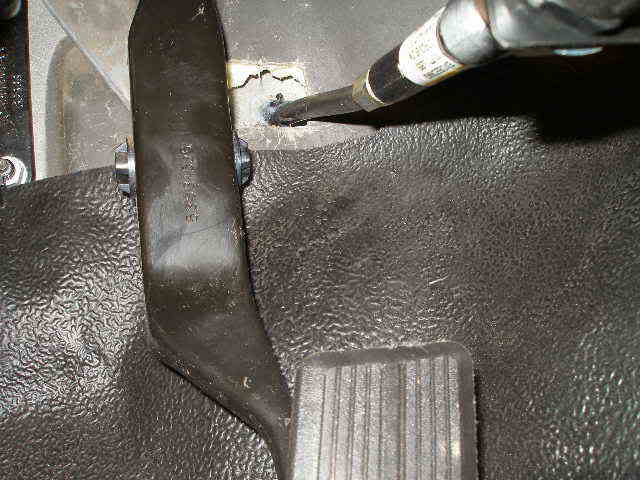
you drill a hole in firewall above and beside the gas pedal. it has to be 11/16" which is a darn big hole. i used the template and drilled a small pilot hole and it came out in the big thick steering reinforcement plate. bad place, so i moved it over toward the passenger side about an inch to get between the plate and the curve in the firewall. my biggest bit was 1/2" and i used a reamer to enlarge it.
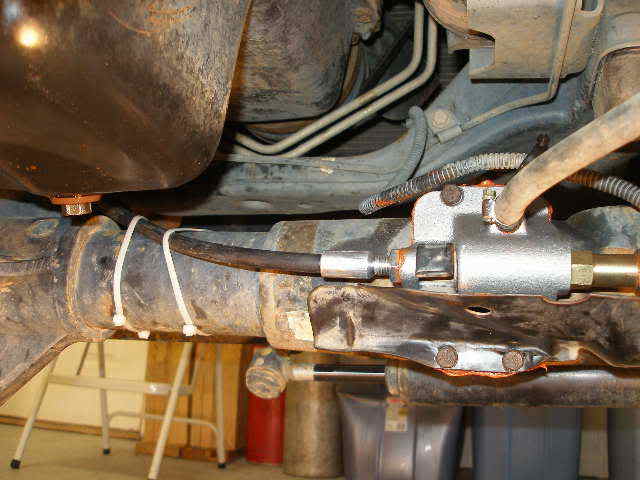
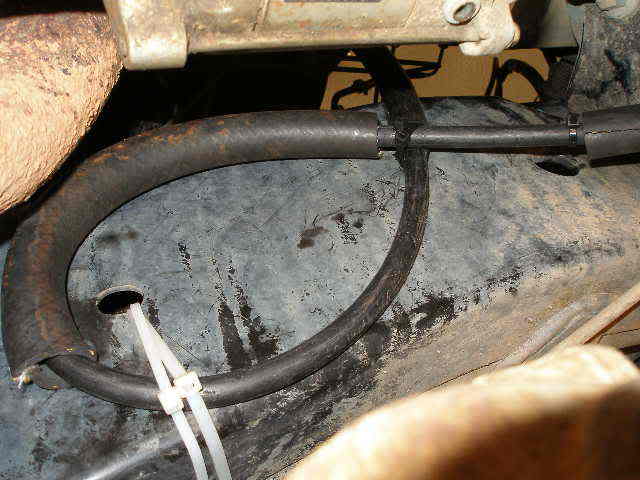
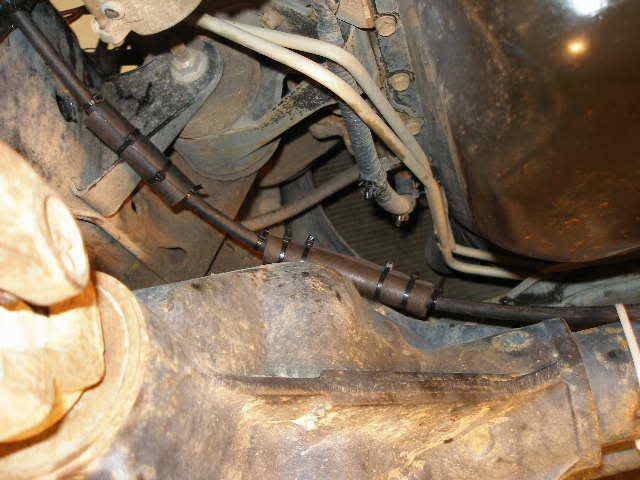
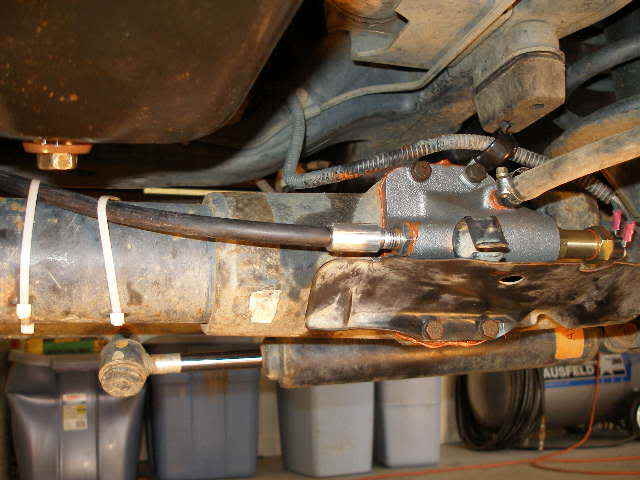
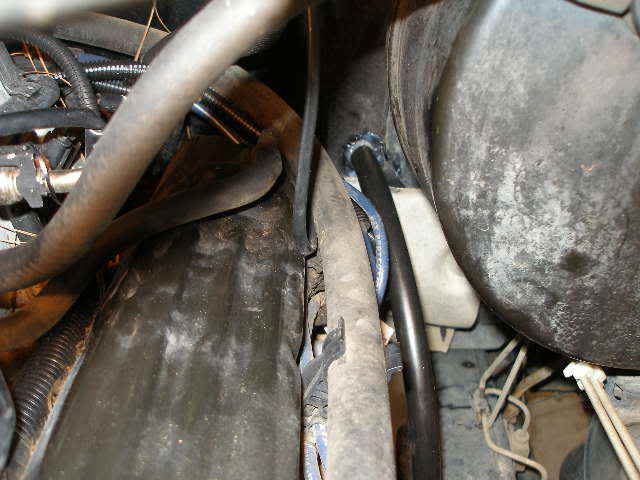
slide the cable through the firewall. the rubber grommet is a complete joke, as is the heat shield tubing. a 2" piece of 3/8-1/2 rubber tubing split lengthways works better than the stupid firewall grommet. now that i think about it, i probably could have gotten the grommet in the firewall if i'd slid it on while only the thin cable was in the hole, but once i slid in the sheathed fat part and got everything tied down and connected it was too late. 5/8" heater hose works good for places that rub. i also used it to cover the cable where its near the manifold. i split the hose lengthways, wrapped it around and tie wrapped as necessary in a number of places. not sure if all that is really necessary or not. i made a loop of the excess cable on the inside of the frame and tie wrapped it to take up all the extra length of the cable that is too long.
disconnect vac and elec from old cad and remove it. the bolts are kind of wimpy, and some people report that they break easy. i sprayed mine with pb blaster several times over the last couple of weeks and they came out ok. my old gasket was an aluminum/cork laminated thing that baffled me for a little while. i kept scraping cork and didn't see the aluminum backing plate. duh. take the cad to the work bench and take the shifting fork out of it and re-use it in the new setup. note the orientation. the 3 e-clips are sort of tricky, but if you get a small flat screwdriver in the slot and pry against the shaft it will POP out. remove the old light switch and tap the end of the shaft with a punch to knock it out in the direction of the diaphram. there are no instructions for any of this, but there are some on pavementsucks.
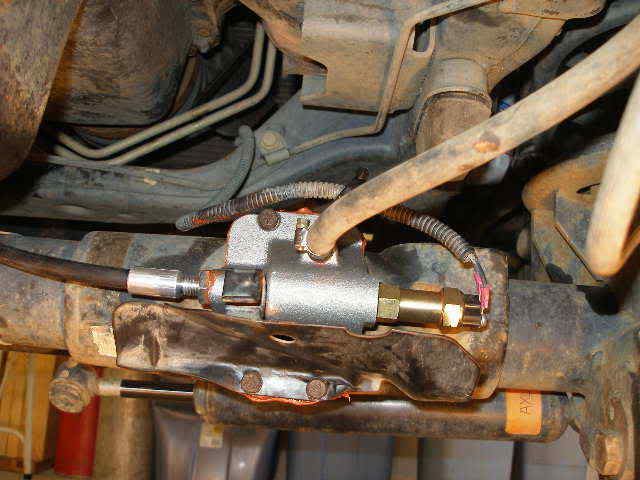
use silicon and assemble the light switch and vent tube into the new cad cover. go back under the truck with the lock nut and new e-clips. if you want to thread on the heat tube or unsplit hoses, do it now. put on lock nut, silicon the cable threads, position the cable through the fork (check orientation) and screw the cable into the cad. install the e-clips. adjust the threaded cable so that when you pull the **** in the cab one of the e-clips bottoms out and when you push the **** the other e-clip bottoms out. mine didn't exactly bottom out both ways, so i centered it with a small amount (~1/16) on each side. attach vent and 4wd light wires. dry fit and test. final install cad into axle tube w/silicon. plug original vac lines. i tested mine by putting the whole truck up on stands and jacks and learning how it works. seal the hole in the firewall w/silicon.
the engage/disengage travel of the cable is about 1 1/2 - 2 inches. the light switch is bogus as it comes on as soon as you pull the cable just a little, but the axle halves don't couple unless the cable (and fork) moves the full amount. i'm not sure if mine is supposed to work like this or not, but if there is any drive tension on the axle, it won't engage unless i back up, or turn the wheel a little. same with disengage, i can't push the cable unless i backup or turn. i suppose its working the same as it did with the vacuum cad, because it does work, and its the same fork, and theres only one way it can fit. i think the difference is that the vac cad put constant pressure on it, it would eventually, automatically move over. now i have to manually do it. that is what i wanted, i just didn't expect the resistance to engage/disengage.
use heavy duty black zip ties. the cable is very stiff. white color looks awful. lol.
update #1. someday when you really need 4wd to get unstuck and you pull on the cable and it won't move... the too small of a cable tie broke and the posilok cable has fallen onto the exhaust manifold and melted the plastic into the spiral wrap. damn. so you get to remove the whole thing, strip the plastic from the melted area, and sort of work it back and forth until it frees up. then put it all back together. tip- tie the damn thing away from the manifold.
update #2. my mysterious and sluggish cad engagement is solved. while replacing axle u-joints and seals, i also replaced the 2 bushings at the cad. the larger one is at the inner housing. i replaced the bushing with the bearing. the smaller bushing is where the 2 halves meet. both of mine had a little wear and play.
the bigger problem was burrs on the splines of the inner axle and the collar. this created a very tight fit to engage, and explained why it was so hard to get it lined up right. i filed the burrs off with a hand file. now it engages smooth and easy.
the vacuum cad still sucks. get a posilok and you'll love 2wd low.
also see this.. http://www.pavementsucks.com/tech/posilock.php
you drill a hole in firewall above and beside the gas pedal. it has to be 11/16" which is a darn big hole. i used the template and drilled a small pilot hole and it came out in the big thick steering reinforcement plate. bad place, so i moved it over toward the passenger side about an inch to get between the plate and the curve in the firewall. my biggest bit was 1/2" and i used a reamer to enlarge it.
slide the cable through the firewall. the rubber grommet is a complete joke, as is the heat shield tubing. a 2" piece of 3/8-1/2 rubber tubing split lengthways works better than the stupid firewall grommet. now that i think about it, i probably could have gotten the grommet in the firewall if i'd slid it on while only the thin cable was in the hole, but once i slid in the sheathed fat part and got everything tied down and connected it was too late. 5/8" heater hose works good for places that rub. i also used it to cover the cable where its near the manifold. i split the hose lengthways, wrapped it around and tie wrapped as necessary in a number of places. not sure if all that is really necessary or not. i made a loop of the excess cable on the inside of the frame and tie wrapped it to take up all the extra length of the cable that is too long.
disconnect vac and elec from old cad and remove it. the bolts are kind of wimpy, and some people report that they break easy. i sprayed mine with pb blaster several times over the last couple of weeks and they came out ok. my old gasket was an aluminum/cork laminated thing that baffled me for a little while. i kept scraping cork and didn't see the aluminum backing plate. duh. take the cad to the work bench and take the shifting fork out of it and re-use it in the new setup. note the orientation. the 3 e-clips are sort of tricky, but if you get a small flat screwdriver in the slot and pry against the shaft it will POP out. remove the old light switch and tap the end of the shaft with a punch to knock it out in the direction of the diaphram. there are no instructions for any of this, but there are some on pavementsucks.
use silicon and assemble the light switch and vent tube into the new cad cover. go back under the truck with the lock nut and new e-clips. if you want to thread on the heat tube or unsplit hoses, do it now. put on lock nut, silicon the cable threads, position the cable through the fork (check orientation) and screw the cable into the cad. install the e-clips. adjust the threaded cable so that when you pull the **** in the cab one of the e-clips bottoms out and when you push the **** the other e-clip bottoms out. mine didn't exactly bottom out both ways, so i centered it with a small amount (~1/16) on each side. attach vent and 4wd light wires. dry fit and test. final install cad into axle tube w/silicon. plug original vac lines. i tested mine by putting the whole truck up on stands and jacks and learning how it works. seal the hole in the firewall w/silicon.
the engage/disengage travel of the cable is about 1 1/2 - 2 inches. the light switch is bogus as it comes on as soon as you pull the cable just a little, but the axle halves don't couple unless the cable (and fork) moves the full amount. i'm not sure if mine is supposed to work like this or not, but if there is any drive tension on the axle, it won't engage unless i back up, or turn the wheel a little. same with disengage, i can't push the cable unless i backup or turn. i suppose its working the same as it did with the vacuum cad, because it does work, and its the same fork, and theres only one way it can fit. i think the difference is that the vac cad put constant pressure on it, it would eventually, automatically move over. now i have to manually do it. that is what i wanted, i just didn't expect the resistance to engage/disengage.
use heavy duty black zip ties. the cable is very stiff. white color looks awful. lol.
update #1. someday when you really need 4wd to get unstuck and you pull on the cable and it won't move... the too small of a cable tie broke and the posilok cable has fallen onto the exhaust manifold and melted the plastic into the spiral wrap. damn. so you get to remove the whole thing, strip the plastic from the melted area, and sort of work it back and forth until it frees up. then put it all back together. tip- tie the damn thing away from the manifold.
update #2. my mysterious and sluggish cad engagement is solved. while replacing axle u-joints and seals, i also replaced the 2 bushings at the cad. the larger one is at the inner housing. i replaced the bushing with the bearing. the smaller bushing is where the 2 halves meet. both of mine had a little wear and play.
the bigger problem was burrs on the splines of the inner axle and the collar. this created a very tight fit to engage, and explained why it was so hard to get it lined up right. i filed the burrs off with a hand file. now it engages smooth and easy.
the vacuum cad still sucks. get a posilok and you'll love 2wd low.
Last edited by dhvaughan; Nov 23, 2013 at 10:58 AM.


Thread Starter
|
Hall Of Fame
Joined: Jul 2006
Posts: 12,204
Likes: 10
From: Gainesville, Ga.
if the price of the cable cad vs vac cad were equal i would prefer the cable.
if the cable is cheaper i would REALLY prefer the cable.
the vac is just subject to fail for a number of reasons, and you never really know when its engaged because the light can not work right. with the cable its either there or its not. no mystery, but a little tricky to engage. i practiced with it some more today and got a little better at operating it. and i REALLY LOVE the 2wd low.
if anyone has any questions, post, pm or email me.


Record Breaker
Joined: Aug 2005
Posts: 1,196
Likes: 0
From: St.Clair, MI
not sure, but im sorta worried that i f'ed sumthing up... there was some wheelspin b4 the grind thud so im thinking the cad didnt feel like engaging when i needed it to be, its gotta be internal but it feels like the kind of grinding that i can only describe as 2 plates with a little wet sand between them rubbing against eachother, its really hard to describe.
Trending Topics
Record Breaker
Joined: Aug 2005
Posts: 1,196
Likes: 0
From: St.Clair, MI
ok tms, went out jacked it up spun everything under the front w/out being in 4hi spin d-shaft, checks out nothing wierd, same with both tires independantly, put in 4hi still jacked and any spining i did to anything felt normal tires spun opposite just fine and dshaft moved just fine no wierd noises, so what i am thinking it is is something internal that normally does the slipping part when turning is acting up, could water on the CAD cause problems cause we have really nasty rainy snowing wet out here w/ puddles in town that splash like mad when u hit em.. idk i hope something isnt wrong its buggin me tho cause the stupid thing screws up once and now i better not start having problems
Record Breaker
Joined: Jul 2006
Posts: 2,400
Likes: 1
From: Warren, NJ
Did you try turning it with the wheels turned? Now I'm thinking U-joint bearings.
I doubt if water caused this ... too much of a coincidence that it started after your "thud".
I doubt if water caused this ... too much of a coincidence that it started after your "thud".