

06-08 Headlight Disassembly/Paint


Thread Starter
|
Champion
Joined: May 2008
Posts: 4,210
Likes: 0
From: Shreveport, LA
For this project you're going to need a few things:
1.) Paint/clear coat
2.) Primer
3.) Masking tape
4.) Sandpaper(optional)
5.) 1 small flat-head screwdriver
6.) Black Silicone/Gasket Maker
7.) Oven
**Before you get started read through the whole how-to and make sure you understand each step so you don't get yourself in a bind later, I've done 6 lights using this method and it works for me. Good Luck.**
First thing you're gonna do is take your headlights off your truck. 2 screws under the hood and one nut inside the fender well hidden behind a rubber grommet should get it (I think they're all 10mm). Also, take the bulbs out of your headlight housing at this time. You also may want to take note of how the headlight will separate where the clear plastic and the black plastic meet.
Ok with the both headlights now in the house, you should pre-heat your oven to 250 degrees(on bake).
While the oven is pre-heating I usually grab a cookie sheet(?) and at least one oven mitt, you can use whatever you want or is easier for you. When the oven reaches 250 degrees it's time to put the headlight on the cookie sheet and slide it in the oven
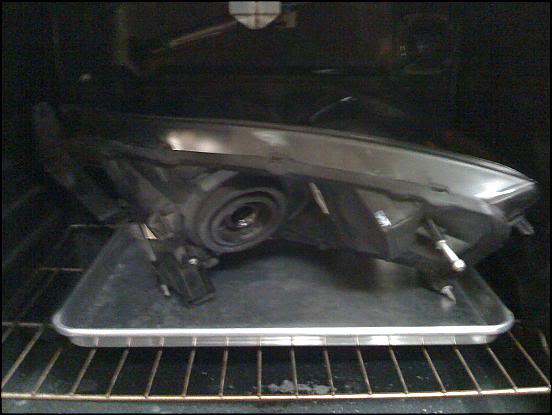
Now, let the headlights bake for roughly 10 minutes. (This is the only way I've tried it and I've never had the headlights 'fog up' and I can separate the headlight in 1 shot so there is no need to re-heat the lights) When the 10 minutes is up the headlights WILL BE HOT! Use the oven mitt(s) and take the headlight out of the oven. You can take the whole tray out and set it on top of the stove but I usually put a couple of pot holders or a towel on the counter to set the headlight directly on.
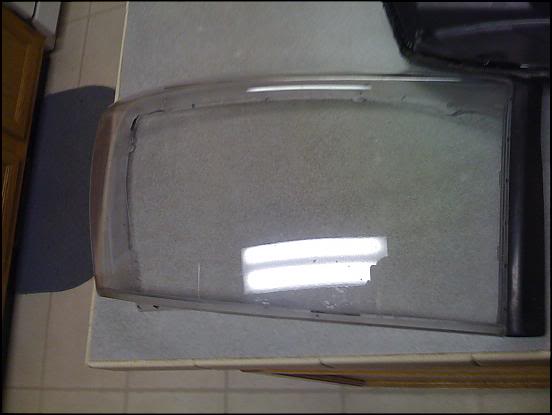
This is a top view to give you an idea of what your trying to do.
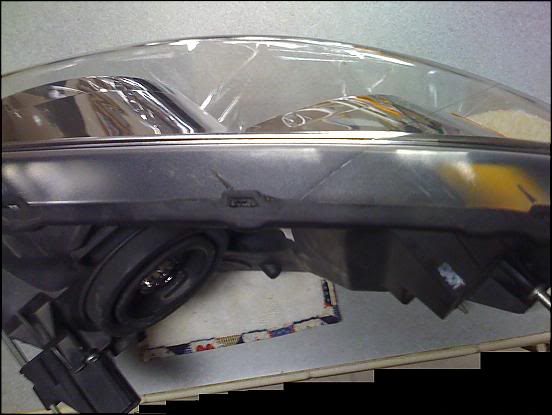
Where the clear housing meets up with the black piece is where you need to slide in the screw-driver to separate the housing. Note the tabs, try not to break these since you'll want to use these again later, they pry up pretty easy though so that shouldn't be a problem.
Take your time, do a good job without doing to much damage and make your way around the headlight separating/prying apart the headlight. If it becomes too tough to separate, then put it back in the oven after it's cool to the touch for another 10 minutes and repeat as necessary(The first set I did was on my truck and I did have to re-heat them once, but the next 2 trucks I've done since then I've gotten apart in 1 shot( it's no big deal just make sure they are at least cool to the touch before re-heating ). Once you separate the clear housing from the black backing, the chrome piece with the reflector just pops out(take note of how it pops out since you're going to have to reverse this process without scratching your fresh paint job later)and it should look something like this.
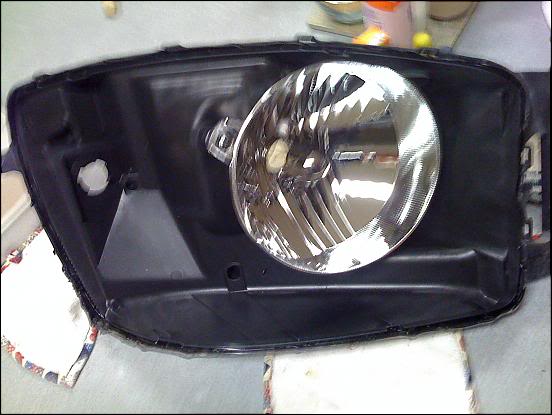
**If you have other plans for the reflector on the side of your blinker besides painting over it, now would probably be a good time to take it out (4 little clips will do it)**
Ok now the easy part, prep and painting. Sanding, the first 2 trucks, I did not sand the headlights but on the last one I did. I think you could by-pass this step, I couldn't tell a difference except that you definitely need to come back with primer if you do because chrome comes off very easily and the plastic scratches pretty easy and I was using 1500 and 2000 grit sand paper so you want to make sure that if you sand to prime it before you paint to help smooth out you finish. Next step would be masking off the area(s) you don't want painted. Since the headlight 'bowl' stays attached to the black plastic piece, all I worry about taping off is the reflector 'bowl'.
I put a few light coats of paint and then a few heavier coats of paint. Waiting about 10 minutes between coats. I come back with the clear coat immediately after my last heavy coat of paint to lock in the shine. If you have a different technique then by all means use it, I'm not a professional.
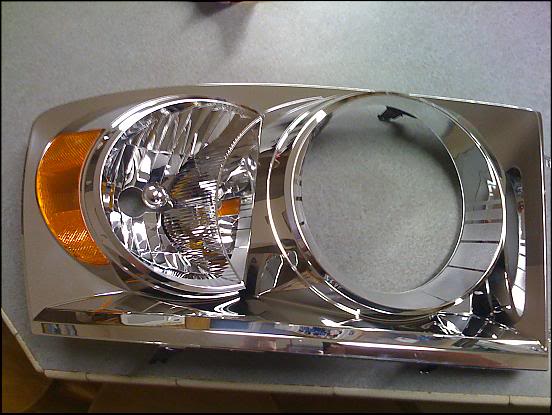
Anyway, however you decide to paint, when you're done it should look like this
The directions on the paint can said to wait an hour before handling, I usually wait atleast 2 or 3 just to be on the safe side. I would definitely wait an hour though. Now it's time to start putting this thing back together and wrap this job up. Go back inside your house (you did paint outside or in a shed or something right?) and very carefully slide your freshly painted pieces back inside the clear housing. I cannot stress enough to take your time and if it's not going in, carefully slide it out and try again, if not you will be looking at some scuffed paint.
At this point I pre-heat the oven at 250 again. While waiting I put a nice bead of the black silicone in the groove that the clear housing goes into. When the oven is ready I put only the black plastic piece with the headlight bowl and the fresh bead of silicone back into the oven, again for 10 minutes. After 10 minutes pull the black piece back out (don't forget your oven mitt(s)) and slide the clear housing (which already has the painted piece locked inside of it) back into the grooves. It sounds easier than it is, if possible I suggest having somebody help out with this step but it can be done by yourself. Once you get it in place, and sometimes it doesn't cooperate, lock the tabs back down on the clear housing.
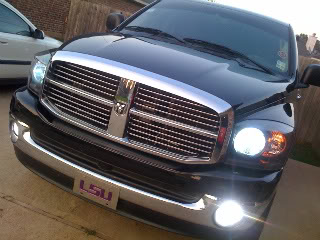
I added another bead of black silicone around the edges when I was done to get it as close as I could to a factory like seal. If you skip this step then you can put your headlights back on your truck now, if you do add another bead of silicone wait until it dries because it gets a little messy. I only added the last bead of silicone to the last truck I did so I'm not sure how much it helps in preventing the light from fogging up like I find mine from time to time first thing in the morning, it's nothing that can't be cured by turning your headlights on for a few minutes though so this last step is optional. That's about it....here is what I ended up with.
1.) Paint/clear coat
2.) Primer
3.) Masking tape
4.) Sandpaper(optional)
5.) 1 small flat-head screwdriver
6.) Black Silicone/Gasket Maker
7.) Oven
**Before you get started read through the whole how-to and make sure you understand each step so you don't get yourself in a bind later, I've done 6 lights using this method and it works for me. Good Luck.**
First thing you're gonna do is take your headlights off your truck. 2 screws under the hood and one nut inside the fender well hidden behind a rubber grommet should get it (I think they're all 10mm). Also, take the bulbs out of your headlight housing at this time. You also may want to take note of how the headlight will separate where the clear plastic and the black plastic meet.
Ok with the both headlights now in the house, you should pre-heat your oven to 250 degrees(on bake).
While the oven is pre-heating I usually grab a cookie sheet(?) and at least one oven mitt, you can use whatever you want or is easier for you. When the oven reaches 250 degrees it's time to put the headlight on the cookie sheet and slide it in the oven
Now, let the headlights bake for roughly 10 minutes. (This is the only way I've tried it and I've never had the headlights 'fog up' and I can separate the headlight in 1 shot so there is no need to re-heat the lights) When the 10 minutes is up the headlights WILL BE HOT! Use the oven mitt(s) and take the headlight out of the oven. You can take the whole tray out and set it on top of the stove but I usually put a couple of pot holders or a towel on the counter to set the headlight directly on.
This is a top view to give you an idea of what your trying to do.
Where the clear housing meets up with the black piece is where you need to slide in the screw-driver to separate the housing. Note the tabs, try not to break these since you'll want to use these again later, they pry up pretty easy though so that shouldn't be a problem.
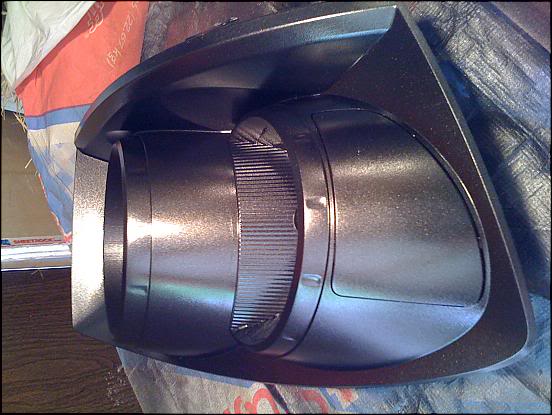
Take your time, do a good job without doing to much damage and make your way around the headlight separating/prying apart the headlight. If it becomes too tough to separate, then put it back in the oven after it's cool to the touch for another 10 minutes and repeat as necessary(The first set I did was on my truck and I did have to re-heat them once, but the next 2 trucks I've done since then I've gotten apart in 1 shot( it's no big deal just make sure they are at least cool to the touch before re-heating ). Once you separate the clear housing from the black backing, the chrome piece with the reflector just pops out(take note of how it pops out since you're going to have to reverse this process without scratching your fresh paint job later)and it should look something like this.
**If you have other plans for the reflector on the side of your blinker besides painting over it, now would probably be a good time to take it out (4 little clips will do it)**
Ok now the easy part, prep and painting. Sanding, the first 2 trucks, I did not sand the headlights but on the last one I did. I think you could by-pass this step, I couldn't tell a difference except that you definitely need to come back with primer if you do because chrome comes off very easily and the plastic scratches pretty easy and I was using 1500 and 2000 grit sand paper so you want to make sure that if you sand to prime it before you paint to help smooth out you finish. Next step would be masking off the area(s) you don't want painted. Since the headlight 'bowl' stays attached to the black plastic piece, all I worry about taping off is the reflector 'bowl'.
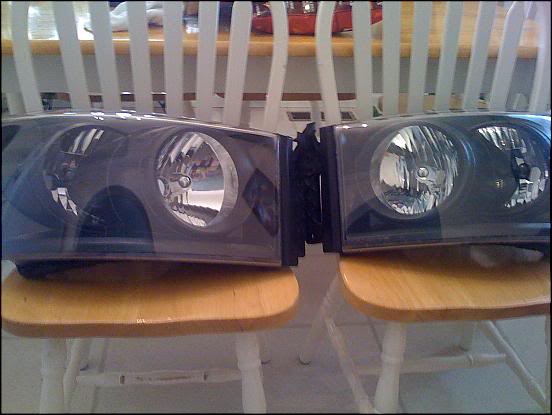
I put a few light coats of paint and then a few heavier coats of paint. Waiting about 10 minutes between coats. I come back with the clear coat immediately after my last heavy coat of paint to lock in the shine. If you have a different technique then by all means use it, I'm not a professional.
Anyway, however you decide to paint, when you're done it should look like this
The directions on the paint can said to wait an hour before handling, I usually wait atleast 2 or 3 just to be on the safe side. I would definitely wait an hour though. Now it's time to start putting this thing back together and wrap this job up. Go back inside your house (you did paint outside or in a shed or something right?) and very carefully slide your freshly painted pieces back inside the clear housing. I cannot stress enough to take your time and if it's not going in, carefully slide it out and try again, if not you will be looking at some scuffed paint.
At this point I pre-heat the oven at 250 again. While waiting I put a nice bead of the black silicone in the groove that the clear housing goes into. When the oven is ready I put only the black plastic piece with the headlight bowl and the fresh bead of silicone back into the oven, again for 10 minutes. After 10 minutes pull the black piece back out (don't forget your oven mitt(s)) and slide the clear housing (which already has the painted piece locked inside of it) back into the grooves. It sounds easier than it is, if possible I suggest having somebody help out with this step but it can be done by yourself. Once you get it in place, and sometimes it doesn't cooperate, lock the tabs back down on the clear housing.
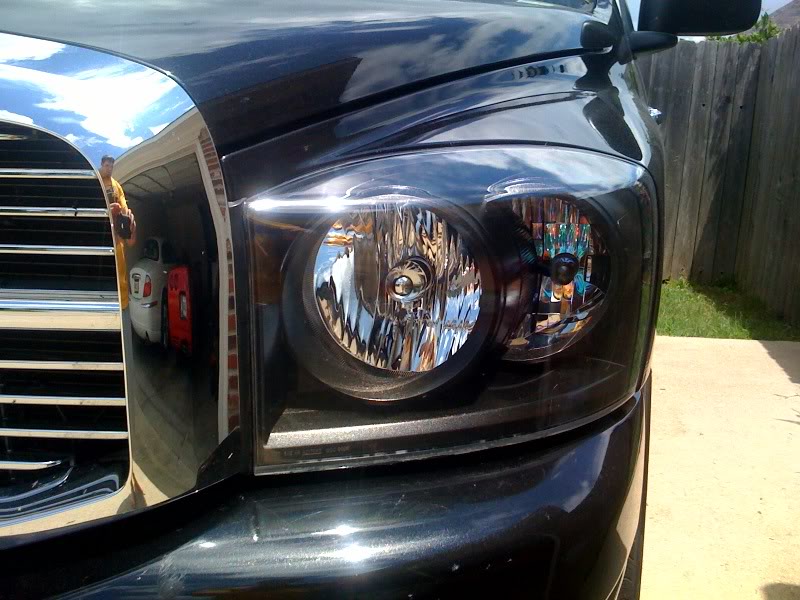
I added another bead of black silicone around the edges when I was done to get it as close as I could to a factory like seal. If you skip this step then you can put your headlights back on your truck now, if you do add another bead of silicone wait until it dries because it gets a little messy. I only added the last bead of silicone to the last truck I did so I'm not sure how much it helps in preventing the light from fogging up like I find mine from time to time first thing in the morning, it's nothing that can't be cured by turning your headlights on for a few minutes though so this last step is optional. That's about it....here is what I ended up with.


Thread Starter
|
Champion
Joined: May 2008
Posts: 4,210
Likes: 0
From: Shreveport, LA
Thread Starter
|
Champion
Joined: May 2008
Posts: 4,210
Likes: 0
From: Shreveport, LA
The dealer sells 5oz cans for like 18bucks. What I would do if i were to do it over again is to find the closest Duplicolor color, paint it that, and then spray the match paint on top of that (use the cheap stuff to base, then the expensive to color)
Thread Starter
|
Champion
Joined: May 2008
Posts: 4,210
Likes: 0
From: Shreveport, LA
You can buy some fiberglass ones on ebay, or wait for these to come out. Some people paint them on, but I personally dont think it would turn out as good on the 06-08 lights
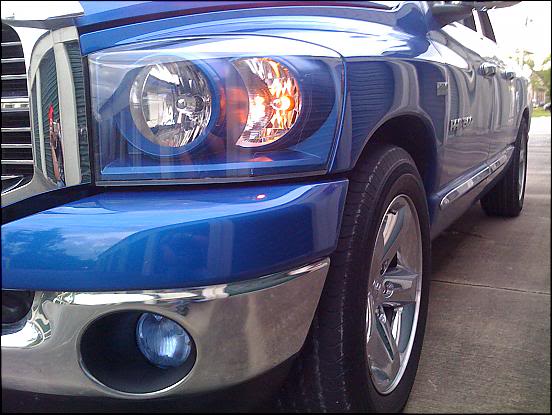
You need some laminx for that ugly amber strip. That would really turn the look of your lights by itself. If you were to crack em open, just take that out and paint the strip/reflector black. Or better yet, put some LEDs in it like the Audi running lights.
Trending Topics
we would end up with a darker amber parking light correct? I dunno I really don't mind the amber stri; maybe if I sit on a milk crate and stare at them for an hour or two....
How does that vinyl work some kind of adhesive or self sticking??
How does that vinyl work some kind of adhesive or self sticking??