

Overhead gauges installed

Thread Starter
|
Veteran
Joined: Sep 2010
Posts: 438
Likes: 0
I'll be taking better pictures when I get home since I just used my 3 year old cell camera when I got to work this morning.
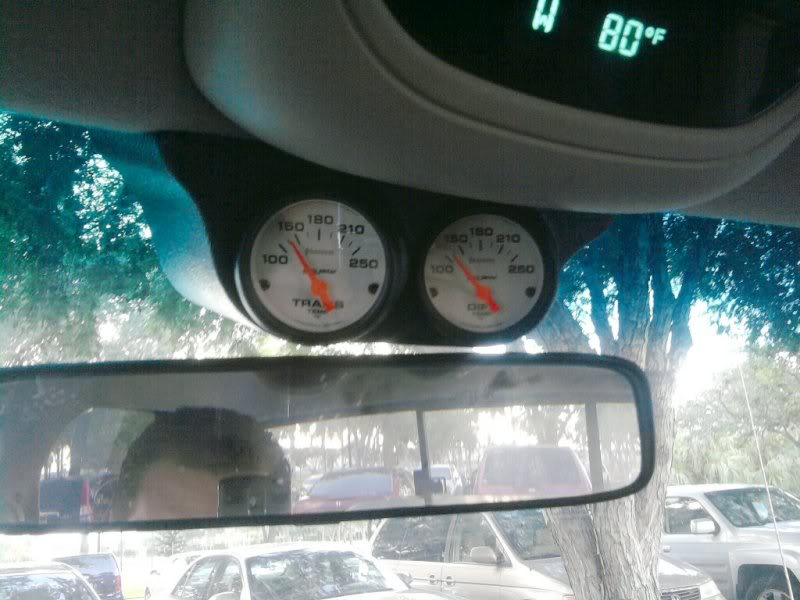
Notice my knappy head in the mirror? lol Anyway, I checked with my infrared thermometer when I got to work that the trans was running at about 138*F and the rear was at about 122*F so the gauges, I think, are pretty accurate. I've read of grounding issues and did find where I would have one on the rear axle so I ran two wires back there, one to the sender and one I grounded to the housing of the rear axle itself via one of the cover bolts.
The transmission, however, had no resistance from the sender, to the chassis of which had no resistance to the dash ground I ended up using. I did leave enough of the ground wire I ran from the rear exposed to I can T off and ground it to the trans if I notice something not quite right. Problem was, I couldn't really find anything to ground to on the trans - perhaps not looking hard enough I suppose. So far it's working out good. Dimmer works, too. Nice touch. I think it was pin 2 on the headlight switch connector. It was like a light brown wire I think.
Anyway, install was tedious but got it done - I just hate wiring.
PS yes I know the gauges are a little off. I didn't finish until 9:30pm last night so I'll tweak them. Not hard to rotate.
Notice my knappy head in the mirror? lol Anyway, I checked with my infrared thermometer when I got to work that the trans was running at about 138*F and the rear was at about 122*F so the gauges, I think, are pretty accurate. I've read of grounding issues and did find where I would have one on the rear axle so I ran two wires back there, one to the sender and one I grounded to the housing of the rear axle itself via one of the cover bolts.
The transmission, however, had no resistance from the sender, to the chassis of which had no resistance to the dash ground I ended up using. I did leave enough of the ground wire I ran from the rear exposed to I can T off and ground it to the trans if I notice something not quite right. Problem was, I couldn't really find anything to ground to on the trans - perhaps not looking hard enough I suppose. So far it's working out good. Dimmer works, too. Nice touch.
I think it was pin 2 on the headlight switch connector. It was like a light brown wire I think. Anyway, install was tedious but got it done - I just hate wiring.
PS yes I know the gauges are a little off. I didn't finish until 9:30pm last night so I'll tweak them. Not hard to rotate.

Thread Starter
|
Veteran
Joined: Sep 2010
Posts: 438
Likes: 0
I actually bought the pod on eBay for $40. THey're pretty expensive for what they are, but the fit is beautiful. I didn't have to modify anything to get it to look the way it does. It was really the only option I could think of for myself, was the overhead pod. I've thought and thought, the pillar I'd loose the handle of which I may miss - plus I've never been a big fan of pillar mounts - to each man his own I guess. Also the spot where you can store stuff in the dash below the AC controls ... I didn't want to not loose that spot I throw crap in there all of the time. The overhead pod is not as easy to spot from outside and looks just right to me.
Thread Starter
|
Veteran
Joined: Sep 2010
Posts: 438
Likes: 0
it mounts with some pretty strong 3M plastic locks like velcro but both pieces are plastic and they lock together pretty good. I had to pull the gauges out, press the pod up against the window where I wanted it and press fairly hard inside of the pod where I had the locks were attached on teh back side until it actually "clicked" in place. Then reinserted the gauges.
Thread Starter
|
Veteran
Joined: Sep 2010
Posts: 438
Likes: 0
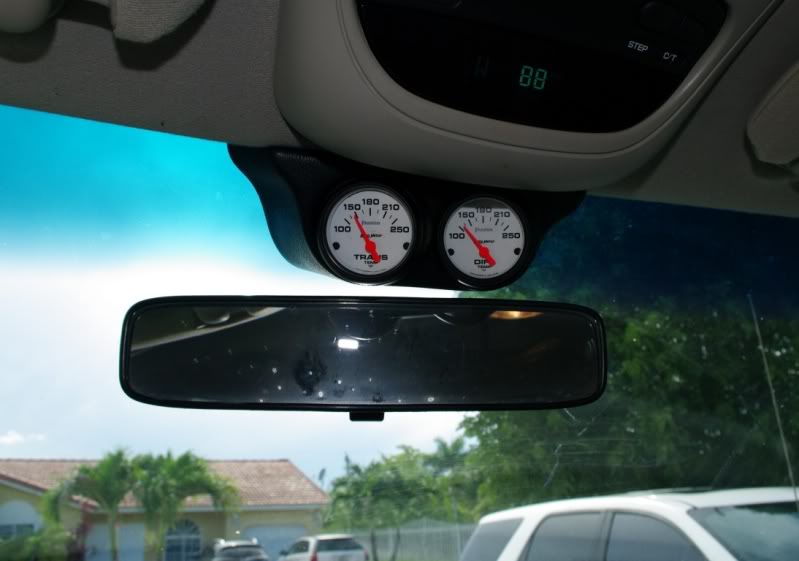
Here are some pics of the job. A better pic of the gauges themselves
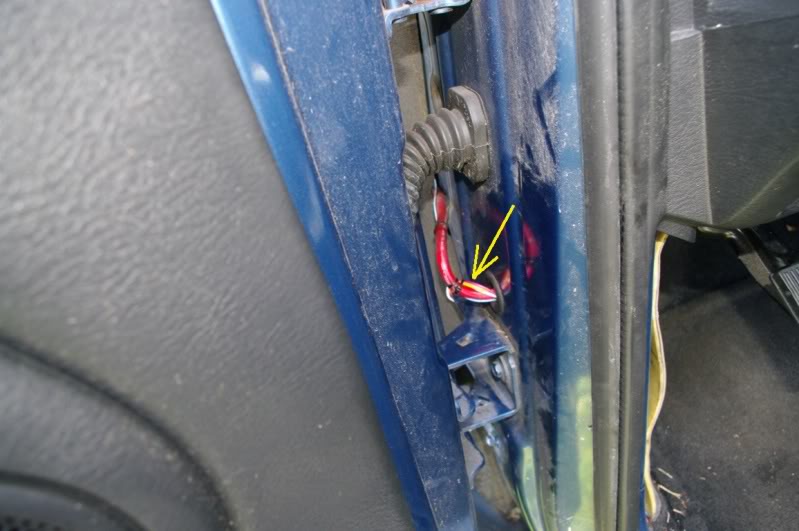
Ran the wires up the pillar.
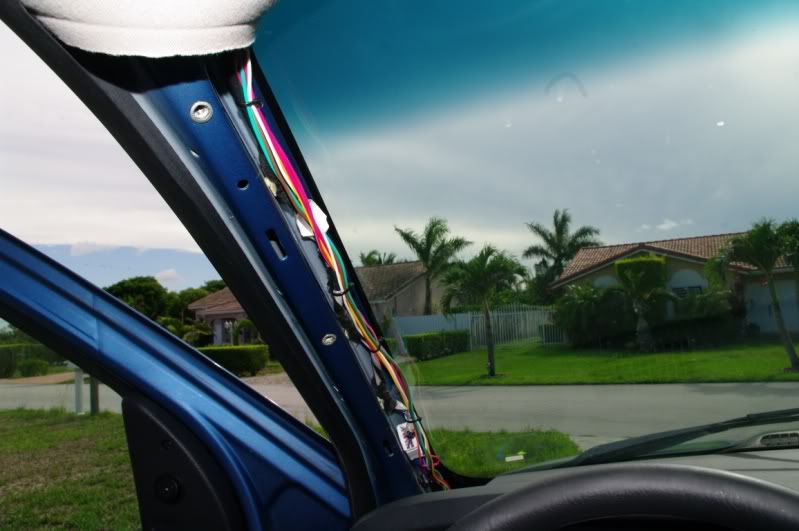
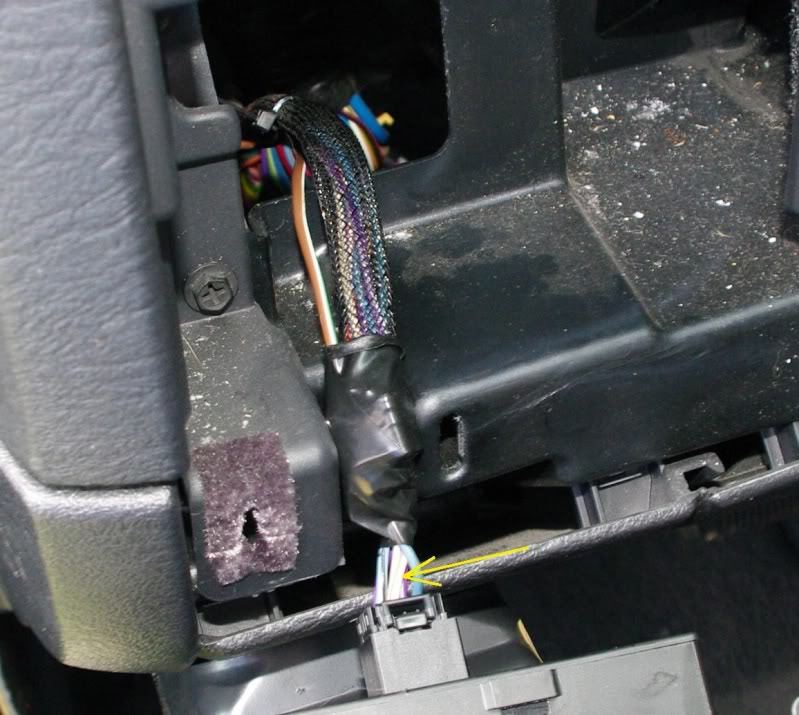
Found a wire that runs to the overhead console that gives me 12+ switched
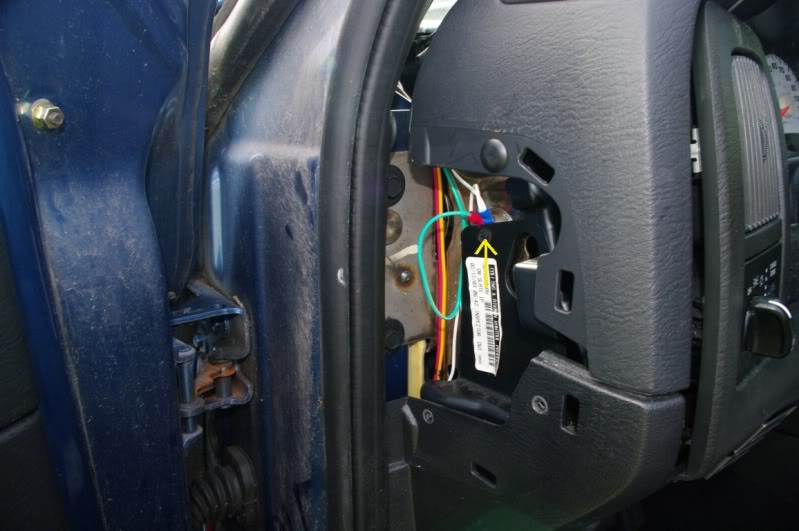
Found the dimmer wire for the lighting. It's like a tan wire with white stripe.
Where I grounded everything, the white wire actually runs all of the way back to the rear cover and grounded by one of the cover bolts. The rear axle is in no way grounded very well. I separate wire will need to be run for this. I did find no issue with using the chassis ground for the trans, tho.
Ran the wires through the side hole I had where I used to route the power for my amp. Then down and around and used as much of the existing plastic tubing as I could.
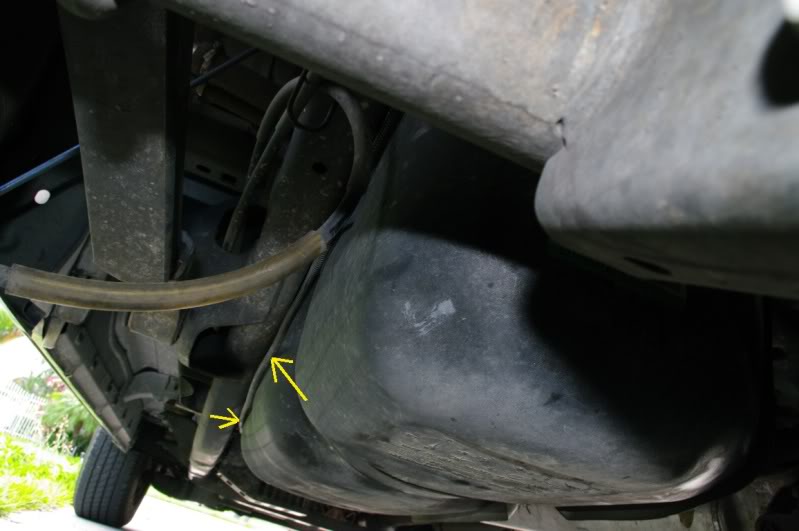
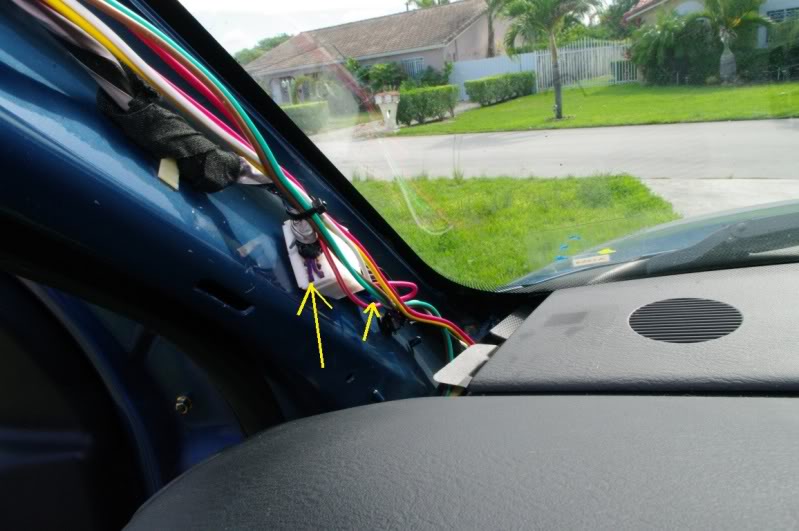
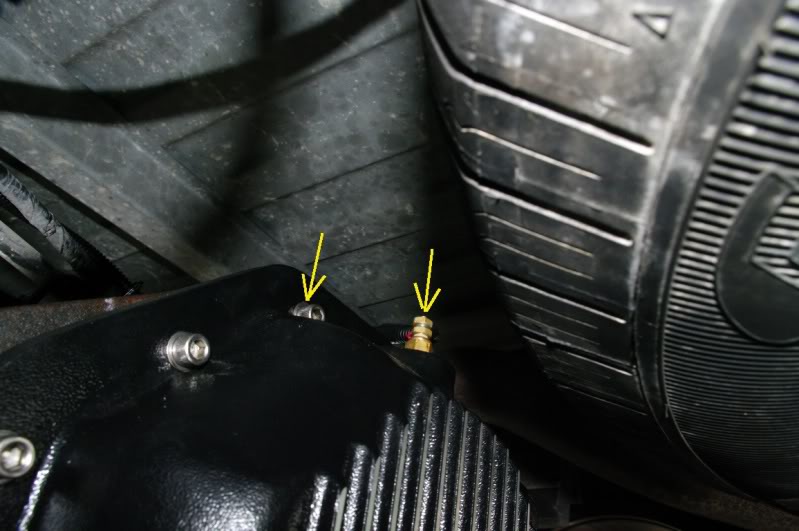
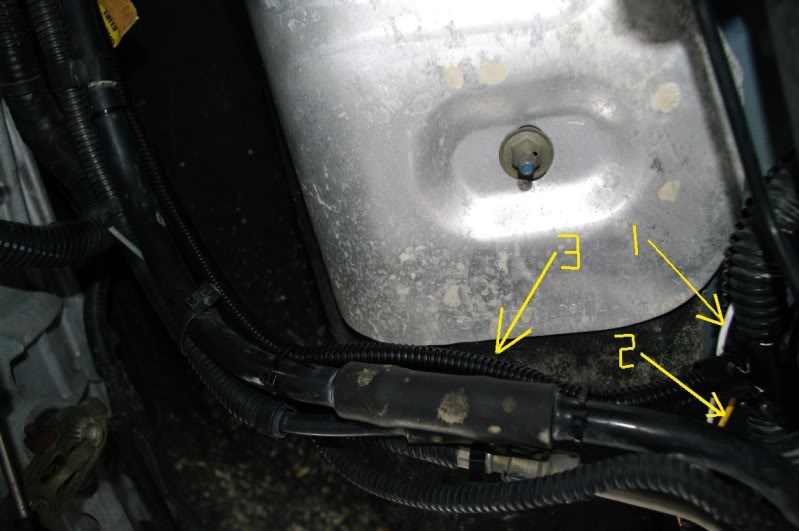
Right near the trans, I installed some new tubing and ran it over top of the trans to the sender on that side. Used port 3 with the adapters. I don't remember what they were off of the top of my head. (bad pic of trans sender, sorry) #1 is the exposed ground run to the rear available to t-tap if needed for the trans, #2 is the yellow wire running to the rear and #3 is the trans wire

Where I branched off with new tubing to the rear differential with the sender wire and ground.

Ran the wires up the pillar.
Found a wire that runs to the overhead console that gives me 12+ switched
Found the dimmer wire for the lighting. It's like a tan wire with white stripe.
Where I grounded everything, the white wire actually runs all of the way back to the rear cover and grounded by one of the cover bolts. The rear axle is in no way grounded very well. I separate wire will need to be run for this. I did find no issue with using the chassis ground for the trans, tho.
Ran the wires through the side hole I had where I used to route the power for my amp. Then down and around and used as much of the existing plastic tubing as I could.
Right near the trans, I installed some new tubing and ran it over top of the trans to the sender on that side. Used port 3 with the adapters. I don't remember what they were off of the top of my head. (bad pic of trans sender, sorry) #1 is the exposed ground run to the rear available to t-tap if needed for the trans, #2 is the yellow wire running to the rear and #3 is the trans wire
Where I branched off with new tubing to the rear differential with the sender wire and ground.
Last edited by areinike; Jun 22, 2011 at 06:12 PM.
Trending Topics


Veteran
Joined: Jun 2010
Posts: 291
Likes: 0
From: Illinois
you could of got a 1 gauge pillar with the handle still . you have to get the one for the srt 10 truck . well fi u do that then you can have 3 gauges , ! looks nice great job . nice detailed pictures also . looks good .