


Custom Ram Air


Thread Starter
|
Registered User
Joined: Mar 2006
Posts: 45
Likes: 0
From:
Parts needed
Phillips
Flat Head
Small Chisle
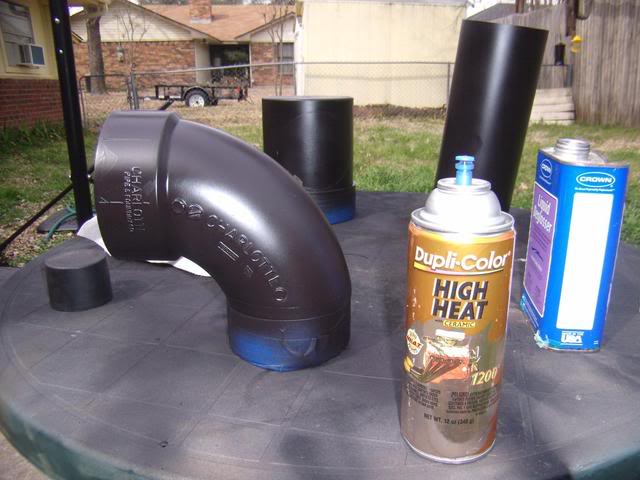
Can of Black Ceramic 1200* spray paint
Sand paper
Drill
1/2" drill bit
3/8" drill
Cordless if your lucky jigsaw
Fiberglass muffler repair tape.
Several ring clmaps 3-5"
3"to4" rubber coupler with ring clamps
6"to4" rubber coupler with ring clamps
(2) Spectre intake tubes
4" Spectre air filter with adjustable pipe size
Small spectre crankcase filter for pcv line
PVC 4" 90* street connector (has female coupler on 1 side and and male insert on other)
12.5" section of 4" pvc
6" ground basin (ground drain deal)
Old go cart innertube (cut in half with about a 4-6" inside diam)
(2)3"-4" drainage coupler (diffrent than the couplers used for pressurized)
Pictures to follow (Keep your pants on)
Phillips
Flat Head
Small Chisle
Can of Black Ceramic 1200* spray paint
Sand paper
Drill
1/2" drill bit
3/8" drill
Cordless if your lucky jigsaw
Fiberglass muffler repair tape.
Several ring clmaps 3-5"
3"to4" rubber coupler with ring clamps
6"to4" rubber coupler with ring clamps
(2) Spectre intake tubes
4" Spectre air filter with adjustable pipe size
Small spectre crankcase filter for pcv line
PVC 4" 90* street connector (has female coupler on 1 side and and male insert on other)
12.5" section of 4" pvc
6" ground basin (ground drain deal)
Old go cart innertube (cut in half with about a 4-6" inside diam)
(2)3"-4" drainage coupler (diffrent than the couplers used for pressurized)
Pictures to follow (Keep your pants on)
Last edited by dafaic; Mar 1, 2010 at 12:02 PM.
Thread Starter
|
Registered User
Joined: Mar 2006
Posts: 45
Likes: 0
From:
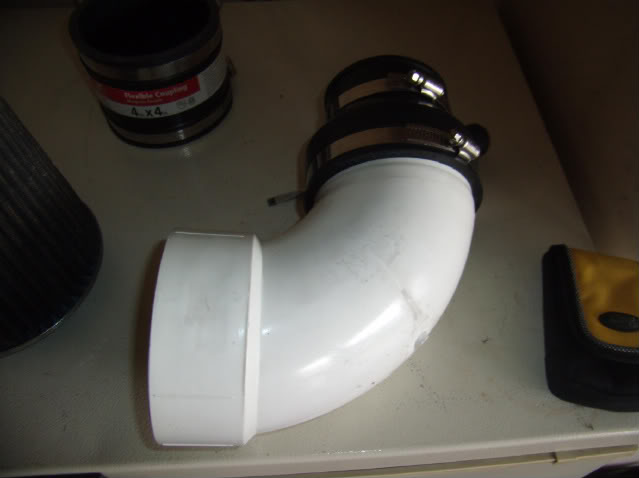
This pic doesn't show it all cause one I already ha the crank case filter installed and I had to go get a second intake tube. I did not end up needing the 4x4 rubber couplers.

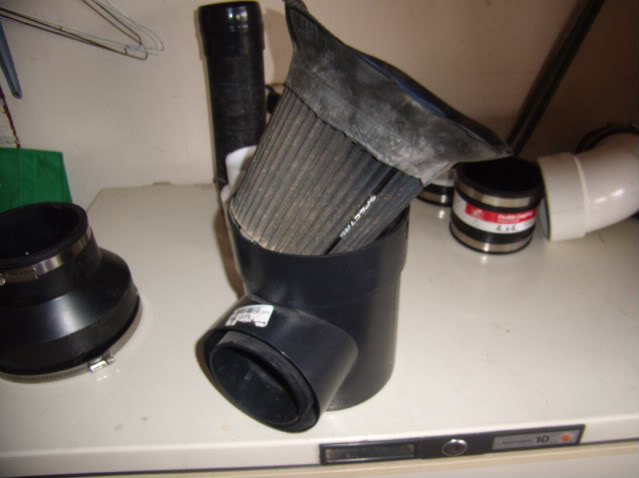
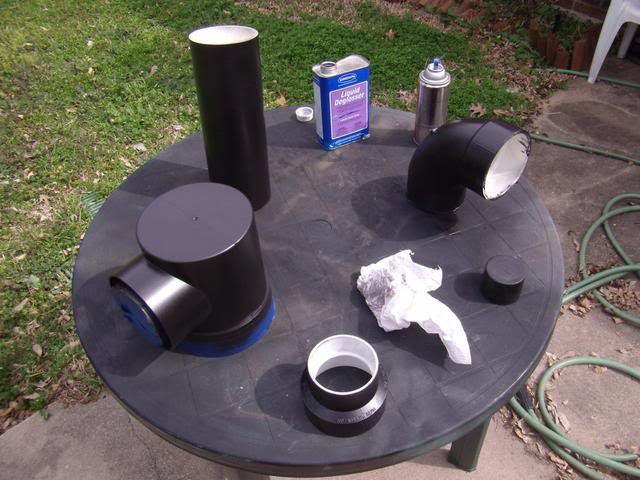
I started assymbling the stuff to get a rough fitment.
This connects to TB
Air filter and cut inner tube

Putting the 2 together
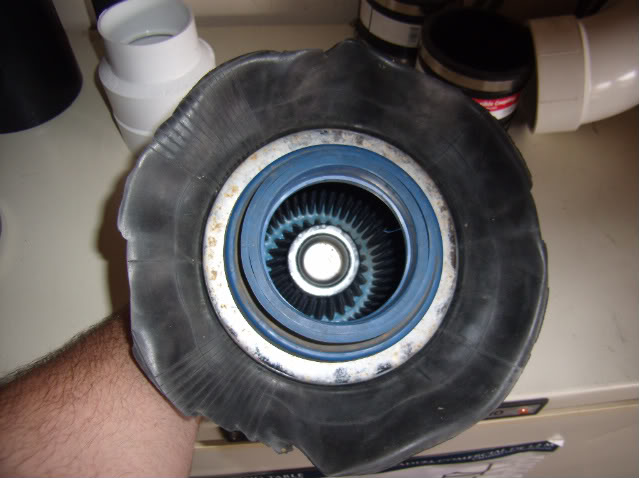
Back side
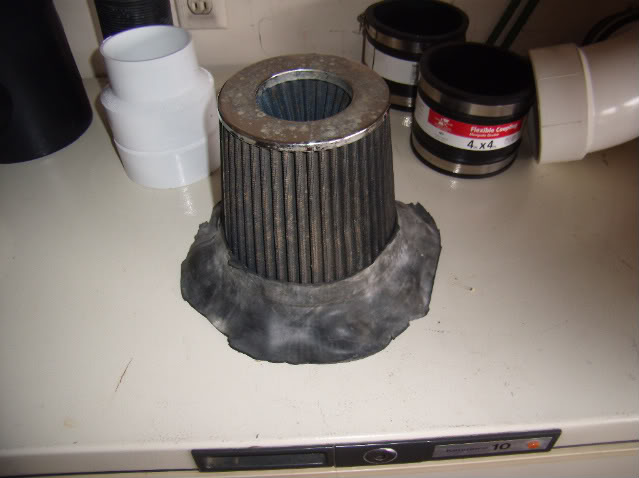
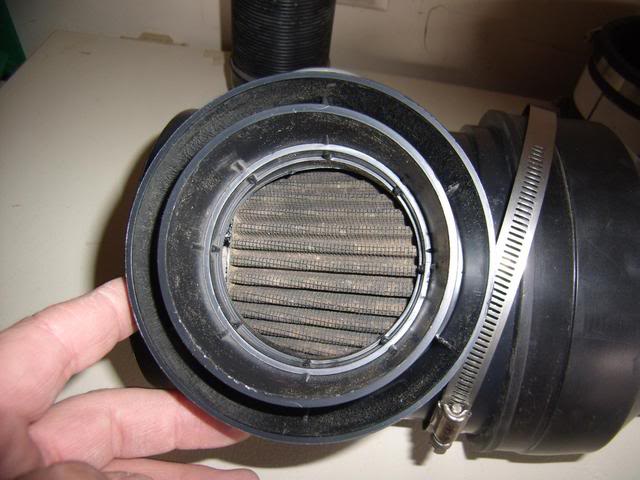
6" Drain basin and filter
Filter going into drain basin
Filter installed into drain basin and first 3"-4" drianage coupler
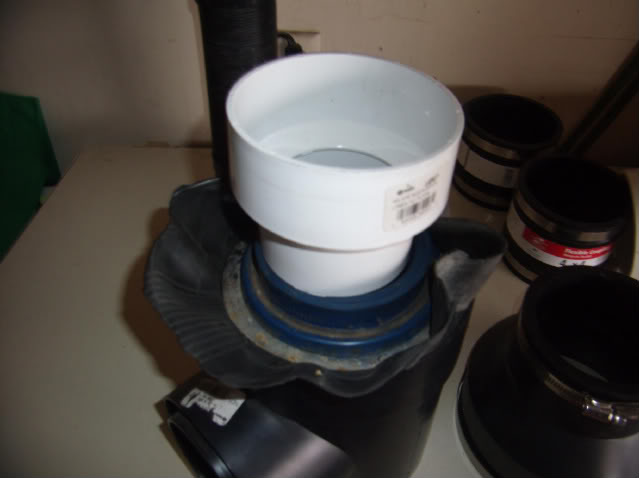
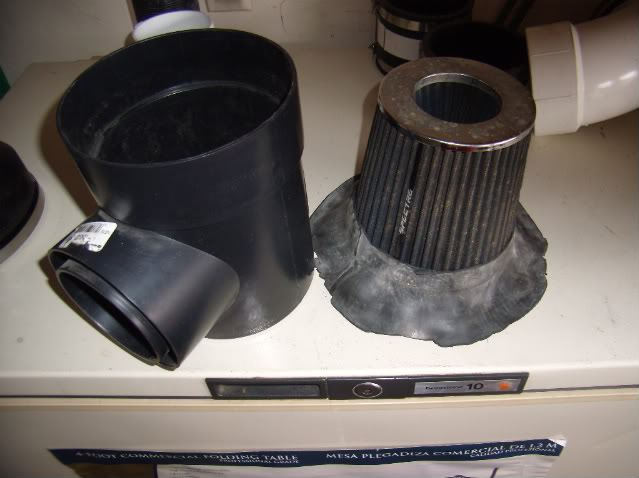
Coupler installed into filter with 6"-4" rubber coupler with clamps
Installing the coupler
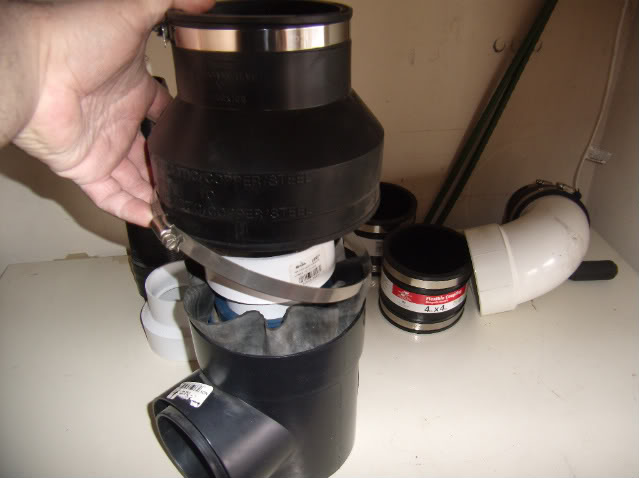
Coupler installed. The rubber coupler is pushed on far enough that the 4" side of the drainage coupler is also inside the rubber so that when the pvc is installed it connects to the pvc which is sealed to the rubber and th rubber seals to the pvc. (Double seal)

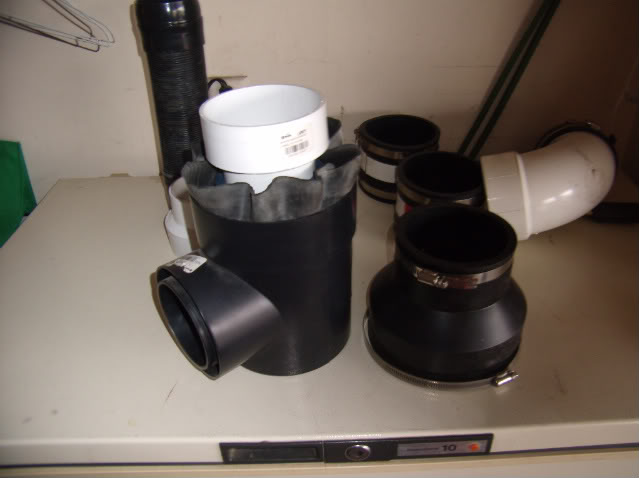
Filter inside
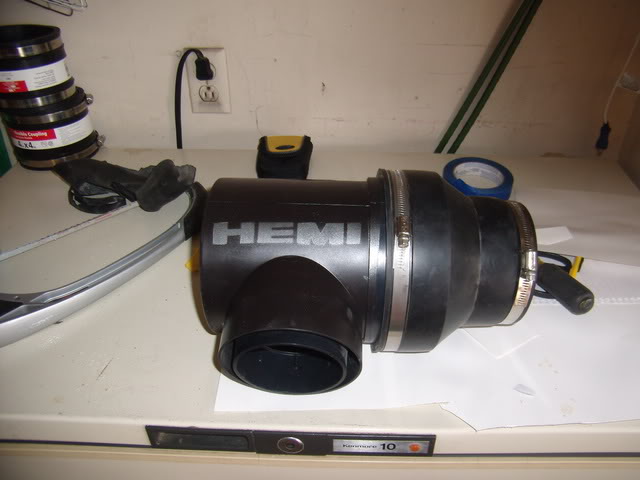
Freezer top mock up. 12.5" pvc goes inbetween filter housing and elbow.
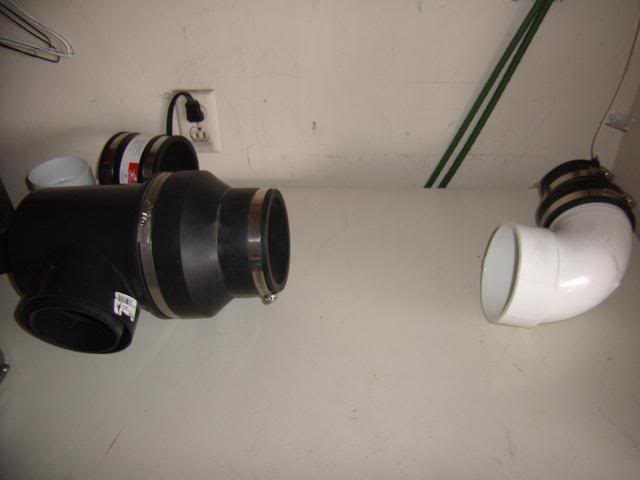
Another freezer top mock up
I started assymbling the stuff to get a rough fitment.
This connects to TB
Air filter and cut inner tube
Putting the 2 together
Back side
6" Drain basin and filter
Filter going into drain basin
Filter installed into drain basin and first 3"-4" drianage coupler
Coupler installed into filter with 6"-4" rubber coupler with clamps
Installing the coupler
Coupler installed. The rubber coupler is pushed on far enough that the 4" side of the drainage coupler is also inside the rubber so that when the pvc is installed it connects to the pvc which is sealed to the rubber and th rubber seals to the pvc. (Double seal)
Filter inside
Freezer top mock up. 12.5" pvc goes inbetween filter housing and elbow.
Another freezer top mock up
Last edited by dafaic; Mar 1, 2010 at 12:46 PM.
Thread Starter
|
Registered User
Joined: Mar 2006
Posts: 45
Likes: 0
From:
I then drilled a 1/2" hole at the 5 o'clock position 2-3" from the end of the pvc elbow for the IAT sensor.
I then wallowed the hole out every so slightly so that the IAt sensor would have to be forced in. The hole must be tight to get a seal.
Forgot to take a picture of this. Can if needed.
I then put the filter housing together, alon with the pvc, and eblow and installed it all as one piece.
I zip tied some fiberglass muffler seal tabe to the fitting at the elbow and pvc to seal it from the outside. I didn't want glue inside the intake beyond the filter.
I used a chisle to remove the 4 plastic screws on the front bumper trim piece just like the vararam and used a jigsaw to cut a hole in it for the tube.
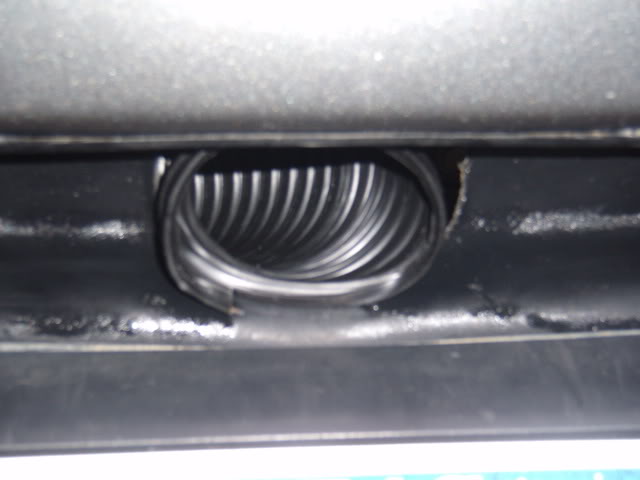
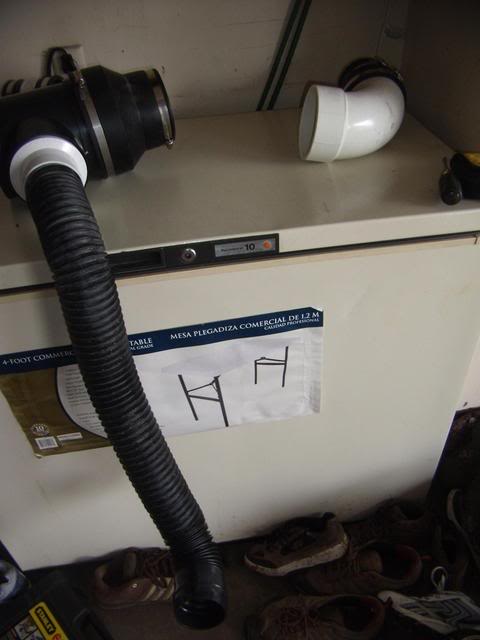
I ran the tube upto the air box
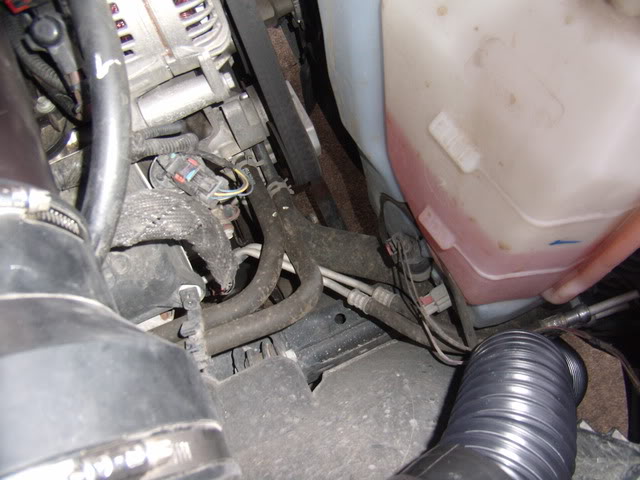


I ziptied the housing to this hole in the cowl and zip ties the pvc down to one of the old hemi air muffler cover things bolt holes.
I then wallowed the hole out every so slightly so that the IAt sensor would have to be forced in. The hole must be tight to get a seal.
Forgot to take a picture of this. Can if needed.
I then put the filter housing together, alon with the pvc, and eblow and installed it all as one piece.
I zip tied some fiberglass muffler seal tabe to the fitting at the elbow and pvc to seal it from the outside. I didn't want glue inside the intake beyond the filter.
I used a chisle to remove the 4 plastic screws on the front bumper trim piece just like the vararam and used a jigsaw to cut a hole in it for the tube.
I ran the tube upto the air box
I ziptied the housing to this hole in the cowl and zip ties the pvc down to one of the old hemi air muffler cover things bolt holes.
Thread Starter
|
Registered User
Joined: Mar 2006
Posts: 45
Likes: 0
From:
The intake tube attaches to the 6" drain basin using the other 3-4" drainage coupler. The 4" side pushed into the drainage coupler housing and the spectre intake tube pushed into the 3" side of the coupler.
Any additional pictures wanted just ask.
I reset the pcm and went for a drive.
The truck is louder and much more responsive.
Seat o pant meter says 80 comes real fast.
If you put your hand in front of the tube you can feel some serious air sucking.
Any additional pictures wanted just ask.
I reset the pcm and went for a drive.
The truck is louder and much more responsive.
Seat o pant meter says 80 comes real fast.
If you put your hand in front of the tube you can feel some serious air sucking.

That's a pretty sick setup, I'd be curious to see how it stacked up against the Vararam intake. Like said before though puddles will be your enemy with that thing, I suggest some kind of water repellent filter sock to protect your motor from hydrolock.
Trending Topics
Thread Starter
|
Registered User
Joined: Mar 2006
Posts: 45
Likes: 0
From:
Well as you can tell the filter wasn't new. I've had the filter hooked up to one of those tubes and it down in the bumper area for a long time since about 5k miles. I've been dodging puddles for a while. Truck has 26k miles now.
Bad thing about needing 2 of those intake tubes is this autozone only carries one at a time. Good thing I already had one and I am glad they had it in black instead of red or blue.
Also aother guy on another forum built his own and was showing me pictures. He used RV corrugated crap tube for his. Hell of an idea. If I have have to change or If i decide to add another going the other direction and using a 4" split instead of an elbow I'll be using the RV tubes.
He showed me pictures of his and he used weapon r intake parts which looked alot better but he really liked what I did and said he was considering building a couple.
Yeah I don't know about stacking upto Vararam in it's current configuration but a dual set up might be another story. I am thinking this is gotta be as good or better than the Volant or that other one simple due to location of the tube. I think Vararam got it right on the location. This is basically the front most part of the truck. Air is going to hit here before anywhere else meaning more air to the system.
Last edited by dafaic; Mar 1, 2010 at 01:21 PM.