


The Stealth BOMB'r is under the knife
#71
 07-05-2010, 11:37 AM

Join Date: Dec 2008
Location: East Alabama
Posts: 863
Likes: 0
Received 0 Likes
on
0 Posts
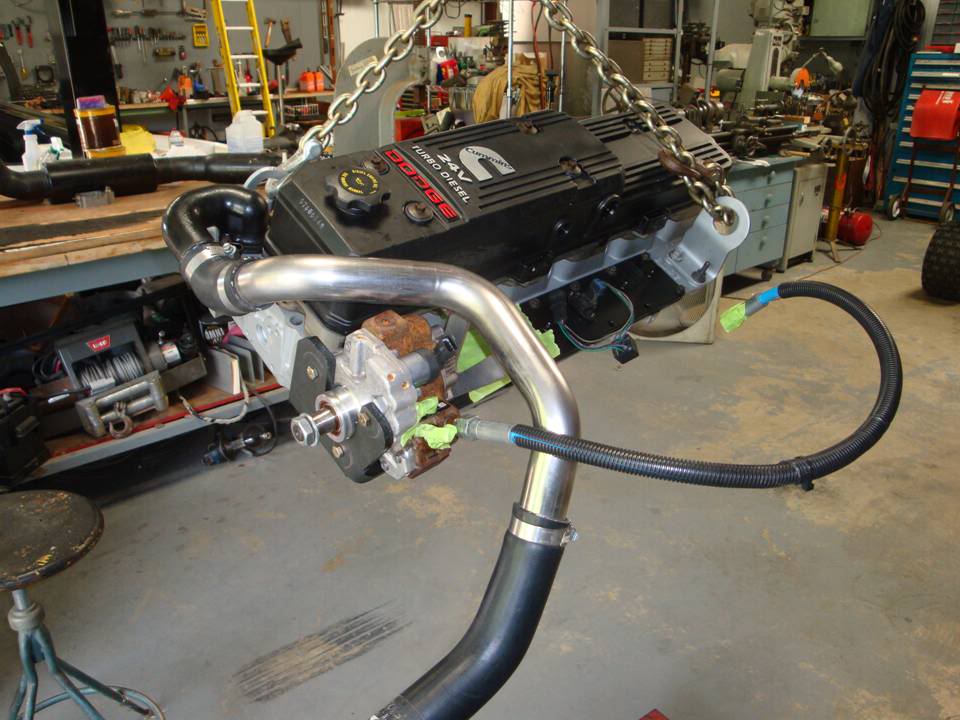
very nice build u have here.I look forward to seeing the progress.One question for ya though,doesnt the fuel line under the tank worry ya about hitting something and breaking it off or bending it?Im sure its a very remote possibility of it happening,but what a mess if it did happen.
The fitting is higher than the rear axle tubes.
This truck sees almost ZERO off roading (i.e. dirt fire break is the extent of it) so the chances of of hitting that fitting are extremely slim.
The front axle and air damn will tag something before that fitting does.
#72
07-05-2010, 07:47 PM
Join Date: Dec 2008
Location: East Alabama
Posts: 863
Likes: 0
Received 0 Likes
on
0 Posts
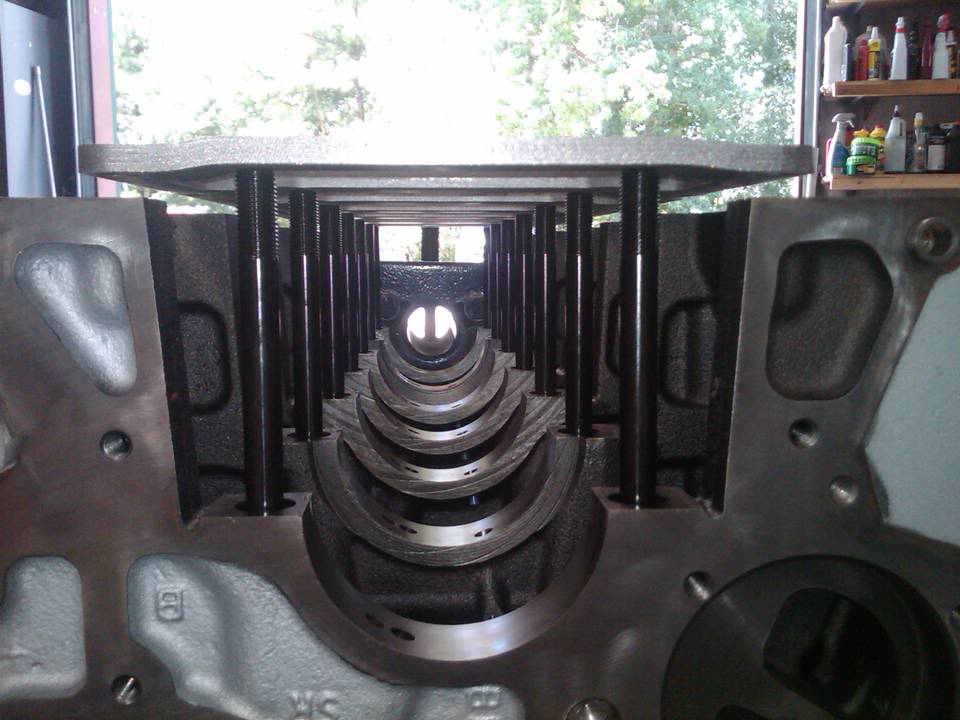
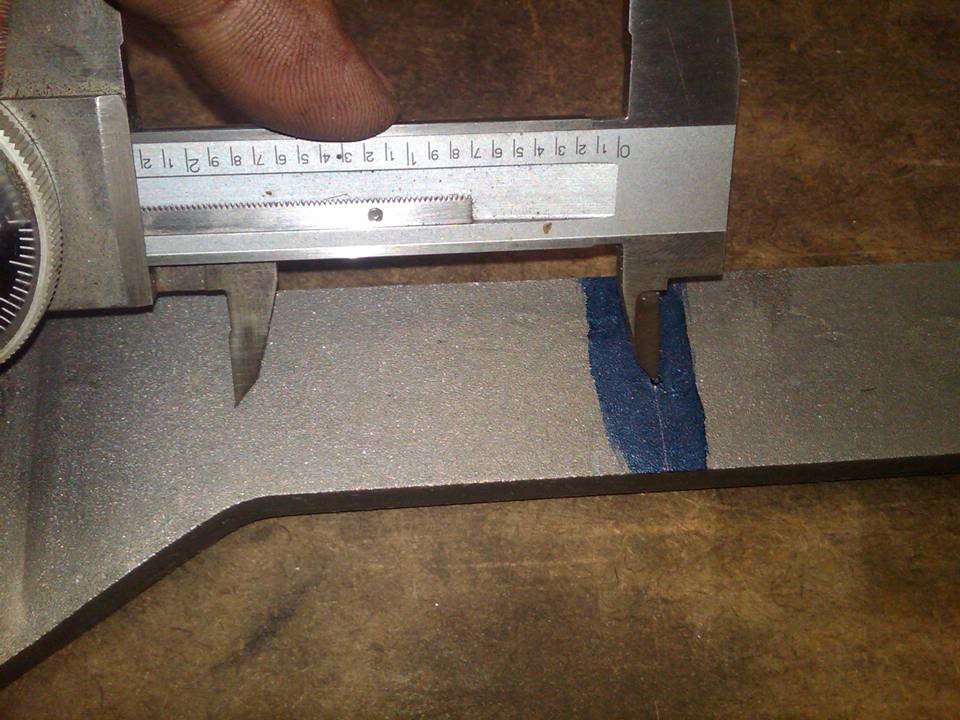
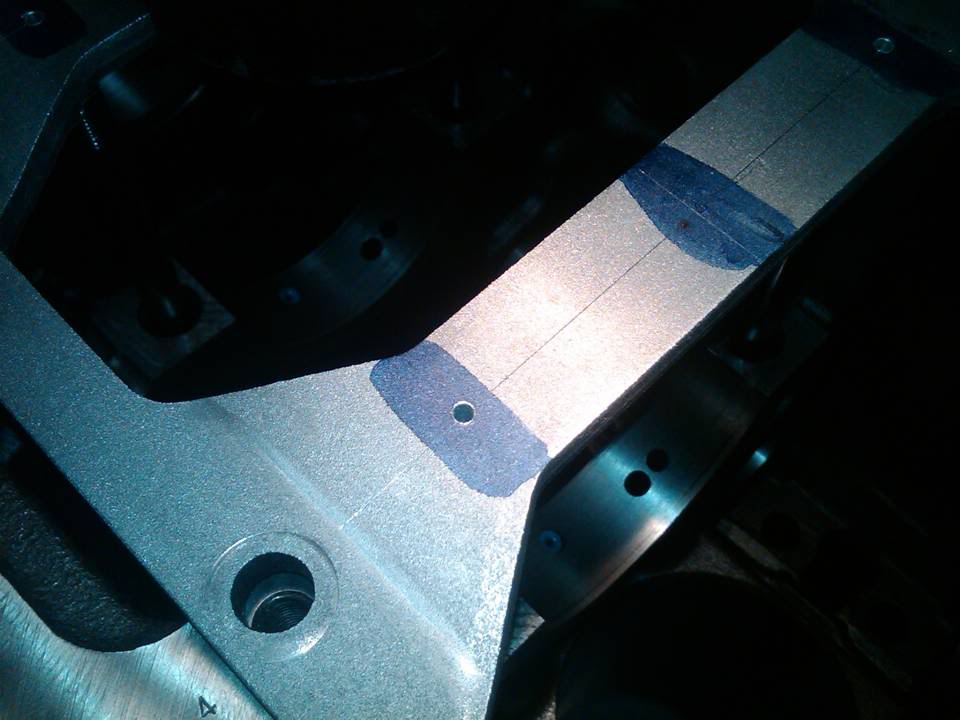
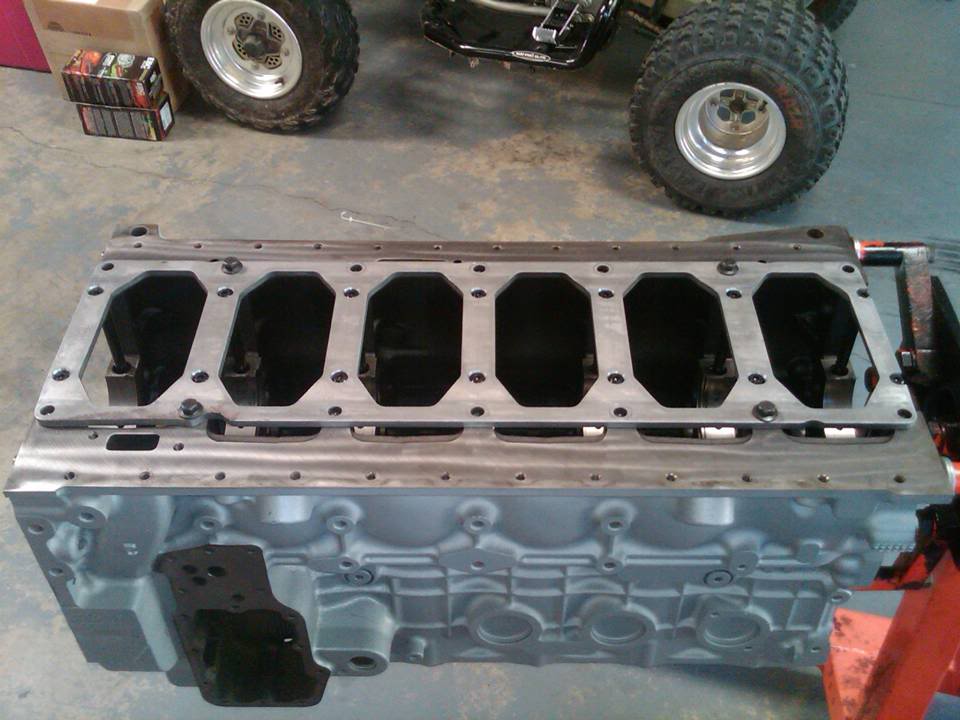
Got started on the block stiffener to accept the main studs today.
The main studs are not a drop in fit, you do have to drill the block stiffener to clear the sutds and nuts.
Careful layout is critical here, otherwise you'll mangle the stiffener.
Measure, measure, measure......
Here you can see how much clearance you need to gain.....
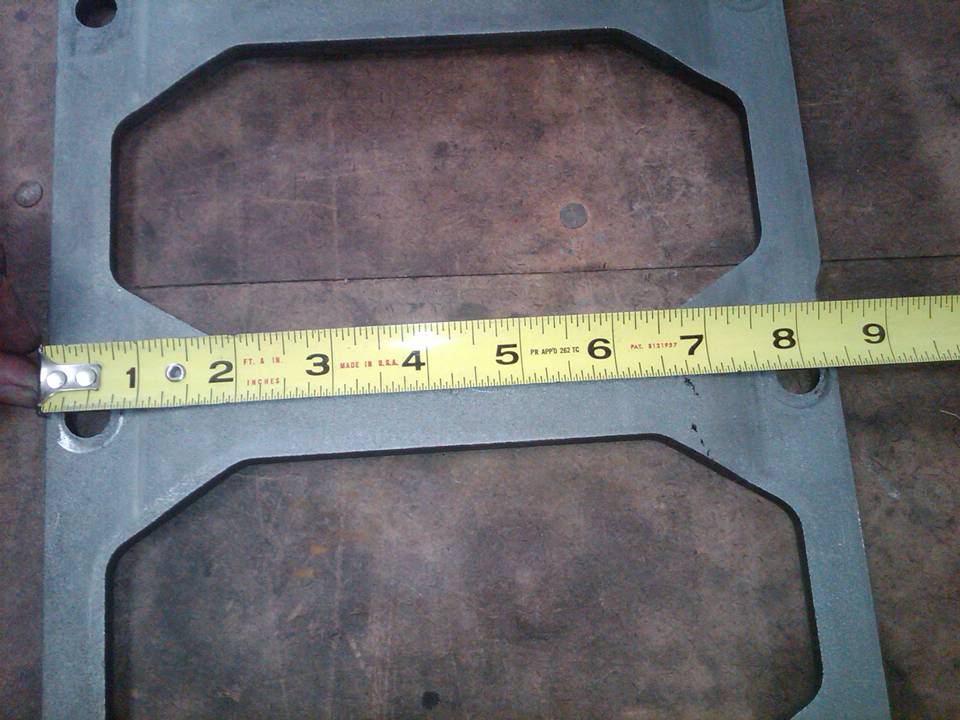
Measure your center to center distance on the studs and carefully lay everything out on the stiffener before cutting or drilling.....
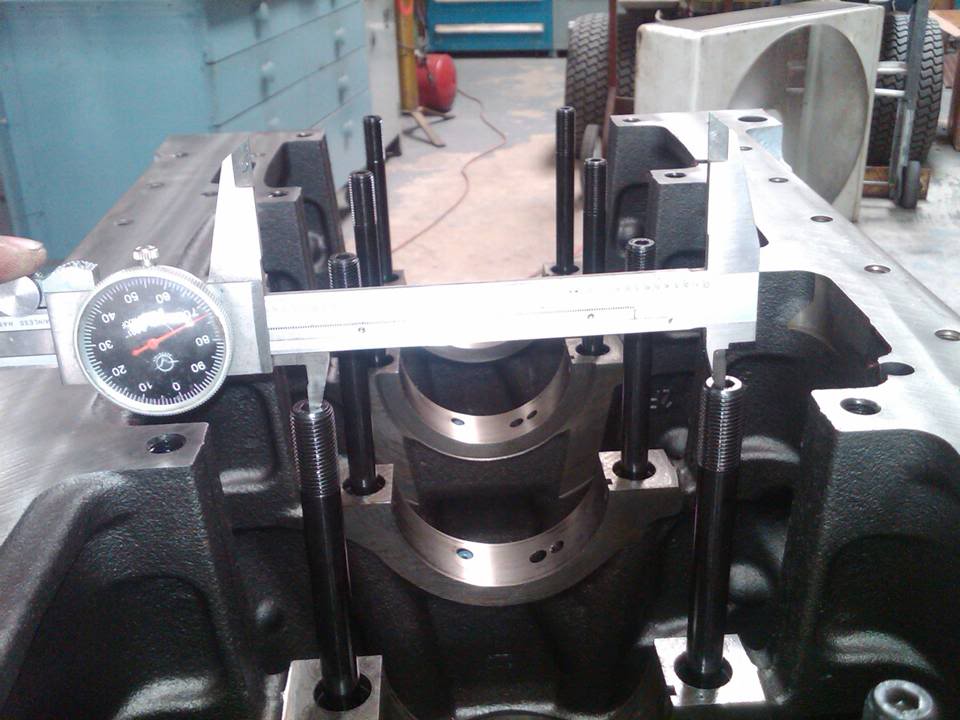
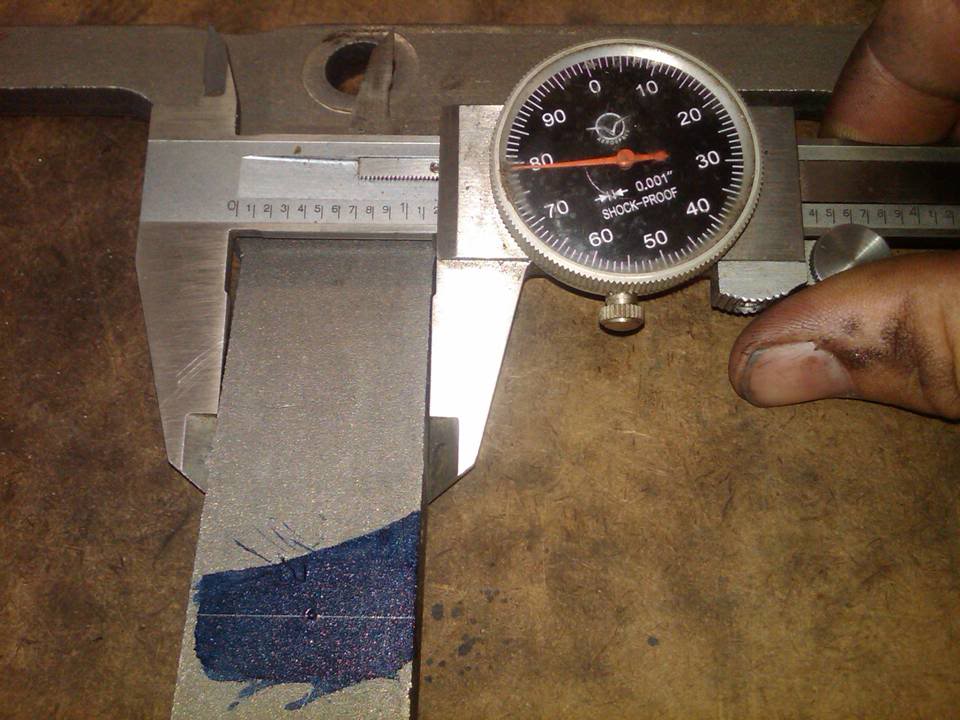
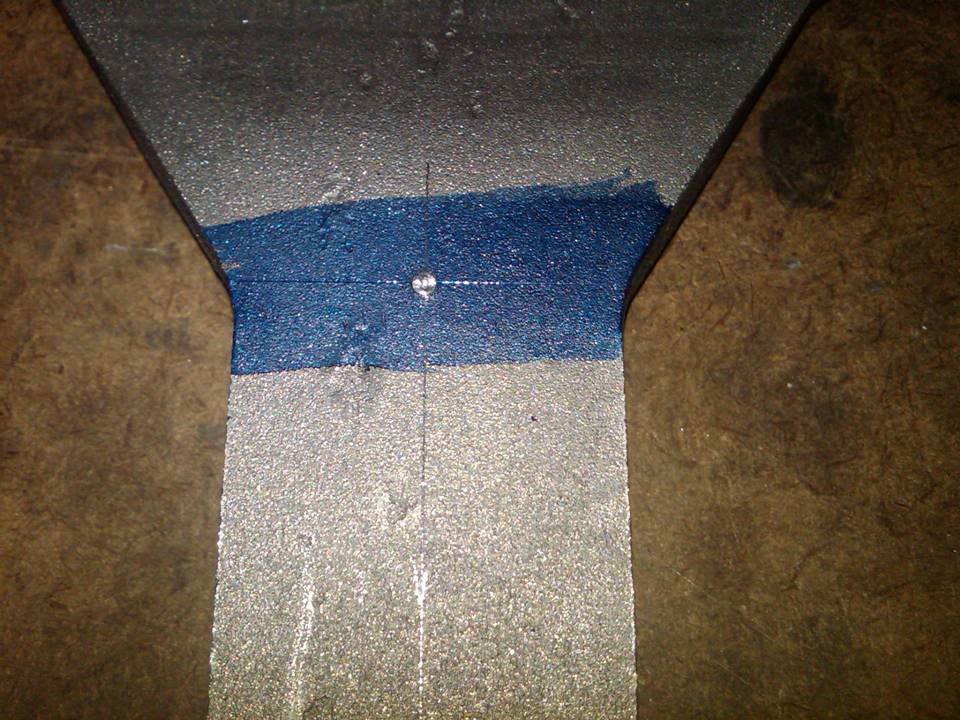

Drill your pilot holes and verify alignment before drilling your main holes.....
Once you're happy, get to work.....
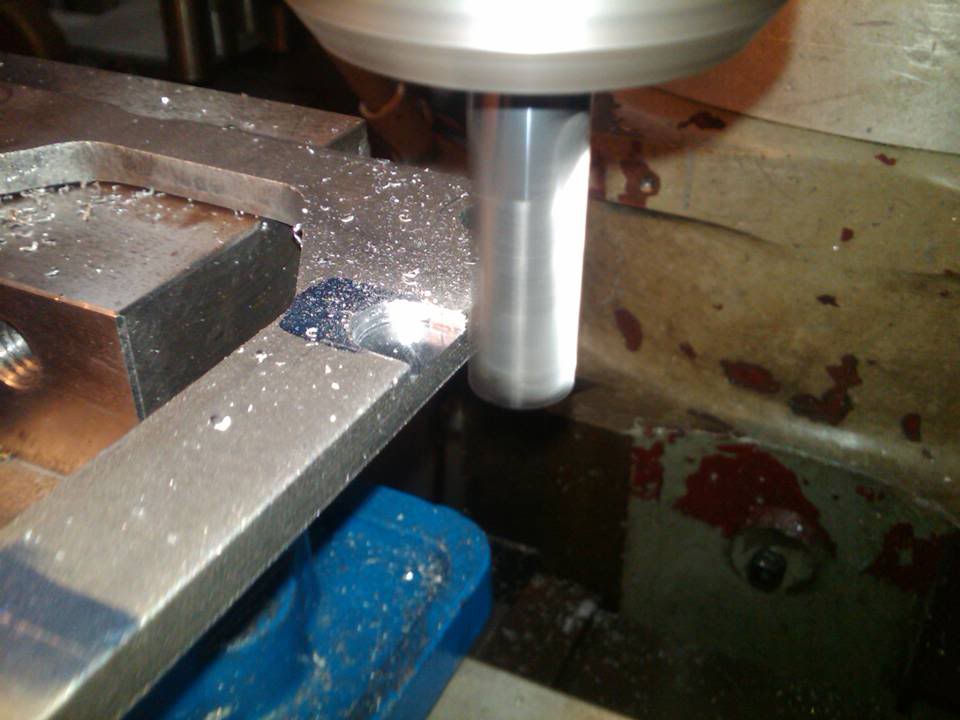
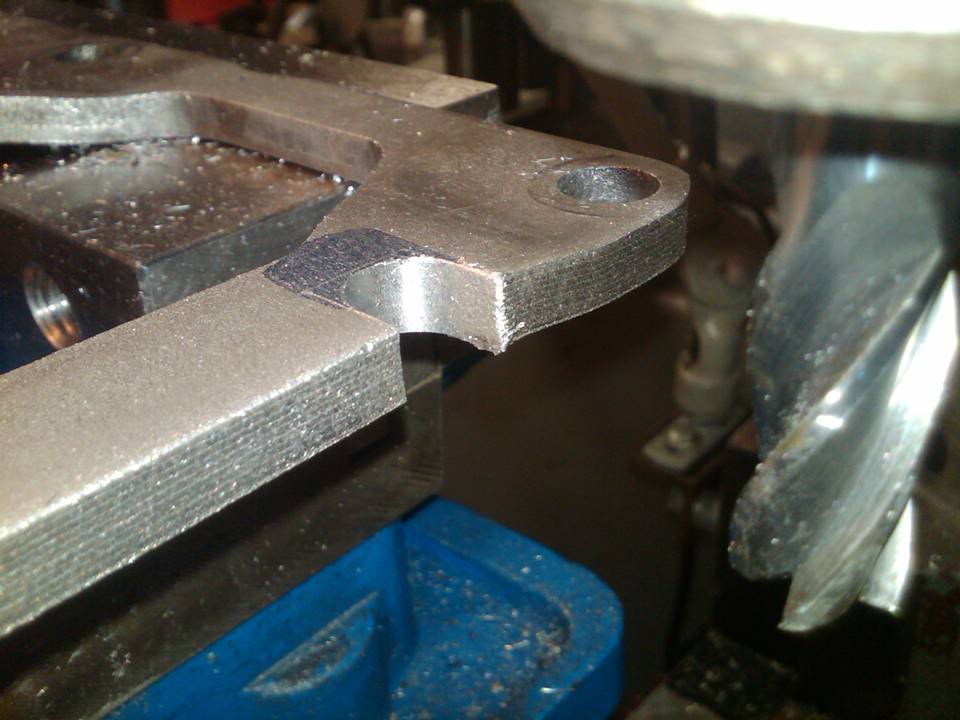

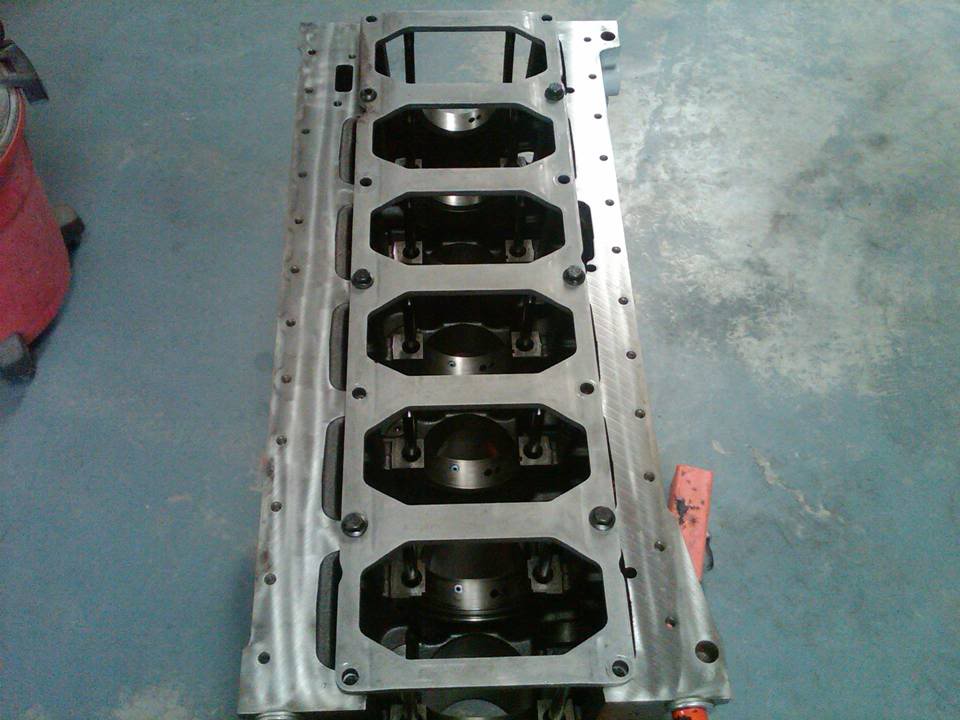
Modified Block Stiffener.....
The main studs are not a drop in fit, you do have to drill the block stiffener to clear the sutds and nuts.
Careful layout is critical here, otherwise you'll mangle the stiffener.
Measure, measure, measure......
Here you can see how much clearance you need to gain.....
Measure your center to center distance on the studs and carefully lay everything out on the stiffener before cutting or drilling.....
Drill your pilot holes and verify alignment before drilling your main holes.....
Once you're happy, get to work.....
Modified Block Stiffener.....
#73
07-05-2010, 11:33 PM
Veteran
Join Date: Jul 2010
Location: cocoa beach, fl
Posts: 263
Likes: 0
Received 0 Likes
on
0 Posts
#74
07-07-2010, 03:28 PM
Record Breaker
#75
07-07-2010, 09:46 PM
Join Date: Dec 2008
Location: East Alabama
Posts: 863
Likes: 0
Received 0 Likes
on
0 Posts
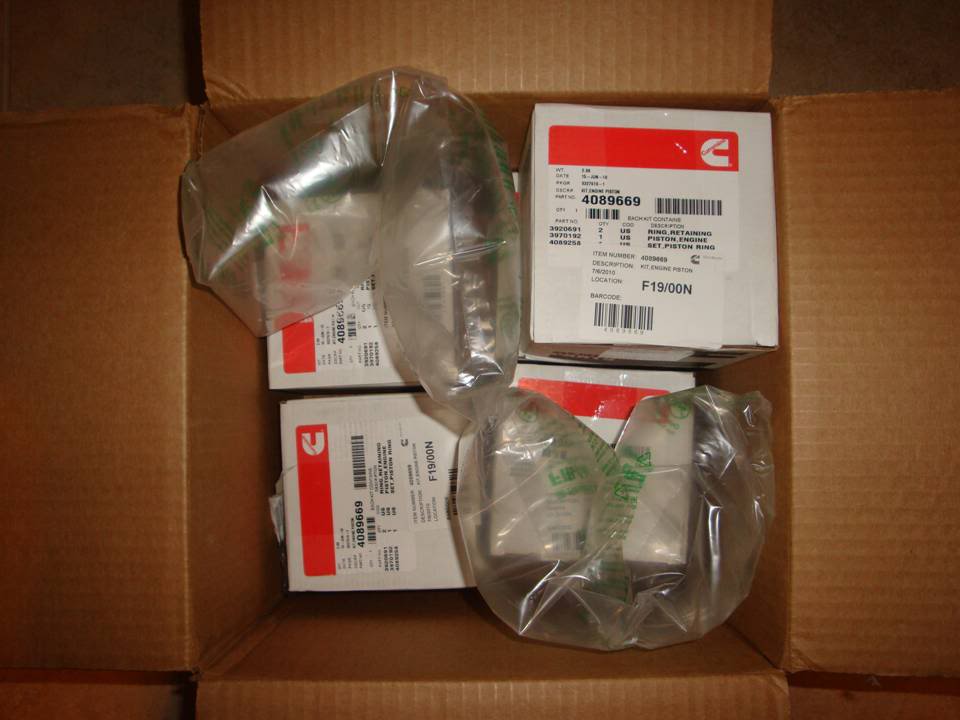
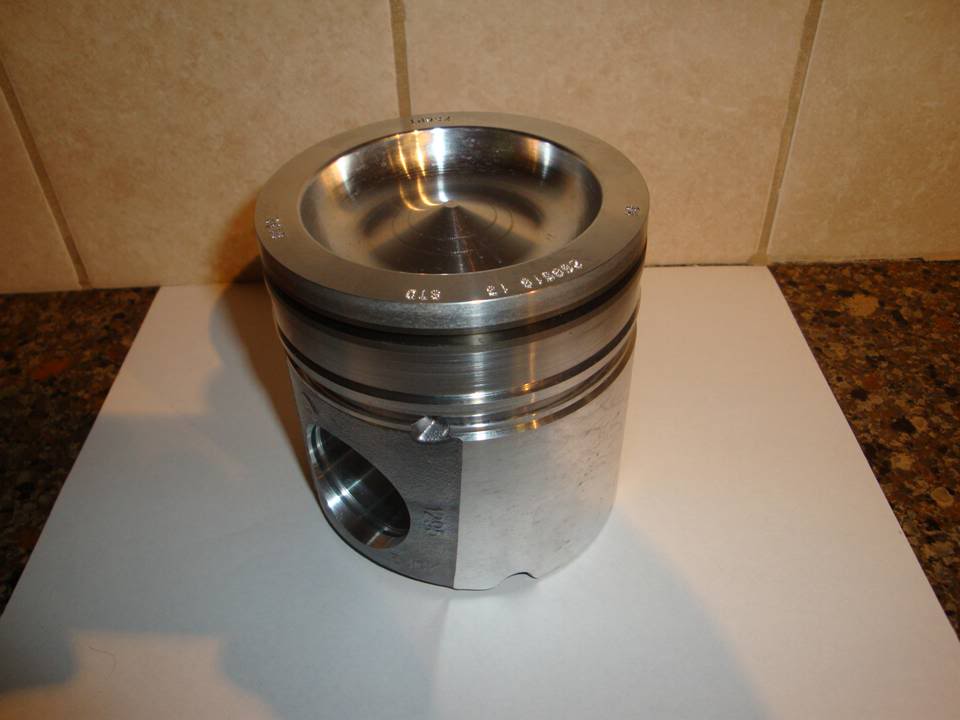
Either way, I ordered a new set of pistons today. They'll be here on Friday and are getting sent right back out for coating.......packed in something that resembles a crate for a nuclear warhead.
#76
07-08-2010, 11:18 AM
Join Date: Dec 2008
Location: East Alabama
Posts: 863
Likes: 0
Received 0 Likes
on
0 Posts
So, being that a lot of the motor stuff will be waiting on those parts, gonna get started on the trans this week.
When it goes back in, the heat exchanger on the driver side of the block will not be there and it will have stainless braided lines running up to a larger trans cooler up front.
The trans is already a built SunCoast, so all I'm doing is freshening it. New steels, frictions, seals, bands, bearings, bushings and a good clean up.
Otherwise, I just want to check the shafts and make sure they're still in good shape.
#77
07-08-2010, 05:13 PM
Join Date: Dec 2008
Location: East Alabama
Posts: 863
Likes: 0
Received 0 Likes
on
0 Posts

#78
07-11-2010, 07:36 PM
Join Date: Dec 2008
Location: East Alabama
Posts: 863
Likes: 0
Received 0 Likes
on
0 Posts
So, got some more work done today.
Figured I'd get all the stuff assembled on the head.
Made a few modifications to some existing parts and added some new ones.
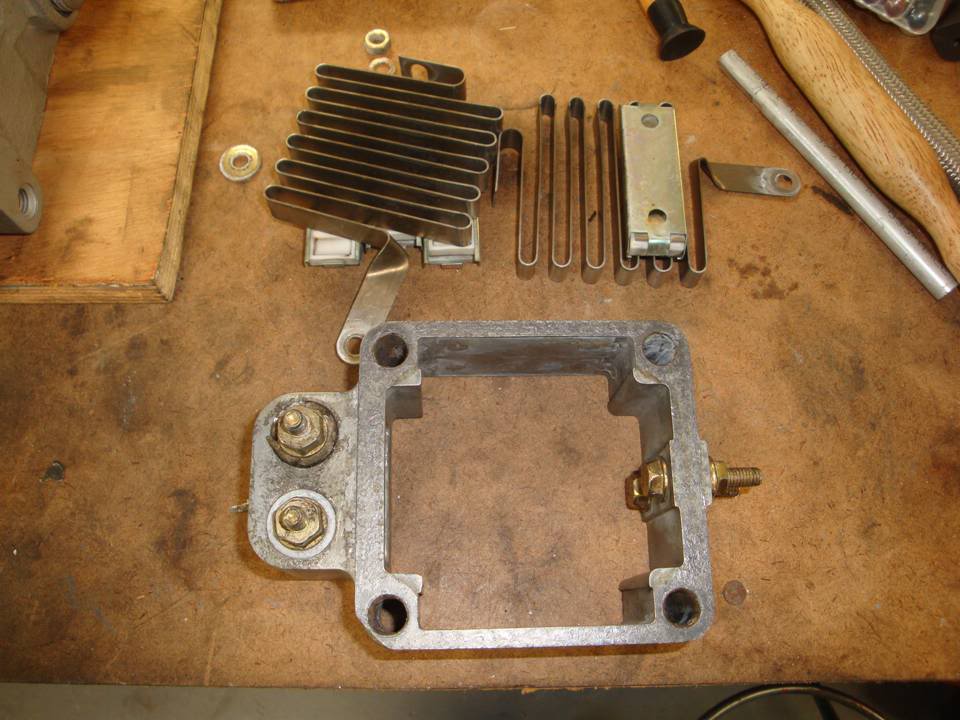
First, gutted the grid heater.....I live in AL, it's never cold enough to need it.
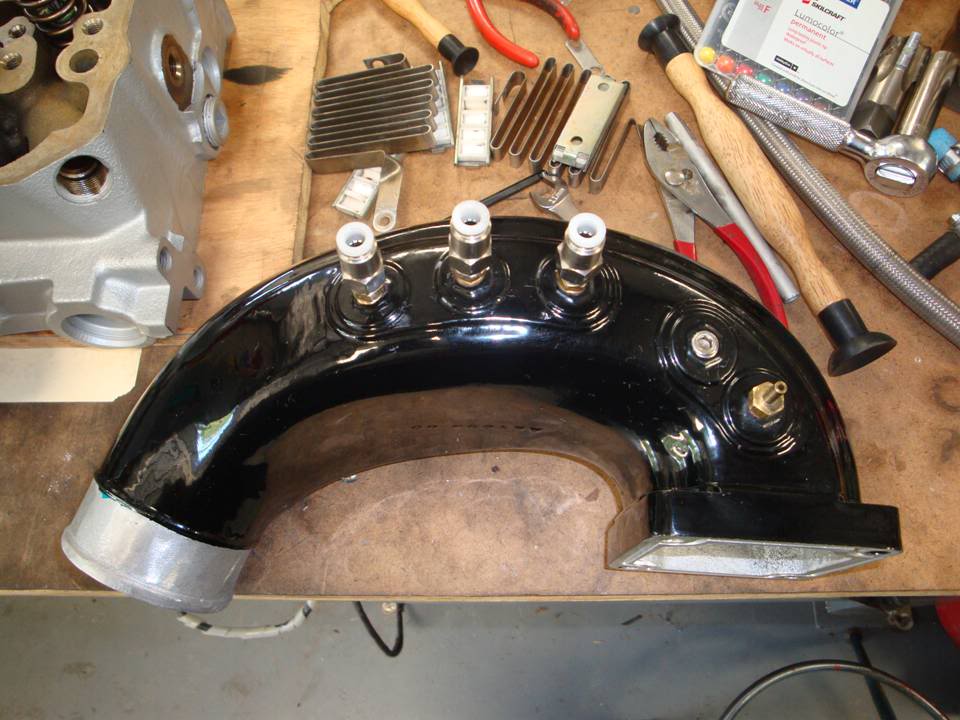
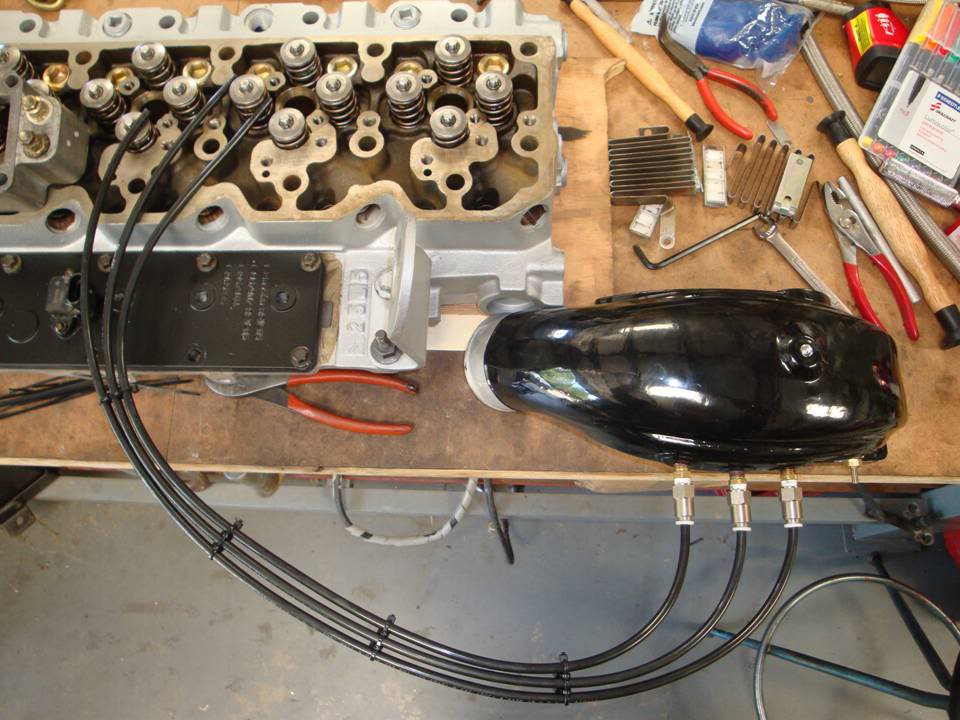
Assembled the new intake horn and accessories. 3 of the fittings are for water, 1 is for the boost gauge and the one that has the plug in it will be the second nitrous stage.
Started to put all the crap back on the head so it's ready to go.

1/2 NPT to -12 NPT fitting for the bypass (this isn't the fitting that is staying on it)
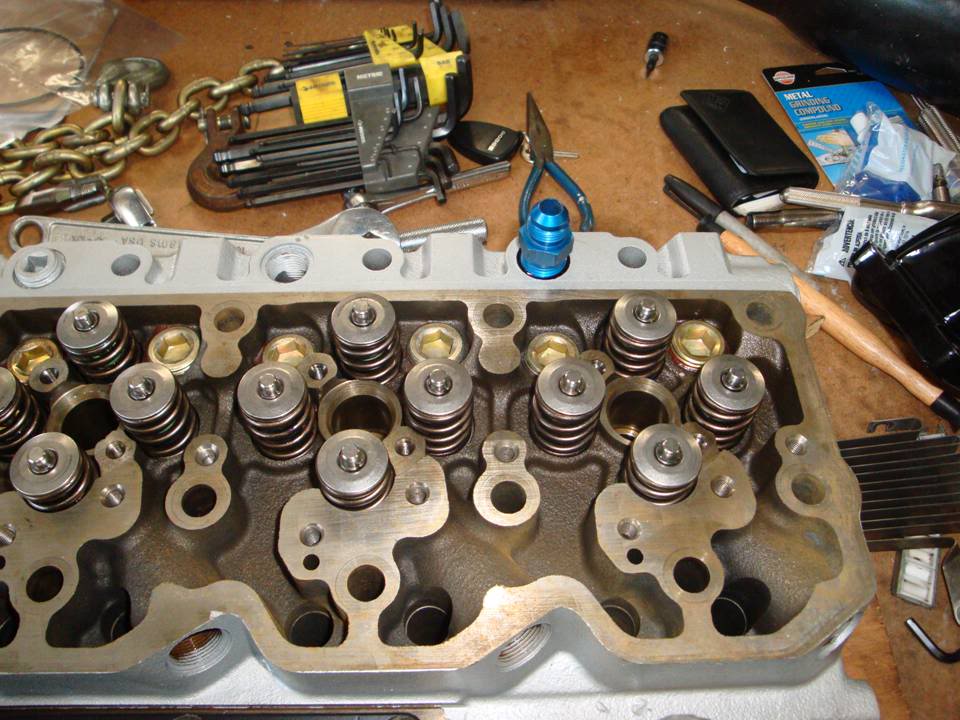
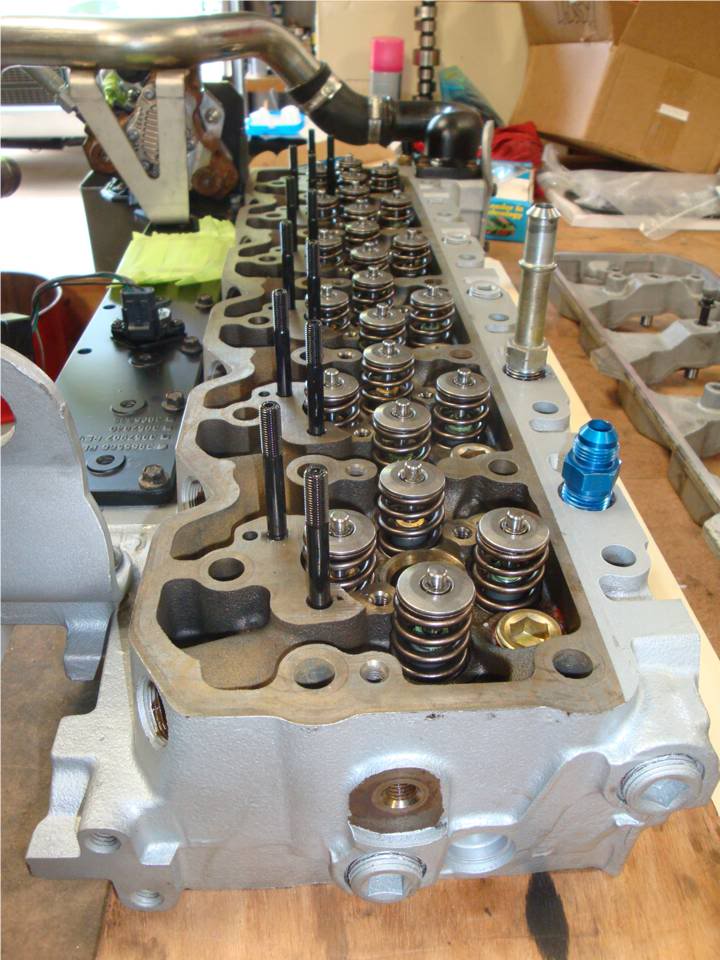
Rocker studs are back in.
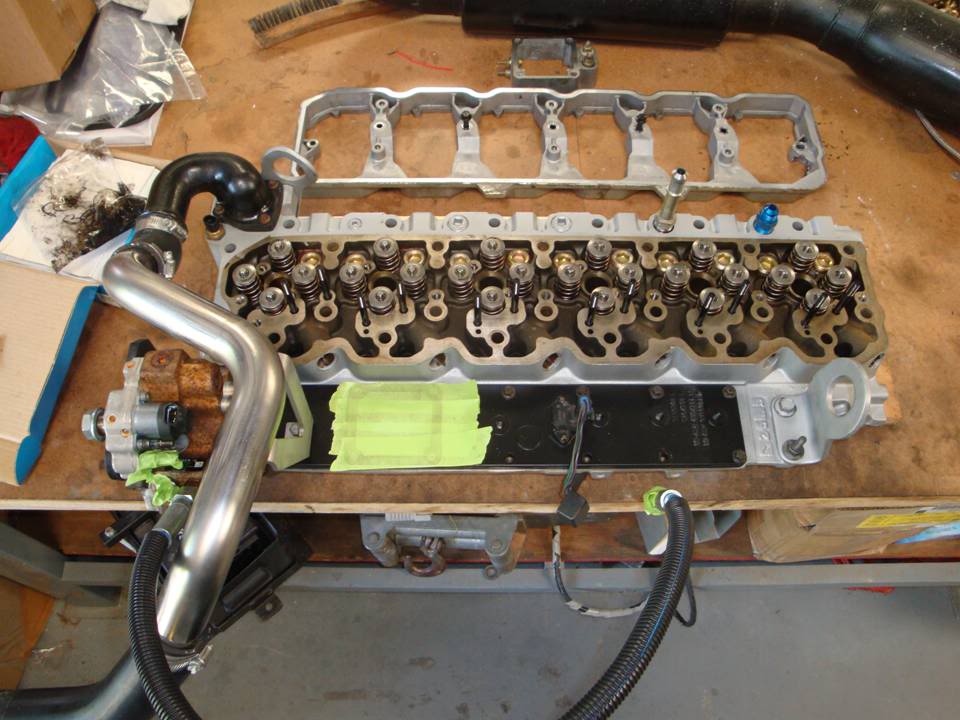
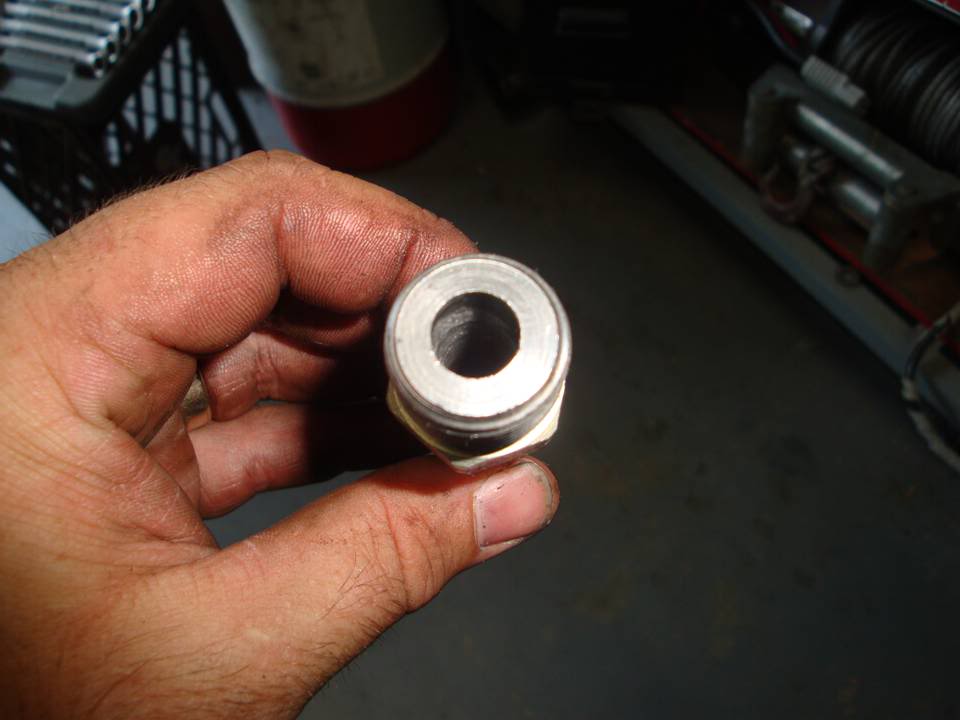
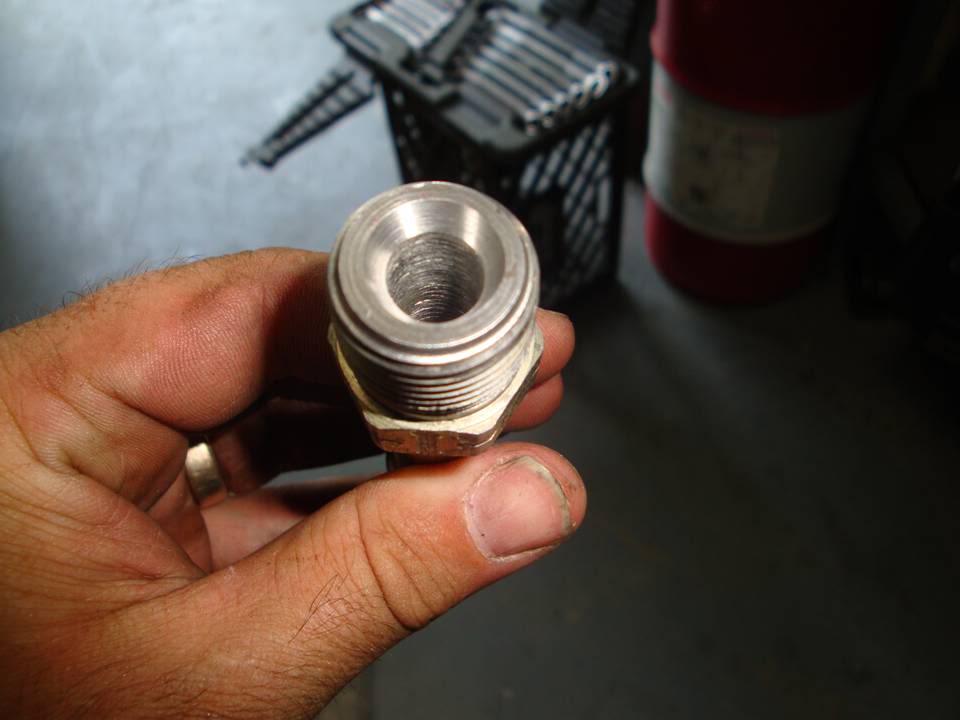
Modified the fitting for the heater core. 2 reasons for this....First, the opening at the bottom is only 3/16 of an inch, whereas the rest of the fitting is 3/8, so I opend that up to 3/8 to allow full flow through there. Second, I put it in the lathe and took off the top of it that is EXTREMELY sharp and tends to cut the heater core hose and cause a leak.
I forgot to get pics of it before modifying it. These are the after pictures.

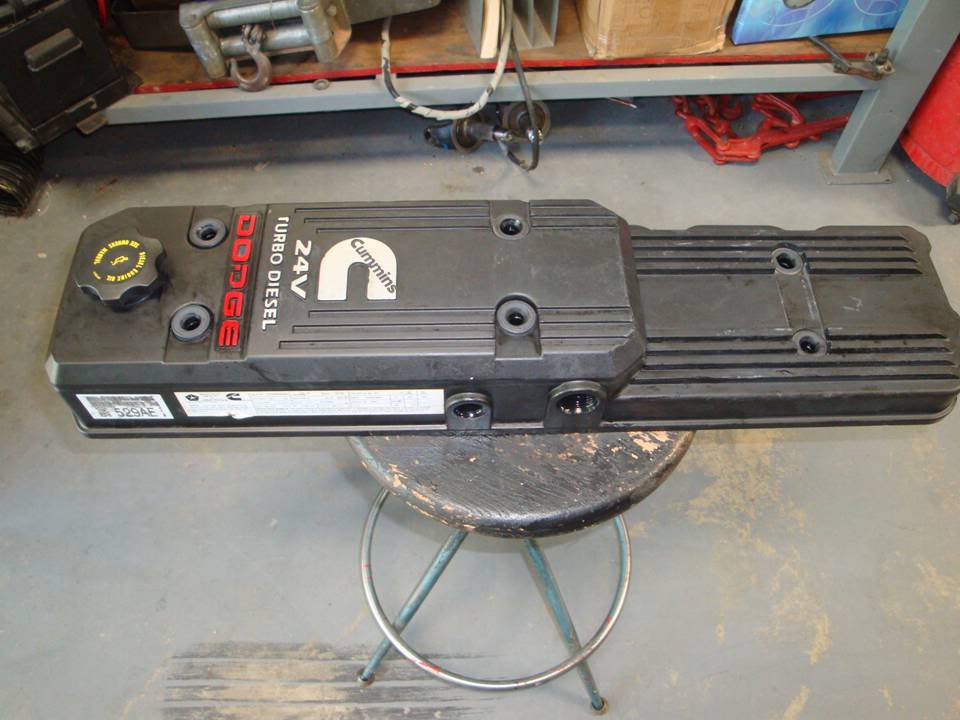
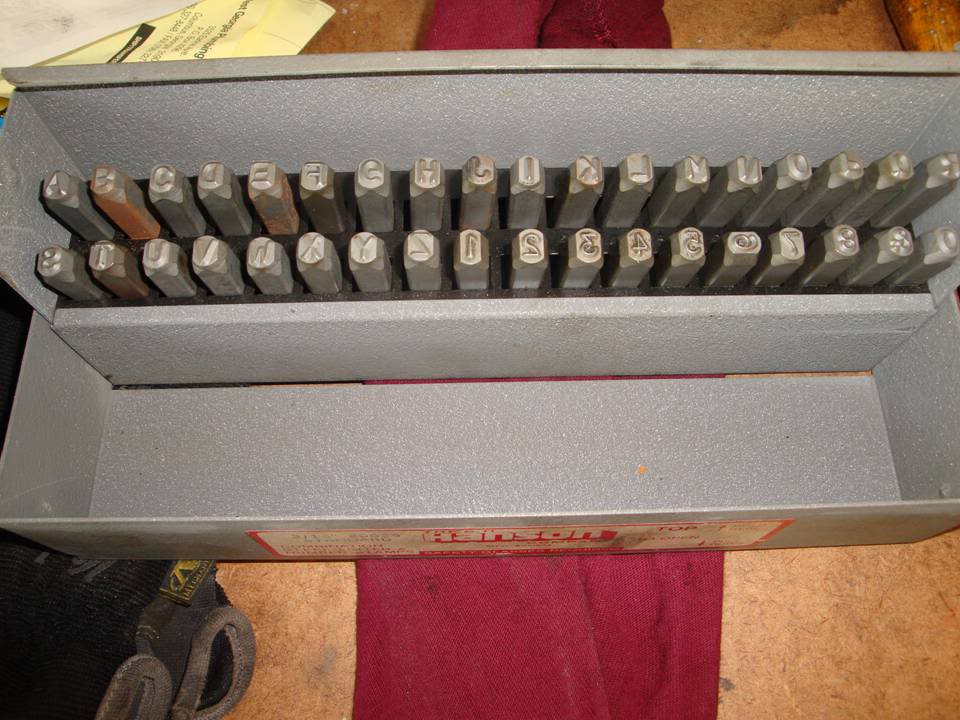
The valve cover is going the get painted, just haven't decided on what I want to do here yet. But to get it prep'd, I wanted to make sure the engine serial was always there, so the valve cover got stamped and the all the stickers got removed.


And, other than the fuel system, the head is ready to go. I'll get the injectors, lines and rail cleaned up tomorrow and put on.
Figured I'd get all the stuff assembled on the head.
Made a few modifications to some existing parts and added some new ones.
First, gutted the grid heater.....I live in AL, it's never cold enough to need it.
Assembled the new intake horn and accessories. 3 of the fittings are for water, 1 is for the boost gauge and the one that has the plug in it will be the second nitrous stage.
Started to put all the crap back on the head so it's ready to go.
1/2 NPT to -12 NPT fitting for the bypass (this isn't the fitting that is staying on it)
Rocker studs are back in.
Modified the fitting for the heater core. 2 reasons for this....First, the opening at the bottom is only 3/16 of an inch, whereas the rest of the fitting is 3/8, so I opend that up to 3/8 to allow full flow through there. Second, I put it in the lathe and took off the top of it that is EXTREMELY sharp and tends to cut the heater core hose and cause a leak.
I forgot to get pics of it before modifying it. These are the after pictures.
The valve cover is going the get painted, just haven't decided on what I want to do here yet. But to get it prep'd, I wanted to make sure the engine serial was always there, so the valve cover got stamped and the all the stickers got removed.
And, other than the fuel system, the head is ready to go. I'll get the injectors, lines and rail cleaned up tomorrow and put on.
#79
07-18-2010, 06:03 PM
Join Date: Dec 2008
Location: East Alabama
Posts: 863
Likes: 0
Received 0 Likes
on
0 Posts
So I started putting a few things back on the motor today.
Got the head as far as I can go until it's put back on, so I figured I'd start on the block.
Test fit the rings and head gasket today.....can't wait to get this thing clamped back down.
Nothing big, just put the motor mounts on, oil pressure sensor, block heater, started cleaning the oil filter head and heat exhanger, but then a buddy got here and we started on his cam issue.
#80
07-19-2010, 01:26 PM
Join Date: Dec 2008
Location: East Alabama
Posts: 863
Likes: 0
Received 0 Likes
on
0 Posts
Okay, a question was asked about wiring the remote mount batteries.
THE 2 most important things on this are:
1 - GOOD GROUNDS!
2 - MAKE SURE YOU HAVE THE SLAVE CABLE BETWEEN THE TWO BATTERIES. The alternator charges at the passenger side, but the voltage and charge state is seen by the ECM on the driver side. If that cable is not there and the ECM sees the driver side going dead, it will tell the alternator to ramp up the voltage. This will cause the system to throw aprox 18 volts to the passenger battery, which is still charged and the battery WILL exploded after a VERY short distance.
Here is how this thing is rigged up. I used, 1 gauge wire throughout.
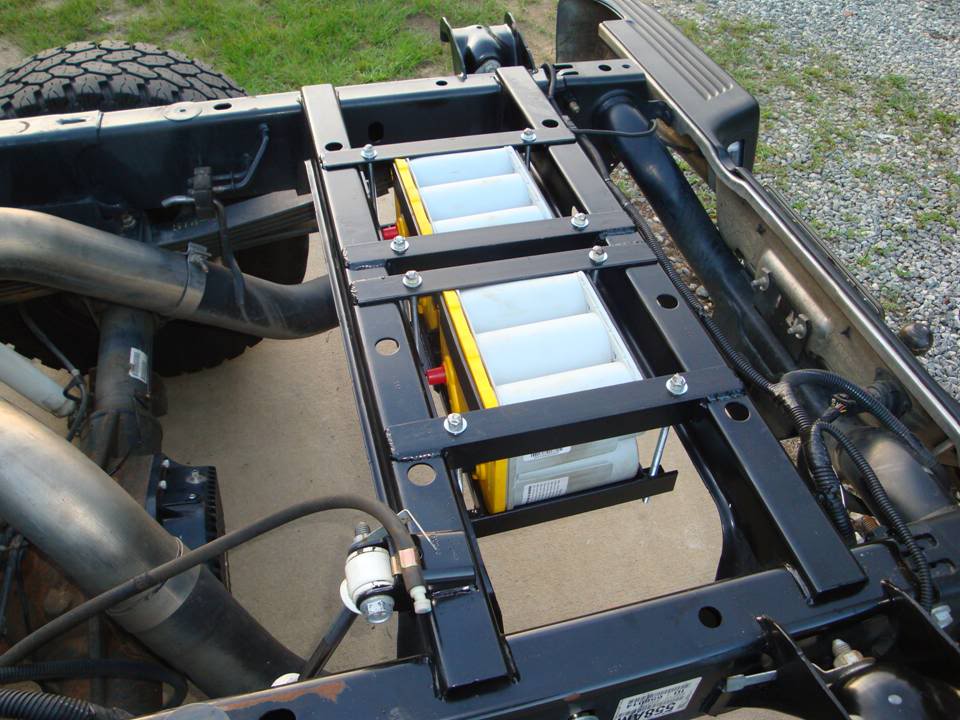
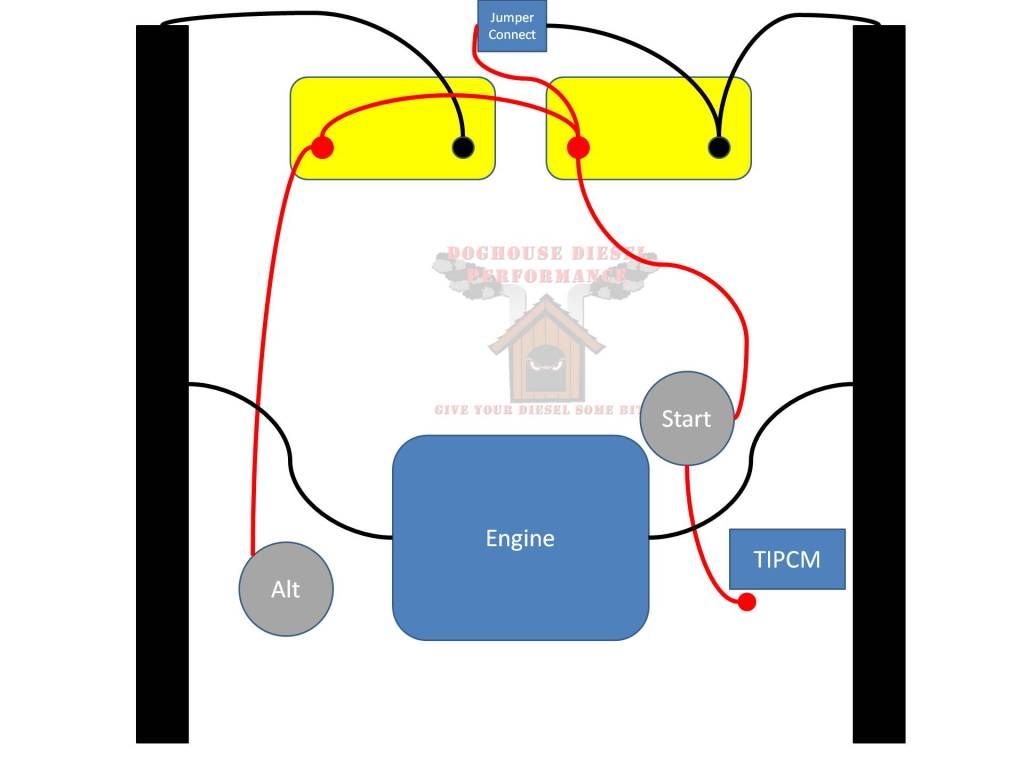
Remember, batteries grounded to frame, engine grounded to frame, body grounded to frame, body grounded to block and you won't have ground issues.
THE 2 most important things on this are:
1 - GOOD GROUNDS!
2 - MAKE SURE YOU HAVE THE SLAVE CABLE BETWEEN THE TWO BATTERIES. The alternator charges at the passenger side, but the voltage and charge state is seen by the ECM on the driver side. If that cable is not there and the ECM sees the driver side going dead, it will tell the alternator to ramp up the voltage. This will cause the system to throw aprox 18 volts to the passenger battery, which is still charged and the battery WILL exploded after a VERY short distance.
Here is how this thing is rigged up. I used, 1 gauge wire throughout.
Remember, batteries grounded to frame, engine grounded to frame, body grounded to frame, body grounded to block and you won't have ground issues.