
2002 Dodge Dakota
#1
 04-01-2013, 07:22 PM


Join Date: Nov 2011
Posts: 19
Likes: 0
Received 0 Likes
on
0 Posts
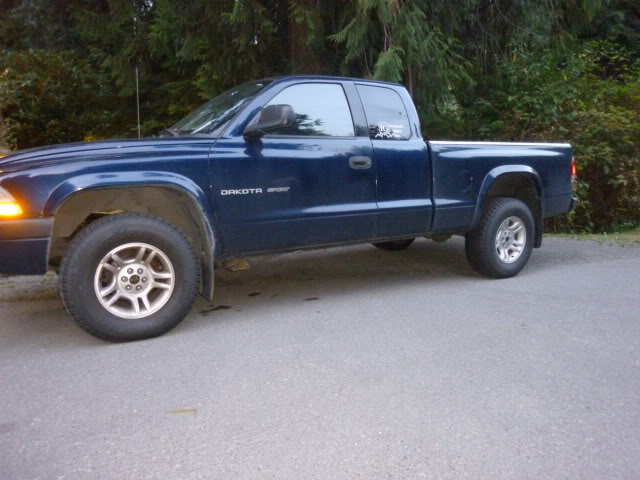
Well, I've been lurking around on this forum for a while now, so I figured I'd show you guys what all I've done with my Dakota. It's a 2002 Dakota Sport 4x4 with a 4.7 in it. I first got it back in September 2011 and the previous owners had pretty much ruined the engine. They said it just had a blown head gasket, but after talking to the guys at the mechanic shop it was sitting at, we found it had a knock and would need quite a bit more work than just putting in a new head gasket. We ended up getting the truck for only 750 bucks! The truck had nearly 200k when we got it, but everything seemed to be in pretty good condition.
The first step of this build log will be of the engine swap me and my dad did. I'm not sure where all my pictures went from my photobucket, but that may actually be a good thing for your guys' sake!
Here's the truck after we unloaded it from the trailer
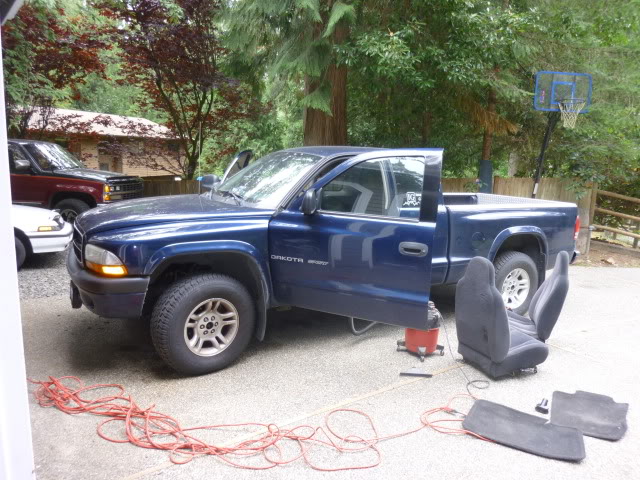
Spent some time cleaning up the interior. It used to be the company truck for a glass company and there was all kinds of crap strewn about the interior.
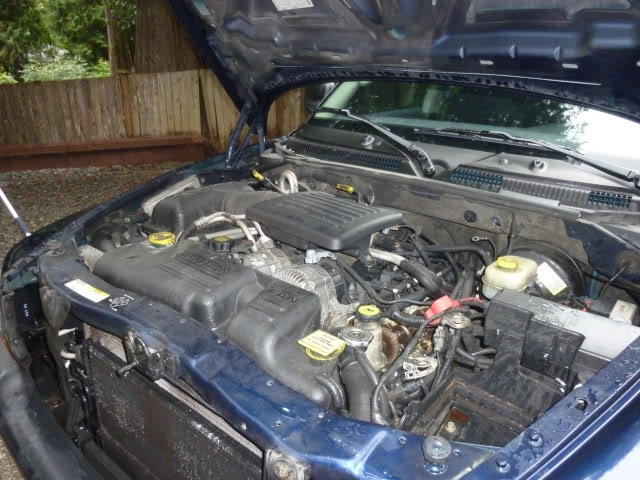
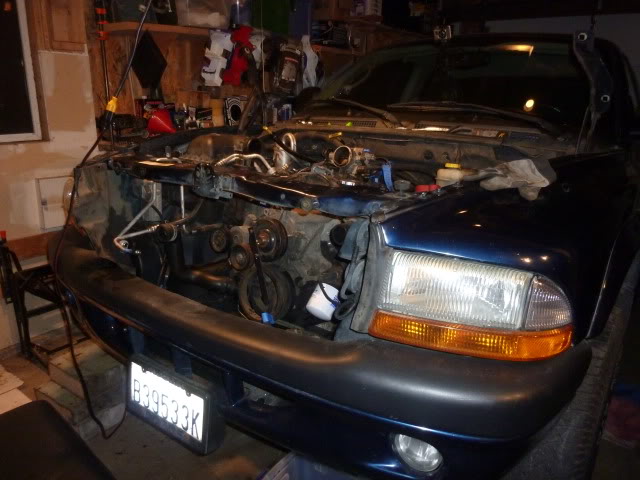
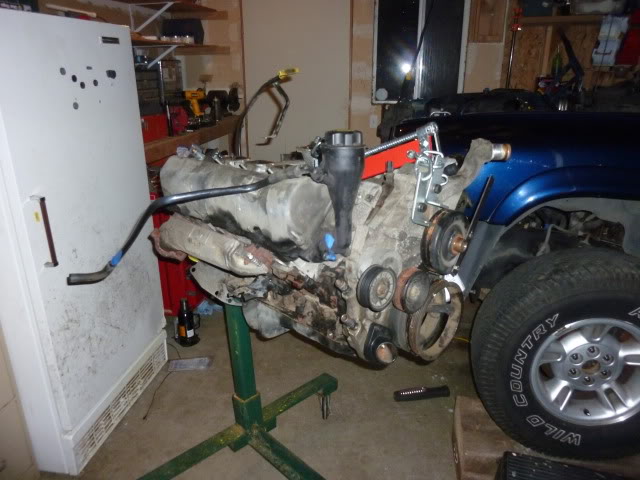
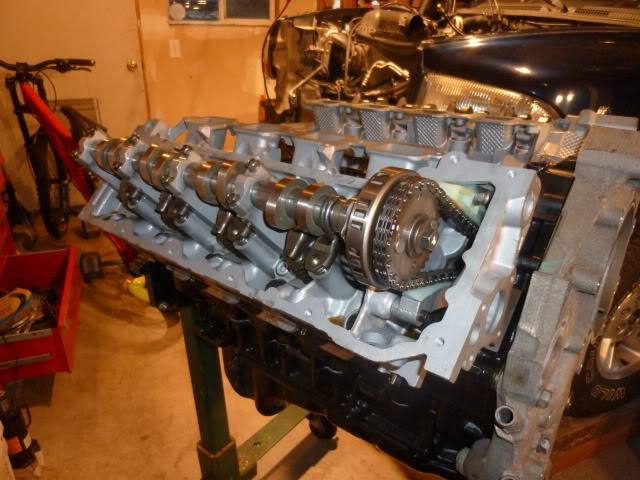
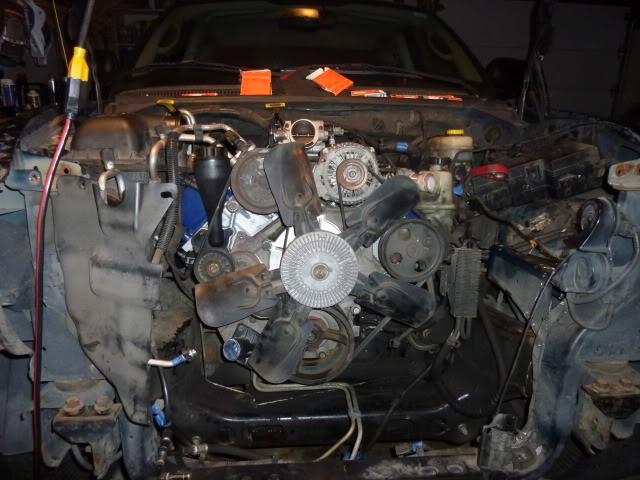
And here's the old motor
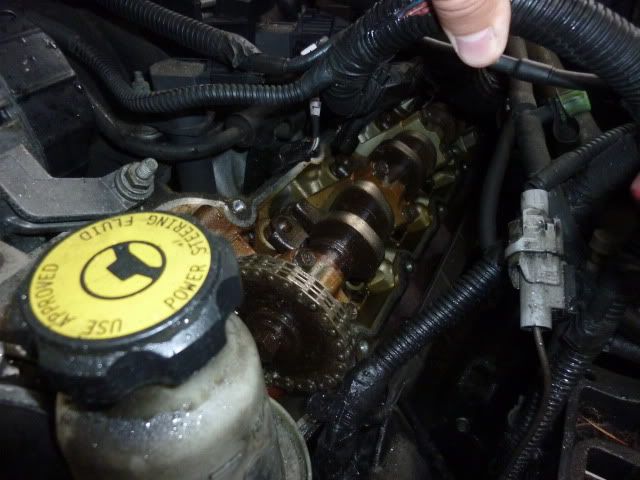
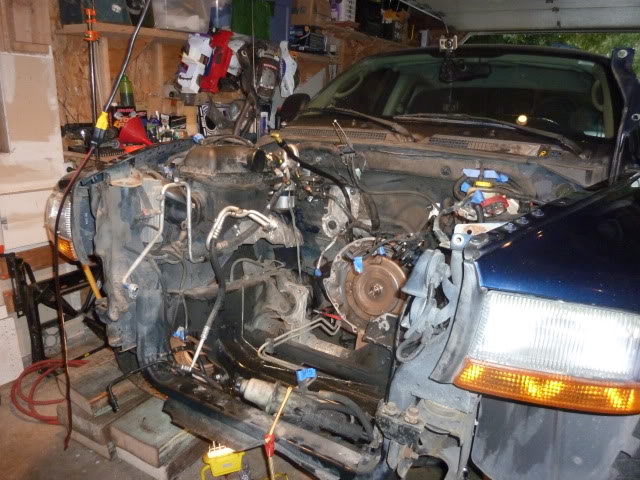
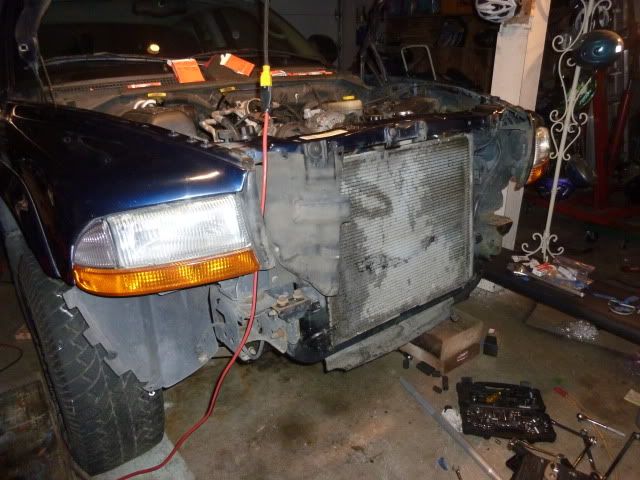
After dismantling quite a few things on the truck...
Got the crane in there
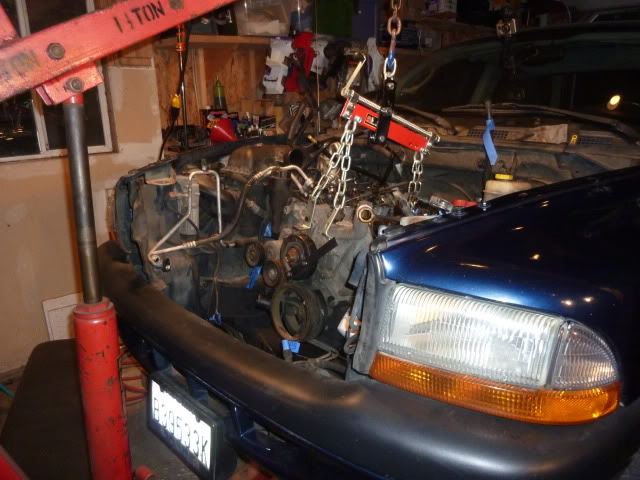
Nice gaping hole in the engine bay
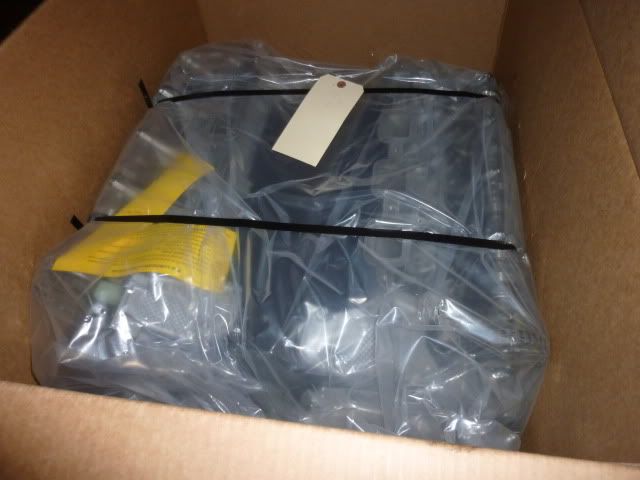
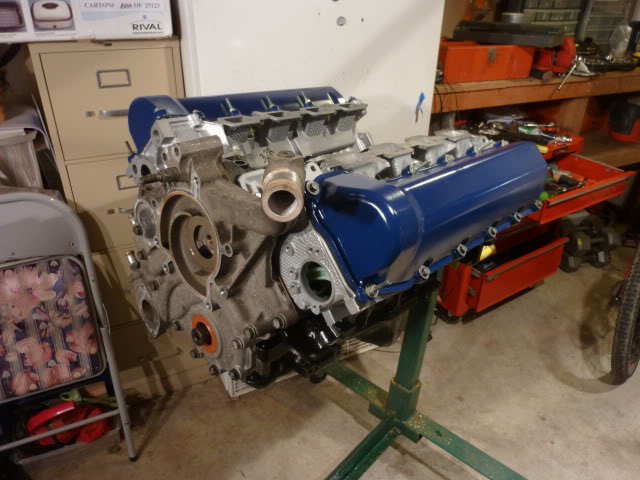
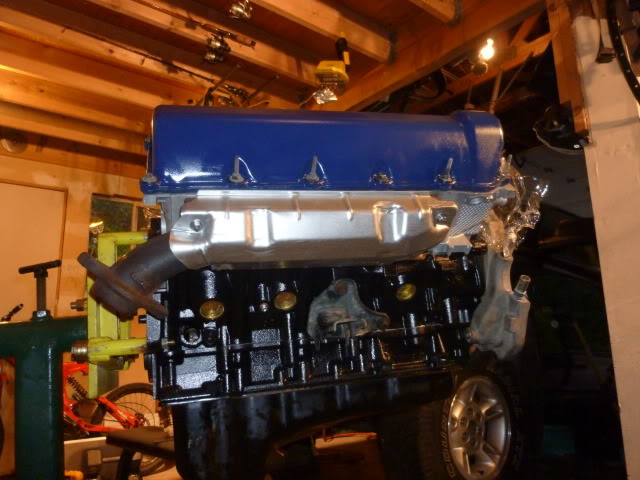
We got this nice delivery a couple days later. It's a remanufactured 4.7 from S and J engines.
I decided to do some work on the old valve covers to make them look a bit nicer. Here they are after a lot of cleaner and elbow grease
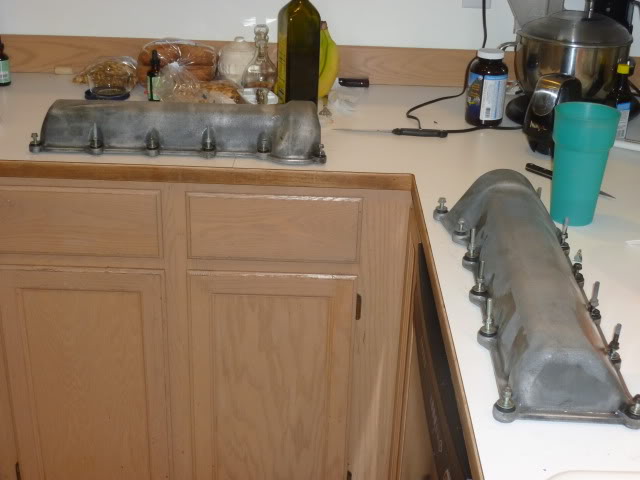
Sprayed them with some blue engine enamel. I think they turned out pretty well!
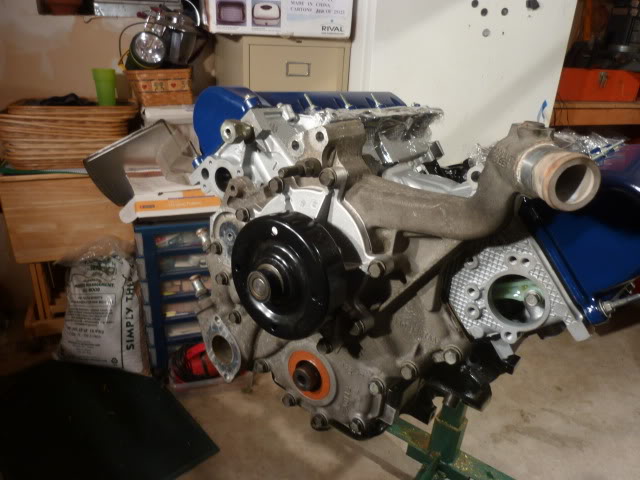
Got the front plate on along with a new water pump
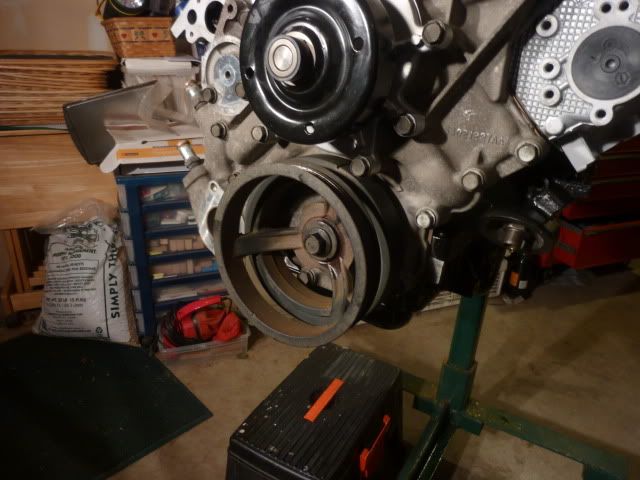
It was a real pain getting the harmonic balancer back on, but we did it!
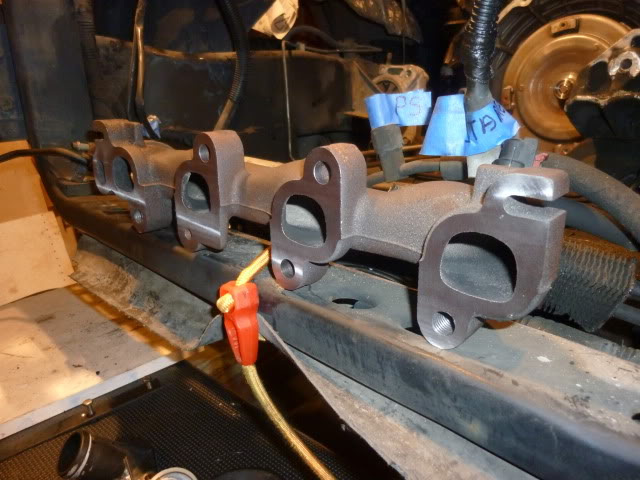
After doing a bit of inspection, we found that the exhaust manifolds had been warped. We ended up taking them to get them machined flat.
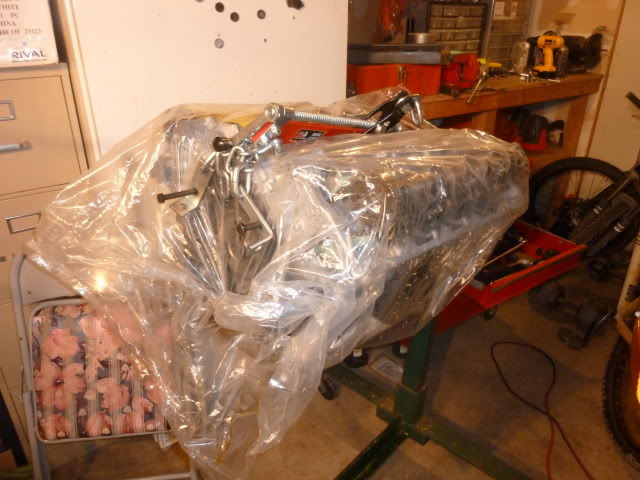
And then it was all ready to go back in!
Back on the crane
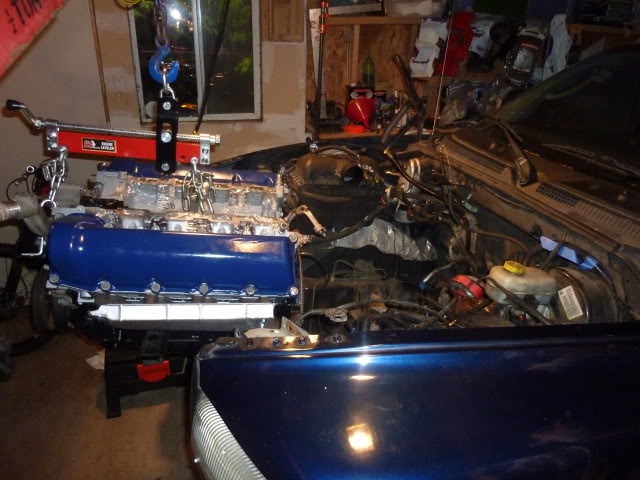
Almost there!
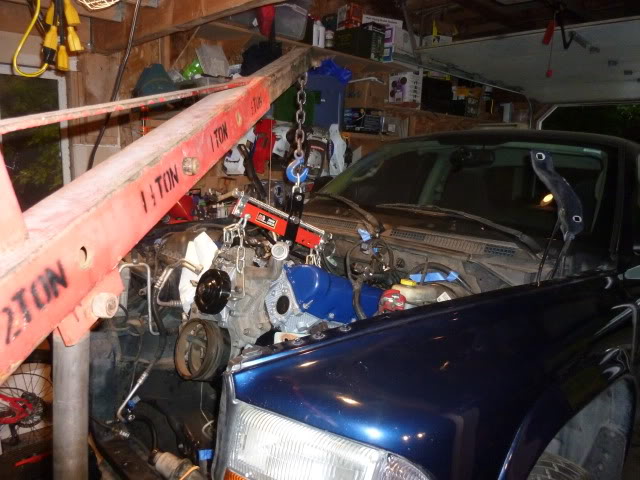
And it's in!
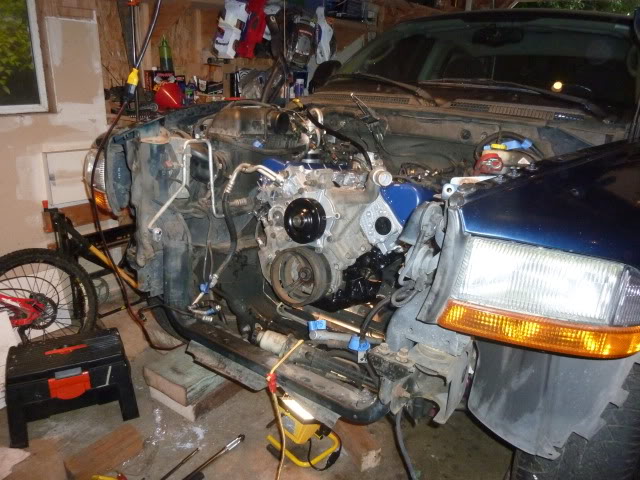
Starting to put it all back together

Alternator, pumps, and fan went back on
Getting it all finished up
After getting it all back together it started right up! The check engine light was on, but it just turned out to be that the o2 sensors had gone bad. Other than that, it worked pretty flawlessly and is still going strong a year and a half later. I've put about 20,000 miles on the new engine without a single issue!
Onward to part 2!
The first step of this build log will be of the engine swap me and my dad did. I'm not sure where all my pictures went from my photobucket, but that may actually be a good thing for your guys' sake!
Here's the truck after we unloaded it from the trailer
Spent some time cleaning up the interior. It used to be the company truck for a glass company and there was all kinds of crap strewn about the interior.
And here's the old motor
After dismantling quite a few things on the truck...
Got the crane in there
Nice gaping hole in the engine bay
We got this nice delivery a couple days later. It's a remanufactured 4.7 from S and J engines.
I decided to do some work on the old valve covers to make them look a bit nicer. Here they are after a lot of cleaner and elbow grease
Sprayed them with some blue engine enamel. I think they turned out pretty well!
Got the front plate on along with a new water pump
It was a real pain getting the harmonic balancer back on, but we did it!
After doing a bit of inspection, we found that the exhaust manifolds had been warped. We ended up taking them to get them machined flat.
And then it was all ready to go back in!
Back on the crane
Almost there!
And it's in!
Starting to put it all back together
Alternator, pumps, and fan went back on
Getting it all finished up
After getting it all back together it started right up! The check engine light was on, but it just turned out to be that the o2 sensors had gone bad. Other than that, it worked pretty flawlessly and is still going strong a year and a half later. I've put about 20,000 miles on the new engine without a single issue!
Onward to part 2!
Last edited by REVOofRustler; 04-02-2013 at 09:40 PM.
#2
04-01-2013, 07:23 PM
Join Date: Nov 2011
Posts: 19
Likes: 0
Received 0 Likes
on
0 Posts
Part 2
A lot of people on here seem to go more towards performance when modifying their cars/trucks. However, there's pretty much zero aftermarket support for 2nd gen Dakotas, so I ended up going a different direction with mine. Over the summer of 2012, I pretty much got addicted to car audio. I already had an Alpine Type R 12" sub out of my old Accord, but after hearing a Jeep with two Crossfire XS-V1 12s I just wasn't happy with my little system. That's when I really started looking into what all goes into putting together such as building custom boxes, electrical systems, etc.
After some research, I decided it was time to try designing and building my own custom sub enclosure for my Type R. I came up with a design that had a net volume of 2.25 cubic feet and tuned to about 33hz.
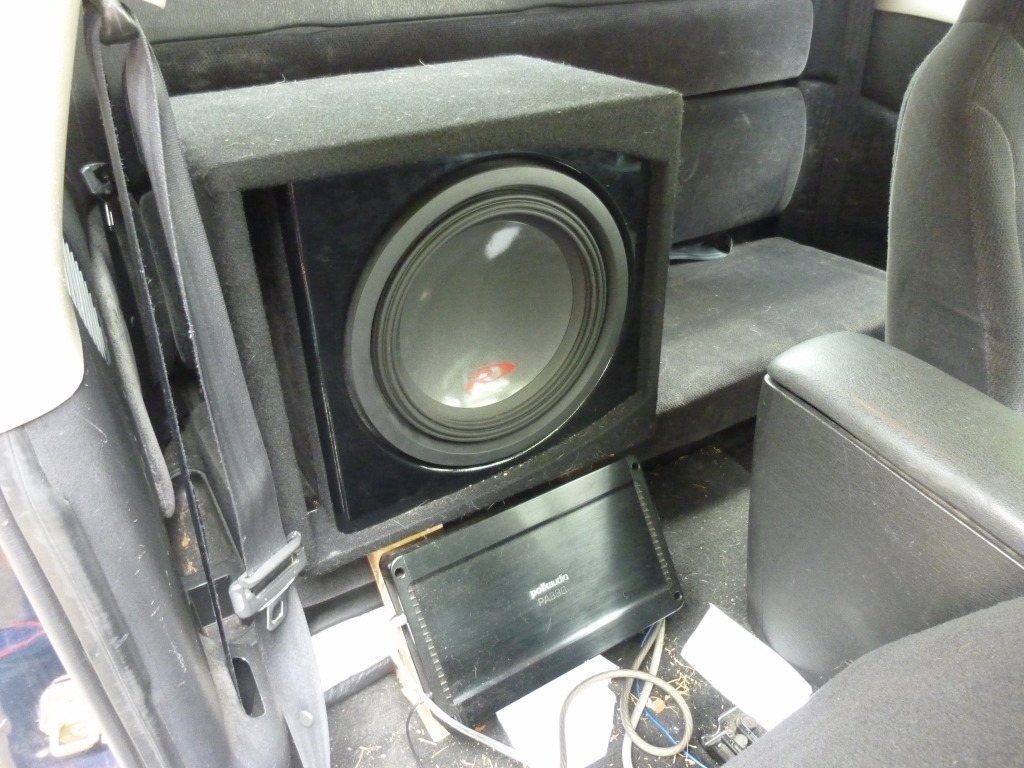
Here's the smaller system that I had already installed. The wires were messy and it didn't look quite as clean as I would have liked.
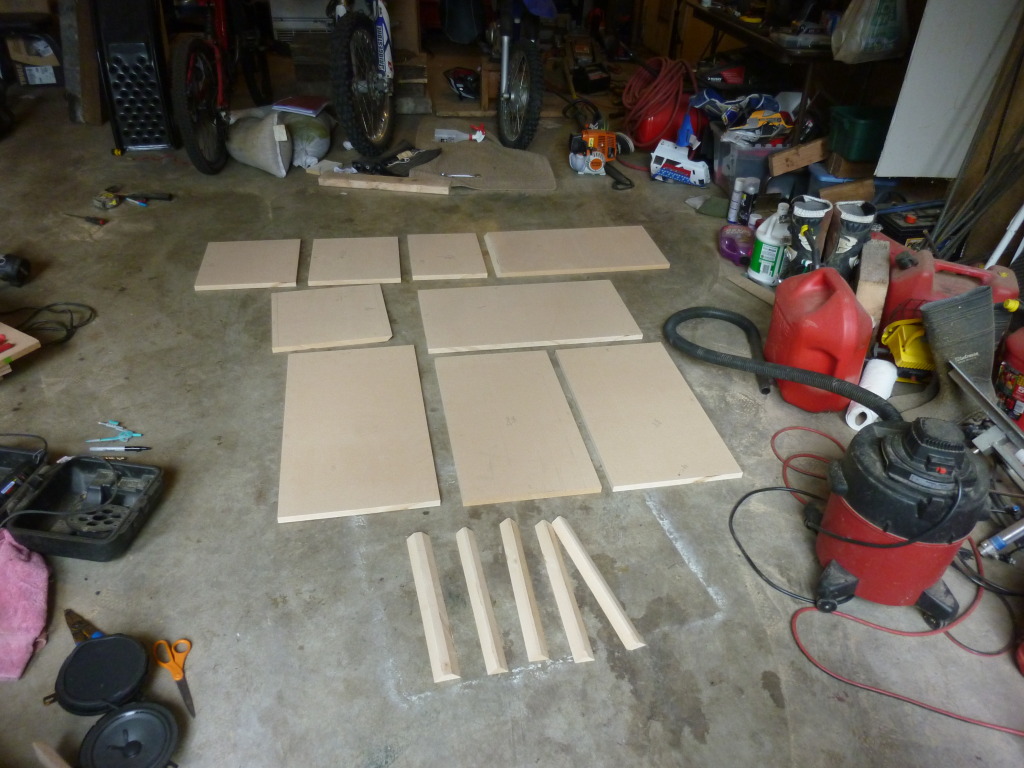
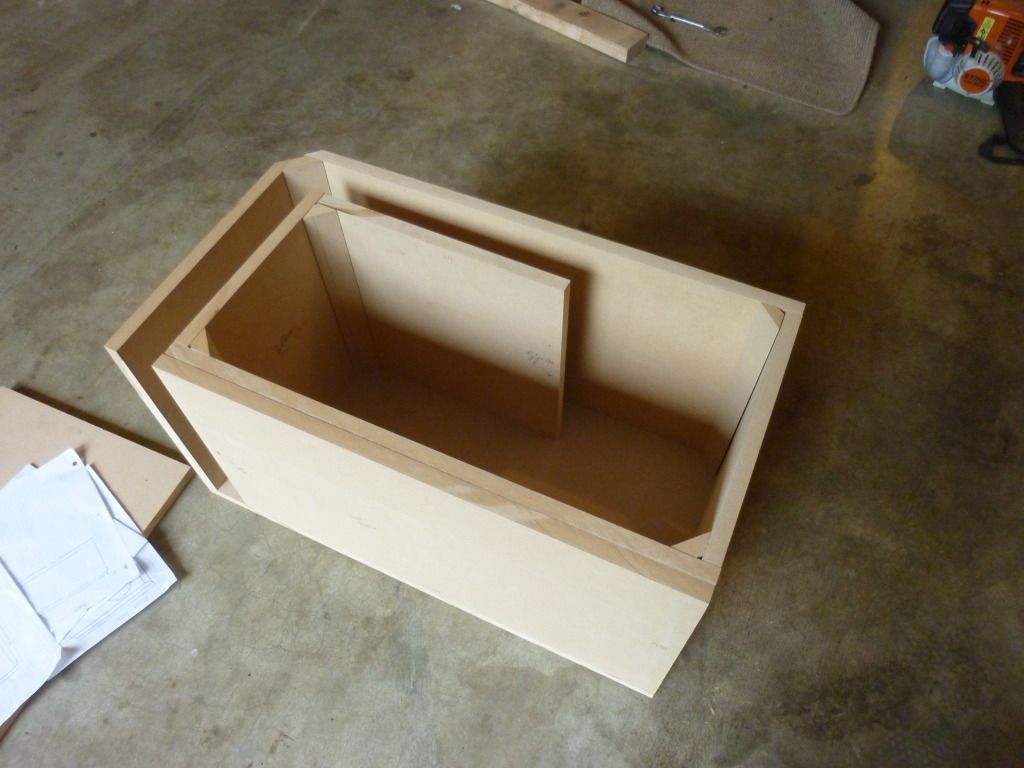
Here's all the wood that me and my buddy cut out for the new box. I used 3/4" MDF
Mockup of the box
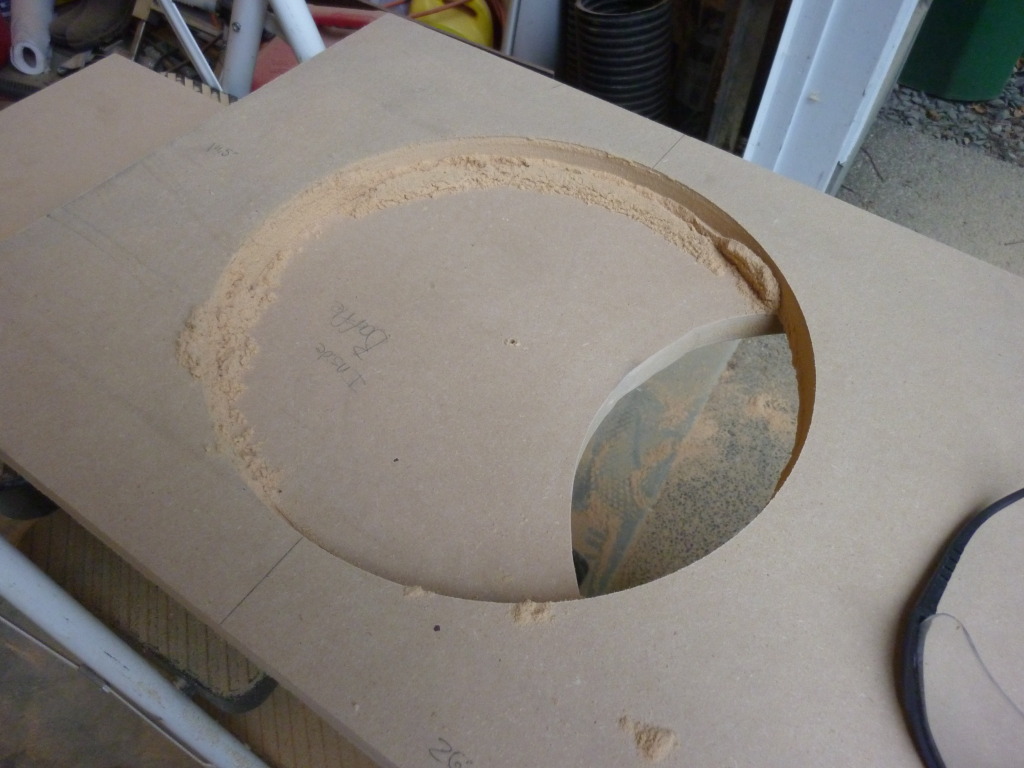
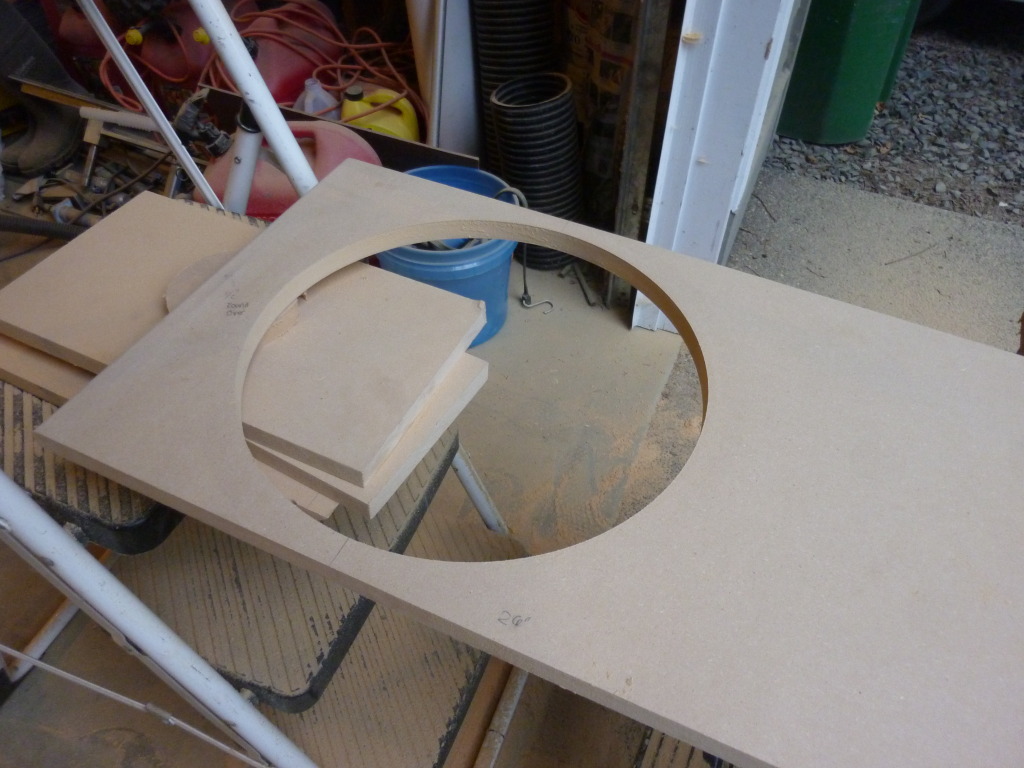
I made this circle jig for my router so that I could make perfect circles in the baffles.

Fits nice!

The baffle on a subwoofer box is the face of the box that the sub is mounted in. I chose to do a double baffle so that the box would be braced a bit better, and also so that I could flush mount the sub in the box. Here's the outside baffle with the hole cut out
I used a 3/4" roundover on the outside baffle
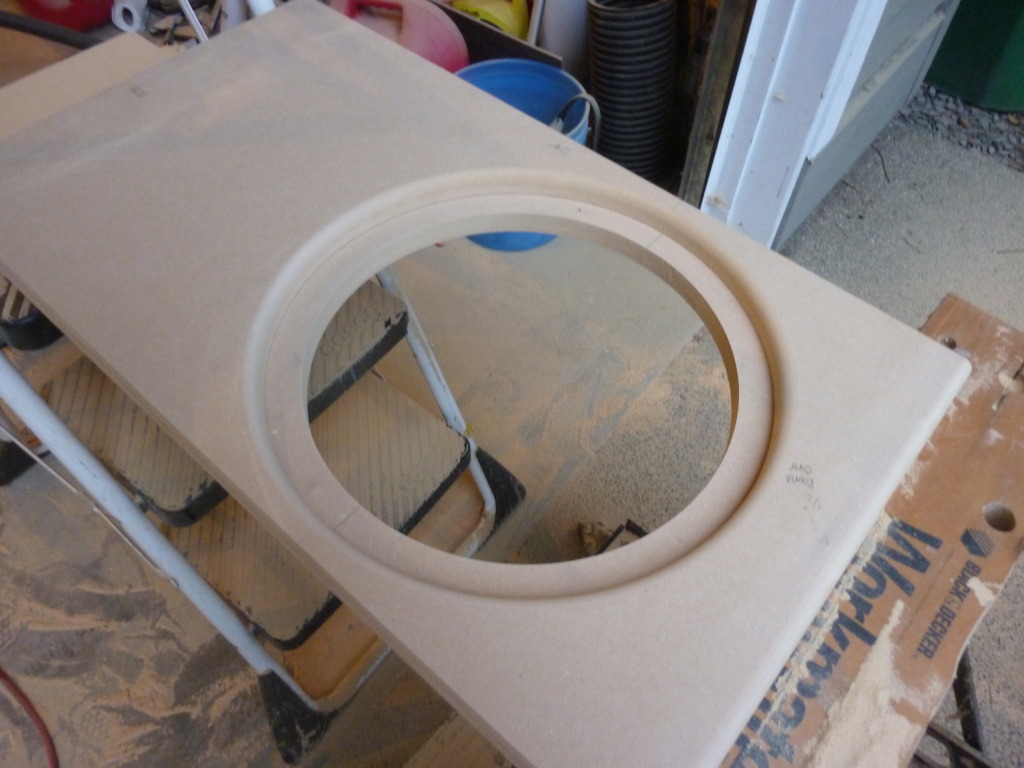
Flush mount
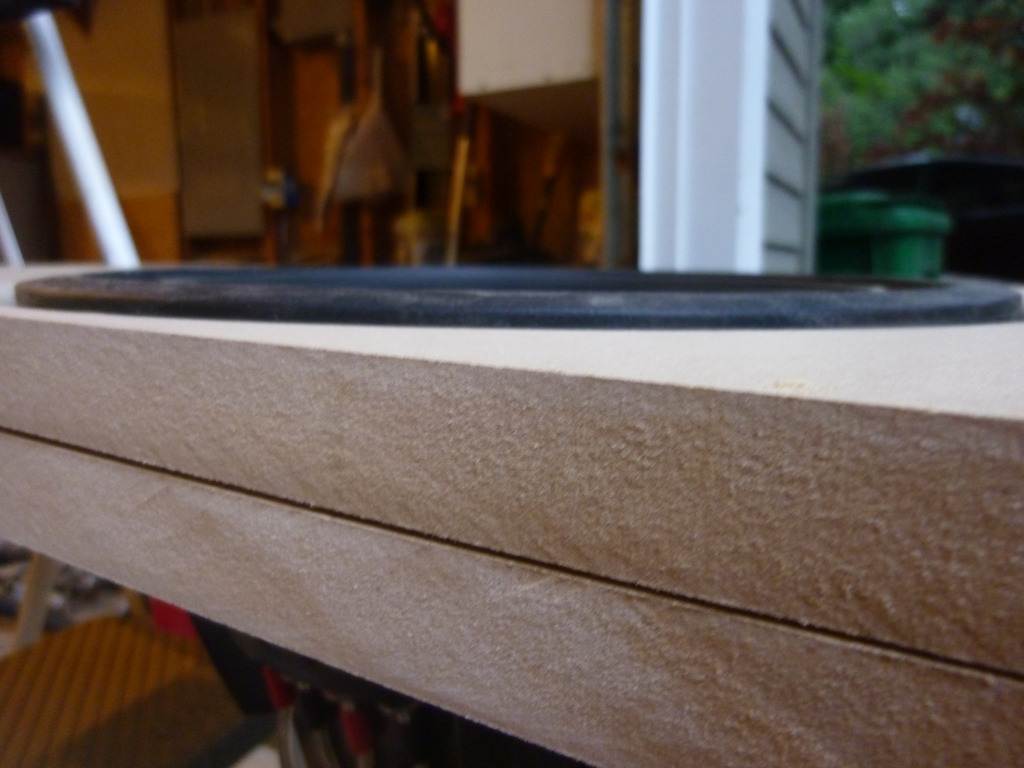
Then it was time to glue the baffles together
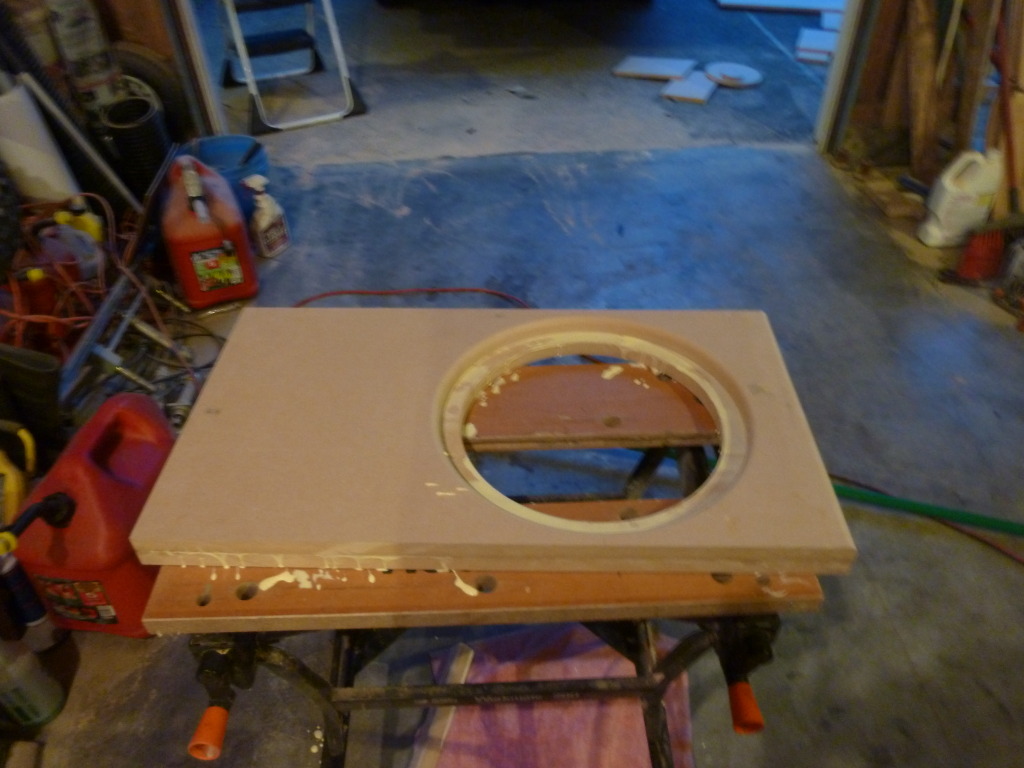
Applied some weight

After the glue had dried, it was time to start drilling and countersinking screw holes.
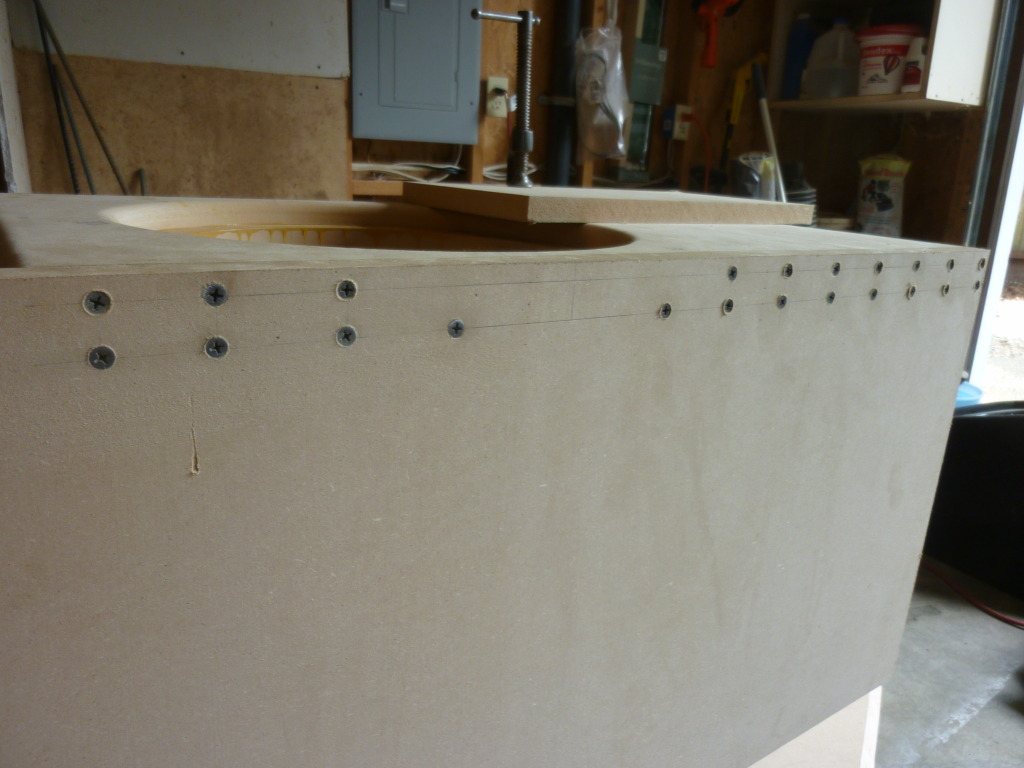
Once I got that done, I had to take the box apart again so I could start gluing it. Something I found out after building the box is that screws are used just to keep pressure on the joints while the glue dries. This is because the glue actually creates a stronger joint/bond than the screws can!
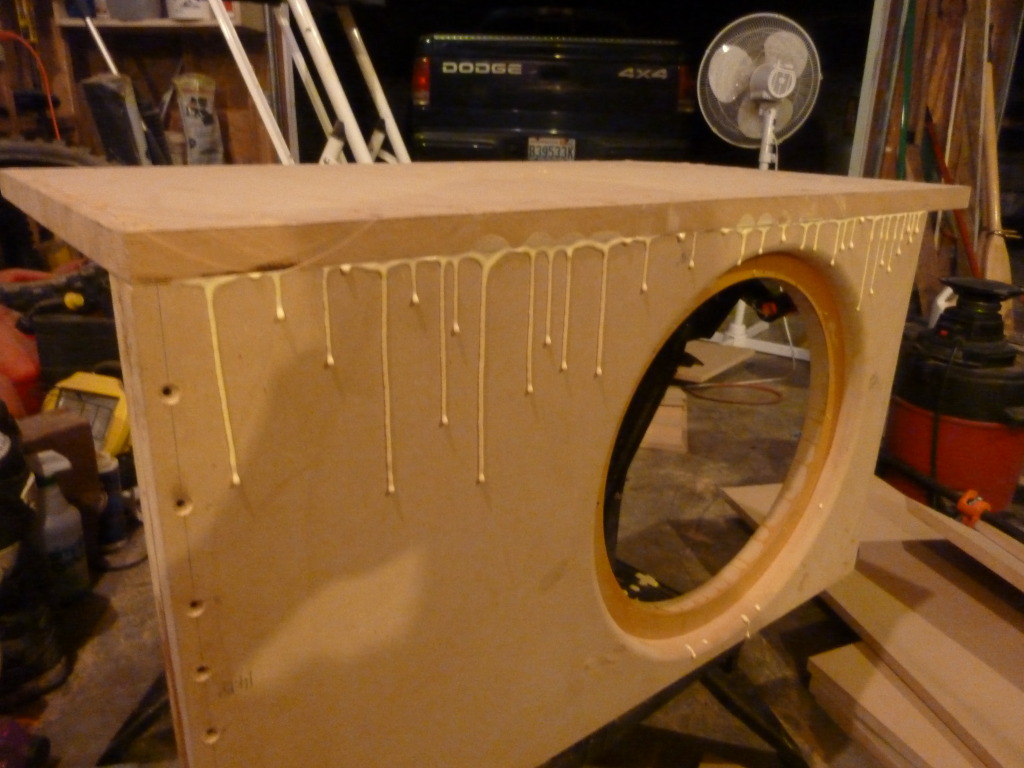
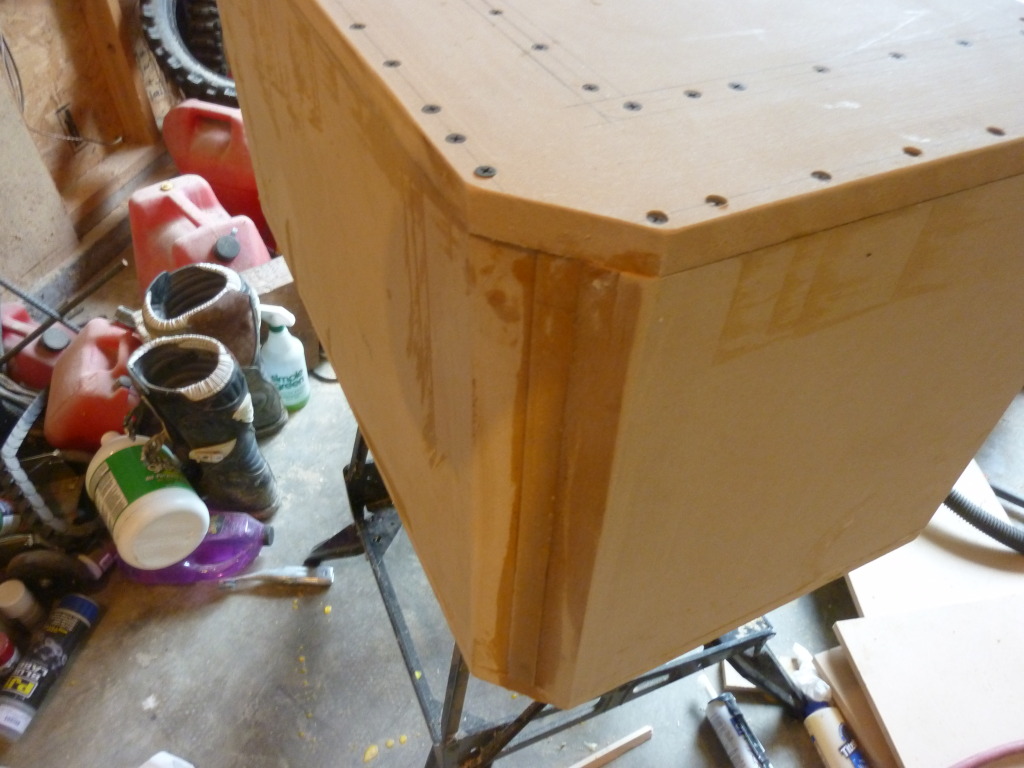
Here's the box after it was all dry

I made a 45 degree angle out of this corner so that it would be able to sit as far to the side of the rear bench seat as possible
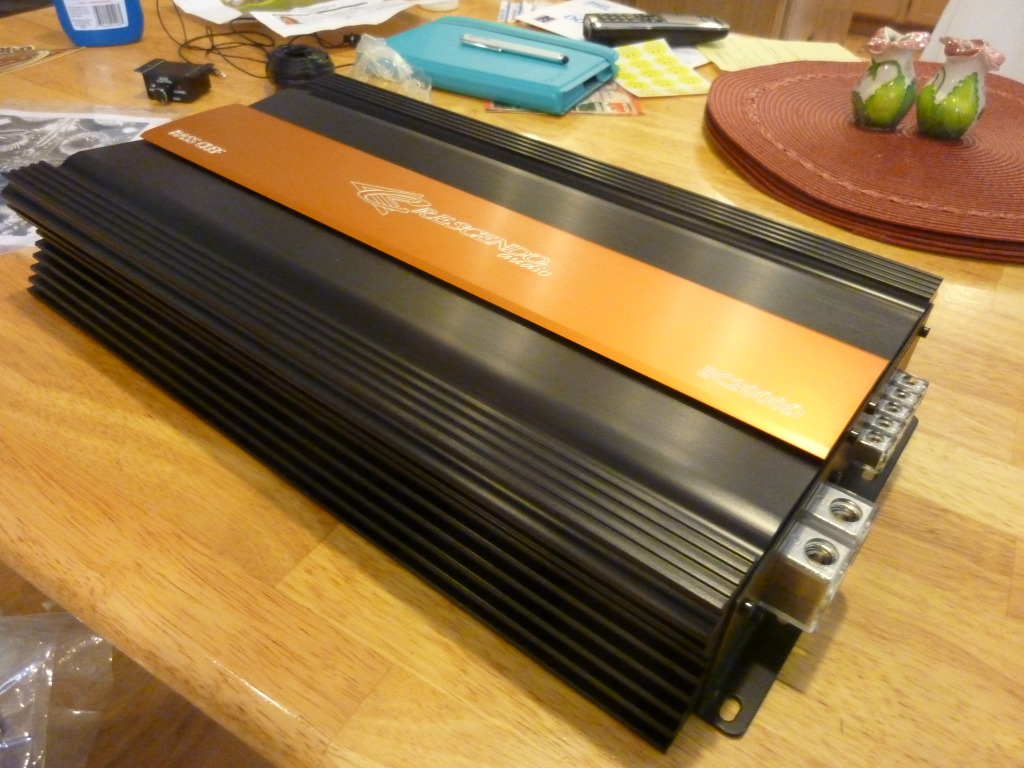
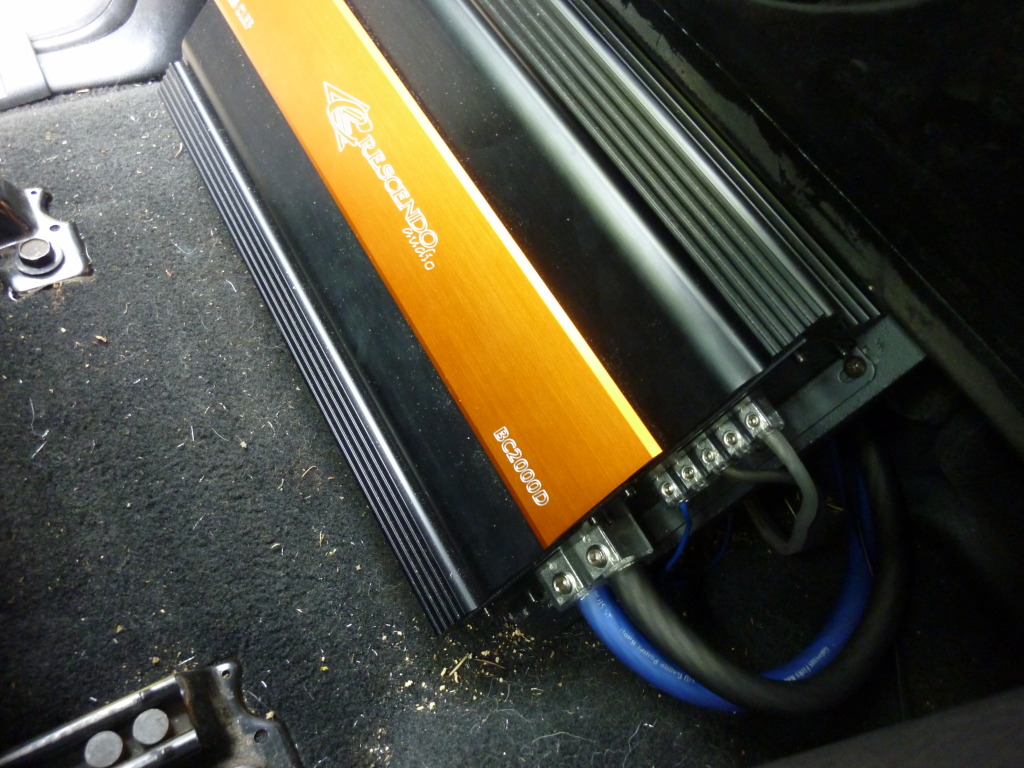
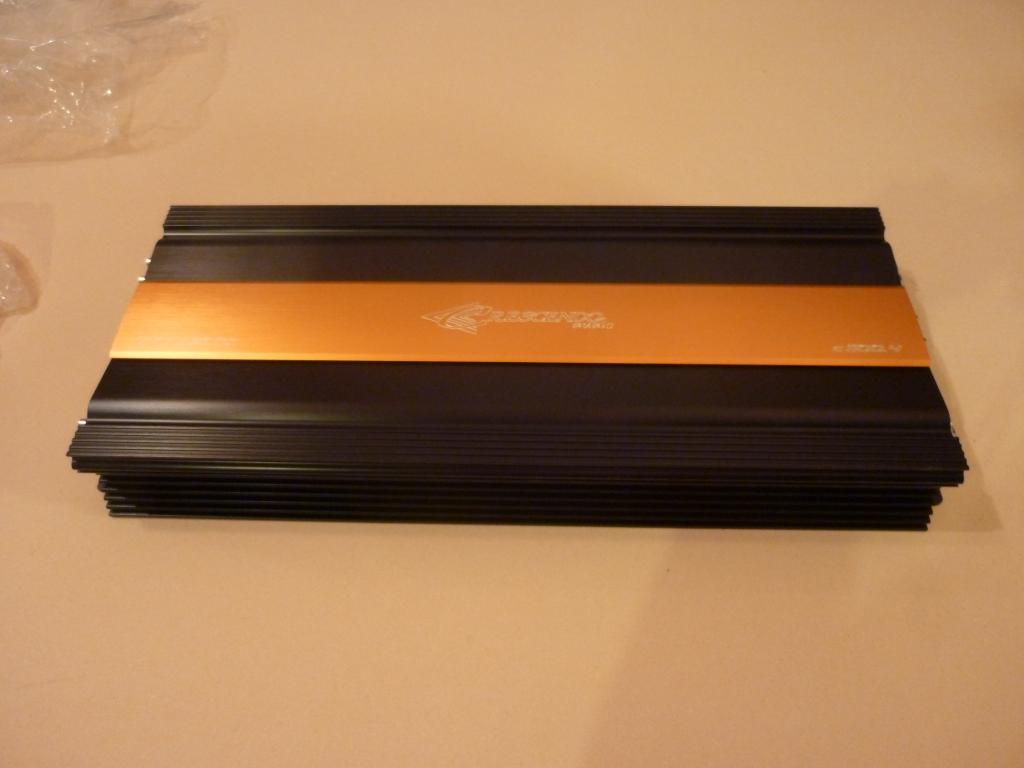
I also got a goody for my truck during the box building process. It's a Crescendo Audio BC2000d amplifier. This model puts out over 2000 watts at 1 ohm.
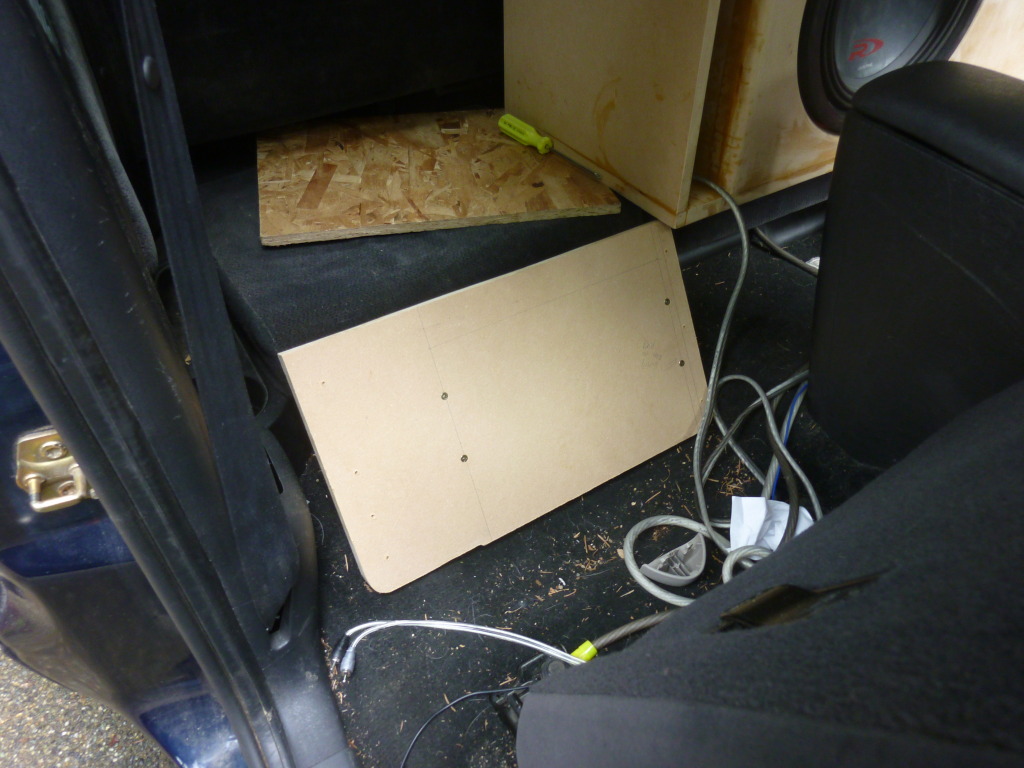
My little amp rack
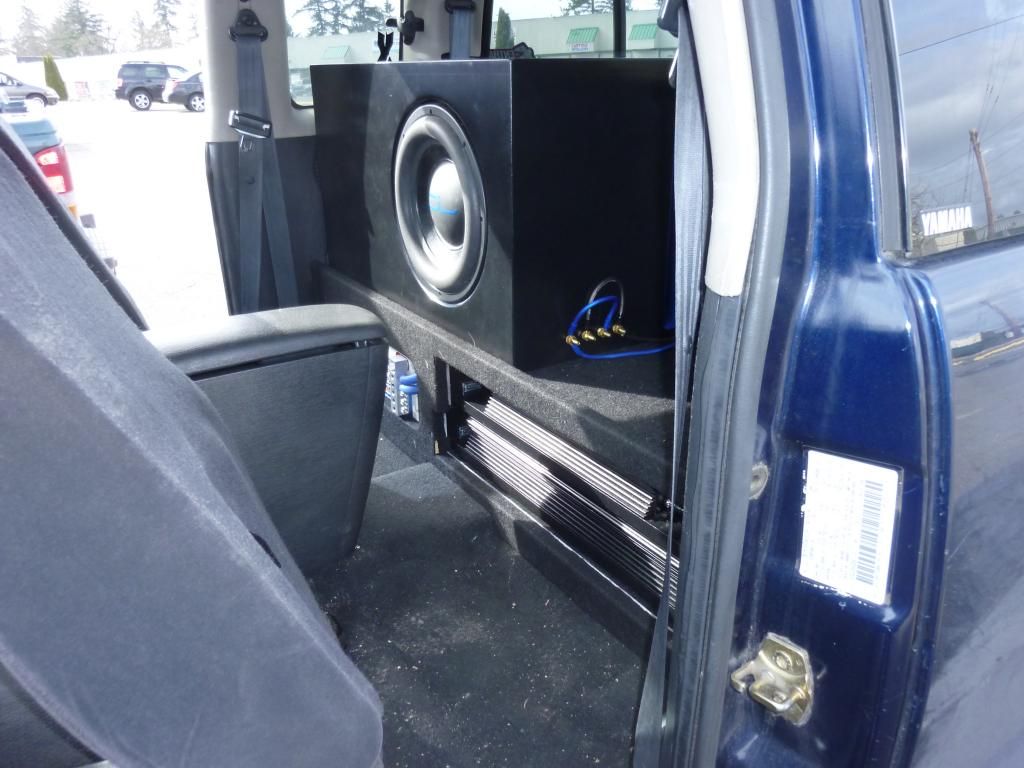
All set up in the truck!
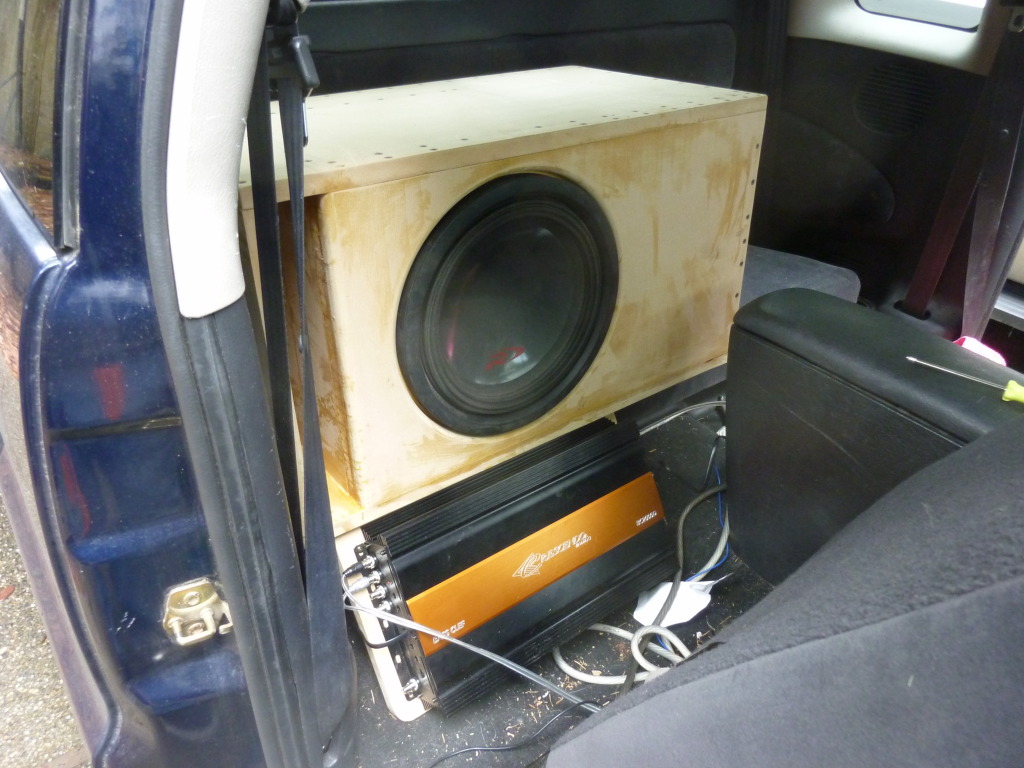
The box sounded worlds better than my old one! The sound quality had improved, it could play lower notes than before, and it was noticeably louder! It all still looked kind of ugly back there, but I'll save that for another part of this build log!
A lot of people on here seem to go more towards performance when modifying their cars/trucks. However, there's pretty much zero aftermarket support for 2nd gen Dakotas, so I ended up going a different direction with mine. Over the summer of 2012, I pretty much got addicted to car audio. I already had an Alpine Type R 12" sub out of my old Accord, but after hearing a Jeep with two Crossfire XS-V1 12s I just wasn't happy with my little system. That's when I really started looking into what all goes into putting together such as building custom boxes, electrical systems, etc.
After some research, I decided it was time to try designing and building my own custom sub enclosure for my Type R. I came up with a design that had a net volume of 2.25 cubic feet and tuned to about 33hz.
Here's the smaller system that I had already installed. The wires were messy and it didn't look quite as clean as I would have liked.
Here's all the wood that me and my buddy cut out for the new box. I used 3/4" MDF
Mockup of the box
I made this circle jig for my router so that I could make perfect circles in the baffles.
Fits nice!
The baffle on a subwoofer box is the face of the box that the sub is mounted in. I chose to do a double baffle so that the box would be braced a bit better, and also so that I could flush mount the sub in the box. Here's the outside baffle with the hole cut out
I used a 3/4" roundover on the outside baffle
Flush mount
Then it was time to glue the baffles together
Applied some weight
After the glue had dried, it was time to start drilling and countersinking screw holes.
Once I got that done, I had to take the box apart again so I could start gluing it. Something I found out after building the box is that screws are used just to keep pressure on the joints while the glue dries. This is because the glue actually creates a stronger joint/bond than the screws can!
Here's the box after it was all dry
I made a 45 degree angle out of this corner so that it would be able to sit as far to the side of the rear bench seat as possible
I also got a goody for my truck during the box building process. It's a Crescendo Audio BC2000d amplifier. This model puts out over 2000 watts at 1 ohm.
My little amp rack
All set up in the truck!
The box sounded worlds better than my old one! The sound quality had improved, it could play lower notes than before, and it was noticeably louder! It all still looked kind of ugly back there, but I'll save that for another part of this build log!
#3
04-01-2013, 07:24 PM
Join Date: Nov 2011
Posts: 19
Likes: 0
Received 0 Likes
on
0 Posts
Part 3
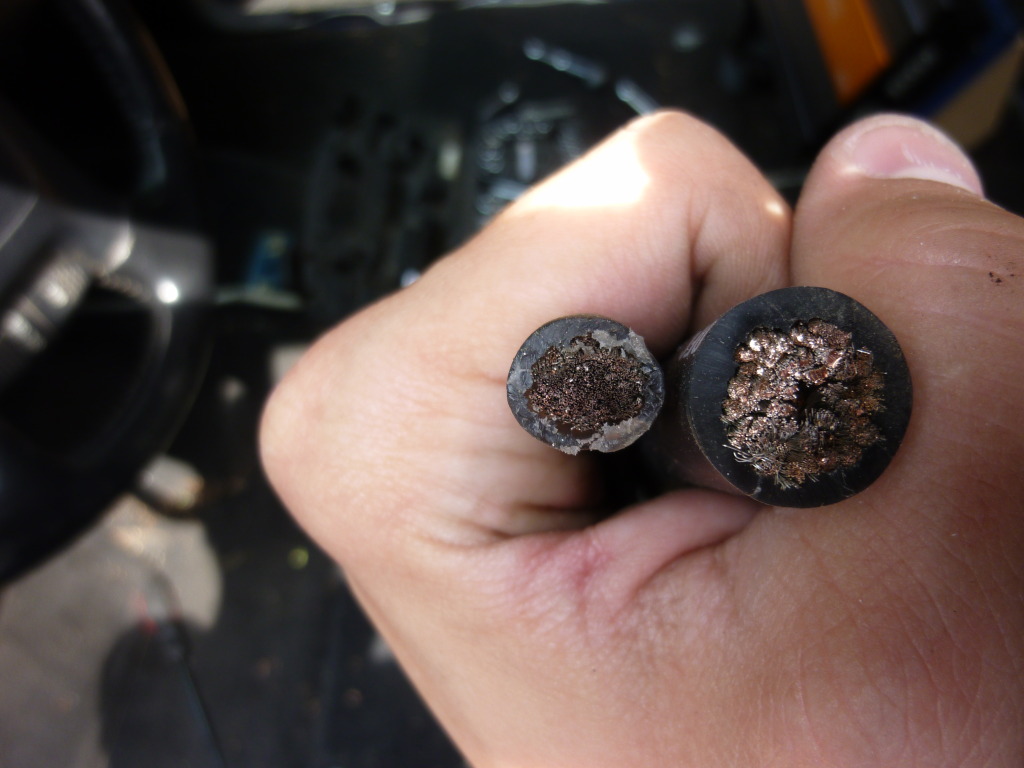
Once I had the box done, it was time to upgrade some wiring. I had some 4 gauge wiring from Best Buy running to the amp, but it wasn't sufficient enough for what I had in mind. It was fine for the Type R because I was running it at a 2 ohm load where the amp will put out about 1000 watts RMS, but I was planning on getting a new sub that could handle the full 2000+ watts that the amp is capable of producing.
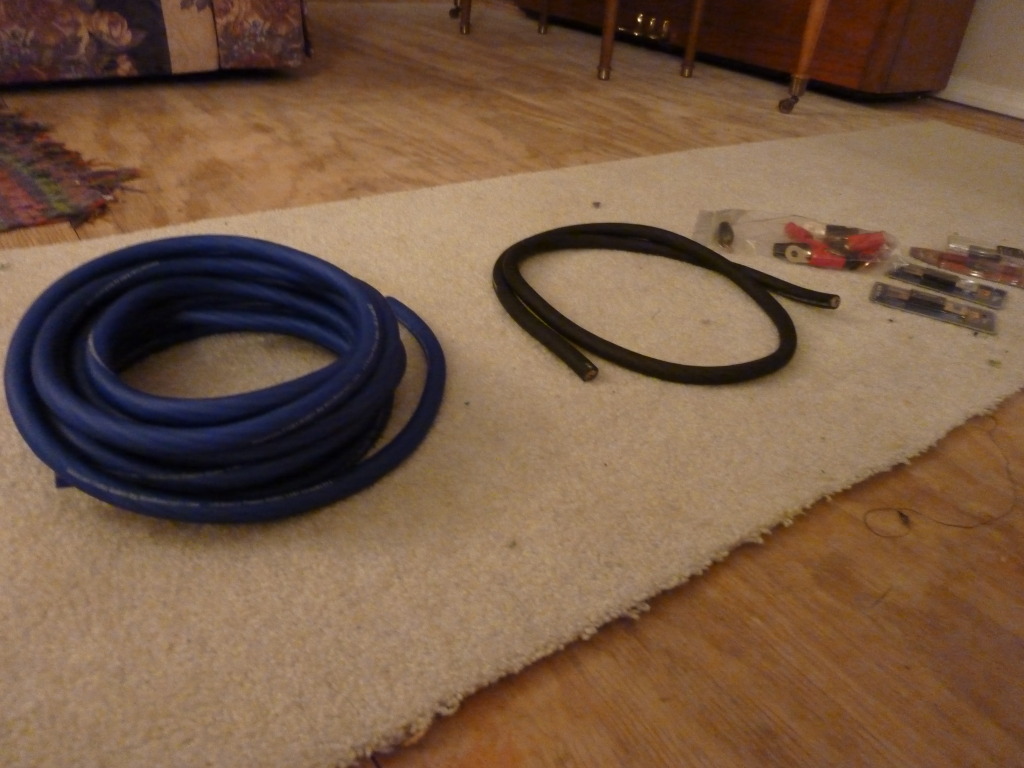
Here's my new wiring. It's 1/0 KnuKonceptz OFC wire.
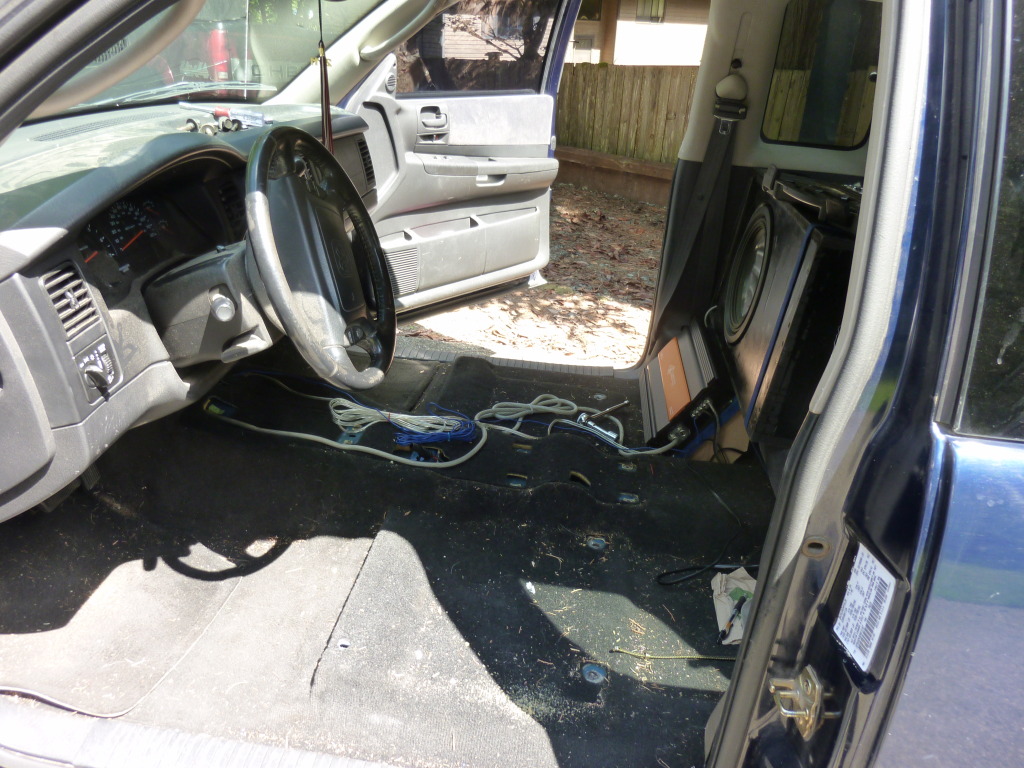
Then it was time to start tearing into my truck
I had also painted the box before I got the new wiring. It was a pretty nasty paint job, but it helped make everything less visible to people walking by my truck.
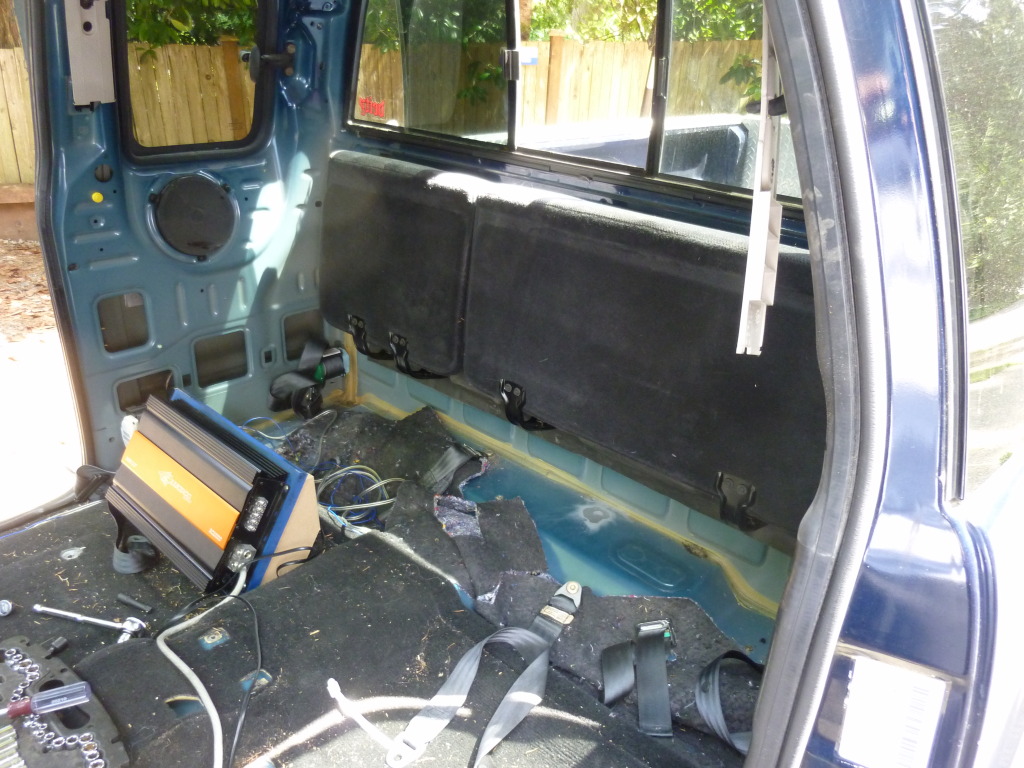
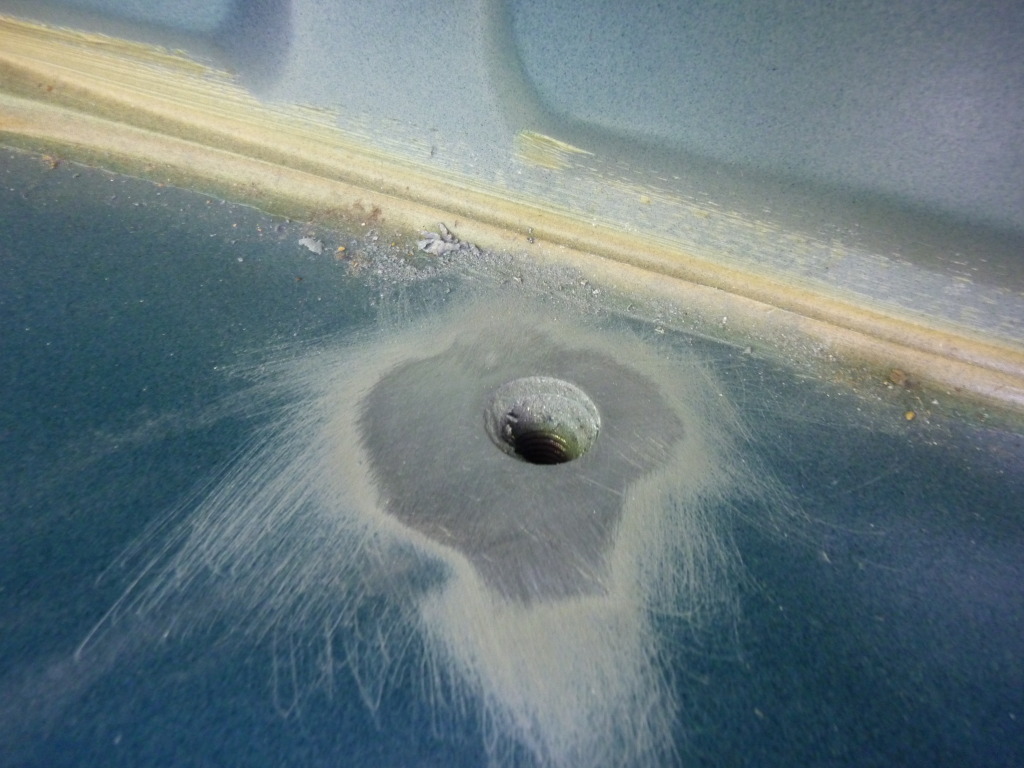
Sanded down one of the rear seat belt mounts to use as a ground
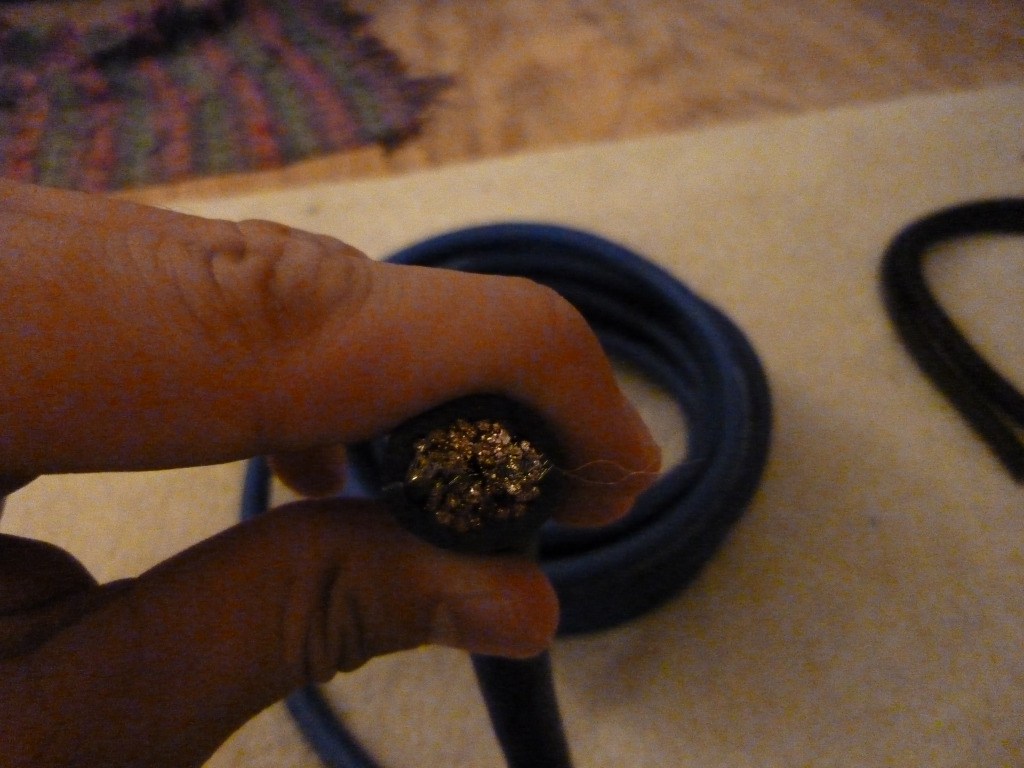
Old wire vs. new wire
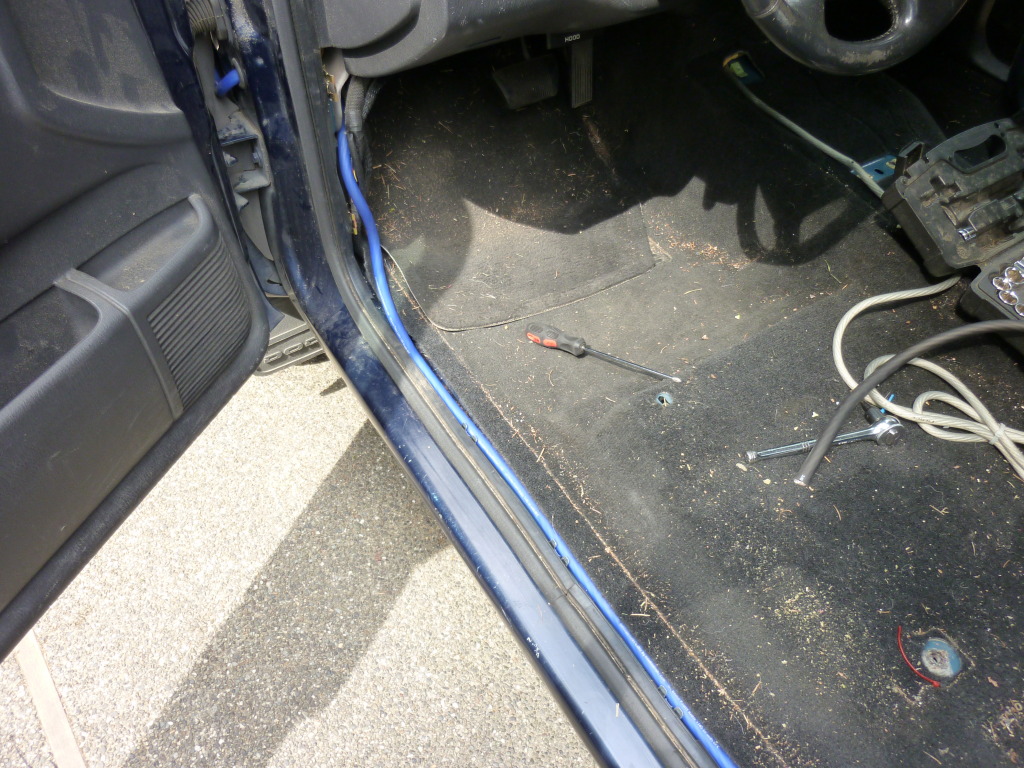
I ran the wire from the engine bay down to the door where I went through an unused grommet. From there, the wire just pops out behind the kick panel and keeps it nice and hidden from view. Then I ran the wire under the door sill trim to the back of the truck.
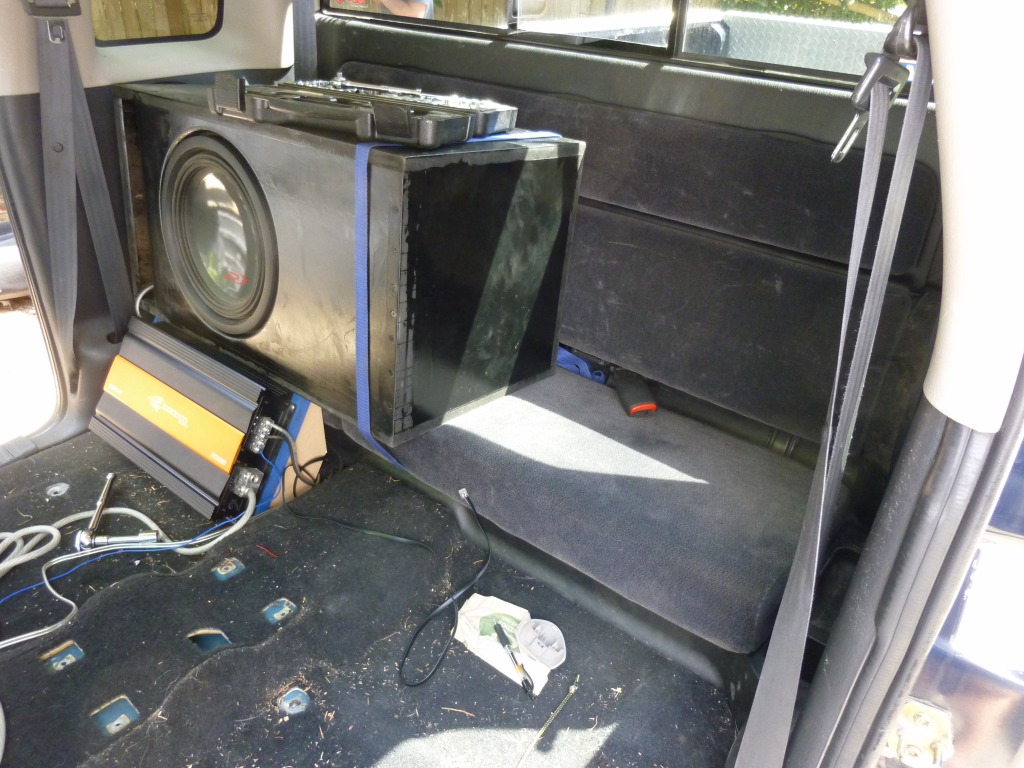
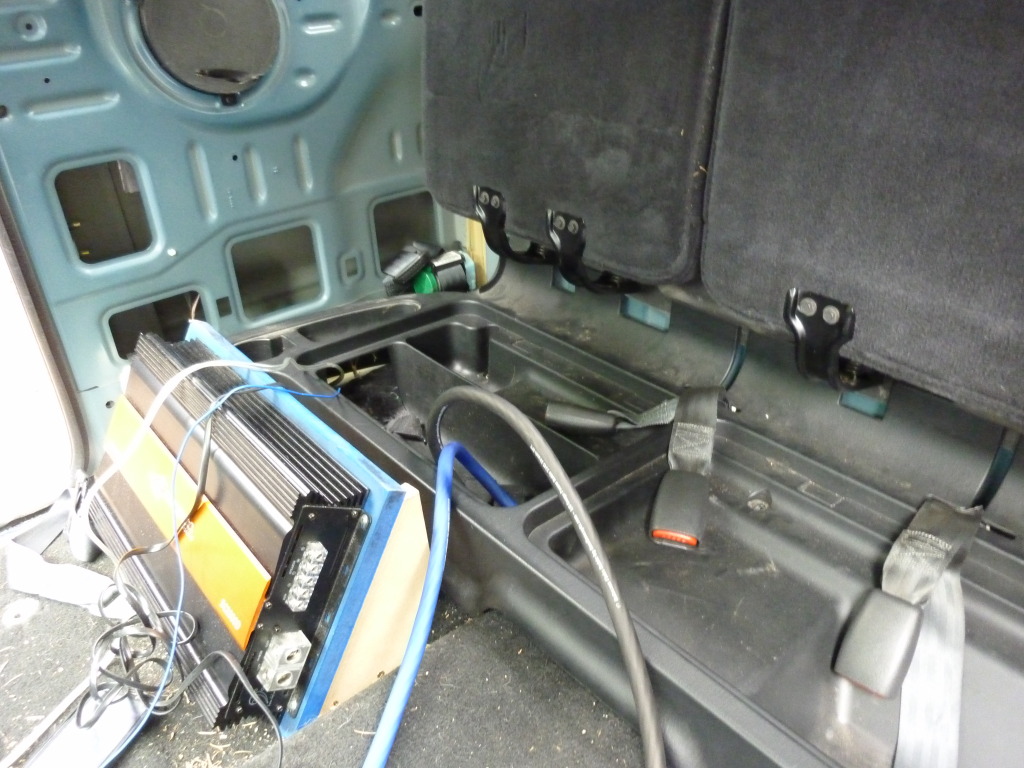
Ran the wire underneath and into the cargo bin behind the amp.
Mounted one of my fuse blocks inside of the amp rack
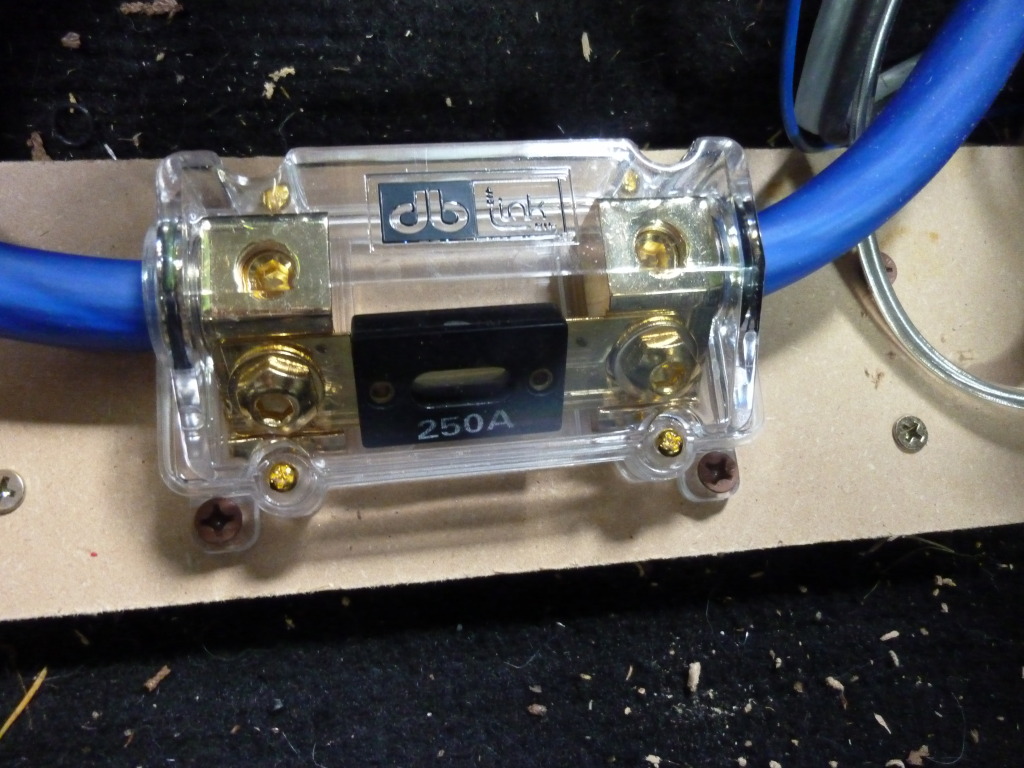
And here's the finished product

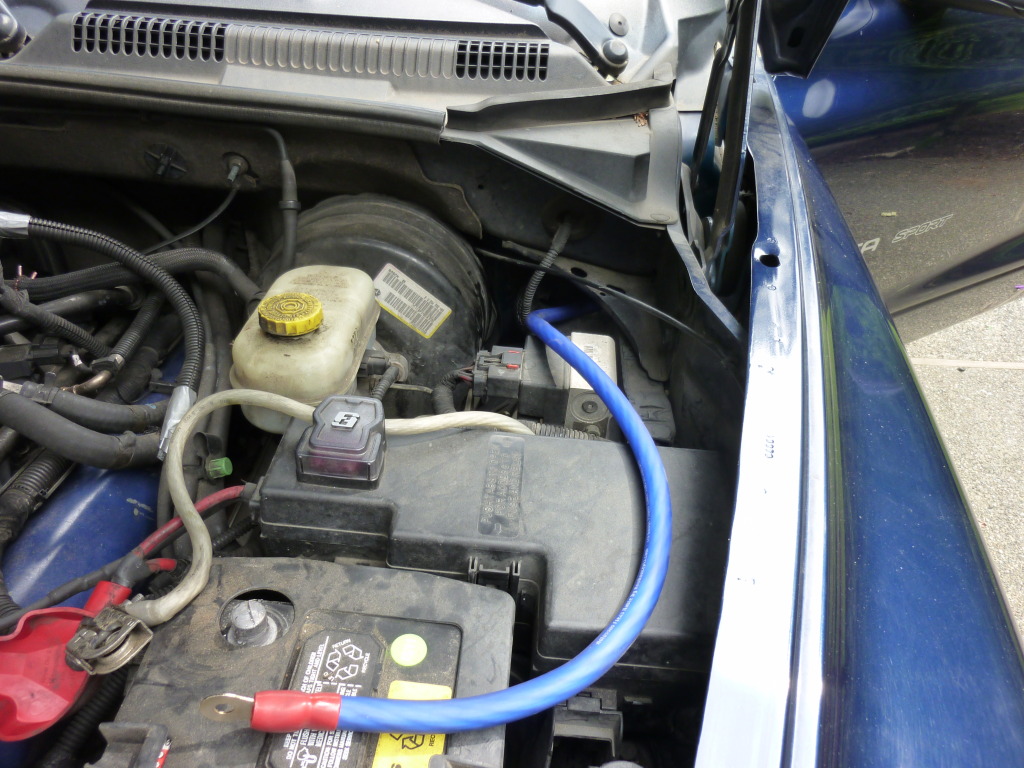
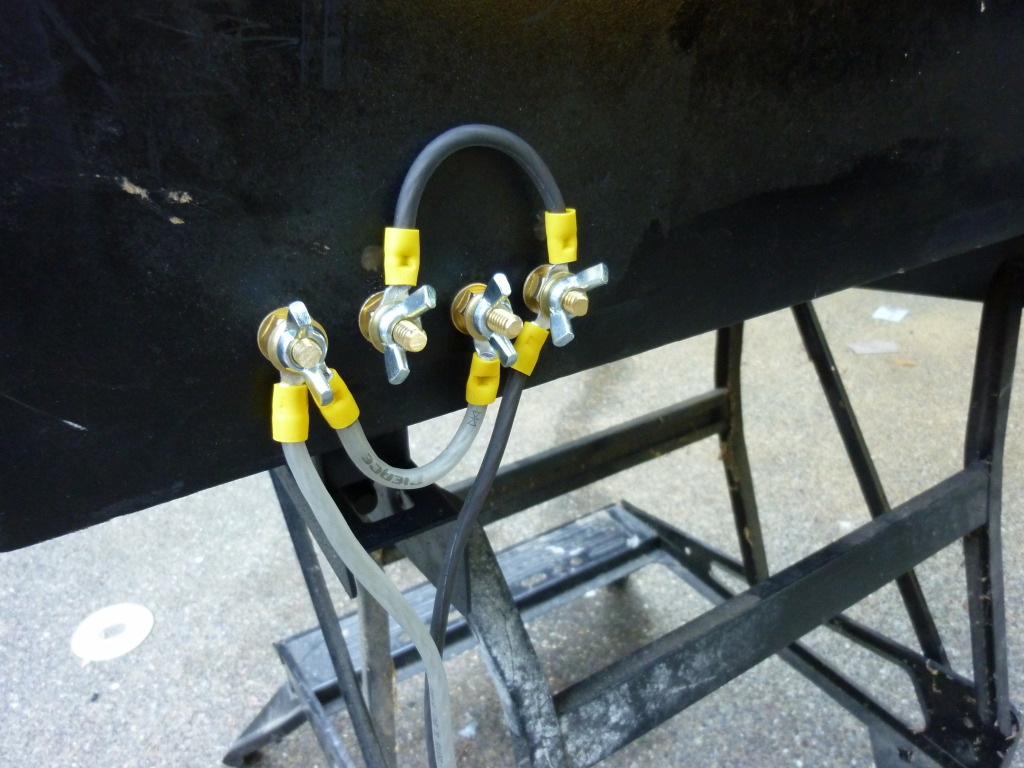
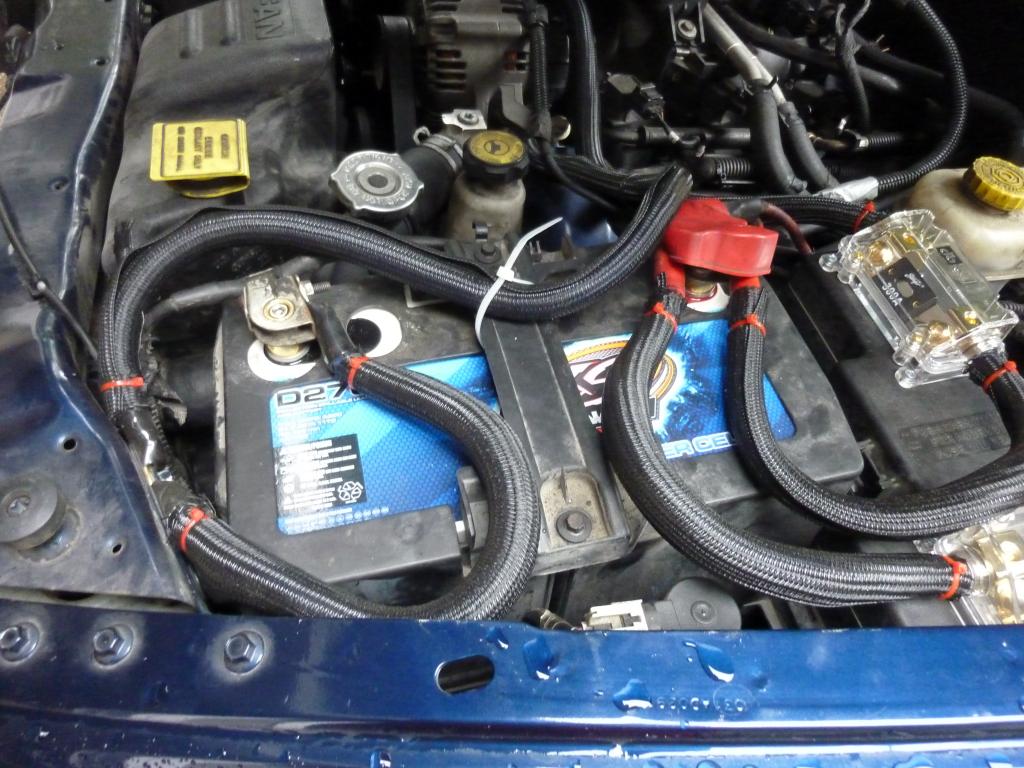
When running an amplifier like that, there are some upgrades that are needed for the electrical system on the truck itself. One of these upgrades is called the "Big Three". This is where you take some nice wire (I used more 0 gauge) to increase the efficiency of the charging system in the truck. The "Big Three" are three runs of wire from the alternator charging post to the battery positive, another run from the alternator casing/engine block to the battery negative, and another run from the battery negative to the body.
Here's how it all turned out
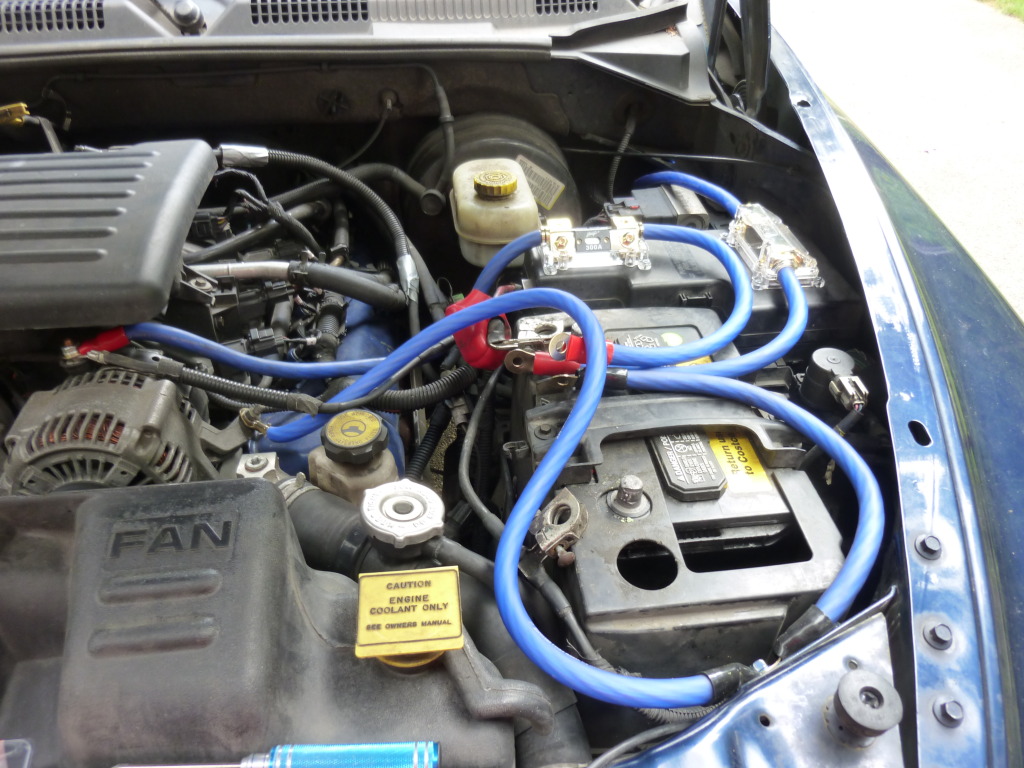
Then I used some Techflex to keep the wire protected

This doesn't increase the actual output of the alternator, but it helps keep the voltage steady when there is a high demand from the amplifier(s).
Once I had the box done, it was time to upgrade some wiring. I had some 4 gauge wiring from Best Buy running to the amp, but it wasn't sufficient enough for what I had in mind. It was fine for the Type R because I was running it at a 2 ohm load where the amp will put out about 1000 watts RMS, but I was planning on getting a new sub that could handle the full 2000+ watts that the amp is capable of producing.
Here's my new wiring. It's 1/0 KnuKonceptz OFC wire.
Then it was time to start tearing into my truck
I had also painted the box before I got the new wiring. It was a pretty nasty paint job, but it helped make everything less visible to people walking by my truck.
Sanded down one of the rear seat belt mounts to use as a ground
Old wire vs. new wire
I ran the wire from the engine bay down to the door where I went through an unused grommet. From there, the wire just pops out behind the kick panel and keeps it nice and hidden from view. Then I ran the wire under the door sill trim to the back of the truck.
Ran the wire underneath and into the cargo bin behind the amp.
Mounted one of my fuse blocks inside of the amp rack
And here's the finished product
When running an amplifier like that, there are some upgrades that are needed for the electrical system on the truck itself. One of these upgrades is called the "Big Three". This is where you take some nice wire (I used more 0 gauge) to increase the efficiency of the charging system in the truck. The "Big Three" are three runs of wire from the alternator charging post to the battery positive, another run from the alternator casing/engine block to the battery negative, and another run from the battery negative to the body.
Here's how it all turned out
Then I used some Techflex to keep the wire protected
This doesn't increase the actual output of the alternator, but it helps keep the voltage steady when there is a high demand from the amplifier(s).
#4
04-01-2013, 07:26 PM
Join Date: Nov 2011
Posts: 19
Likes: 0
Received 0 Likes
on
0 Posts
Part 4
I got tired of looking at my ugly box, so I filled in all the screw holes with wood filler and got it all sanded down nicely
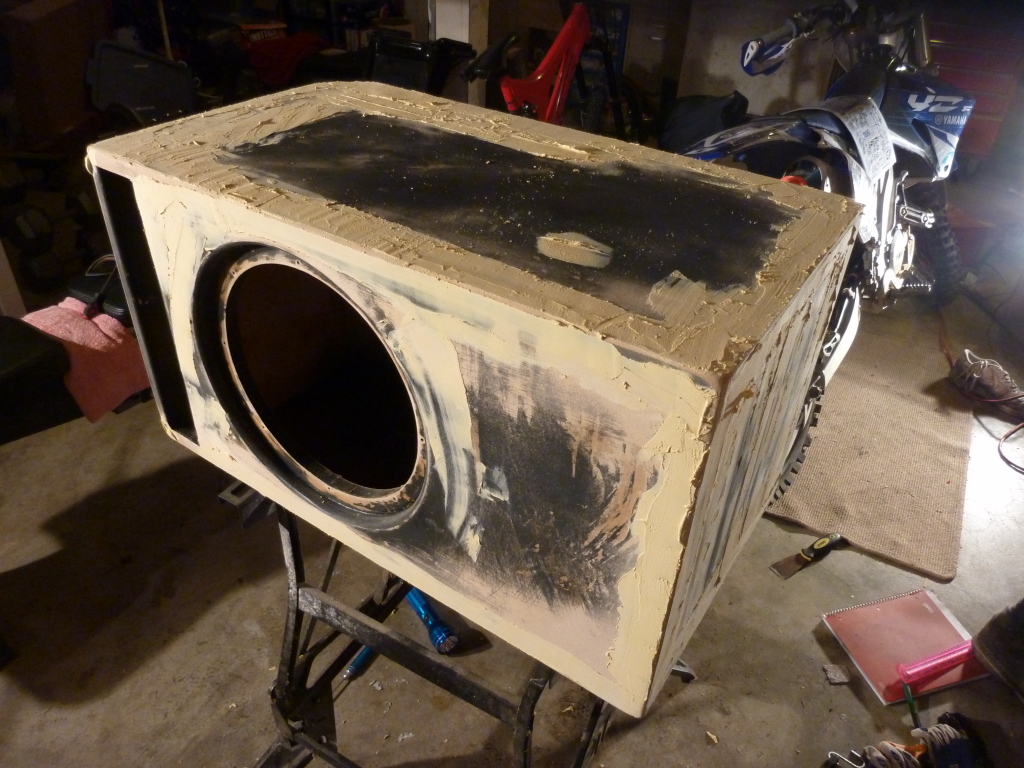

Threw some primer on
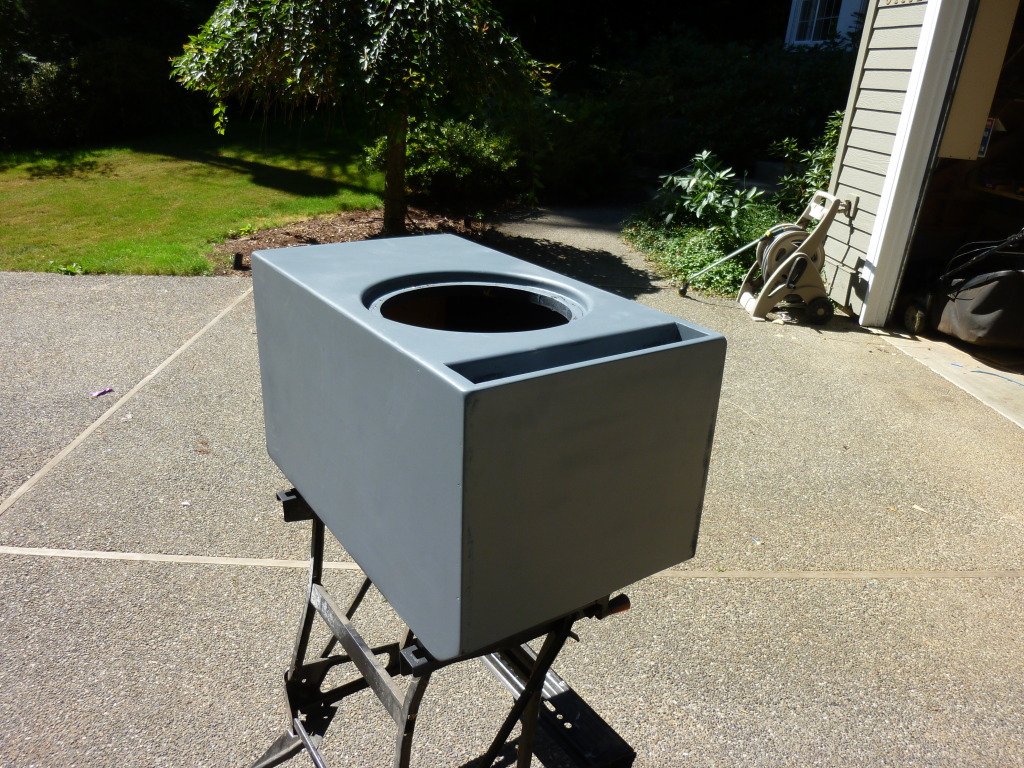
I'll skip all the painting pictures and just skip to the finished box
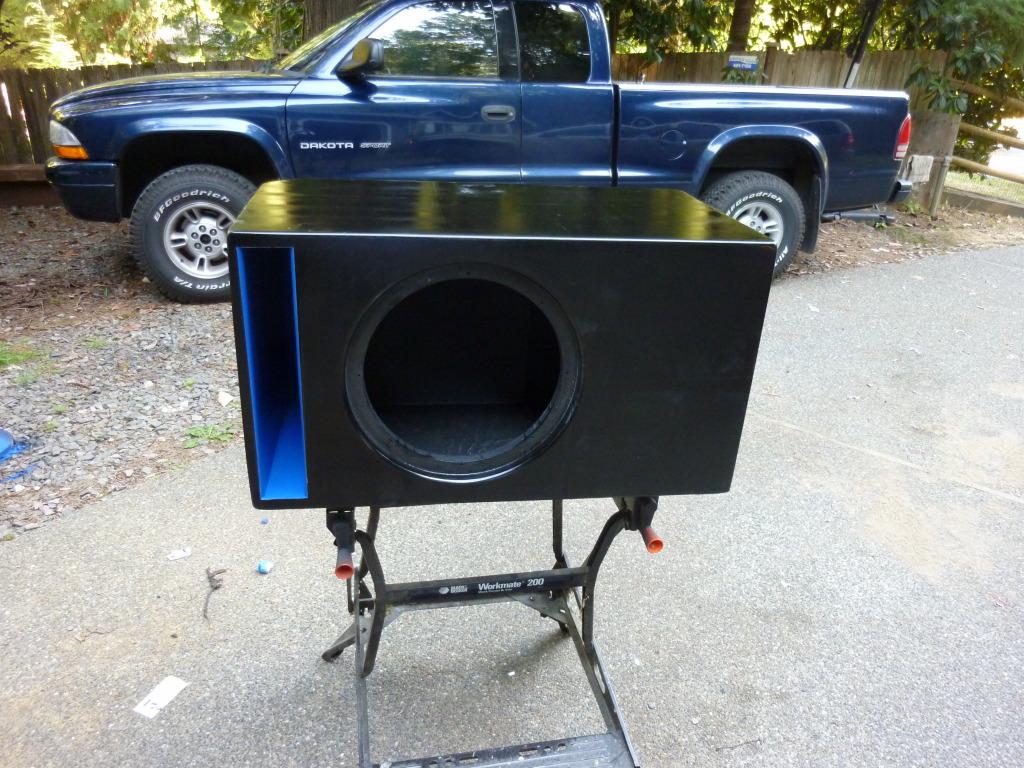
I also added some bolt terminals on the box so that I wouldn't have to run speaker wires through the port of the box.
Looks a bit better than before!
My truck had started rattling a bit, so tore my interior back apart to put in some sound deadener. The stuff I used is Second Skin Damplifier Pro. Here it is on the back wall of the cab
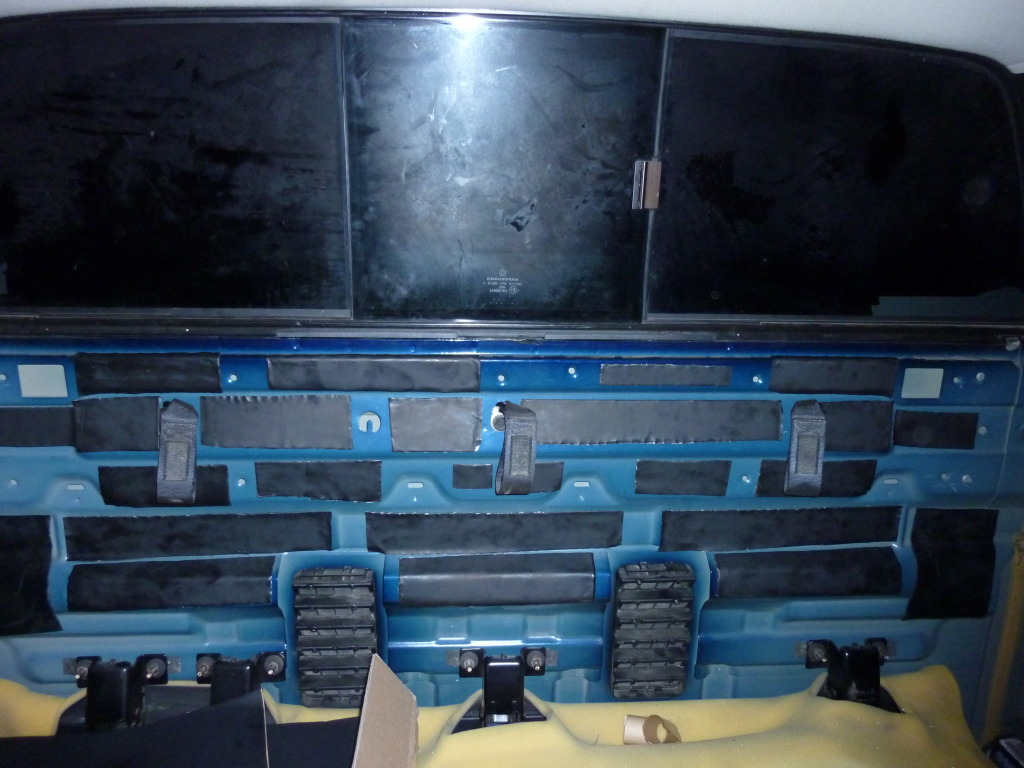
And also on the back of the back seat rest. This is where most of my rattles were coming from, so I put quite a bit on there
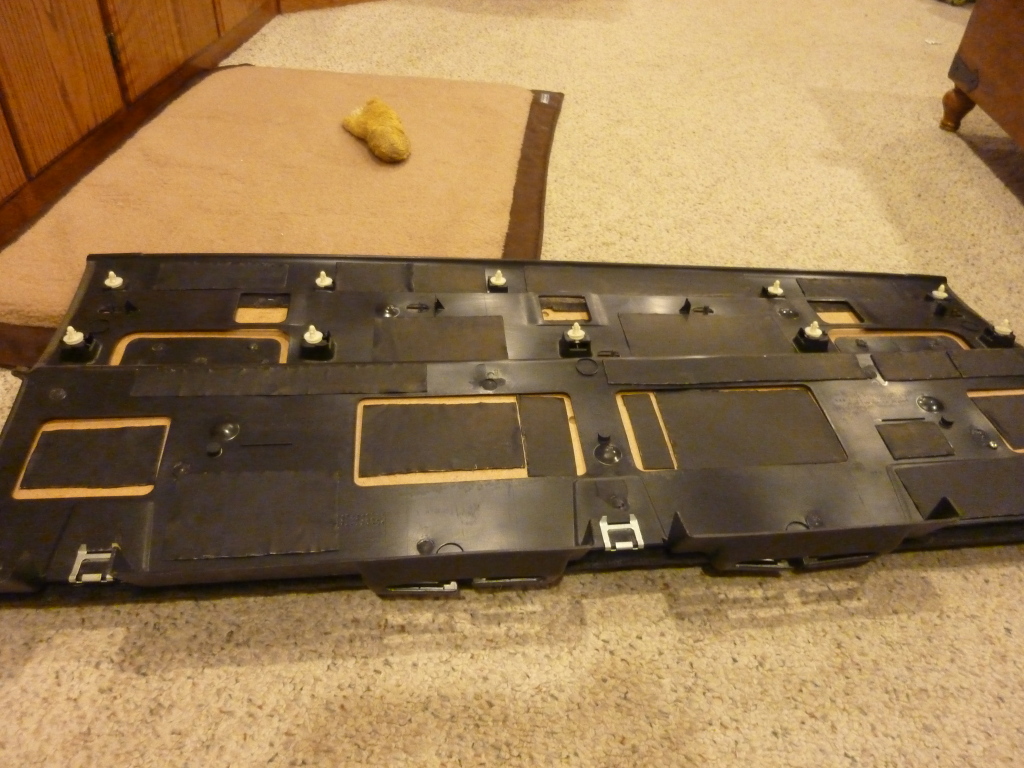
My door panels were also rattling a bit, so I used Great Stuff to keep some panels from rattling around

The Deadener worked very well and my truck sounded a lot better! Nothing like getting rid of those annoying rattles!
Anyways, I've gotta go to work now. I'll work on posting the rest once I get home tonight!
I got tired of looking at my ugly box, so I filled in all the screw holes with wood filler and got it all sanded down nicely
Threw some primer on
I'll skip all the painting pictures and just skip to the finished box
I also added some bolt terminals on the box so that I wouldn't have to run speaker wires through the port of the box.
Looks a bit better than before!
My truck had started rattling a bit, so tore my interior back apart to put in some sound deadener. The stuff I used is Second Skin Damplifier Pro. Here it is on the back wall of the cab
And also on the back of the back seat rest. This is where most of my rattles were coming from, so I put quite a bit on there
My door panels were also rattling a bit, so I used Great Stuff to keep some panels from rattling around
The Deadener worked very well and my truck sounded a lot better! Nothing like getting rid of those annoying rattles!
Anyways, I've gotta go to work now. I'll work on posting the rest once I get home tonight!
#5
04-02-2013, 02:01 AM
Join Date: Nov 2011
Posts: 19
Likes: 0
Received 0 Likes
on
0 Posts
On to part 5!
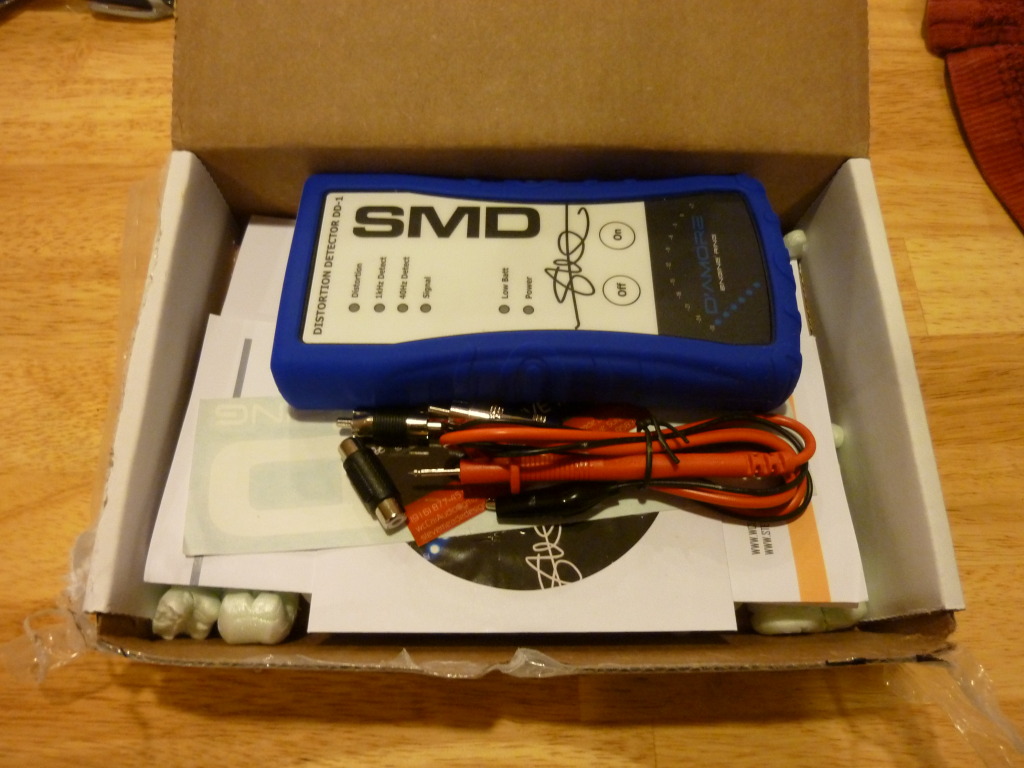
A lot of this would have gone by faster if I didn't have to buy certain tools along the way. One of the tools that I got, though, was a device called the DD-1. Some of you guys may have seen some of Steve Meade's videos posted throughout youtube (Tahoe with 4 18 inch subwoofers), well this tool was thought up by him and one of the tech guys from Rockford Fosgate (the same guy behind the Rockford T15K). Anyways, this tool is used to set the gain **** on amplifiers. A lot of people who are new to audio think that the gain is essentially a volume **** on the amplifier, however this couldn't be more wrong. I won't go into the details, but using your gain like that will cause your amp to send a distorted signal to the subwoofer, which will in turn cause the amp and sub to heat up and eventually blow. The DD-1 detects this distortion so that you can find out where your amp distorts and then you can back it down a notch so that you don't fry your equipment.
Here's the DD-1
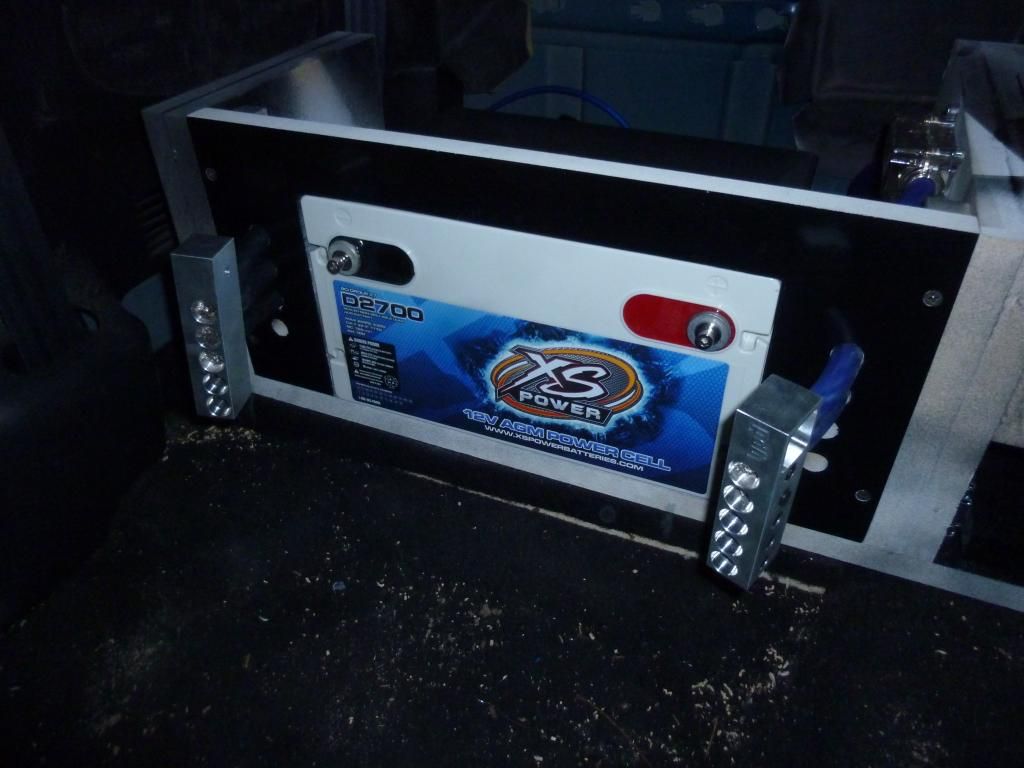
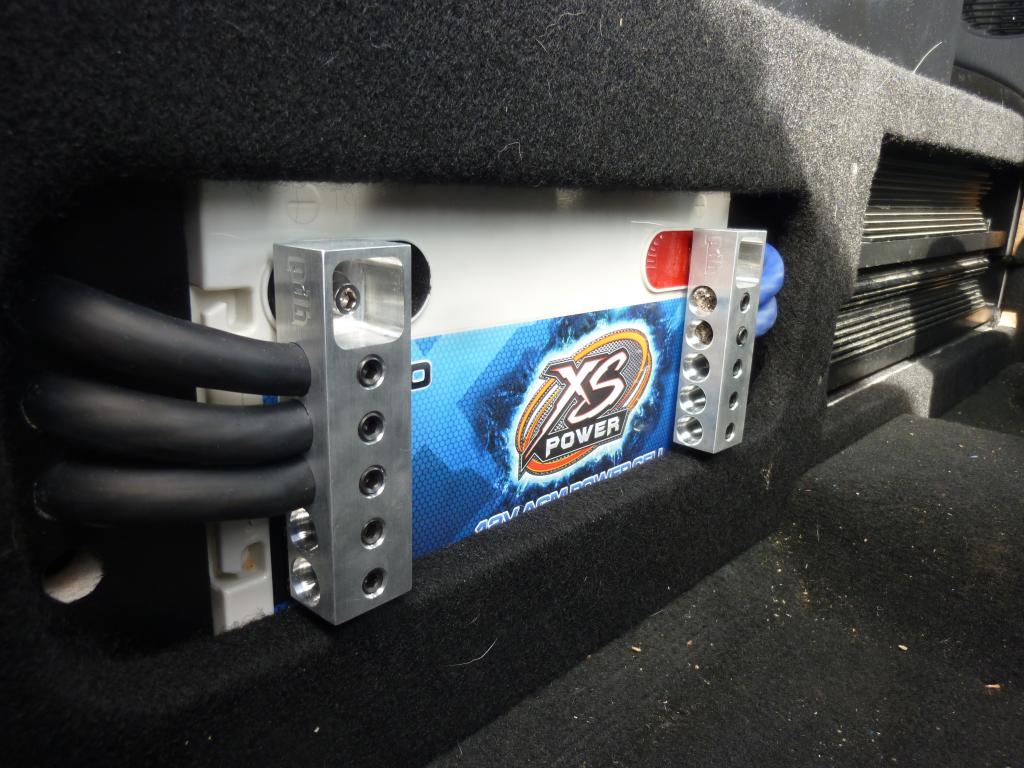
So once I was able to set my gains like a pro, I figured it was time to beef up my electrical system a little more by replacing my Carquest wet cell battery with a nice AGM sealed battery. The battery I chose is an XS Power D2700. XS Power is one of the biggest names by far in the audio community. The D series of batteries are made specifically to handle the abuse from high powered audio equipment.
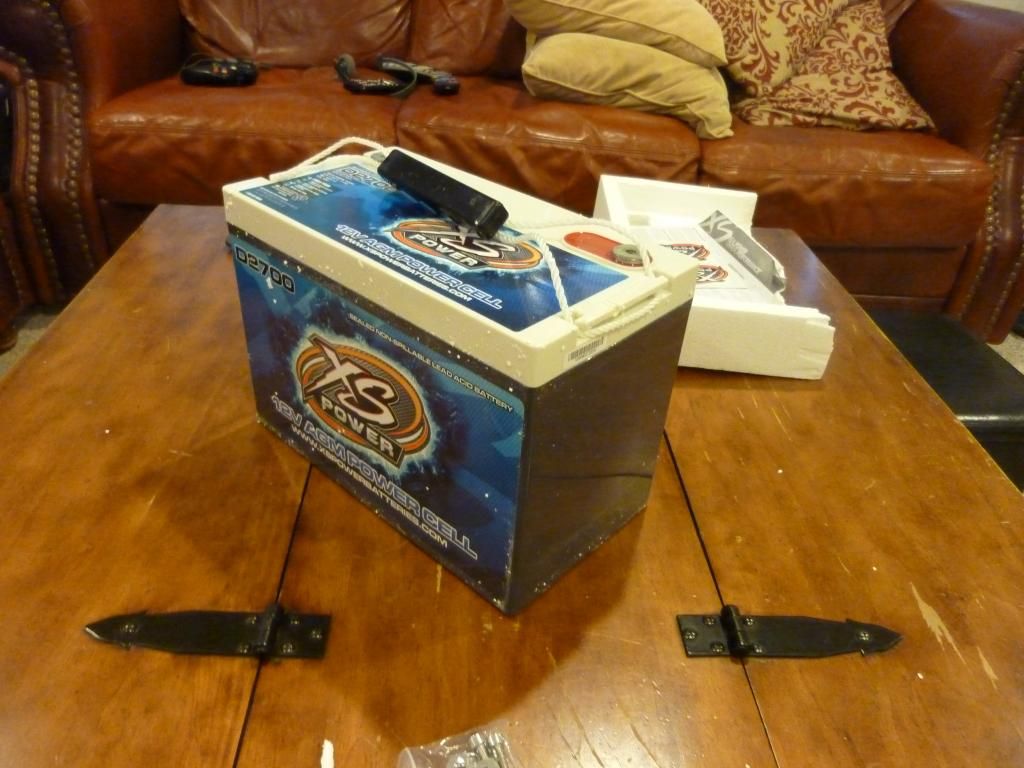
It's recommended to charge these batteries before ever putting them in a car, so I ended up getting a CTEK 7002 charger. This charger is great and I put it on my truck nearly every night to help keep my batteries (yes, there's another one now) conditioned as well as ease a bit of the strain on my alternator.

After getting the battery all charged up, I threw it in my truck
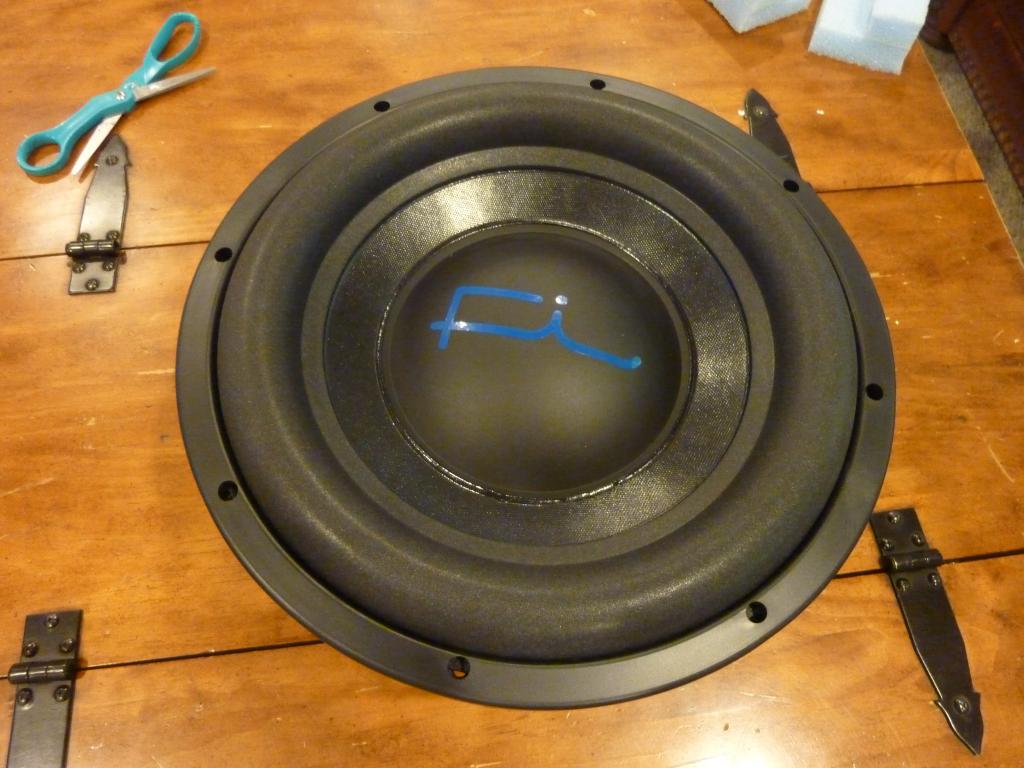
Once I had the battery in, I felt comfortable enough with my electrical system to get a sub that I could really use the full power of my amp with. I opted to go with a Fi Car Audio Q12 subwoofer, which is Fi's sub made for SQ (Sound Quality) setups. Fi custom builds each and every one of their subwoofers to order down in Las Vegas. They have all of their "base model" subs, and then they have various upgrades you can add so that you can really custom tailor the sub to your liking. I got my Q12 with nearly every option available. The only ones I didn't choose were ones that would optimize it for running in a sealed enclosure, which I'm really not planning on doing. I also ordered mine with dual 2 ohm voice coils so that I could wire it down to a 1 ohm load at the amp. The downside of ordering a sub through Fi is that it takes about a month for them to build it and ship to your house. However, it is DEFINITELY worth the wait!
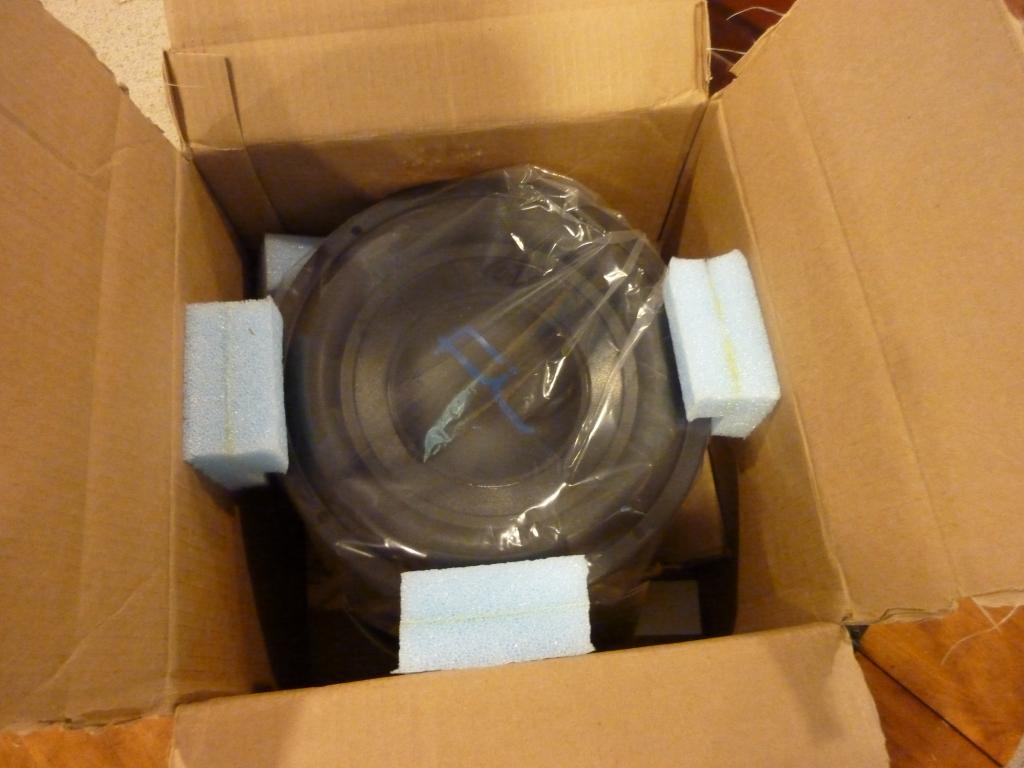
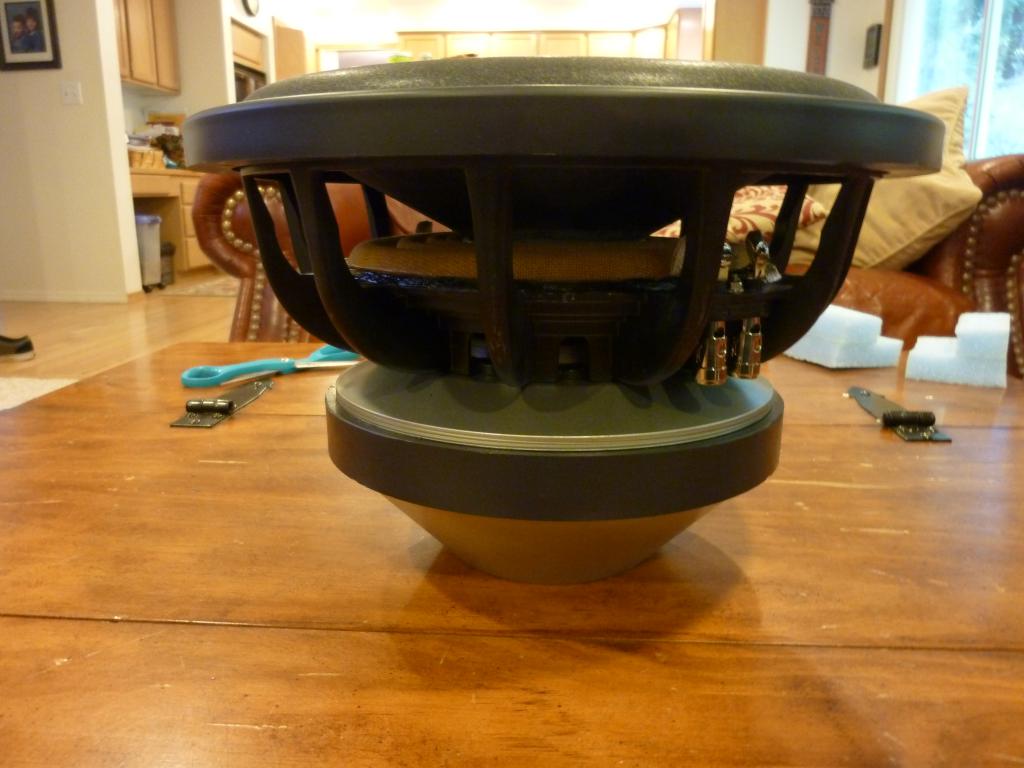
This sub is an absolute beast!
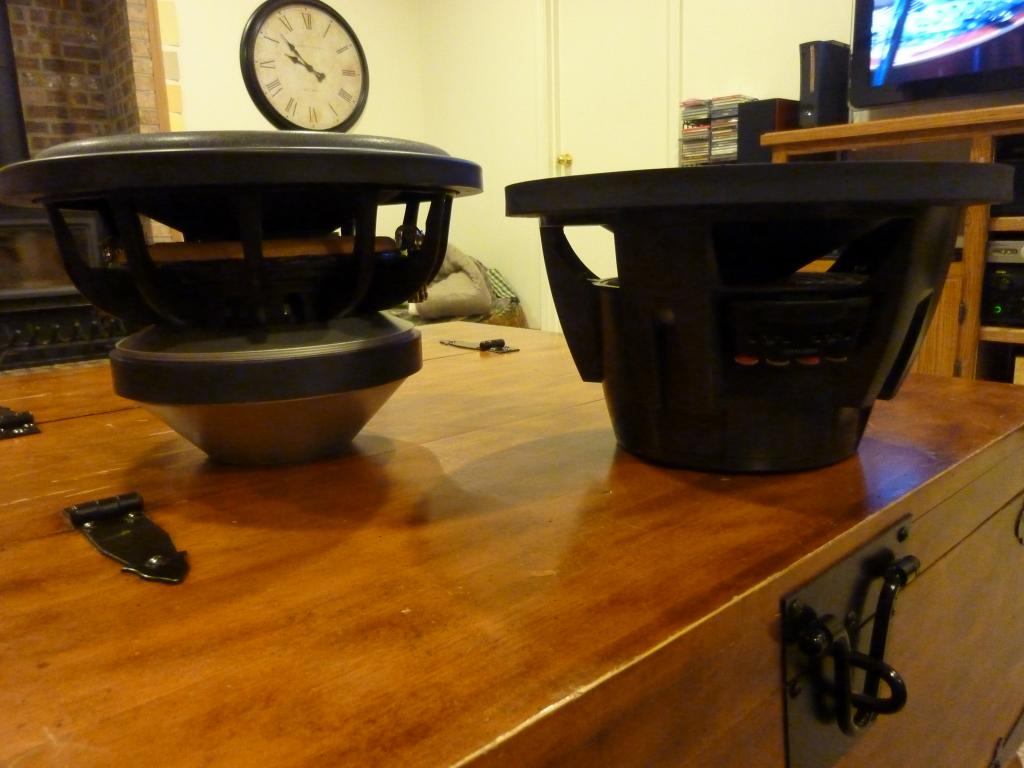
Here it is compared to my wimpy little Type R
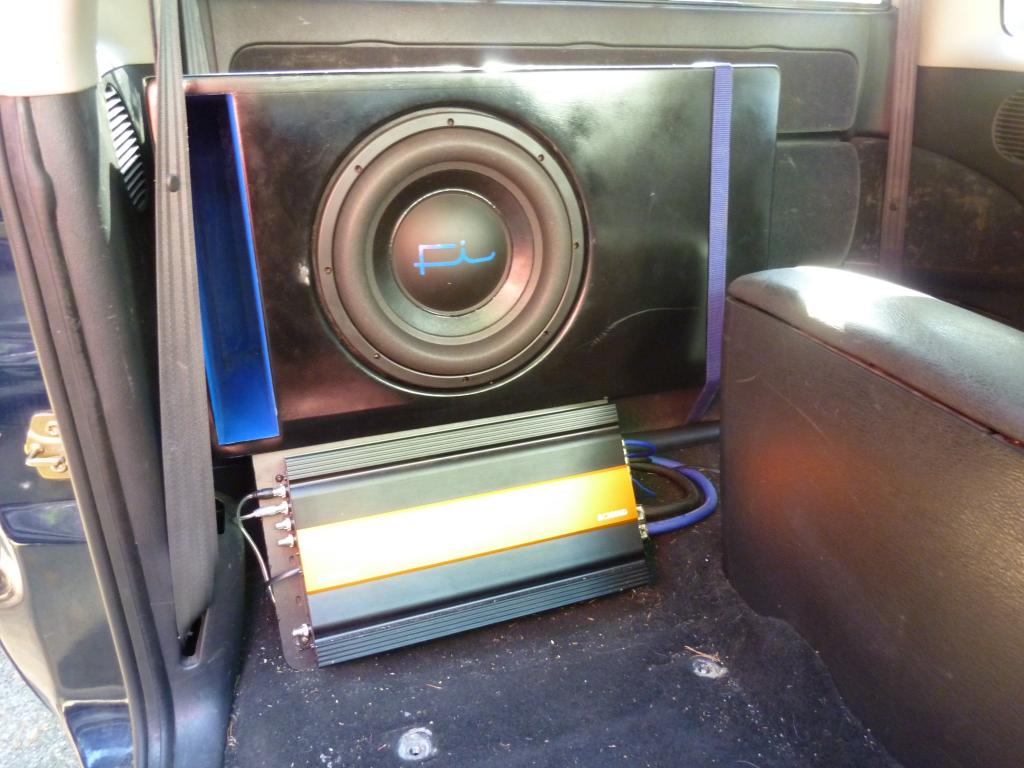
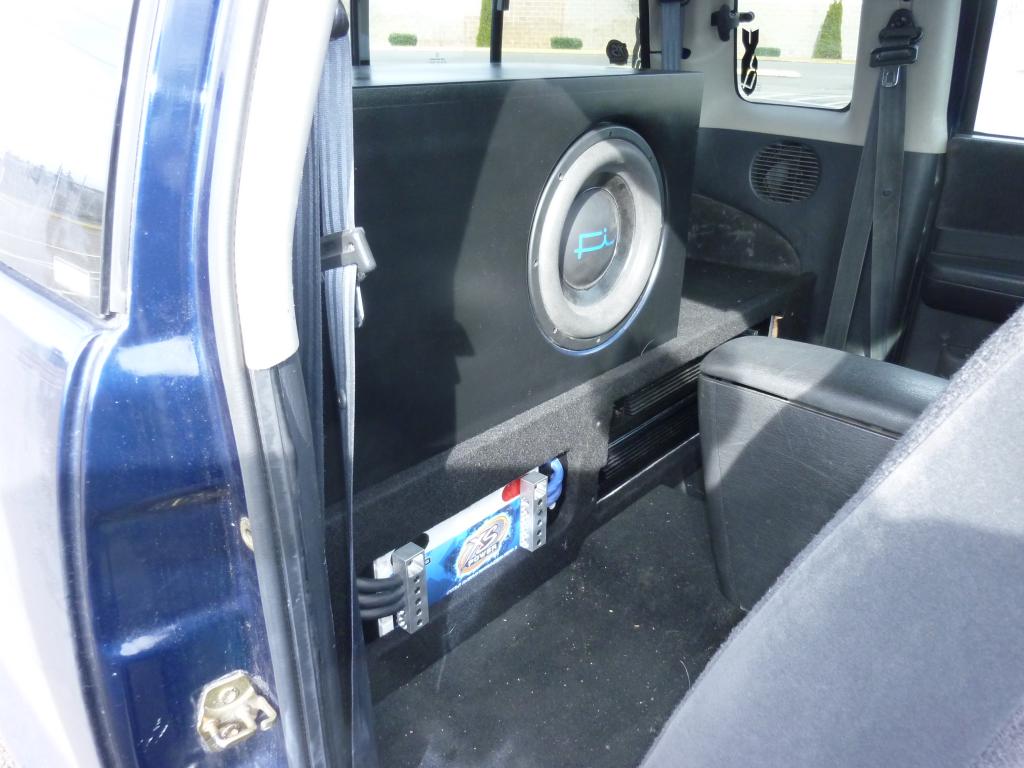
And there it is in it's new home!
I can say that this is one of the nicest sounding subs I've ever heard, and it still gets fairly loud. One of the things that I really love about this sub is how much of a monster it is on the really low lows.
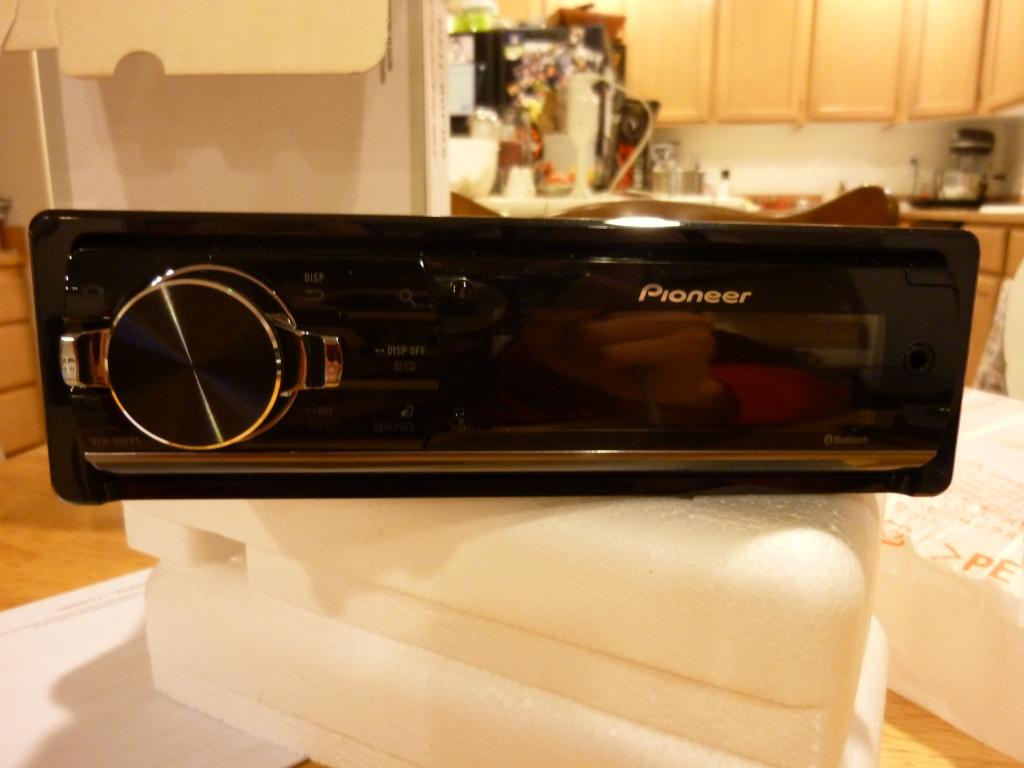
Up until this point, I had been using a Sony head unit out of my old car. As some of you may know, Sony really is pretty notorious for producing very low quality car audio equipment (although I've heard their new head units are amazing). So that meant it was time for a new deck. I went with a Pioneer DEH-80PRS which is one of the nicest single din units out there. It has full active capabilities (I might explain this later), speaker timing, and an insane amount of adjustability to get the perfect sound you're looking for.
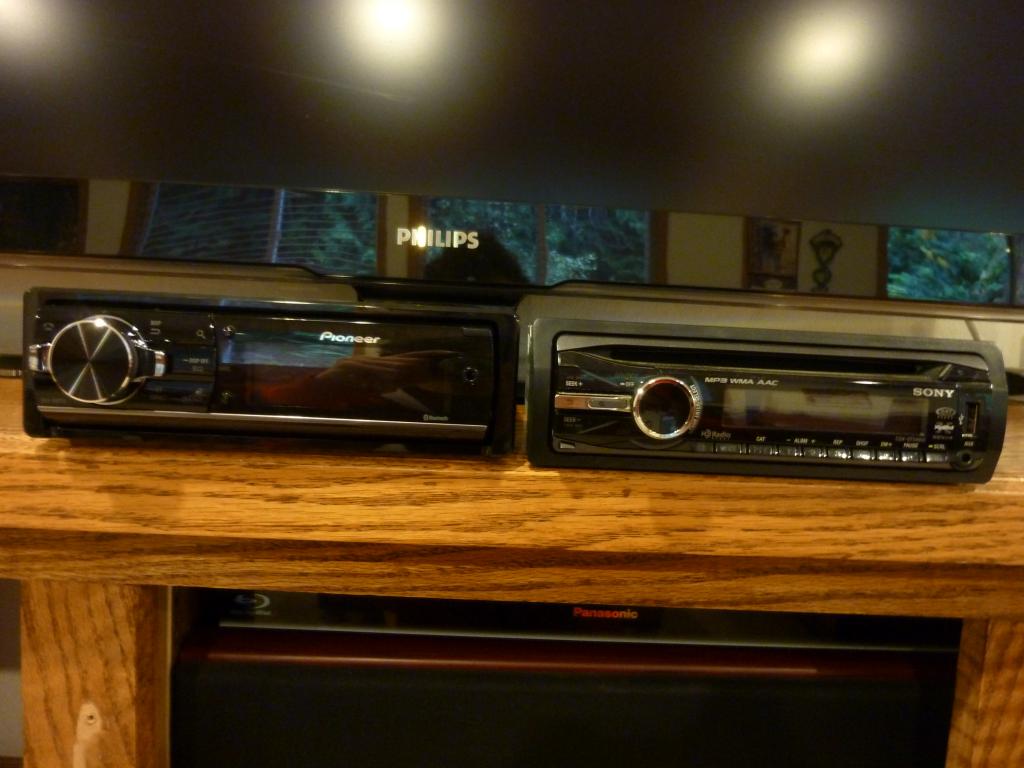
New vs. Old
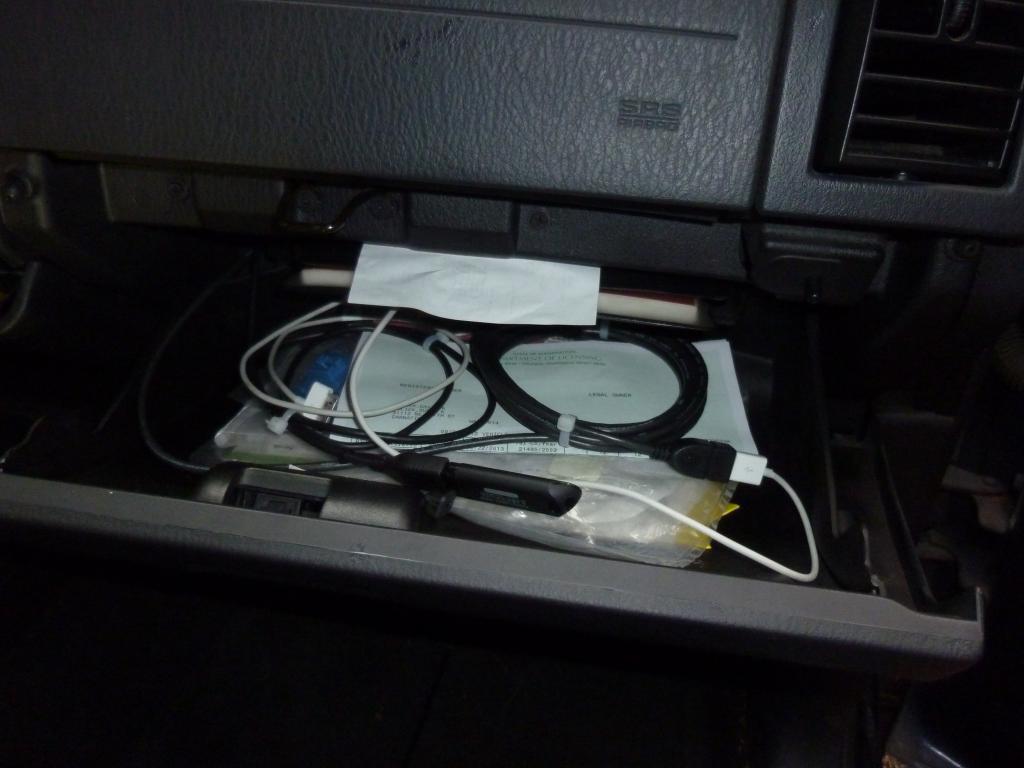
The Pioneer head unit has two USB inputs on the back, so I ran some USB extensions into my glove box where I can hook up my ipod and/or flash drives.
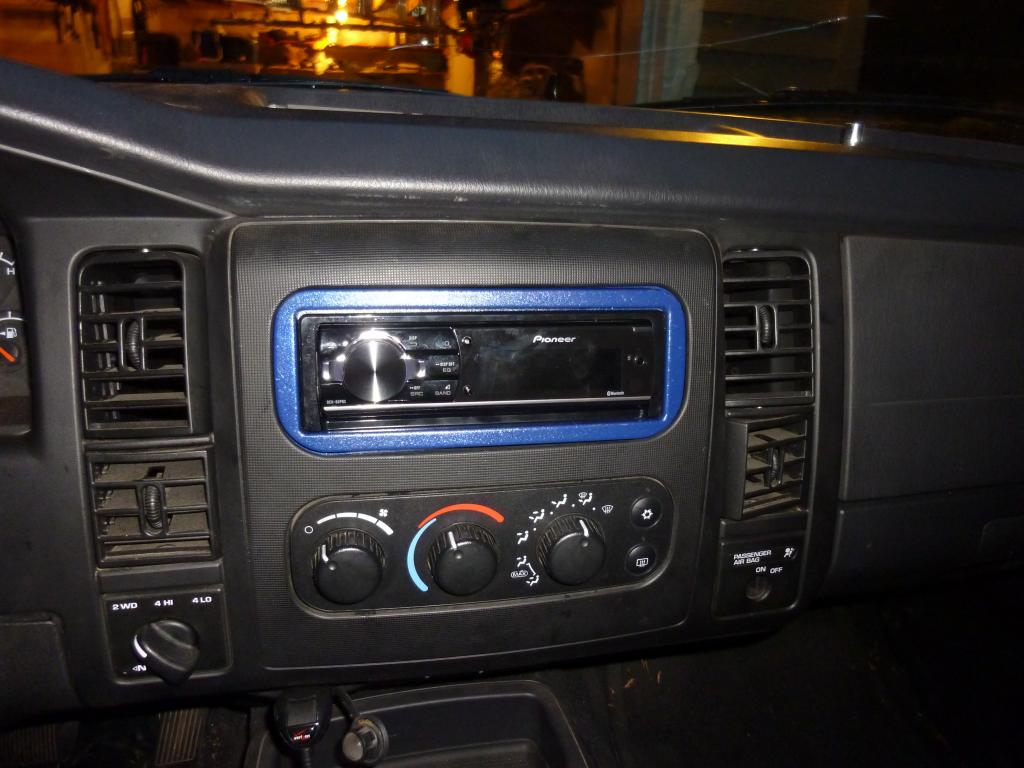
All installed
Now we're finally starting to get up to date, but I'll have to finish that tomorrow. It's getting late here and I have class at 7:30 in the morning!
A lot of this would have gone by faster if I didn't have to buy certain tools along the way. One of the tools that I got, though, was a device called the DD-1. Some of you guys may have seen some of Steve Meade's videos posted throughout youtube (Tahoe with 4 18 inch subwoofers), well this tool was thought up by him and one of the tech guys from Rockford Fosgate (the same guy behind the Rockford T15K). Anyways, this tool is used to set the gain **** on amplifiers. A lot of people who are new to audio think that the gain is essentially a volume **** on the amplifier, however this couldn't be more wrong. I won't go into the details, but using your gain like that will cause your amp to send a distorted signal to the subwoofer, which will in turn cause the amp and sub to heat up and eventually blow. The DD-1 detects this distortion so that you can find out where your amp distorts and then you can back it down a notch so that you don't fry your equipment.
Here's the DD-1
So once I was able to set my gains like a pro, I figured it was time to beef up my electrical system a little more by replacing my Carquest wet cell battery with a nice AGM sealed battery. The battery I chose is an XS Power D2700. XS Power is one of the biggest names by far in the audio community. The D series of batteries are made specifically to handle the abuse from high powered audio equipment.
It's recommended to charge these batteries before ever putting them in a car, so I ended up getting a CTEK 7002 charger. This charger is great and I put it on my truck nearly every night to help keep my batteries (yes, there's another one now) conditioned as well as ease a bit of the strain on my alternator.
After getting the battery all charged up, I threw it in my truck
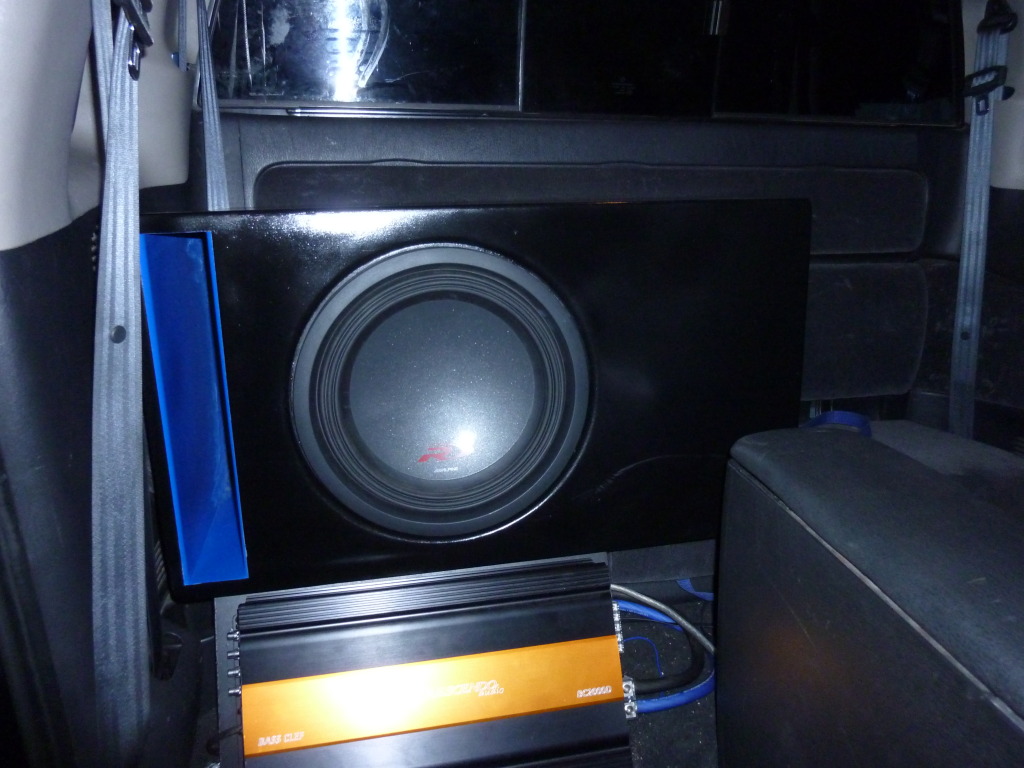
Once I had the battery in, I felt comfortable enough with my electrical system to get a sub that I could really use the full power of my amp with. I opted to go with a Fi Car Audio Q12 subwoofer, which is Fi's sub made for SQ (Sound Quality) setups. Fi custom builds each and every one of their subwoofers to order down in Las Vegas. They have all of their "base model" subs, and then they have various upgrades you can add so that you can really custom tailor the sub to your liking. I got my Q12 with nearly every option available. The only ones I didn't choose were ones that would optimize it for running in a sealed enclosure, which I'm really not planning on doing. I also ordered mine with dual 2 ohm voice coils so that I could wire it down to a 1 ohm load at the amp. The downside of ordering a sub through Fi is that it takes about a month for them to build it and ship to your house. However, it is DEFINITELY worth the wait!
This sub is an absolute beast!
Here it is compared to my wimpy little Type R
And there it is in it's new home!
I can say that this is one of the nicest sounding subs I've ever heard, and it still gets fairly loud. One of the things that I really love about this sub is how much of a monster it is on the really low lows.
Up until this point, I had been using a Sony head unit out of my old car. As some of you may know, Sony really is pretty notorious for producing very low quality car audio equipment (although I've heard their new head units are amazing). So that meant it was time for a new deck. I went with a Pioneer DEH-80PRS which is one of the nicest single din units out there. It has full active capabilities (I might explain this later), speaker timing, and an insane amount of adjustability to get the perfect sound you're looking for.
New vs. Old
The Pioneer head unit has two USB inputs on the back, so I ran some USB extensions into my glove box where I can hook up my ipod and/or flash drives.
All installed
Now we're finally starting to get up to date, but I'll have to finish that tomorrow. It's getting late here and I have class at 7:30 in the morning!
Last edited by REVOofRustler; 04-02-2013 at 02:31 AM.
#6
04-02-2013, 03:41 PM
Join Date: Nov 2011
Posts: 19
Likes: 0
Received 0 Likes
on
0 Posts
Let's move on to part 6!
I ended up getting myself a table saw around Christmas so that I could start building more boxes to experiment with
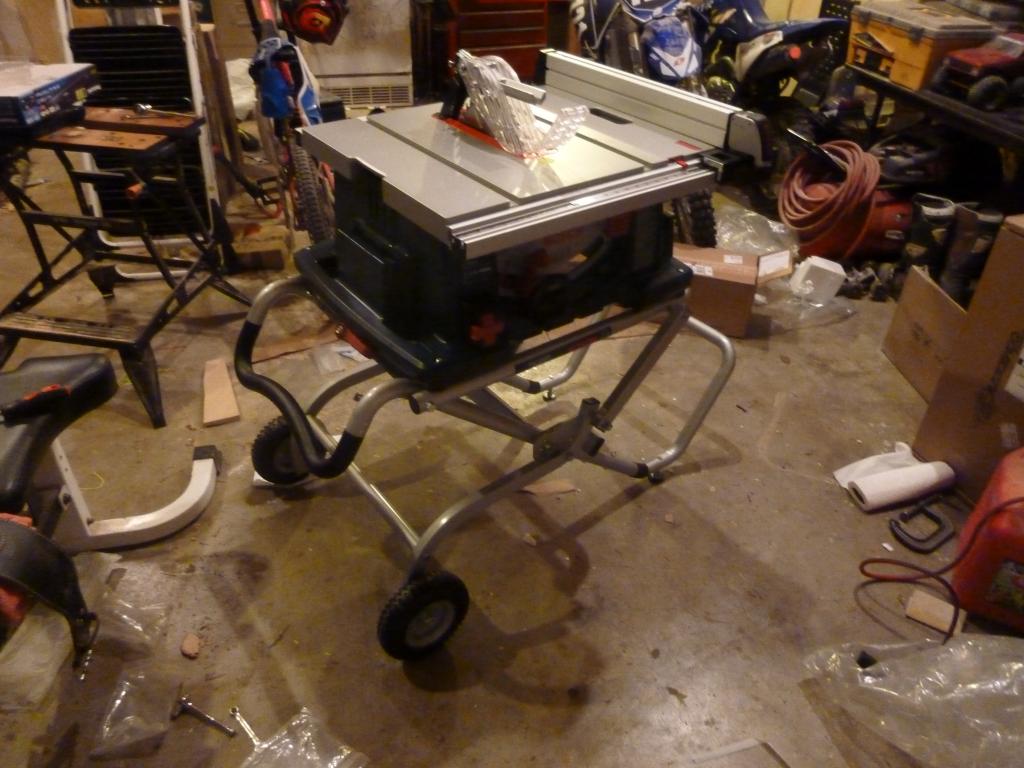
So of course I had to test it out by building myself a new box. Here's all the pieces cut out.
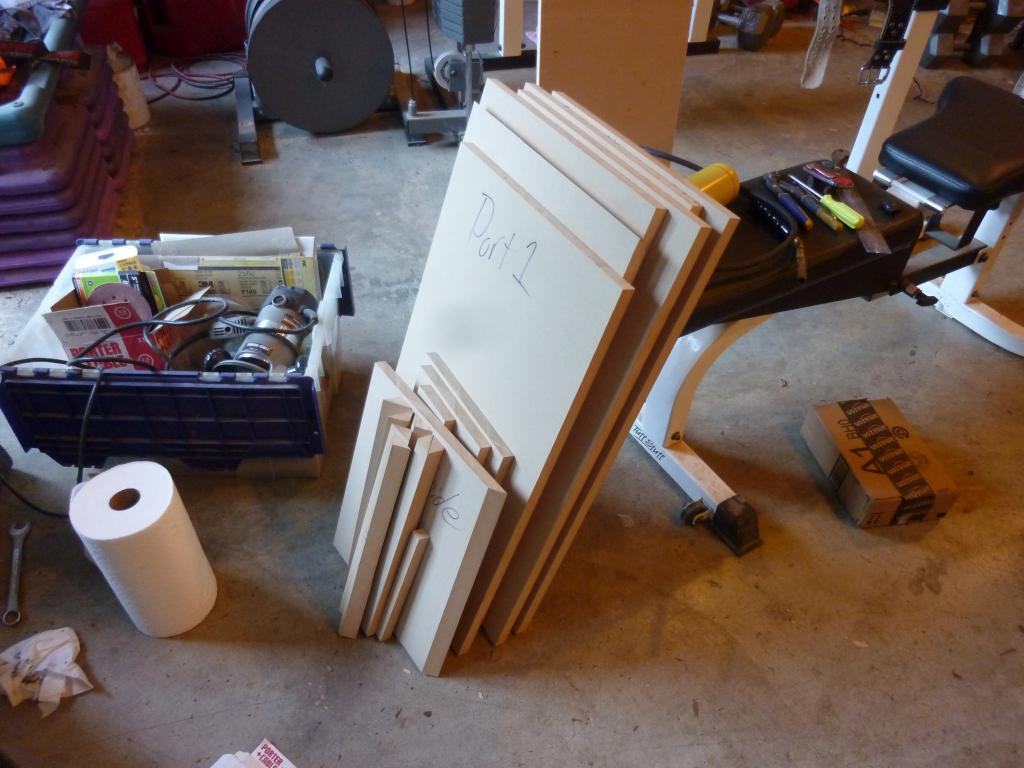
Here's a little mockup of the inside of the box
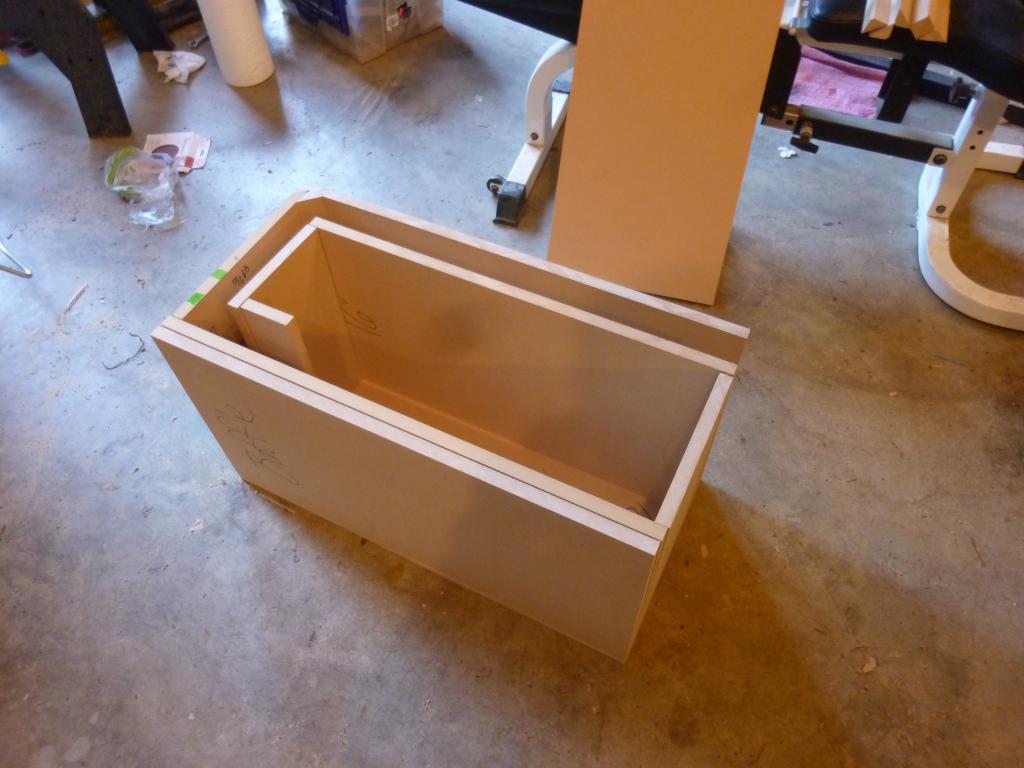
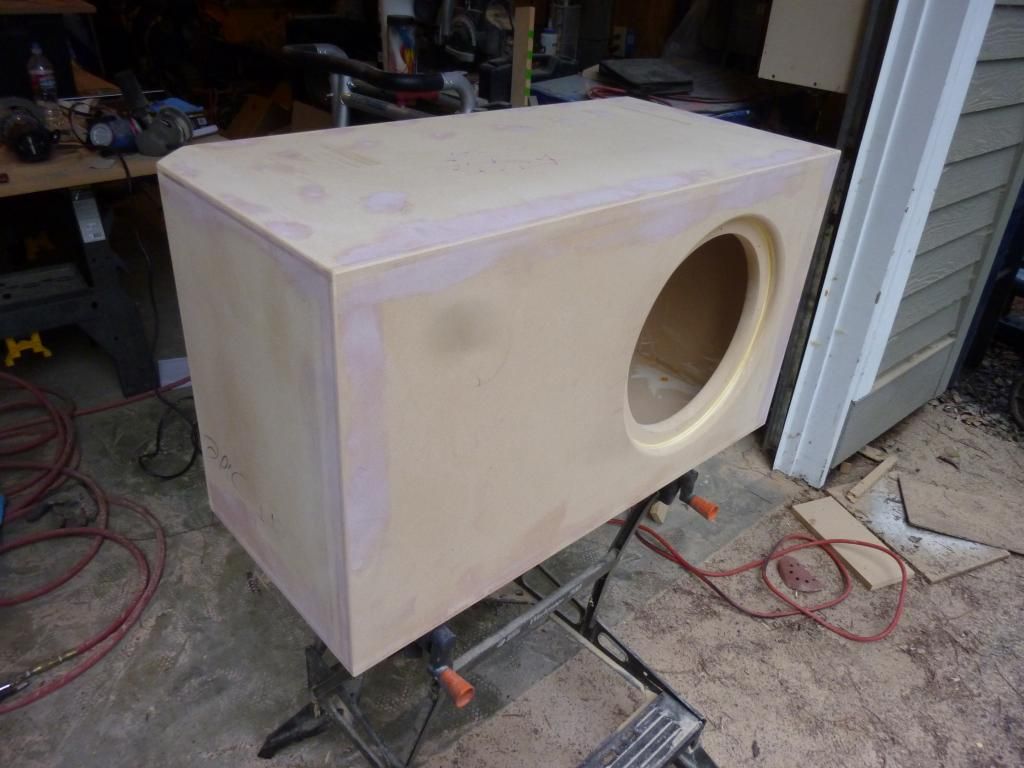
And then here's how the box turned out after filling in screw holes with bondo and then doing a lot of sanding.
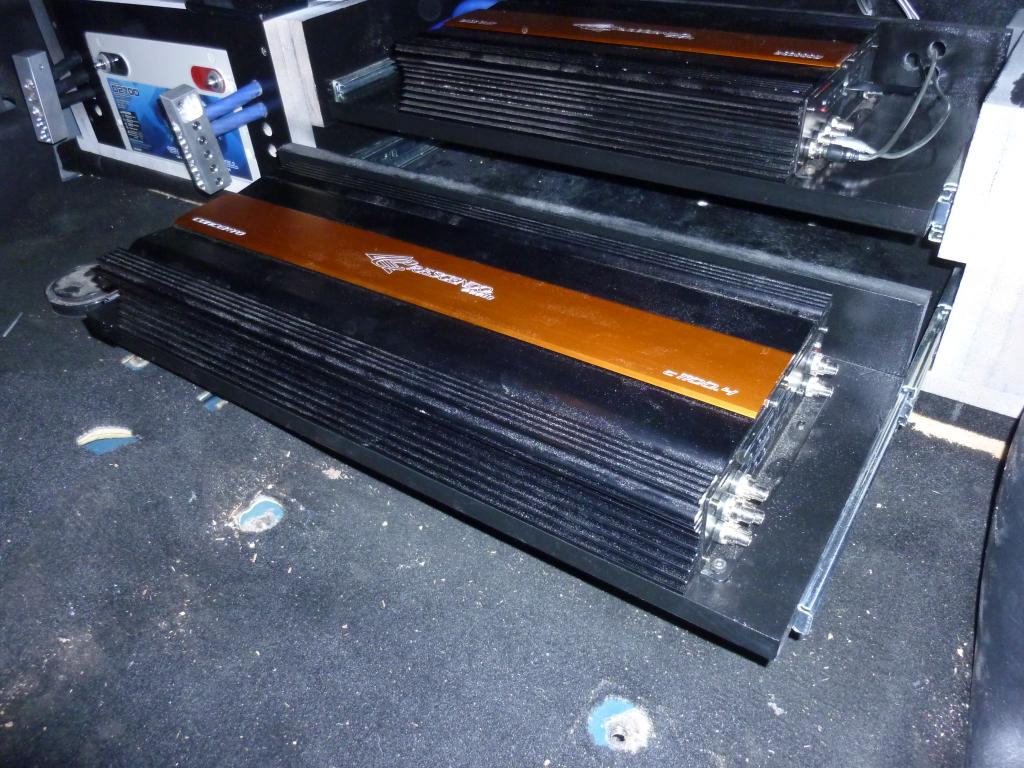
About the same time as I got the table saw, I also picked up a Crescendo C1100.4 4 channel amp to use for all my mids and highs.
So now that I had a nice 4 channel amp to go along with my sub amp, I needed to find somewhere to fit them both in my truck. I wanted them to take up as little space as possible, but I still needed them to be accessible. I ended up taking everything but the driver's seat out of the truck for a couple weeks while I brainstormed a solution.
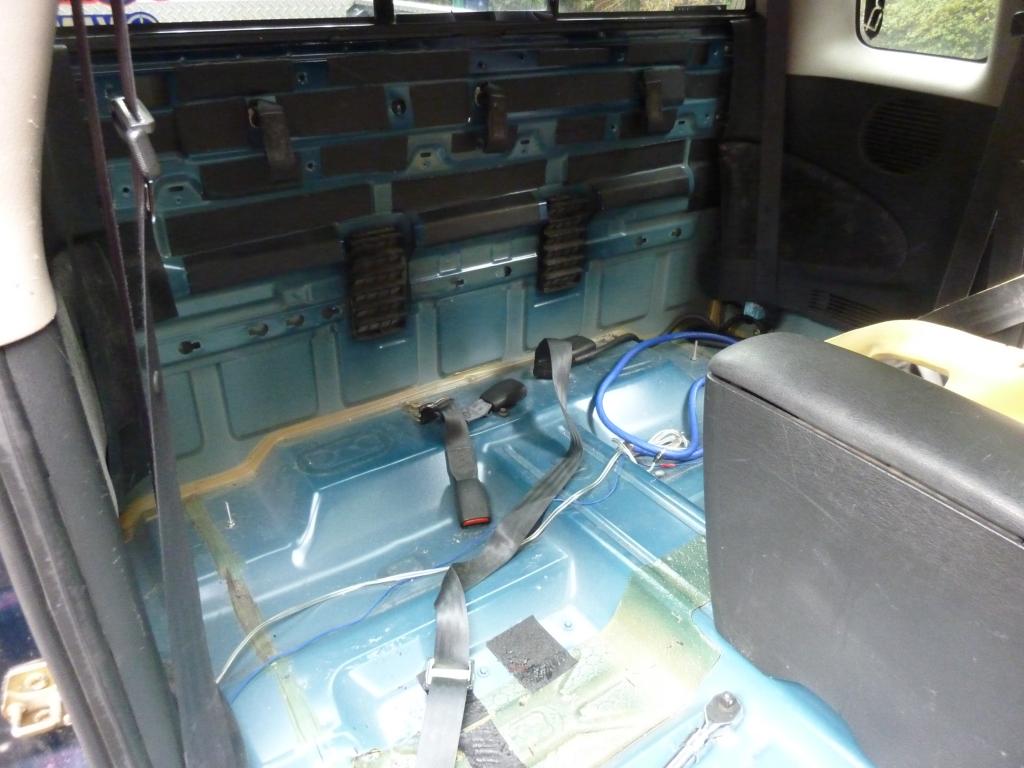
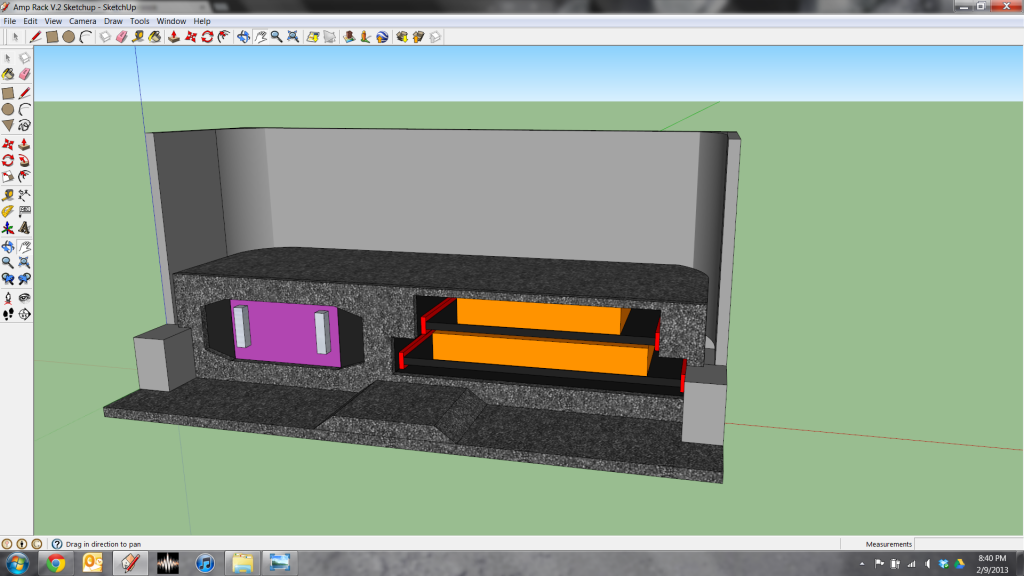
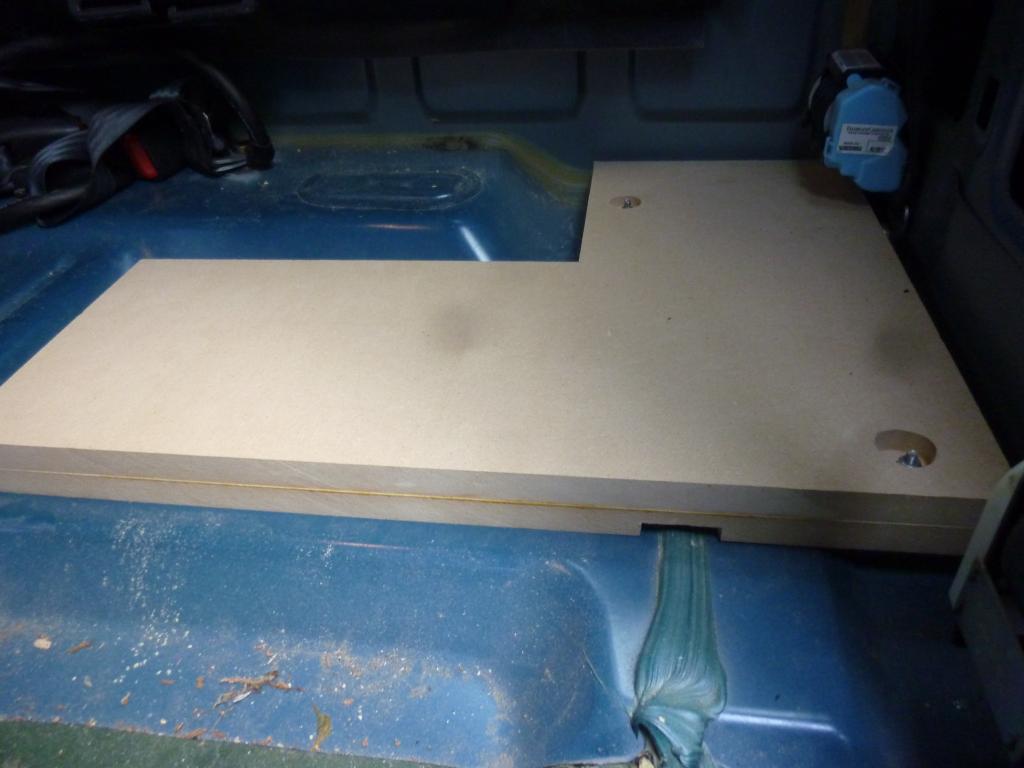
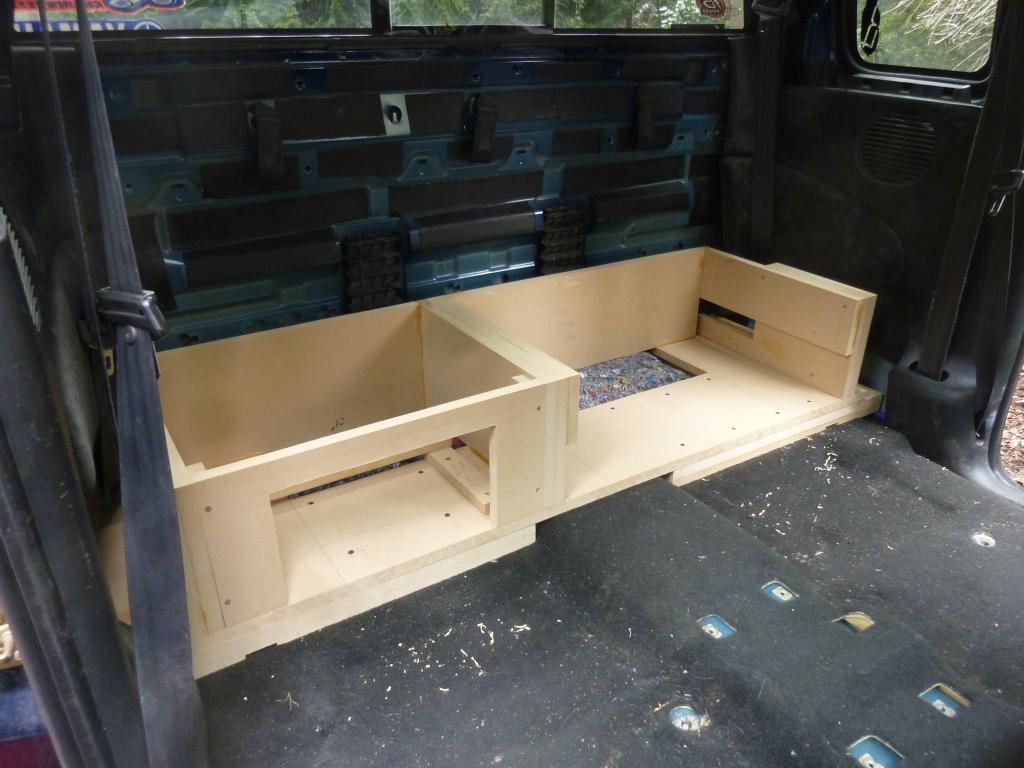
After a lot of measuring, here's what I came up with to replace the back seat
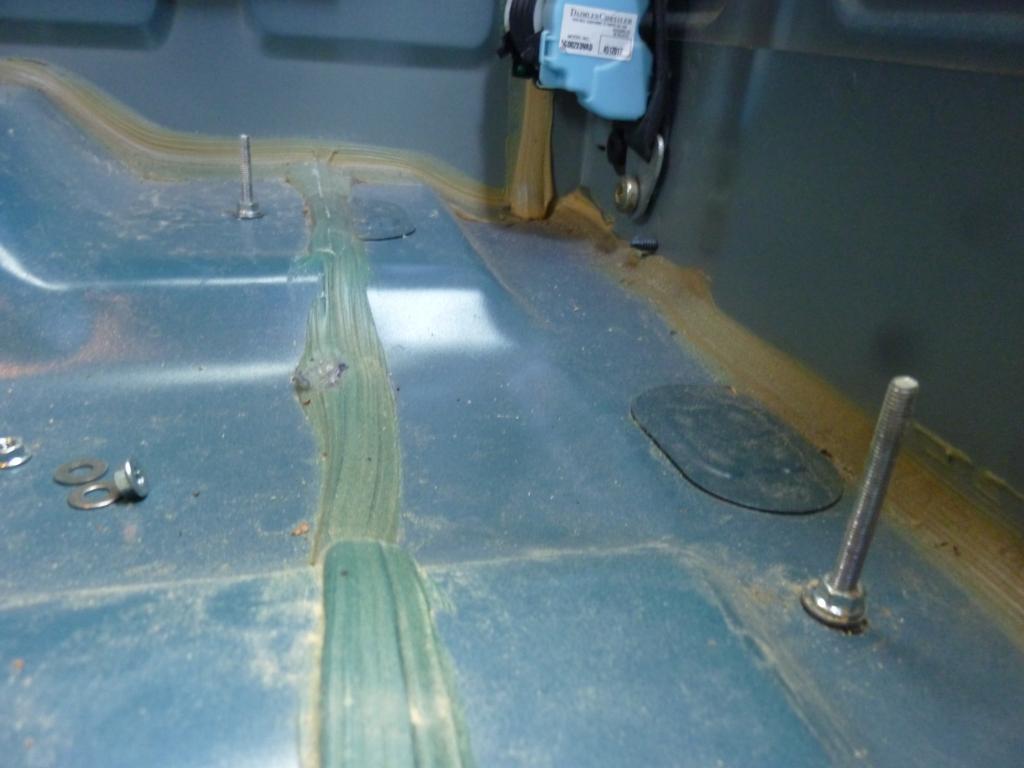
The first thing I needed to do was make a level floor in the back of the cab so that I would have something solid to build on to. I put some threaded rod through the factory anchors for the storage tray so that I could keep everything in place.
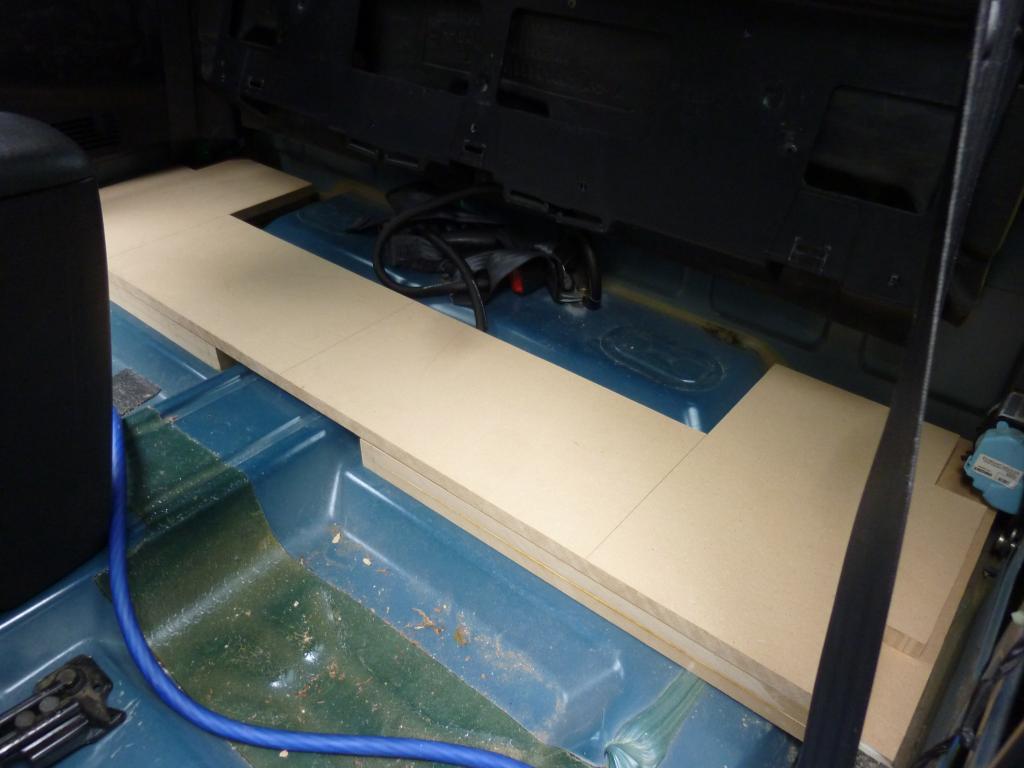
Once I got the "floor" all done, I was ready to get working on the amp rack itself. Here it is after a bit of assembly

Then a little bit later
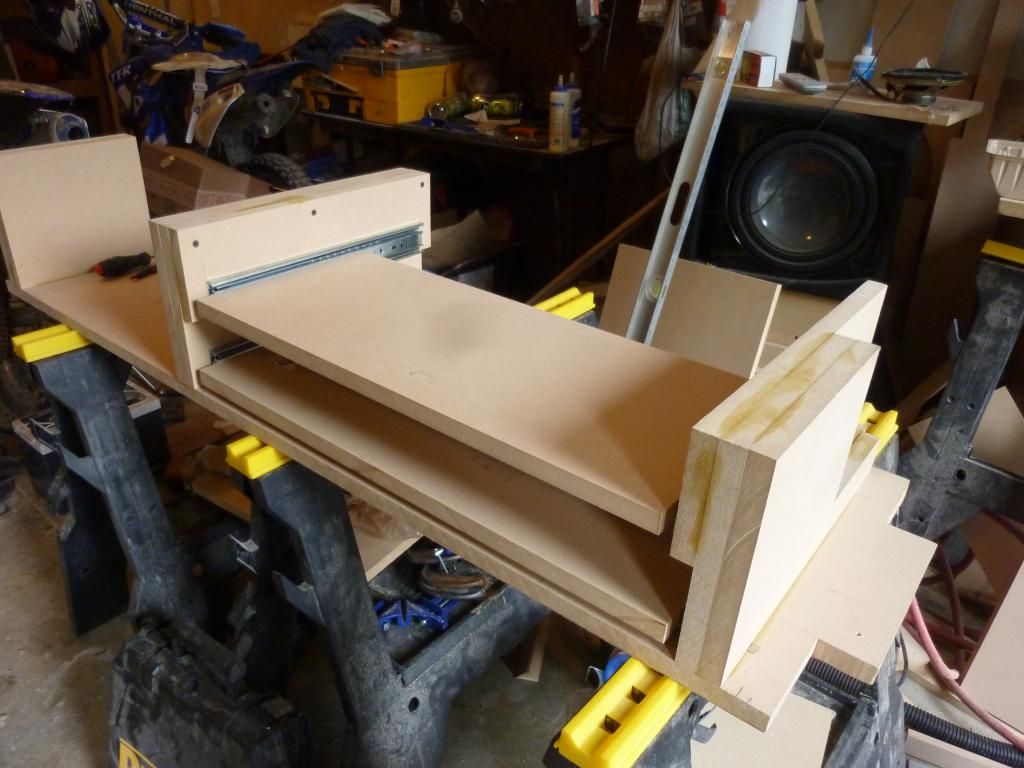
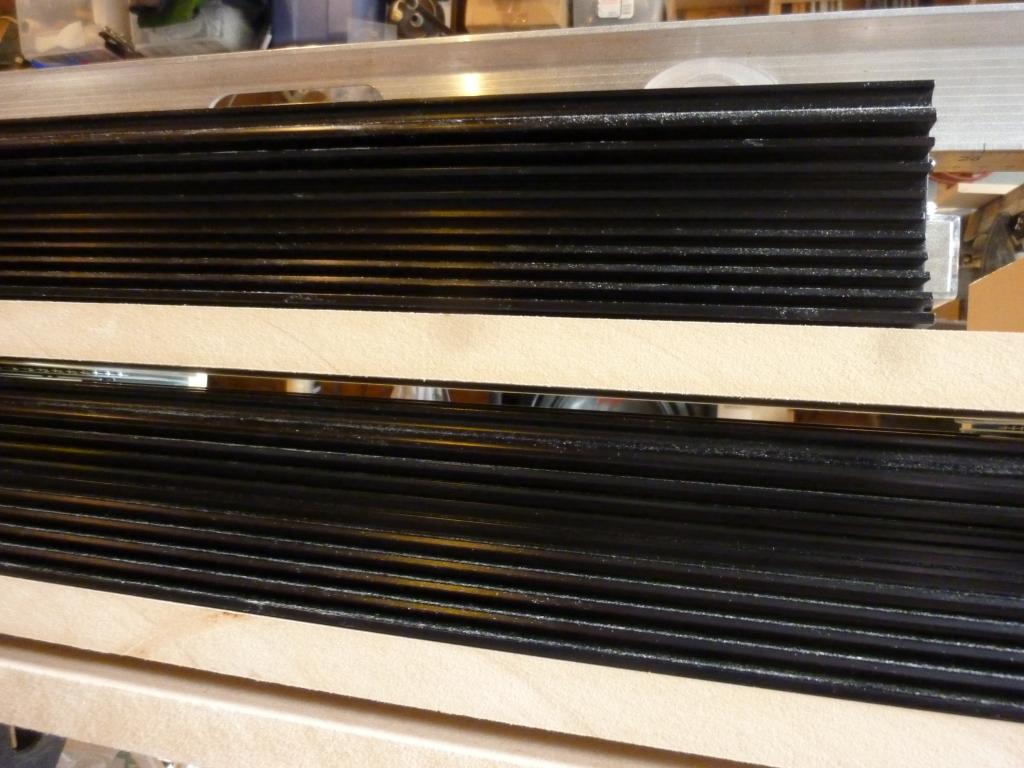
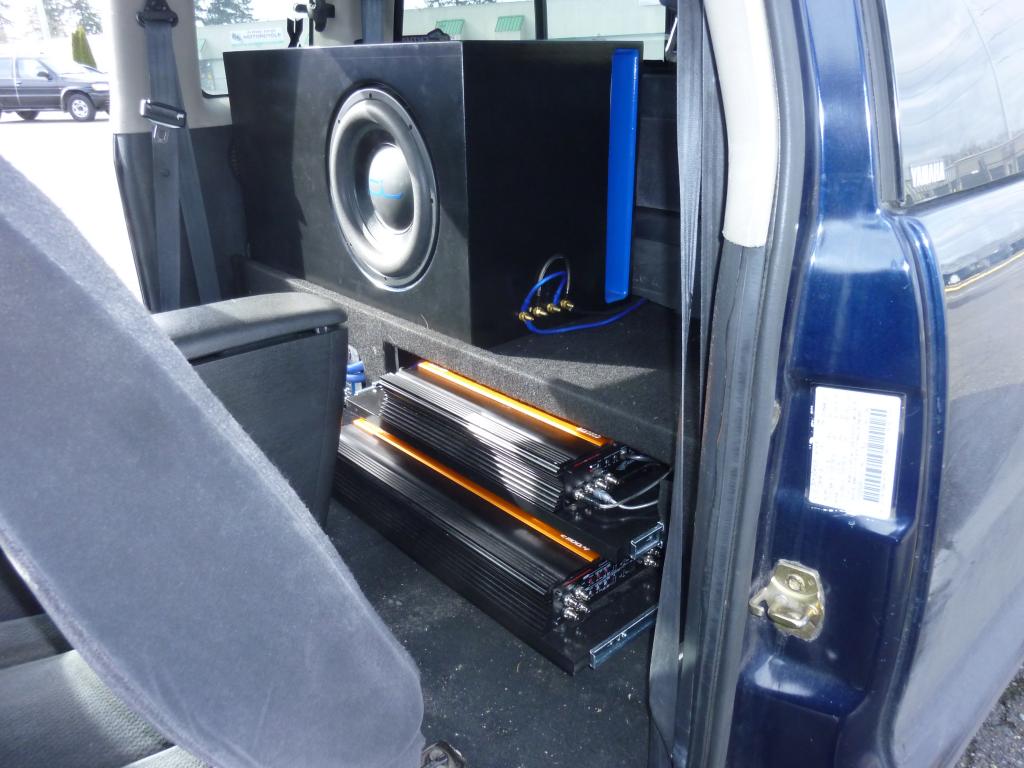
Here's how the amps fit on the rack.
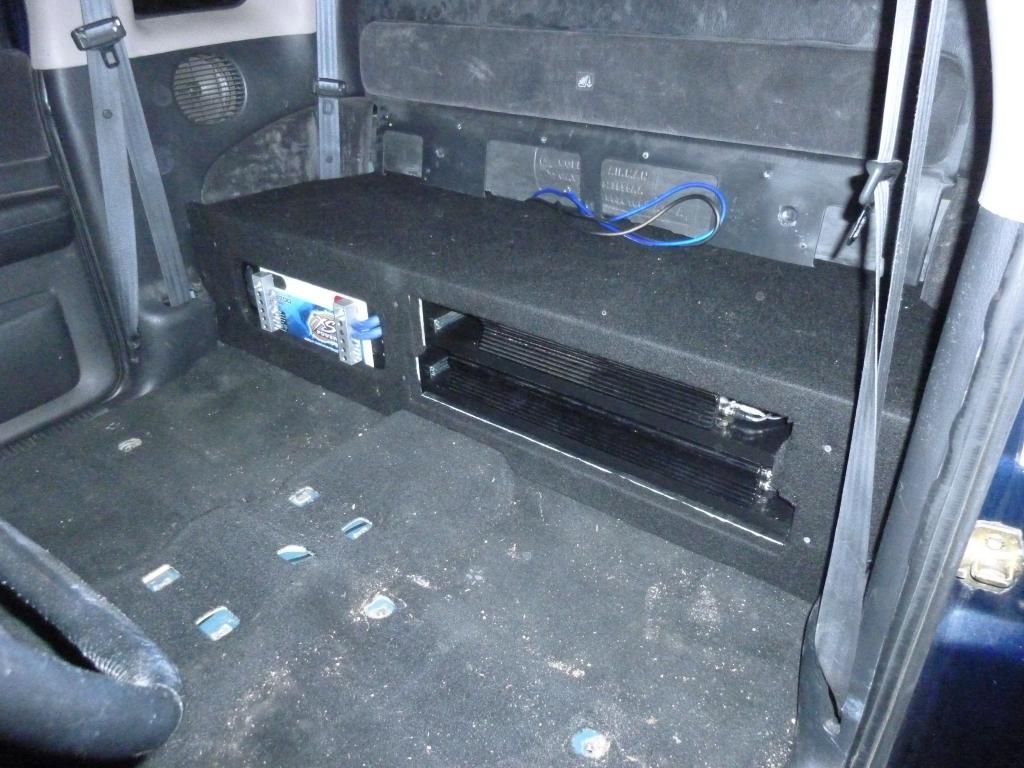
A problem that I was facing with mounting the amps under the back seat, was that I couldn't really access the amps' controls. I think I found a pretty good way to fix that, though...

Once I got the sliding amp shelves all put in, I needed to make a spot for my second battery. I ended up getting another XS Power D2700 just like I put under the hood.

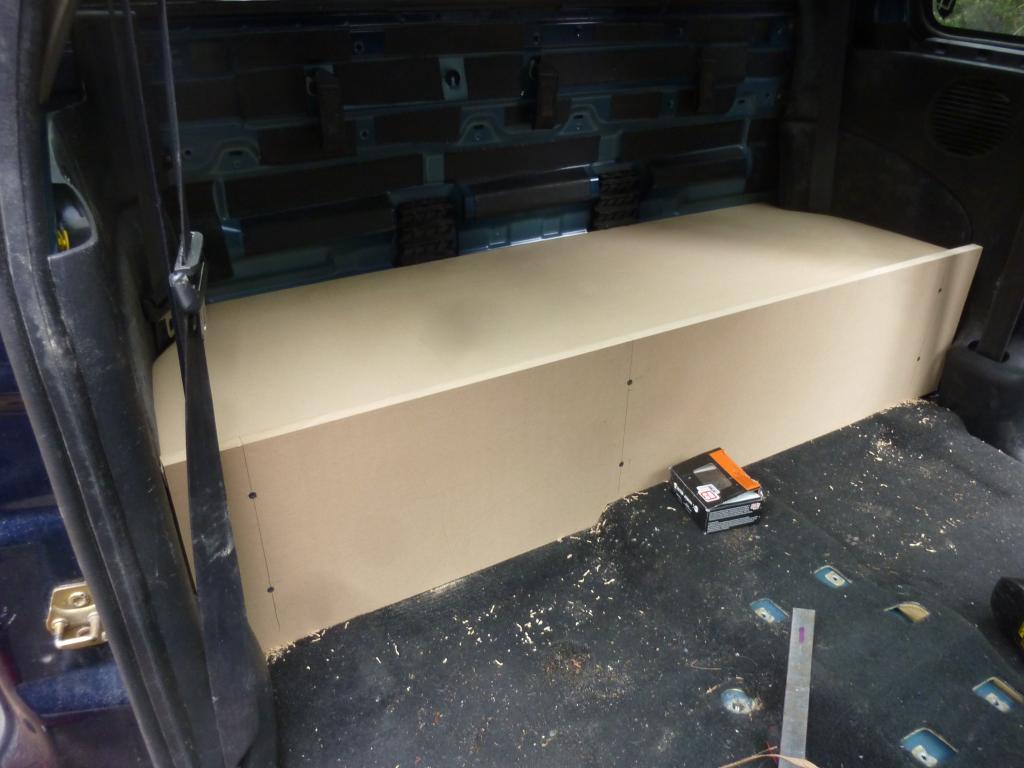
Here's how it all fits into the back of the truck
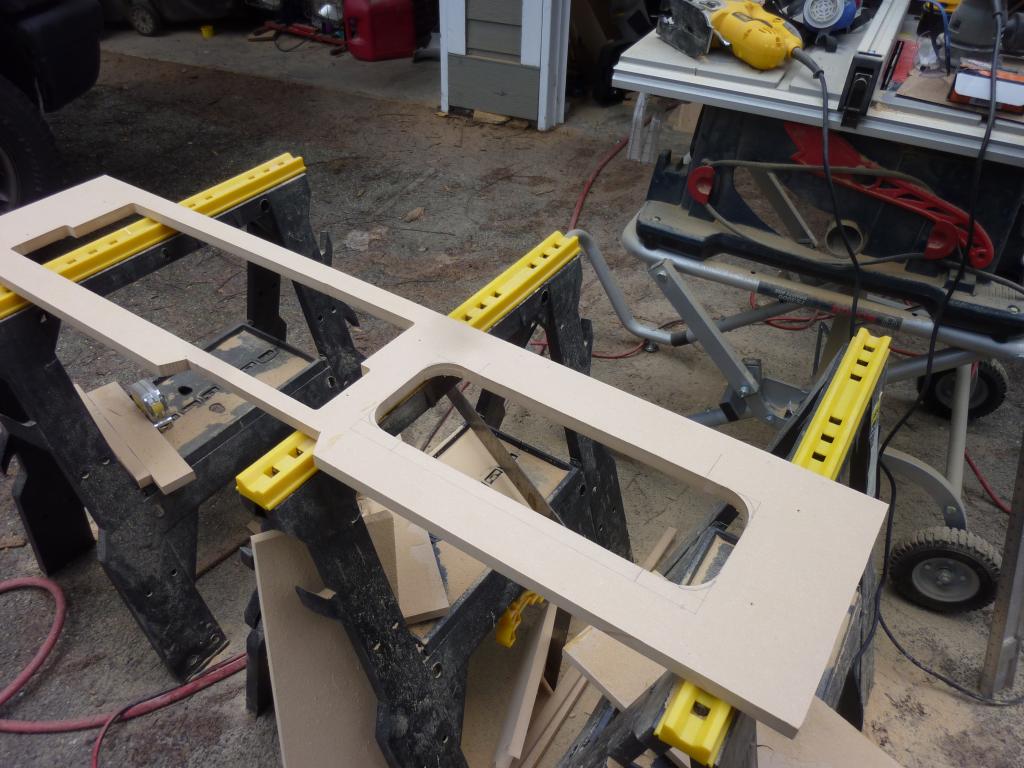
Then I cut out the top and front trim panels
Then I used a tracing bit for my router to cut out the spot for the amps
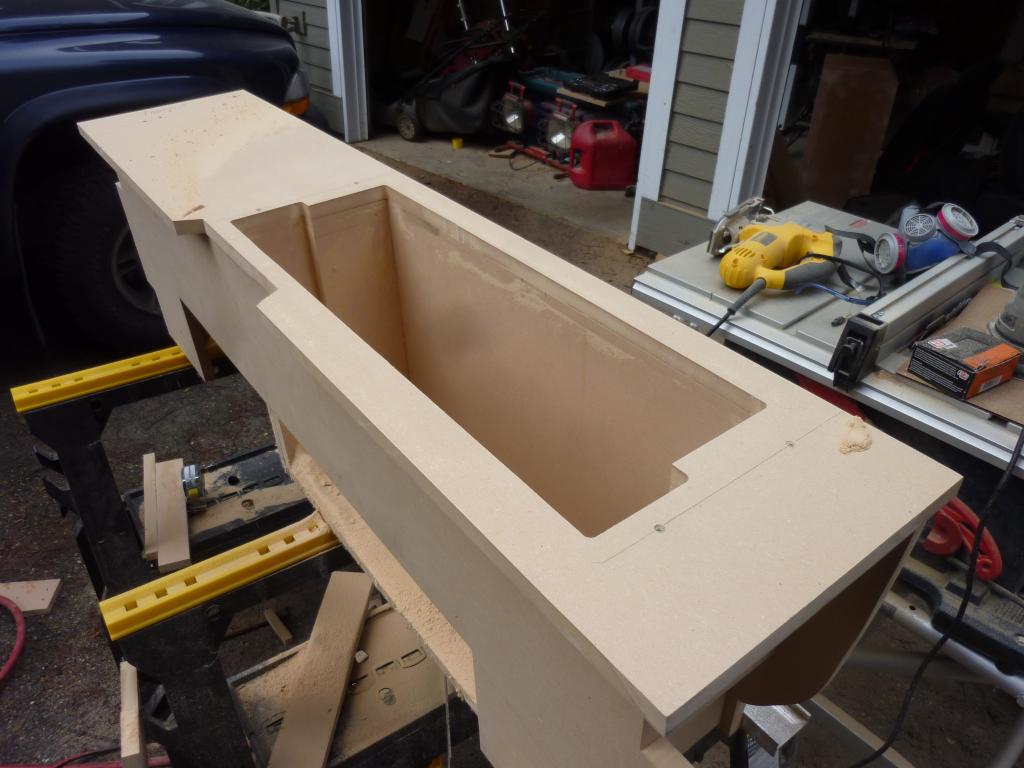
And then I cut out the spot for the battery
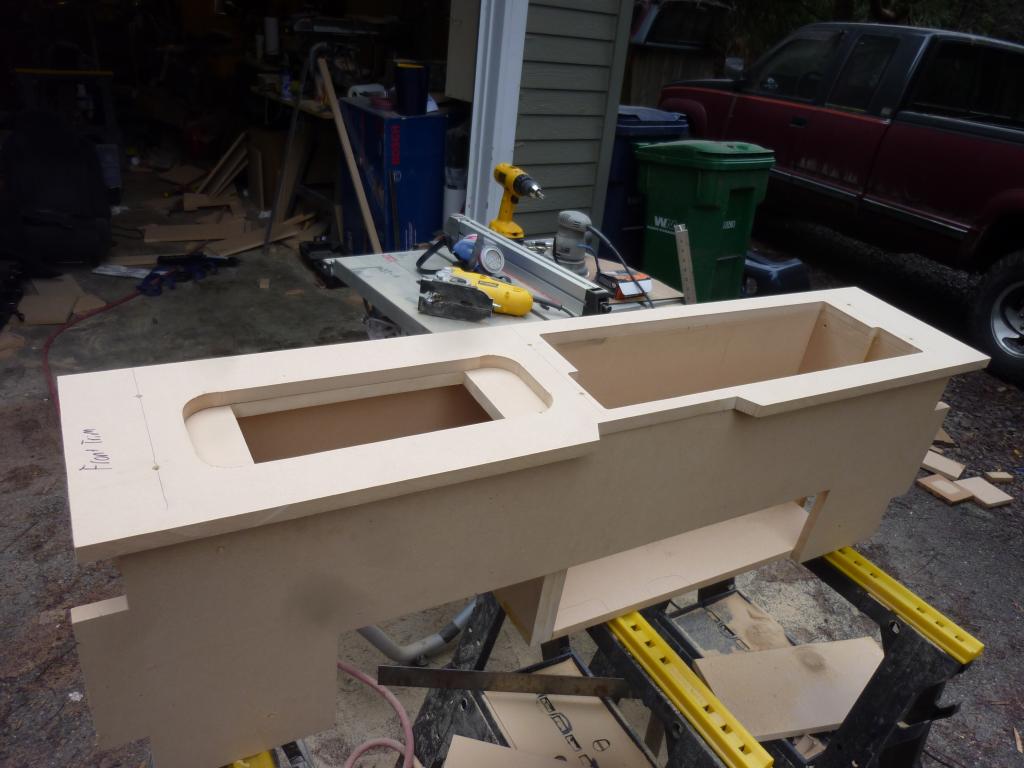
Once I was happy with how everything fit, I moved onto painting the new box and the amp rack. This is with a couple coats of primer on everything. I only painted the spots on the amp rack that were actually going to be visible.
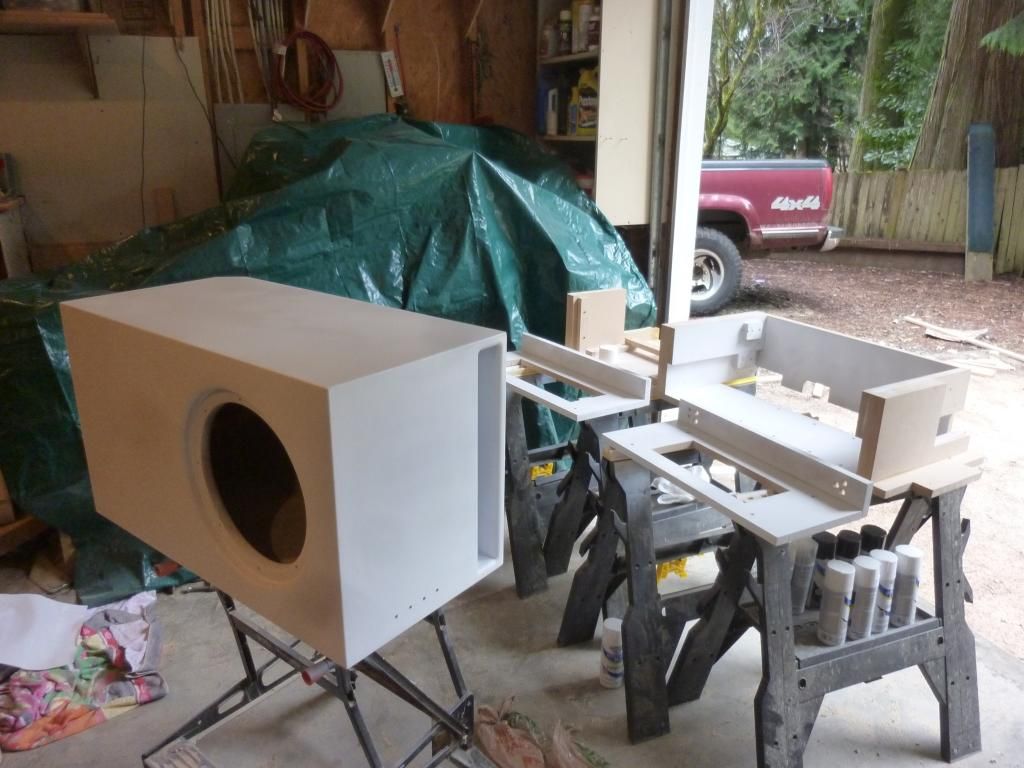
Here you can see it all with gloss black and clear coat. I like painting my ports to match the blue logo on my sub
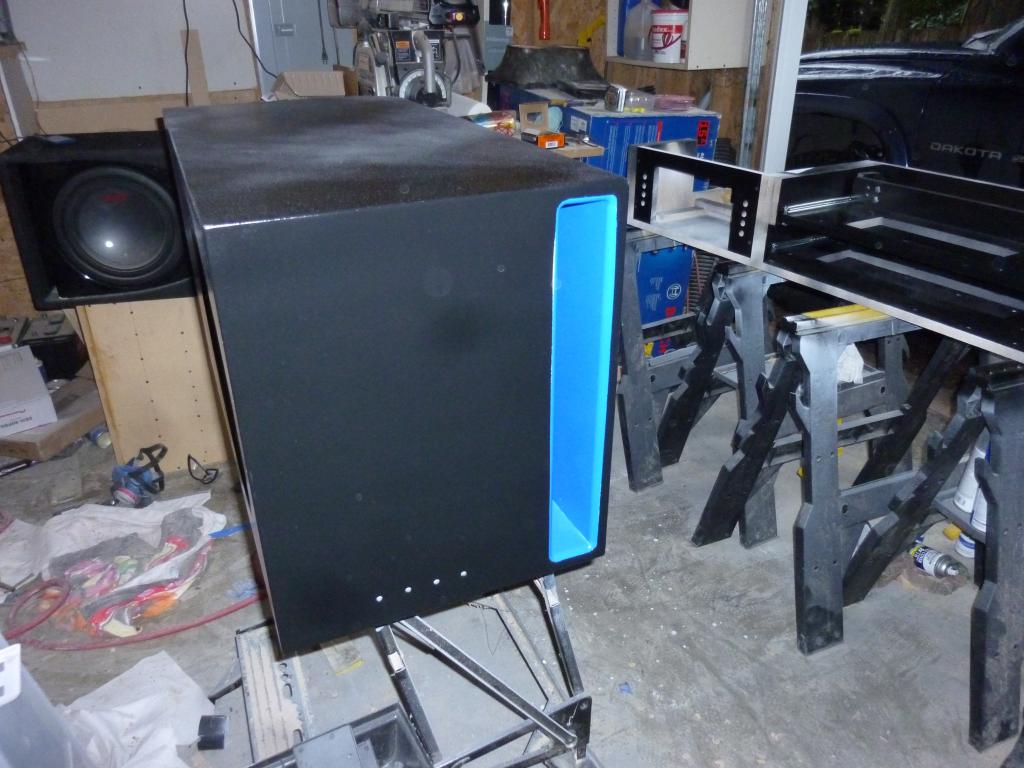
Time to move it all into the truck!
Sub amp wired up

I'm still waiting on my new door speakers to get delivered, so the 4 channel is really just for show right now!
I wrapped the top and front trim pieces in black carpet so that it would match the interior of the truck
And there we go!
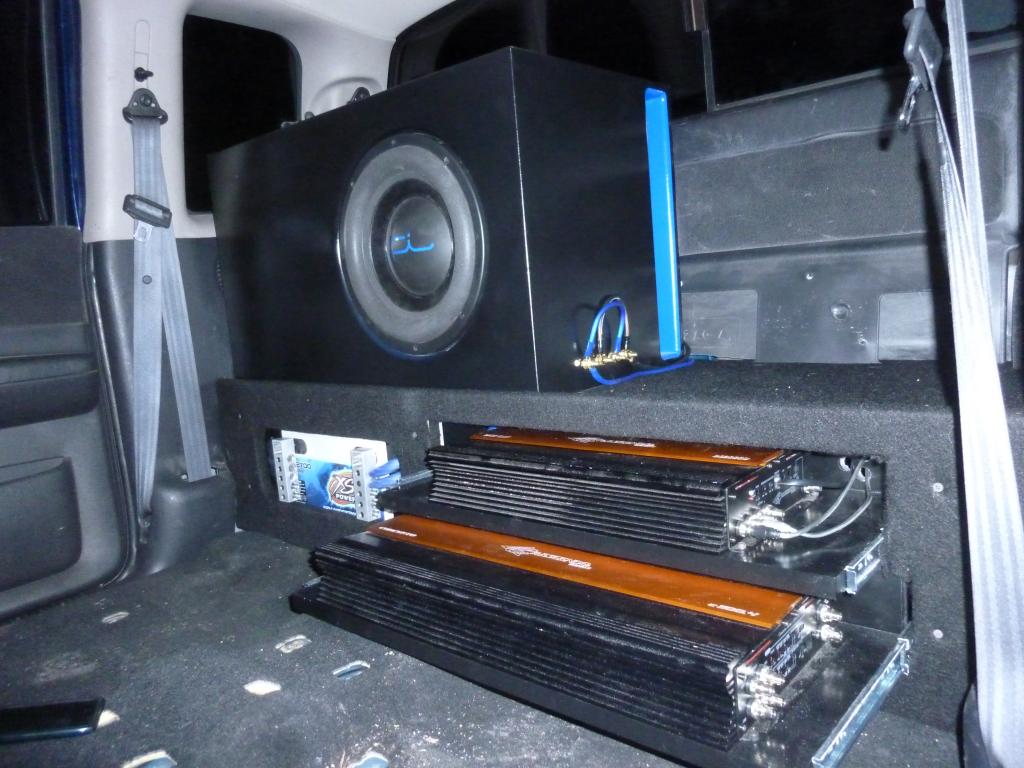
Here's how it all looks in some decent lighting
So now you guys are all caught up on the audio side of my truck!
I ended up getting myself a table saw around Christmas so that I could start building more boxes to experiment with
So of course I had to test it out by building myself a new box. Here's all the pieces cut out.
Here's a little mockup of the inside of the box
And then here's how the box turned out after filling in screw holes with bondo and then doing a lot of sanding.
About the same time as I got the table saw, I also picked up a Crescendo C1100.4 4 channel amp to use for all my mids and highs.
So now that I had a nice 4 channel amp to go along with my sub amp, I needed to find somewhere to fit them both in my truck. I wanted them to take up as little space as possible, but I still needed them to be accessible. I ended up taking everything but the driver's seat out of the truck for a couple weeks while I brainstormed a solution.
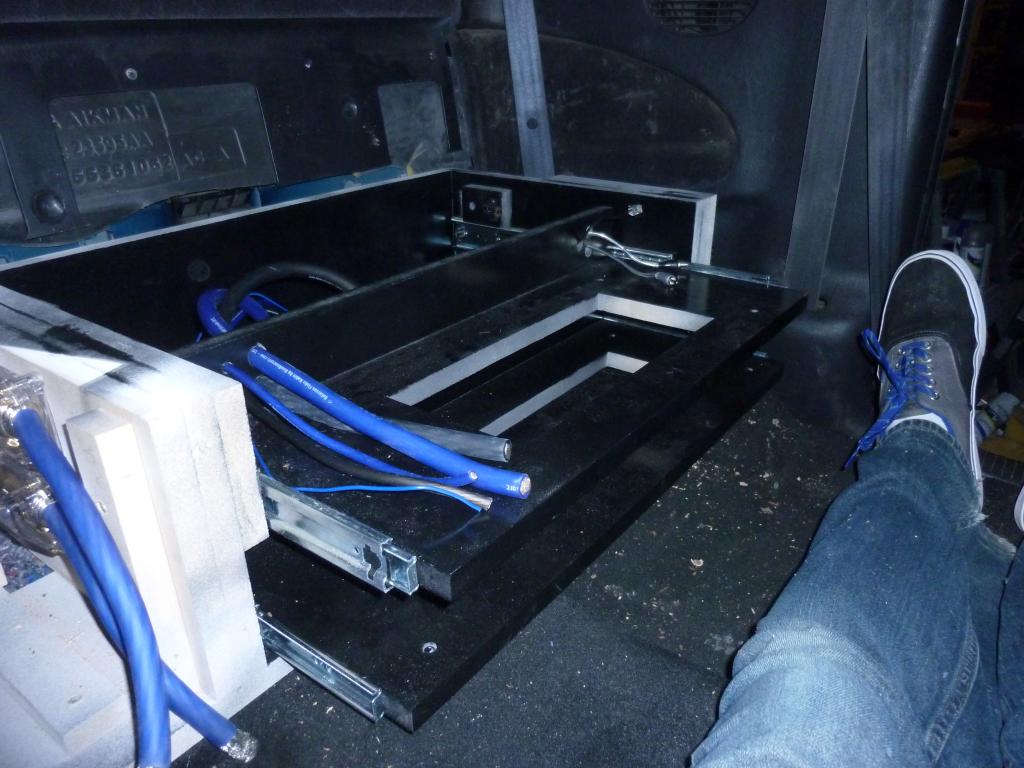
After a lot of measuring, here's what I came up with to replace the back seat
The first thing I needed to do was make a level floor in the back of the cab so that I would have something solid to build on to. I put some threaded rod through the factory anchors for the storage tray so that I could keep everything in place.
Once I got the "floor" all done, I was ready to get working on the amp rack itself. Here it is after a bit of assembly
Then a little bit later
Here's how the amps fit on the rack.
A problem that I was facing with mounting the amps under the back seat, was that I couldn't really access the amps' controls. I think I found a pretty good way to fix that, though...
Once I got the sliding amp shelves all put in, I needed to make a spot for my second battery. I ended up getting another XS Power D2700 just like I put under the hood.
Here's how it all fits into the back of the truck
Then I cut out the top and front trim panels
Then I used a tracing bit for my router to cut out the spot for the amps
And then I cut out the spot for the battery
Once I was happy with how everything fit, I moved onto painting the new box and the amp rack. This is with a couple coats of primer on everything. I only painted the spots on the amp rack that were actually going to be visible.
Here you can see it all with gloss black and clear coat. I like painting my ports to match the blue logo on my sub
Time to move it all into the truck!
Sub amp wired up
I'm still waiting on my new door speakers to get delivered, so the 4 channel is really just for show right now!
I wrapped the top and front trim pieces in black carpet so that it would match the interior of the truck
And there we go!
Here's how it all looks in some decent lighting
So now you guys are all caught up on the audio side of my truck!
#7
04-02-2013, 03:54 PM
Join Date: Nov 2011
Posts: 19
Likes: 0
Received 0 Likes
on
0 Posts
Part 7
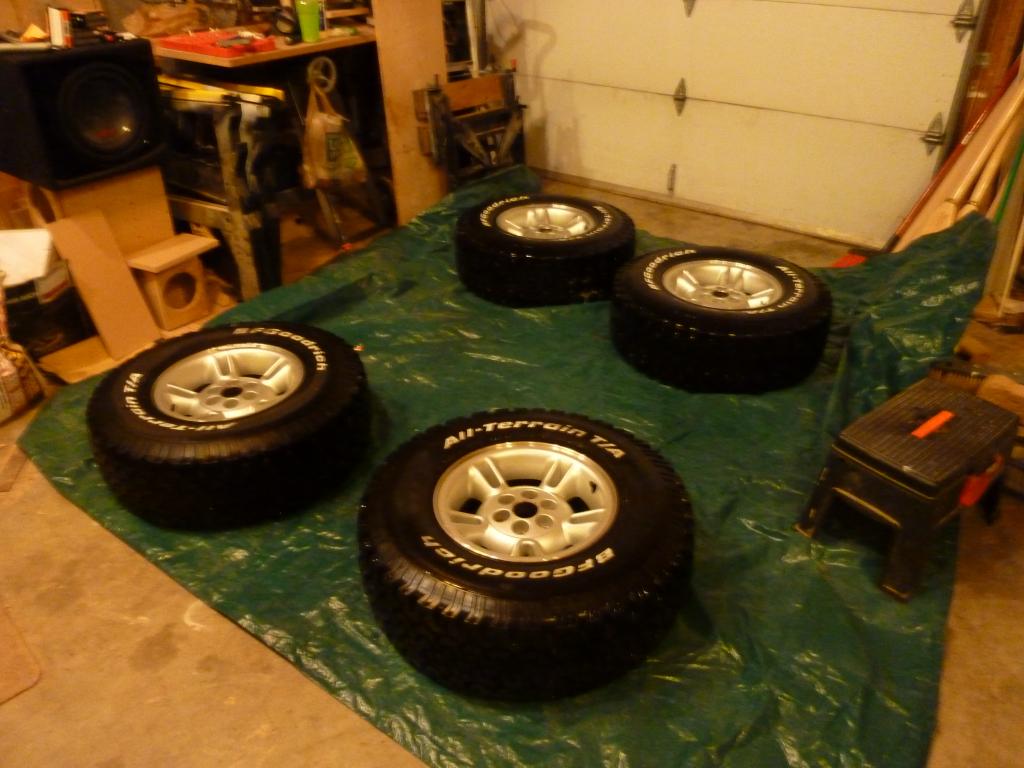
Something I found with my truck (and a lot of other Dakotas and Durangos I see on the road), is that the front wheels seem to get tons of brake dust on them. I loved how my truck looked right after cleaning it, but a couple weeks would go by and then the front wheels look brown again. I had seen a couple Dakotas where they used Plasti Dip on the rims, and I liked it quite a bit so I decided to try it myself!
Here are the wheels after getting them all cleaned and ready to be painted
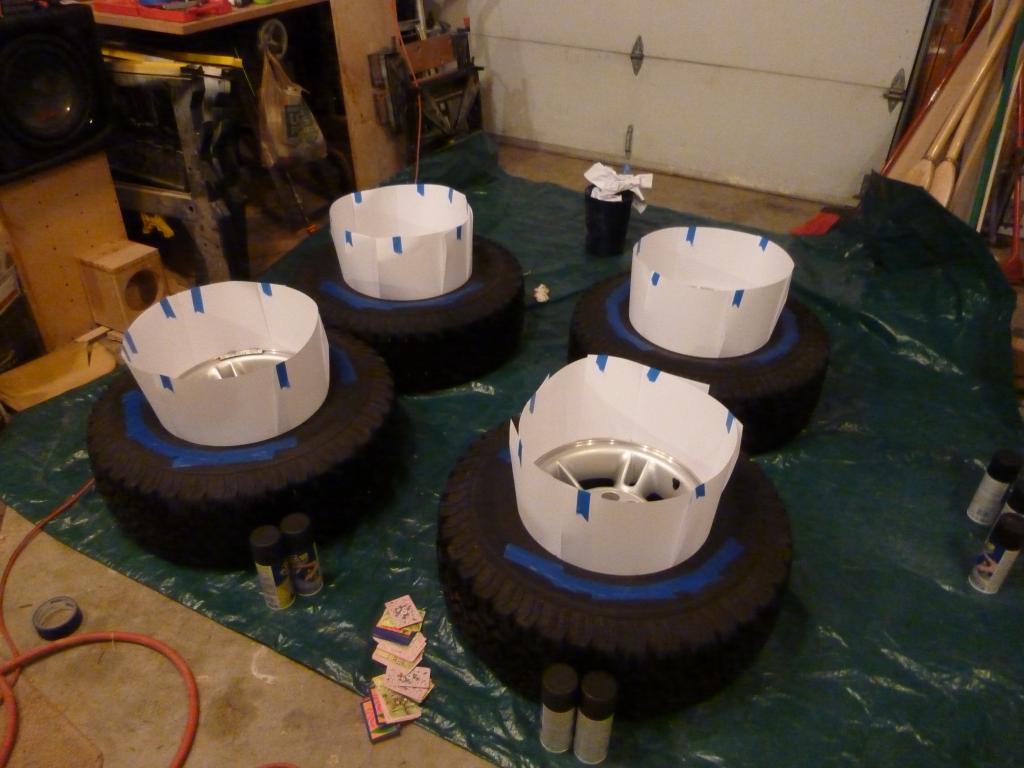
All masked off
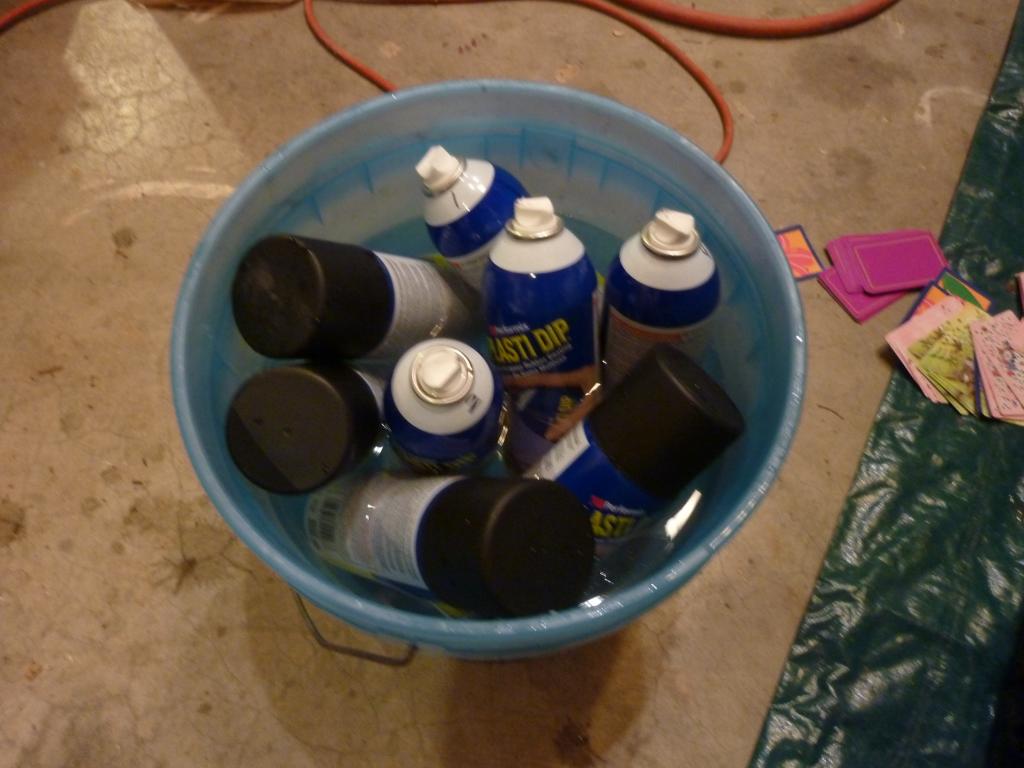
It was pretty cold that night, so I had to keep the cans in warm water so that they would spray correctly
Here are the wheels after putting about a can on each wheel
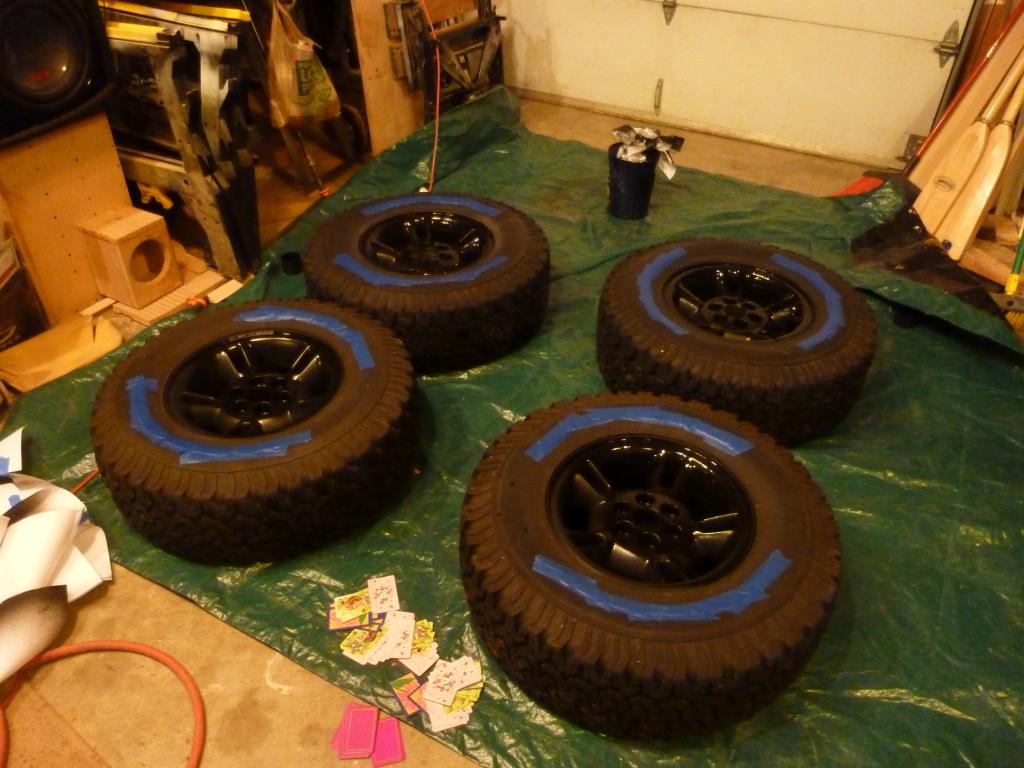
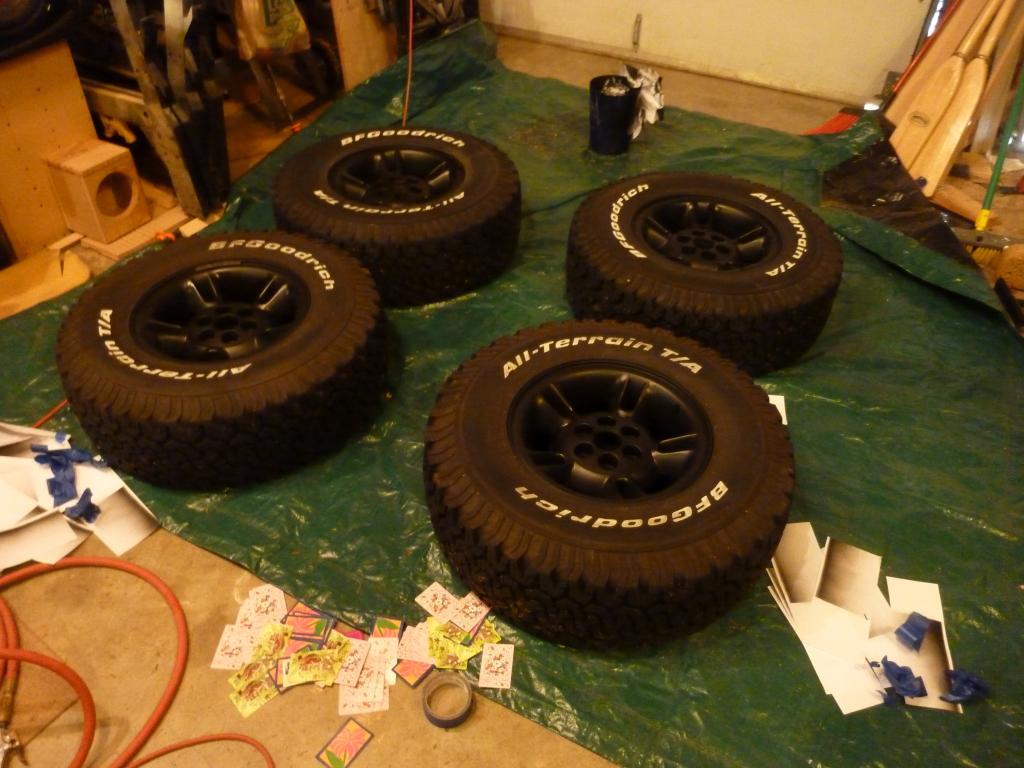
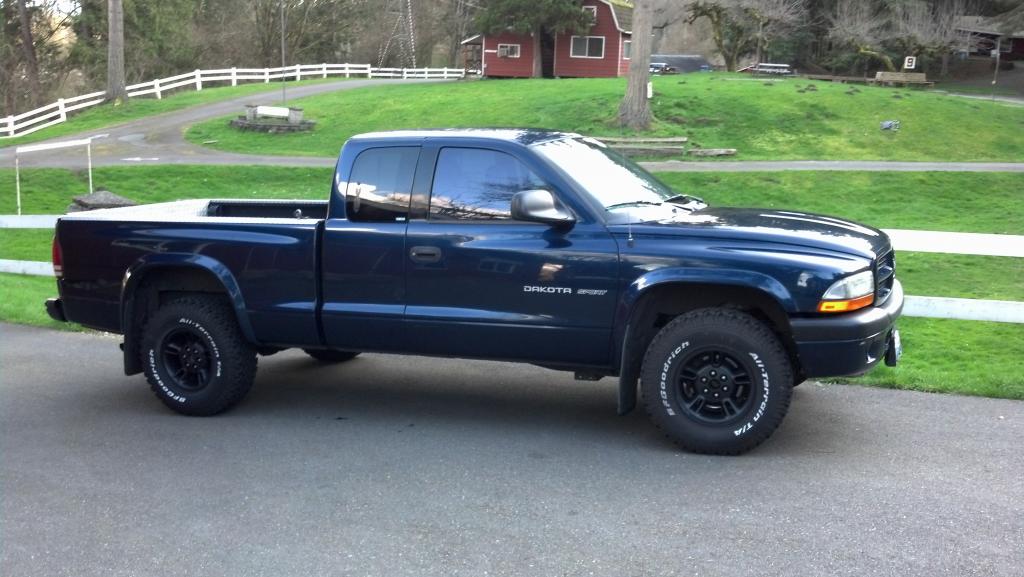
And here's how it turned out! I love how much more aggressive it looks now!
And that is all that I've currently done to my Dakota! I'm planning on putting a catback exhaust and a cold air intake on it sometime this year, but that's still a little ways off. Anyways, let me know what you guys think!
Something I found with my truck (and a lot of other Dakotas and Durangos I see on the road), is that the front wheels seem to get tons of brake dust on them. I loved how my truck looked right after cleaning it, but a couple weeks would go by and then the front wheels look brown again. I had seen a couple Dakotas where they used Plasti Dip on the rims, and I liked it quite a bit so I decided to try it myself!
Here are the wheels after getting them all cleaned and ready to be painted
All masked off
It was pretty cold that night, so I had to keep the cans in warm water so that they would spray correctly
Here are the wheels after putting about a can on each wheel
And here's how it turned out! I love how much more aggressive it looks now!
And that is all that I've currently done to my Dakota! I'm planning on putting a catback exhaust and a cold air intake on it sometime this year, but that's still a little ways off. Anyways, let me know what you guys think!
Trending Topics
#10
06-10-2013, 03:24 AM
Join Date: Nov 2011
Posts: 19
Likes: 0
Received 0 Likes
on
0 Posts
Thanks guys! So far I'm still loving how everything turned out. The clutch bearing on the AC Compressor went out on me on Thursday, so until I have time to fix that, I pulled my AC compressor and slapped a new belt on there so that I can drive it to school and work. Thankfully I'm in Washington so AC is really isn't that important anyways!