

What Did You Do To Your 2ND GEN RAM Today?

Champion
Joined: Sep 2011
Posts: 3,891
Likes: 8
From: NorCal
That thing looks short or it is me? The tranny I mean.
What kind of slow stuff?
Champion
Joined: Sep 2011
Posts: 3,891
Likes: 8
From: NorCal
I just don't like doing this job. It's just not glorious or anything. 
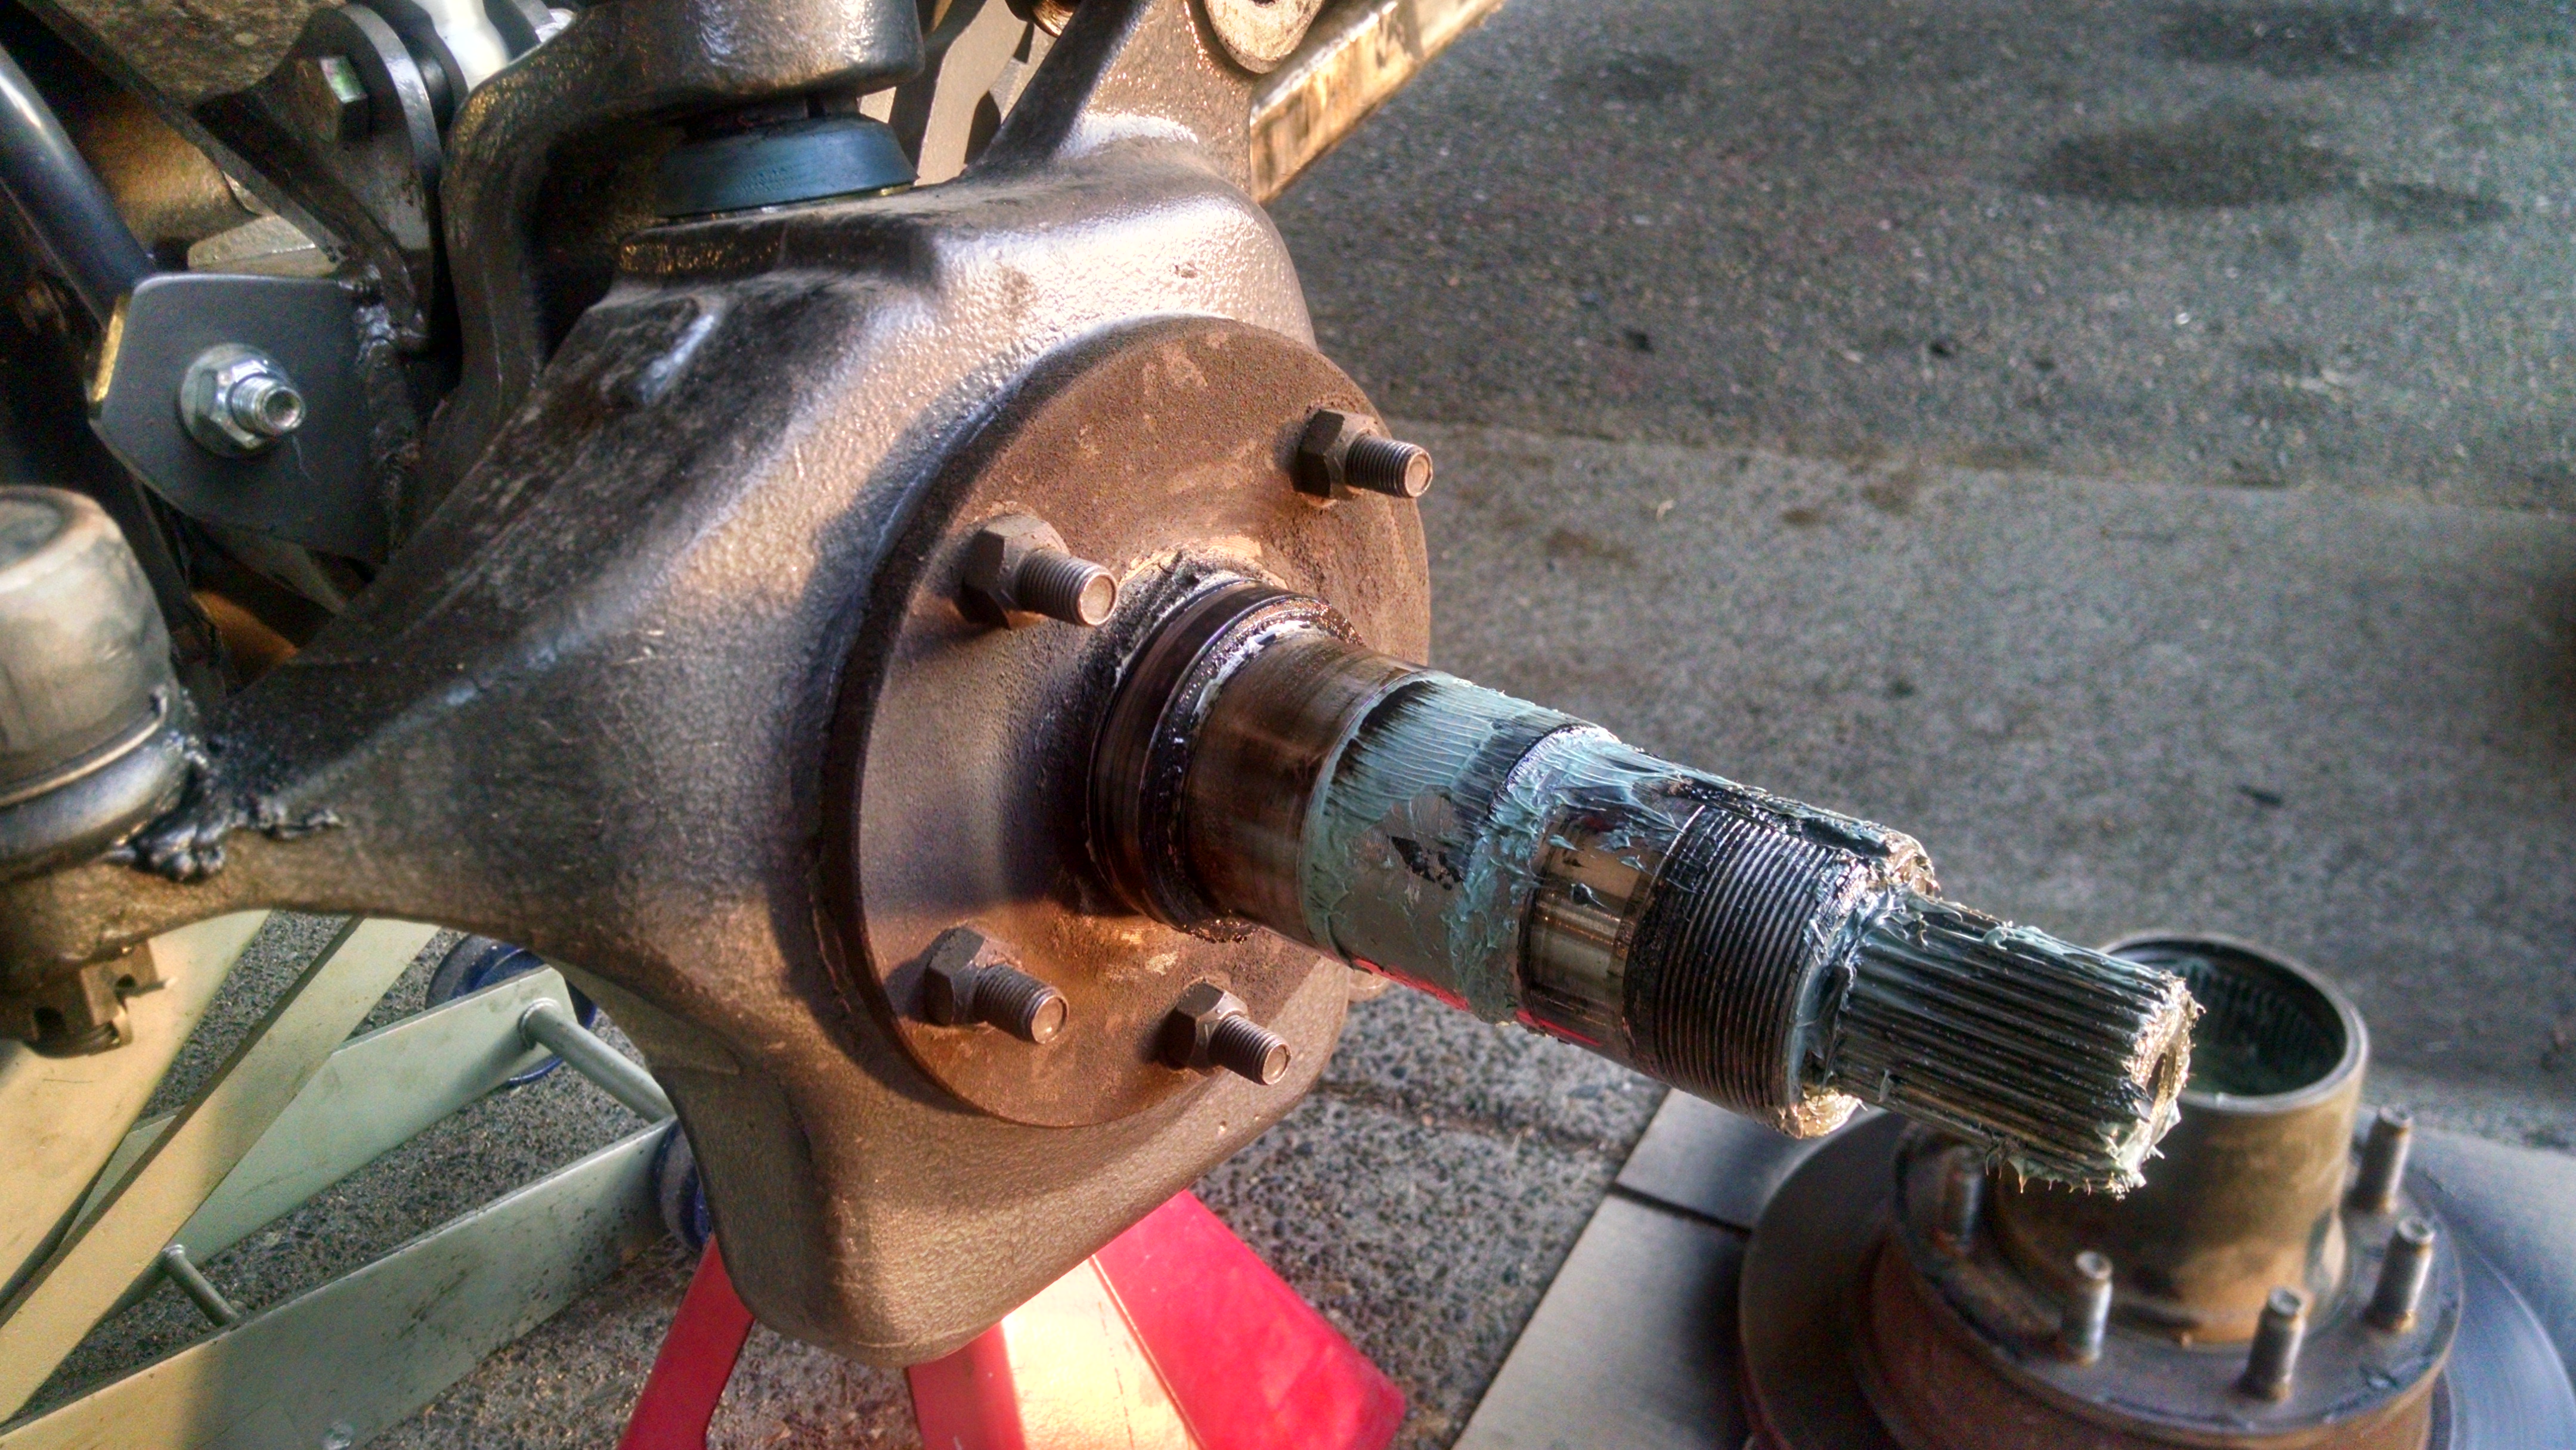
The factory ujoints from 97 finally let go on the driverside. Actually, one cap started breaking and remained together, thankfully. These old joints are not greaseable, which helped the needles dry out, as expected. But this joint can say that it touched the Rubicon on 2 occasions.
I thought this job was like 3 hours or something. Oh NO...all the live long day. grrr

Have to take alot of stuff off to get to the axleshaft, which is so much fun.

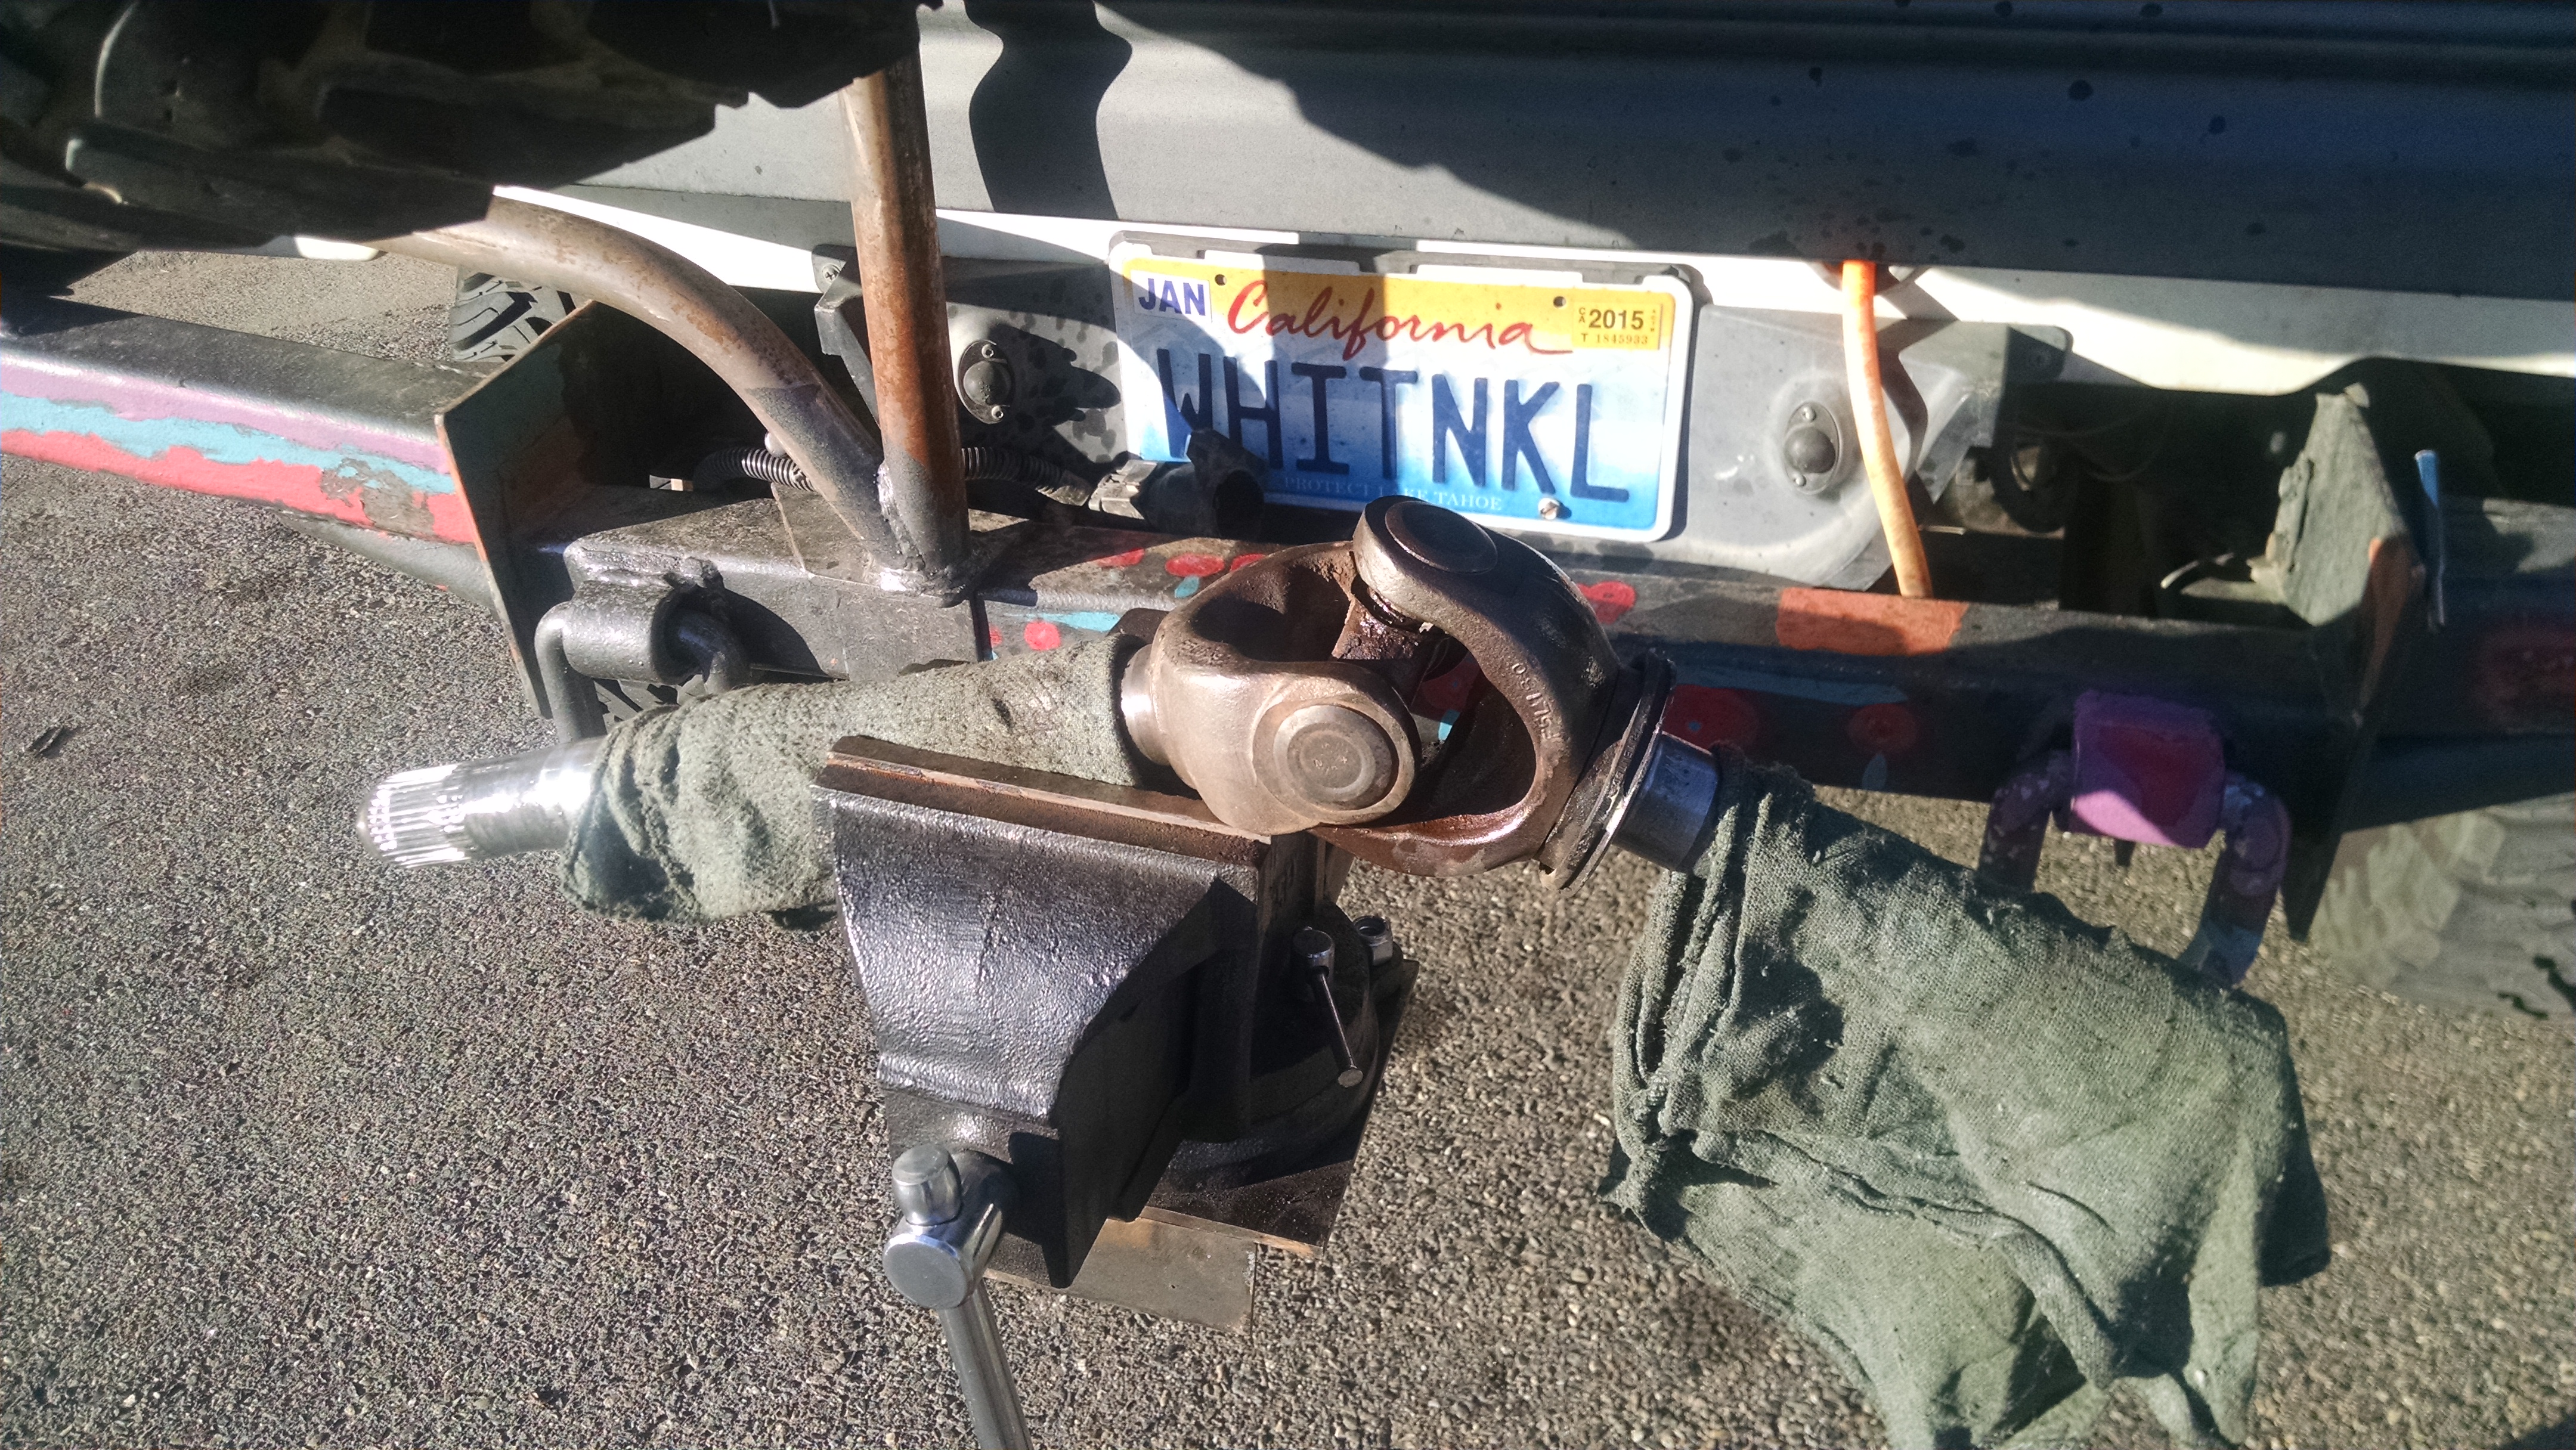
I thought I was cool with this big vise setup. No...the throat was not large enough to get sockets in to help press. So much for trail repair effort help! lol
So I whacked on each joint move them a bit.
Both caps moved a smidge, which was not enough to get vise grips on caps to turn...as that is supposed to be a way since caps are pressed onto the trunnion from the outside.

Used the press and finally the shaft side let go. However, still couldn't get them separated as not enough clearance on the cap from the yoke ear. Had to use cutoff wheel to remove cap material. What a PITA. No pictures of that frustrating bonanza, but here for working stub shaft side.
Tried the press and no freaking luck. Thought I was going to shoot something really bad in a direction of bad results. I think I might of yielded the yoke ears a few thousandths actually.
I ended up using that large socket, which was perfect for cap to go in and seat against the ear. It's the socket size for D60 pinion nut. Then used BFH and socket to whack cap from other end.
Then had to work the cap to break out to get the **** out!
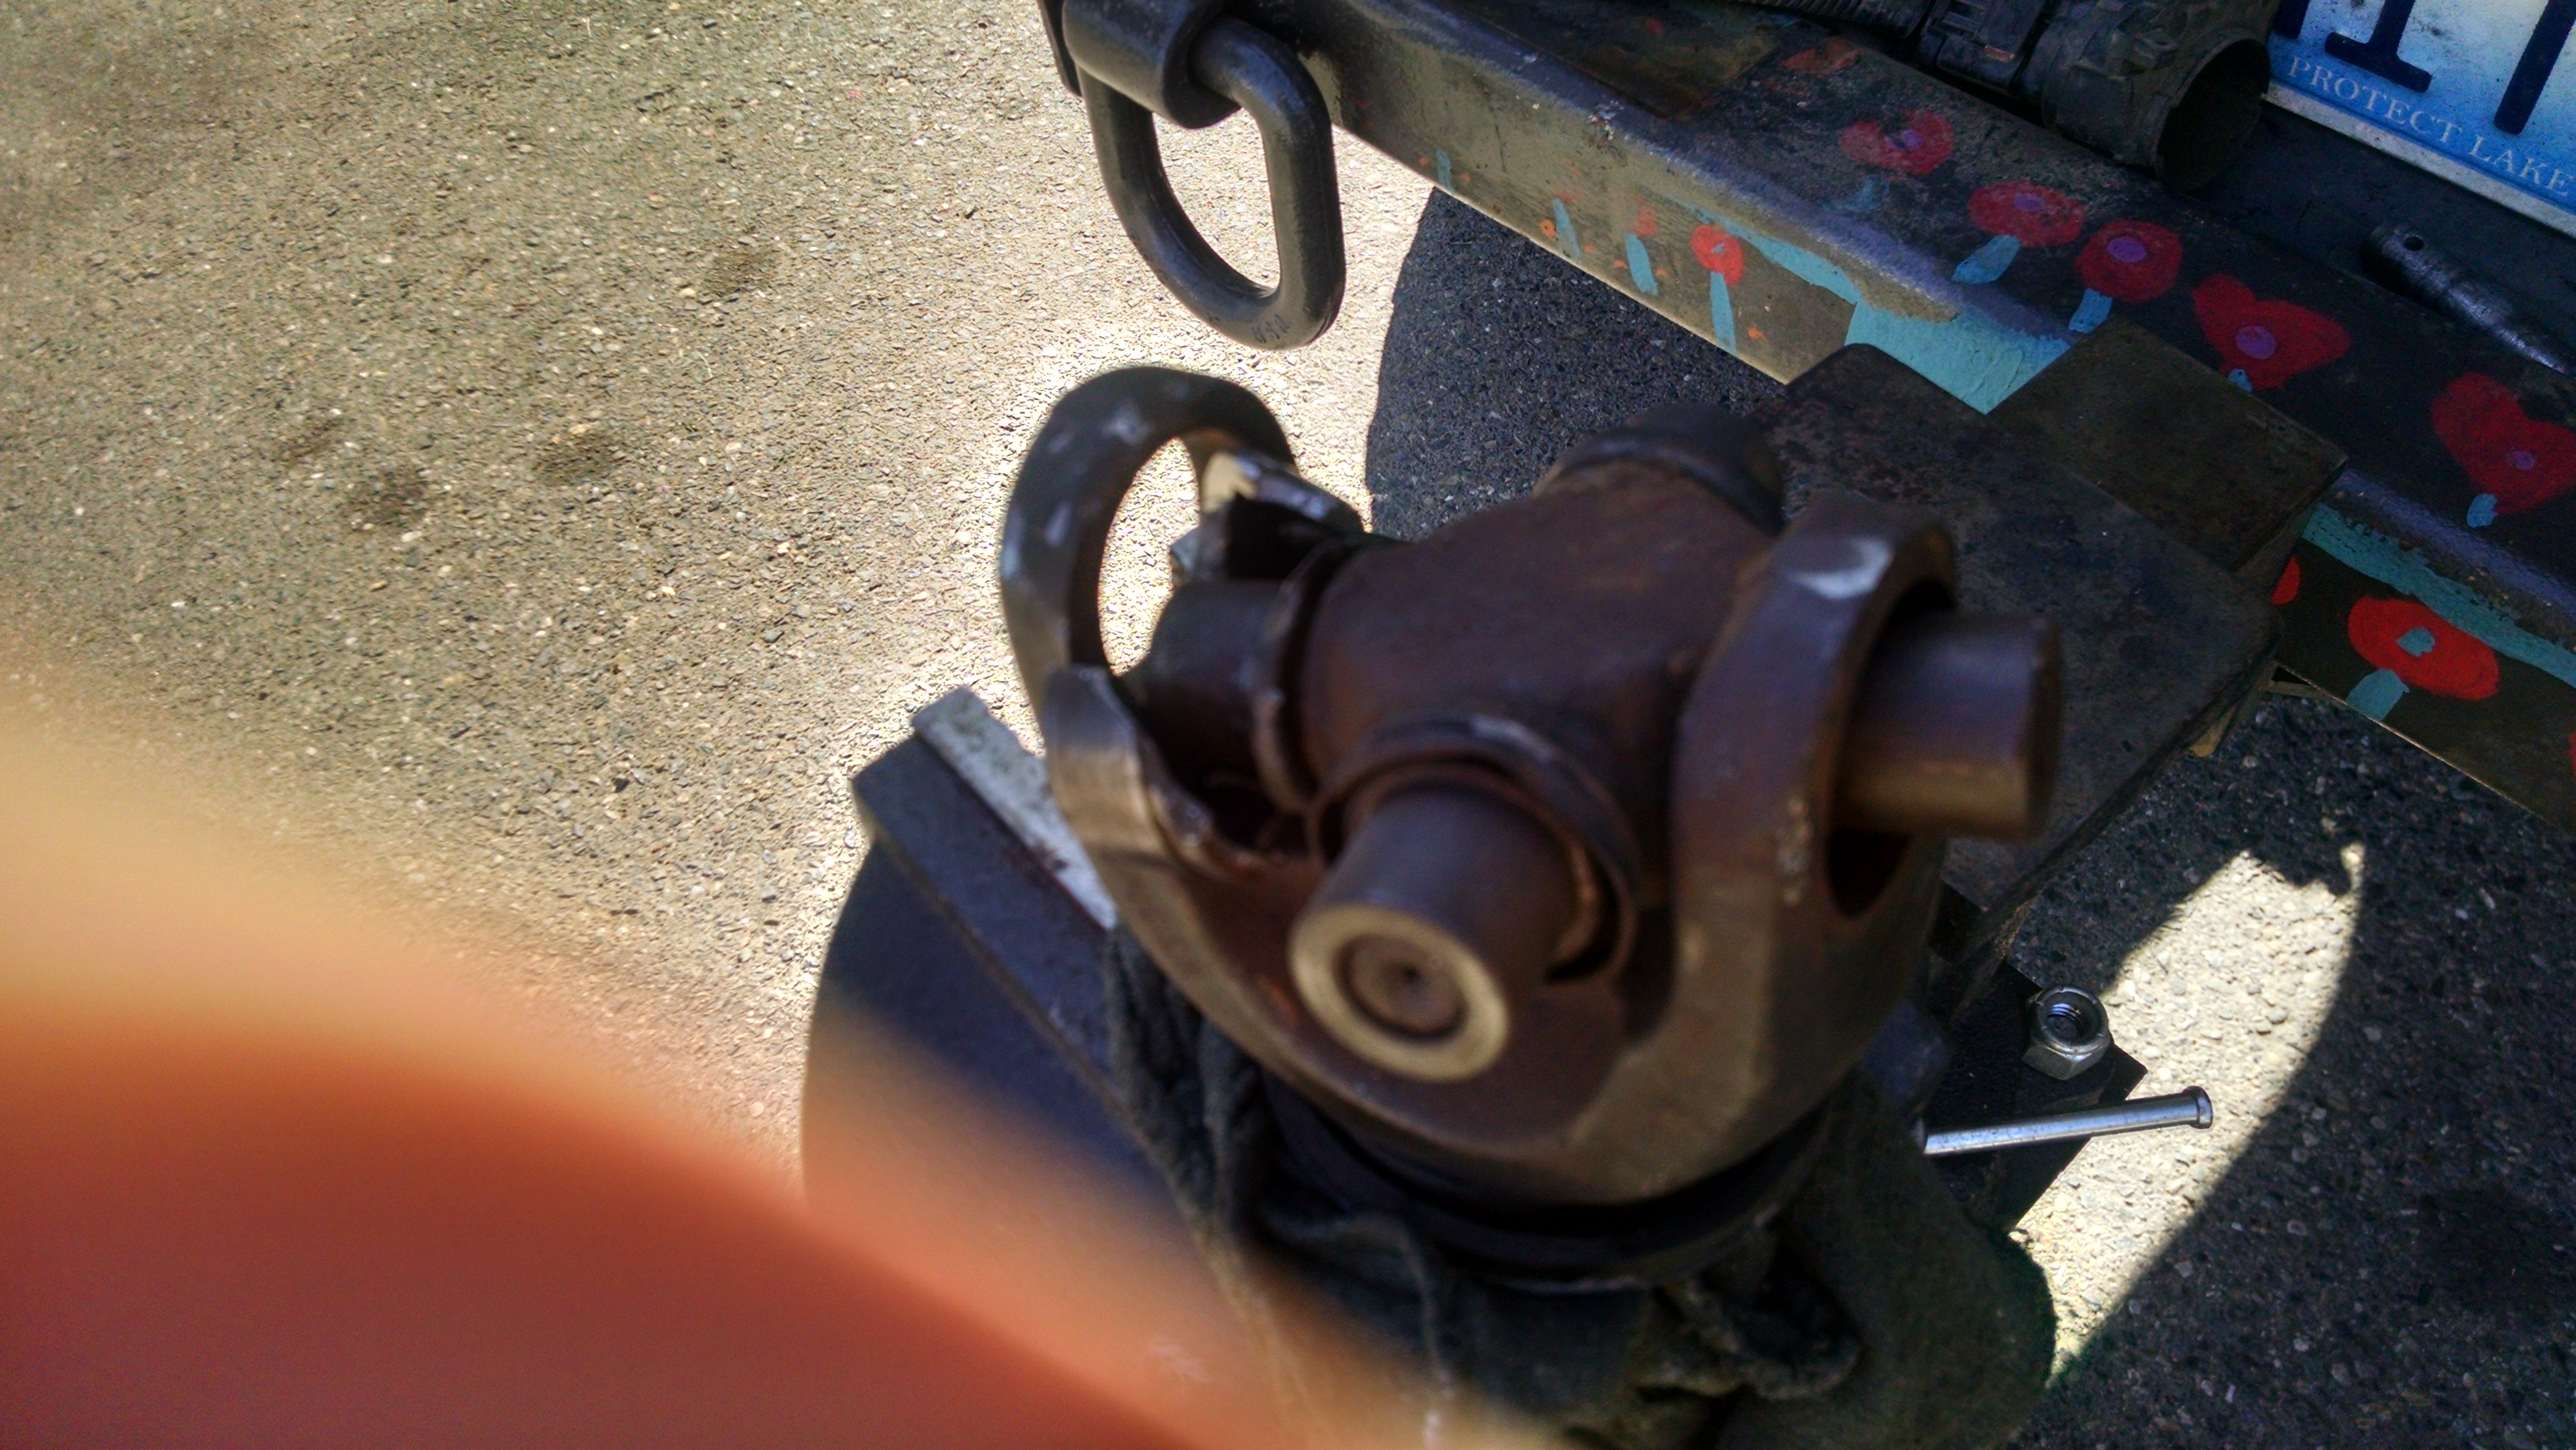
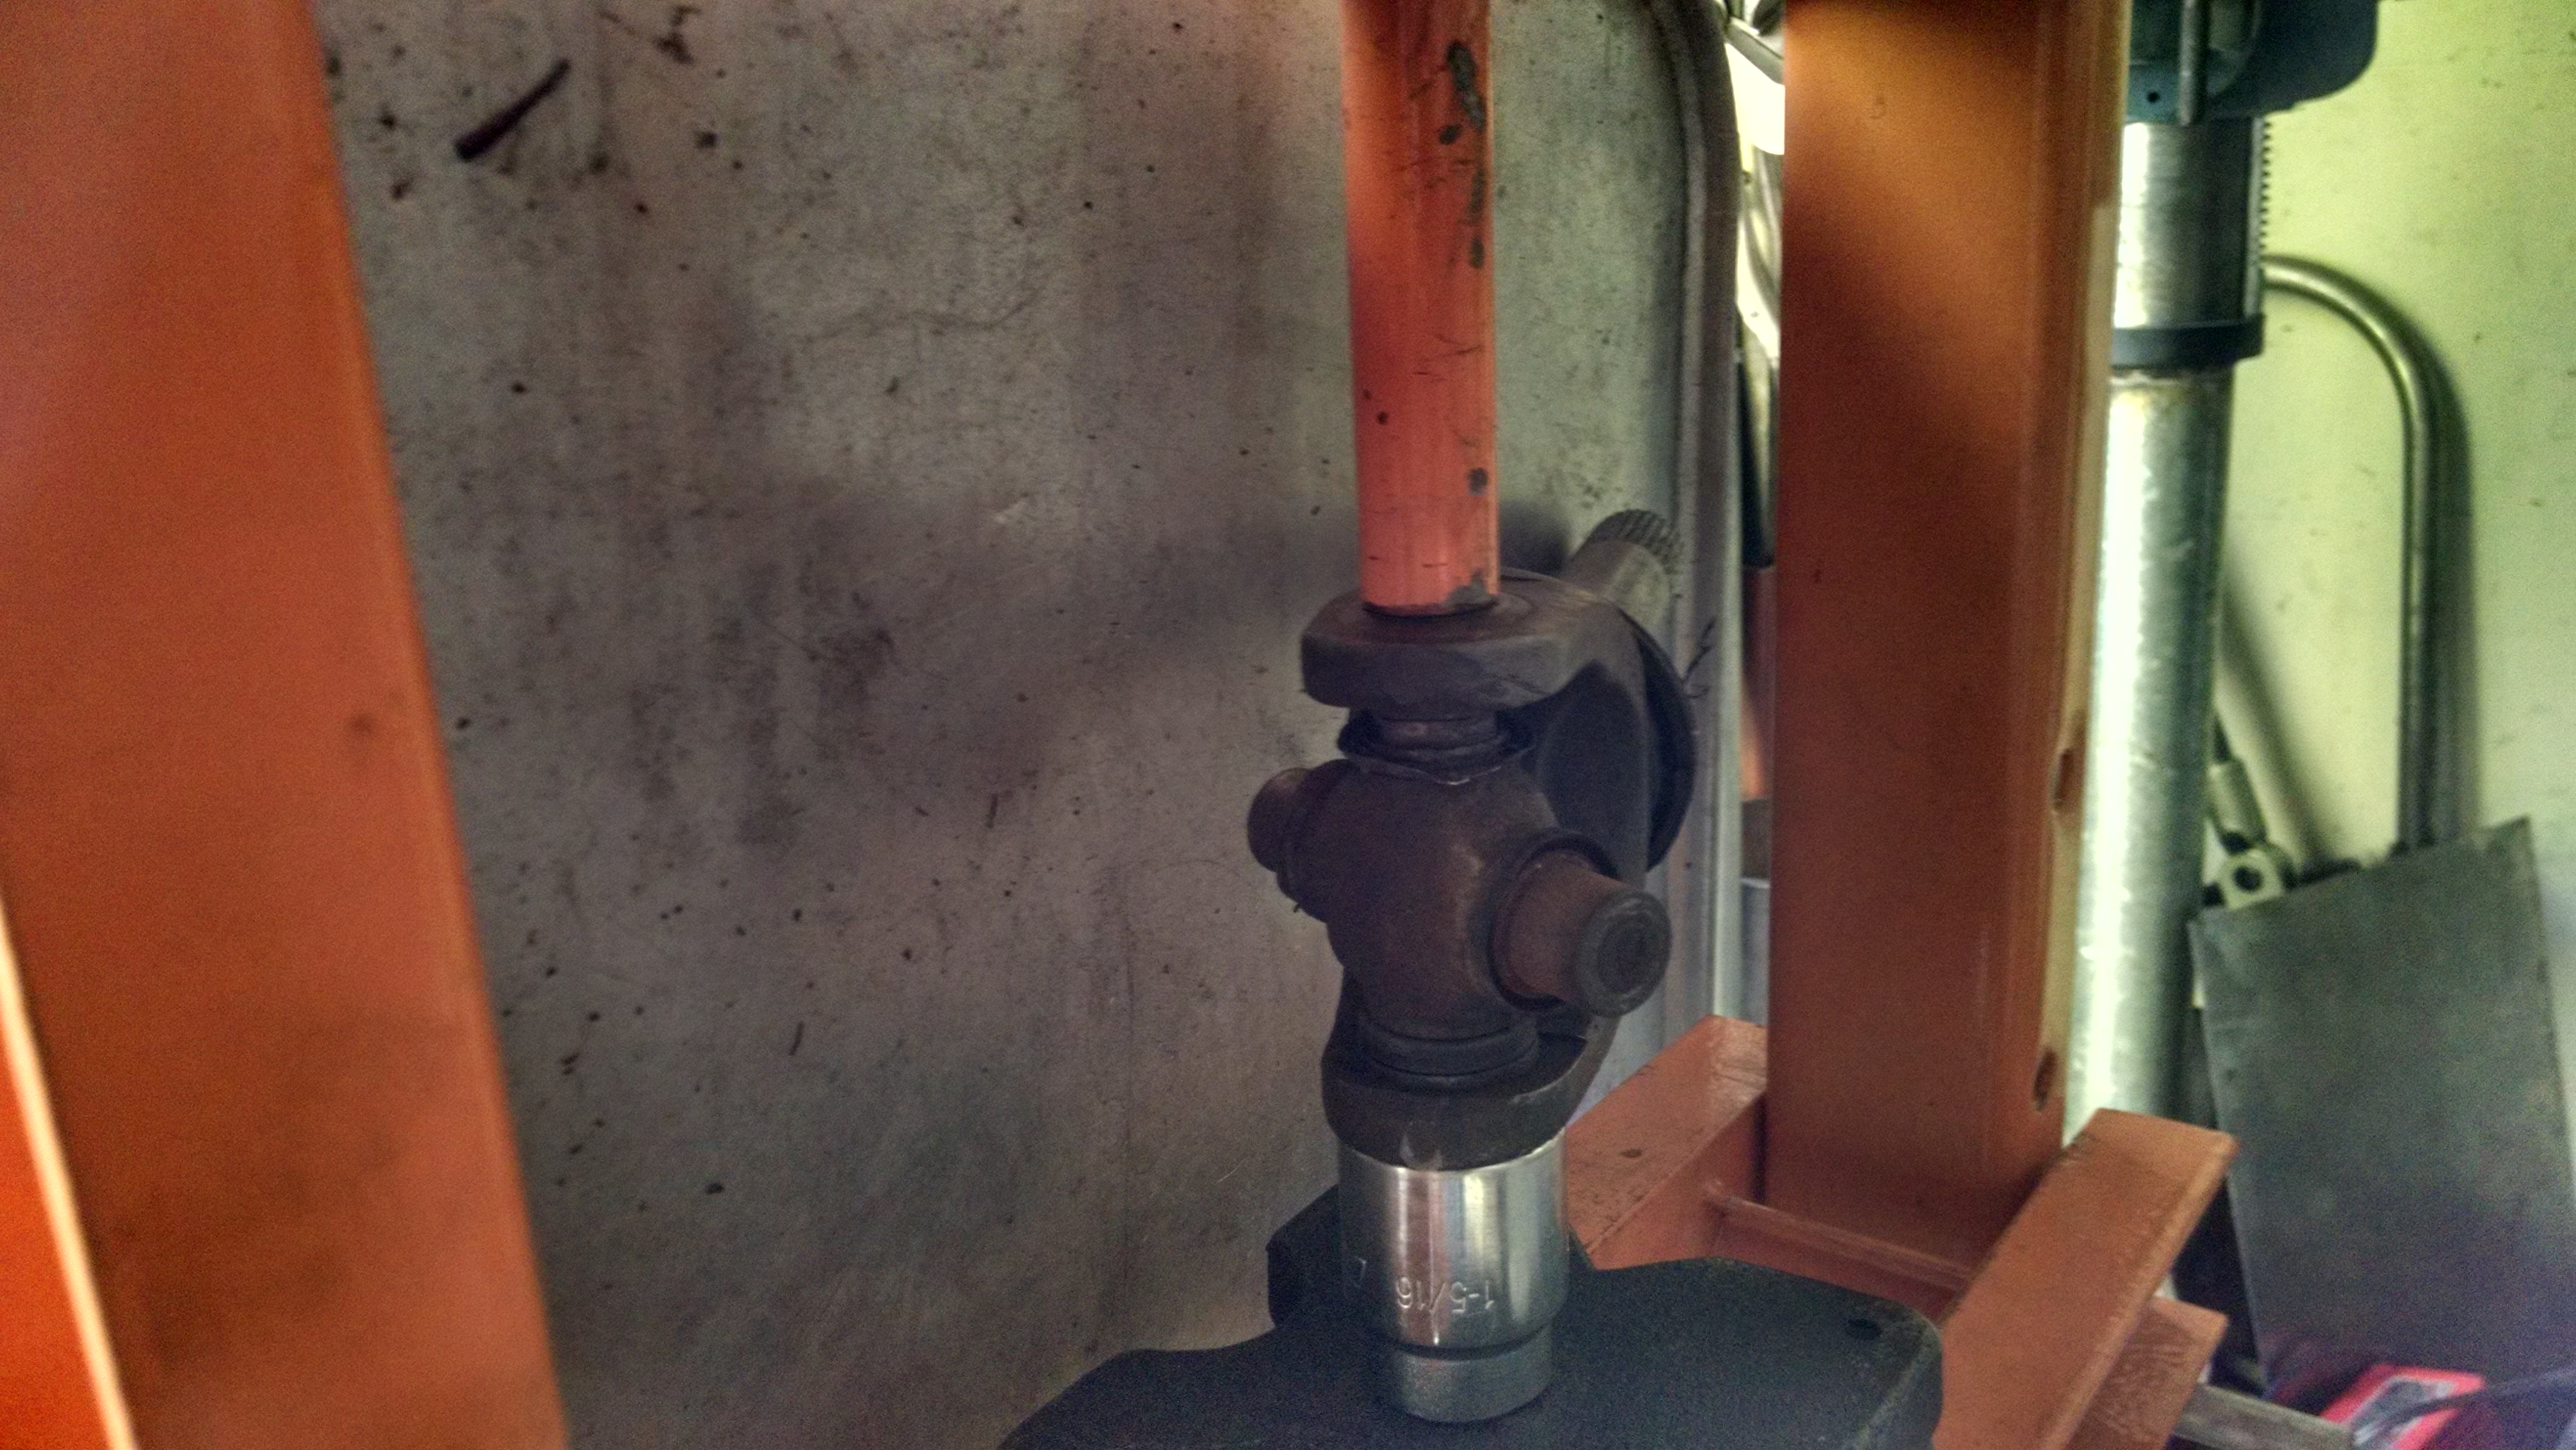
It was a bit easier to press it all back together, but was a bit tricky to get the clips on the inboard side to seat properly. After all back together I look and I see....zerk is point in a difficult direction... Still can work it access it, but geez.
I'm getting a ujoint specific tool dang it! But this one is too expensive.

The factory ujoints from 97 finally let go on the driverside. Actually, one cap started breaking and remained together, thankfully. These old joints are not greaseable, which helped the needles dry out, as expected. But this joint can say that it touched the Rubicon on 2 occasions.
I thought this job was like 3 hours or something. Oh NO...all the live long day. grrr
Have to take alot of stuff off to get to the axleshaft, which is so much fun.
I thought I was cool with this big vise setup. No...the throat was not large enough to get sockets in to help press. So much for trail repair effort help! lol
So I whacked on each joint move them a bit.
Both caps moved a smidge, which was not enough to get vise grips on caps to turn...as that is supposed to be a way since caps are pressed onto the trunnion from the outside.
Used the press and finally the shaft side let go. However, still couldn't get them separated as not enough clearance on the cap from the yoke ear. Had to use cutoff wheel to remove cap material. What a PITA. No pictures of that frustrating bonanza, but here for working stub shaft side.
Tried the press and no freaking luck. Thought I was going to shoot something really bad in a direction of bad results. I think I might of yielded the yoke ears a few thousandths actually.
I ended up using that large socket, which was perfect for cap to go in and seat against the ear. It's the socket size for D60 pinion nut. Then used BFH and socket to whack cap from other end.
Then had to work the cap to break out to get the **** out!
It was a bit easier to press it all back together, but was a bit tricky to get the clips on the inboard side to seat properly. After all back together I look and I see....zerk is point in a difficult direction...
I'm getting a ujoint specific tool dang it! But this one is too expensive.
Record Breaker


Joined: Nov 2011
Posts: 1,898
Likes: 162
From: Cle Elum, WA
This works pretty good too.
http://www.harborfreight.com/ball-jo...les-60827.html
They are cheap and the "C" will bend at some point.
http://www.harborfreight.com/ball-jo...les-60827.html
They are cheap and the "C" will bend at some point.
This works pretty good too.
http://www.harborfreight.com/ball-jo...les-60827.html
They are cheap and the "C" will bend at some point.
http://www.harborfreight.com/ball-jo...les-60827.html
They are cheap and the "C" will bend at some point.
Professional
Joined: Jun 2013
Posts: 159
Likes: 0
From: West TN
My rough measurements come to,
46RH = 31 3/4"
NP435 = 25 1/2"
She is going to be my dedicated wheeling rig.
Champion
Joined: Sep 2011
Posts: 3,891
Likes: 8
From: NorCal
This works pretty good too.
http://www.harborfreight.com/ball-jo...les-60827.html
They are cheap and the "C" will bend at some point.
http://www.harborfreight.com/ball-jo...les-60827.html
They are cheap and the "C" will bend at some point.
Champion
Joined: Sep 2011
Posts: 3,891
Likes: 8
From: NorCal
I want to say it is the A...not really sure as I've had the transmission laying around for 3 months waiting to do this swap. It has the deepgrove ball bearing on the input shaft and the granny low first gear.
My rough measurements come to,
46RH = 31 3/4"
NP435 = 25 1/2"
She is going to be my dedicated wheeling rig.
My rough measurements come to,
46RH = 31 3/4"
NP435 = 25 1/2"
She is going to be my dedicated wheeling rig.
Here is a breakdown on the reductions...

Are you going to add the Behemoth doubler to help with that driveshaft length? I can't remember if you are standard cab.
"Dedicated wheeling ring" does not answer "what kind of slow stuff".

Champion
Joined: Jun 2012
Posts: 3,096
Likes: 2
From: Iowa
Left work for my usual 30mile trek back home, and got a txt from the wife saying I95 was backed up, and I should take Federal Hwy home... not a problem, thanks for the heads-up.
About 4miles into the trip I get the warning "BING" and a Check Gauges light (first time ever)... a quick glance and I see temp is high, so I back off and take the first drive off the street... it happened to be an old closed down auto parts store (irrelevant to the story), and I rolled around the back... popped the hood to see the top radiator hose flapping in the breeze.
The plastic bib had broken off the top of the left tank at the hose clamp.
OK... break out the screwdriver, loosen the clamp (don't burn yourself) slide the clamp within an 1/8" of the end of the hose, push the hose onto the stub of the bib and tighten it up.
Now, for some water... looked around, and there was a coiled hose under a bush on the corner of the building, so I was in luck... fill it up, started it up and topped it off after it burped a few times, cap on, and I was on my merry way... lost about 15min of happy hour
What temp does the check gauges light come on at?
It hit around 235�F on the gauge by the time I shut down... I'm hoping I haven't damaged the heads.
Guess I'm looking for a good ali radiator over the weekend.
If you have stock heads kiss them goodbye. If they ran out of water the temperature was most certainly well in excess of the 235 on your temp gauge. Change your oil right away too.
Put it this way: If stock heads can't handle the 190* factory running temp how much do you think they can handle at temps over 235*?
And I hate to break it to you, putting cold water in out of a hose into a steaming hot engine is a BAD idea. Could crack your block easily.
The higher quality and expensive ones are great and often come with some kind of lifetimes replacement policy.
The cheapo harbor freight one should be plenty for u joints. And is trail repair friendly.
If you have stock heads kiss them goodbye. If they ran out of water the temperature was most certainly well in excess of the 235 on your temp gauge. Change your oil right away too.
Put it this way: If stock heads can't handle the 190* factory running temp how much do you think they can handle at temps over 235*?
And I hate to break it to you, putting cold water in out of a hose into a steaming hot engine is a BAD idea. Could crack your block easily.
Put it this way: If stock heads can't handle the 190* factory running temp how much do you think they can handle at temps over 235*?
And I hate to break it to you, putting cold water in out of a hose into a steaming hot engine is a BAD idea. Could crack your block easily.
Water coming out of hose is hardly "cold". Is it a good idea? Nah...
His only real danger would be if there was a large air pocket that got trapped in the heads for a while before coolant circulated.