

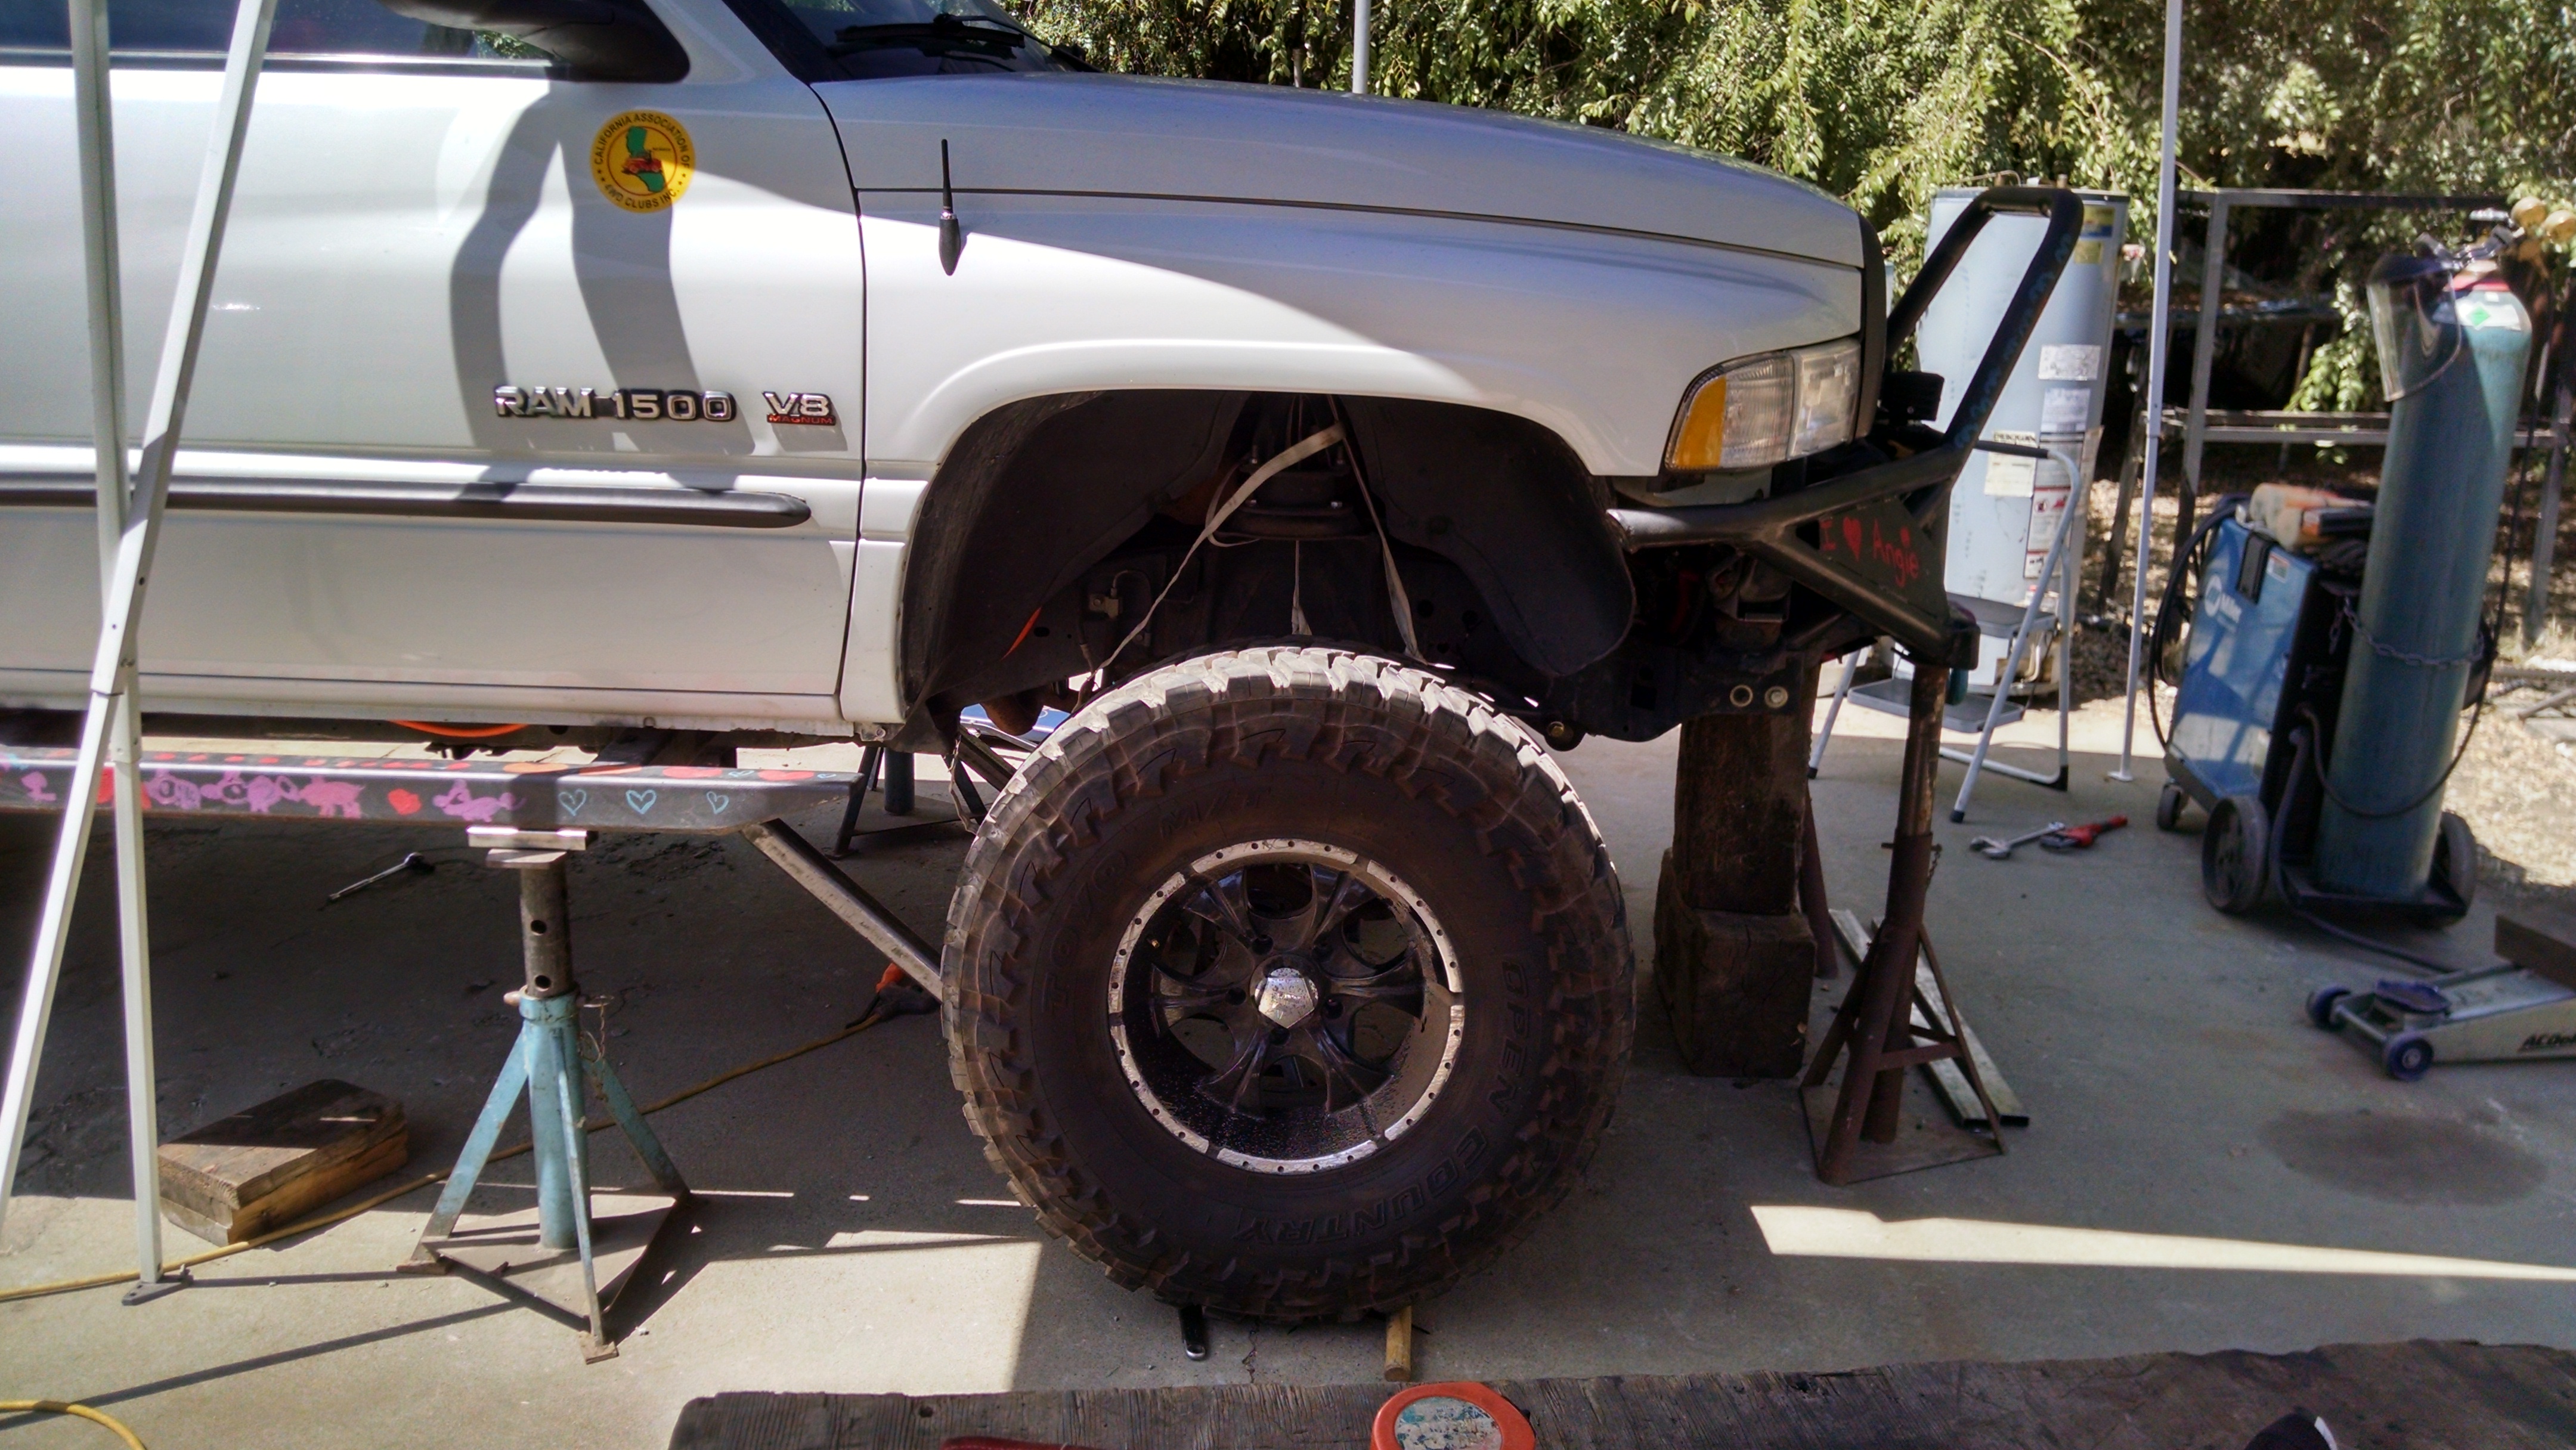
Wheeling a fullsize

From what ive seen and heard, moog has gone down in craftsmanship in the last 5 or so years. I refuse to use moog, but I havent had to replace any bjs on my truck yet...
Thread Starter
|
Champion
Joined: Sep 2011
Posts: 3,891
Likes: 8
From: NorCal
^He said NOT to use Moog. 
No pics yesterday b/c the light went away.
Progress was:
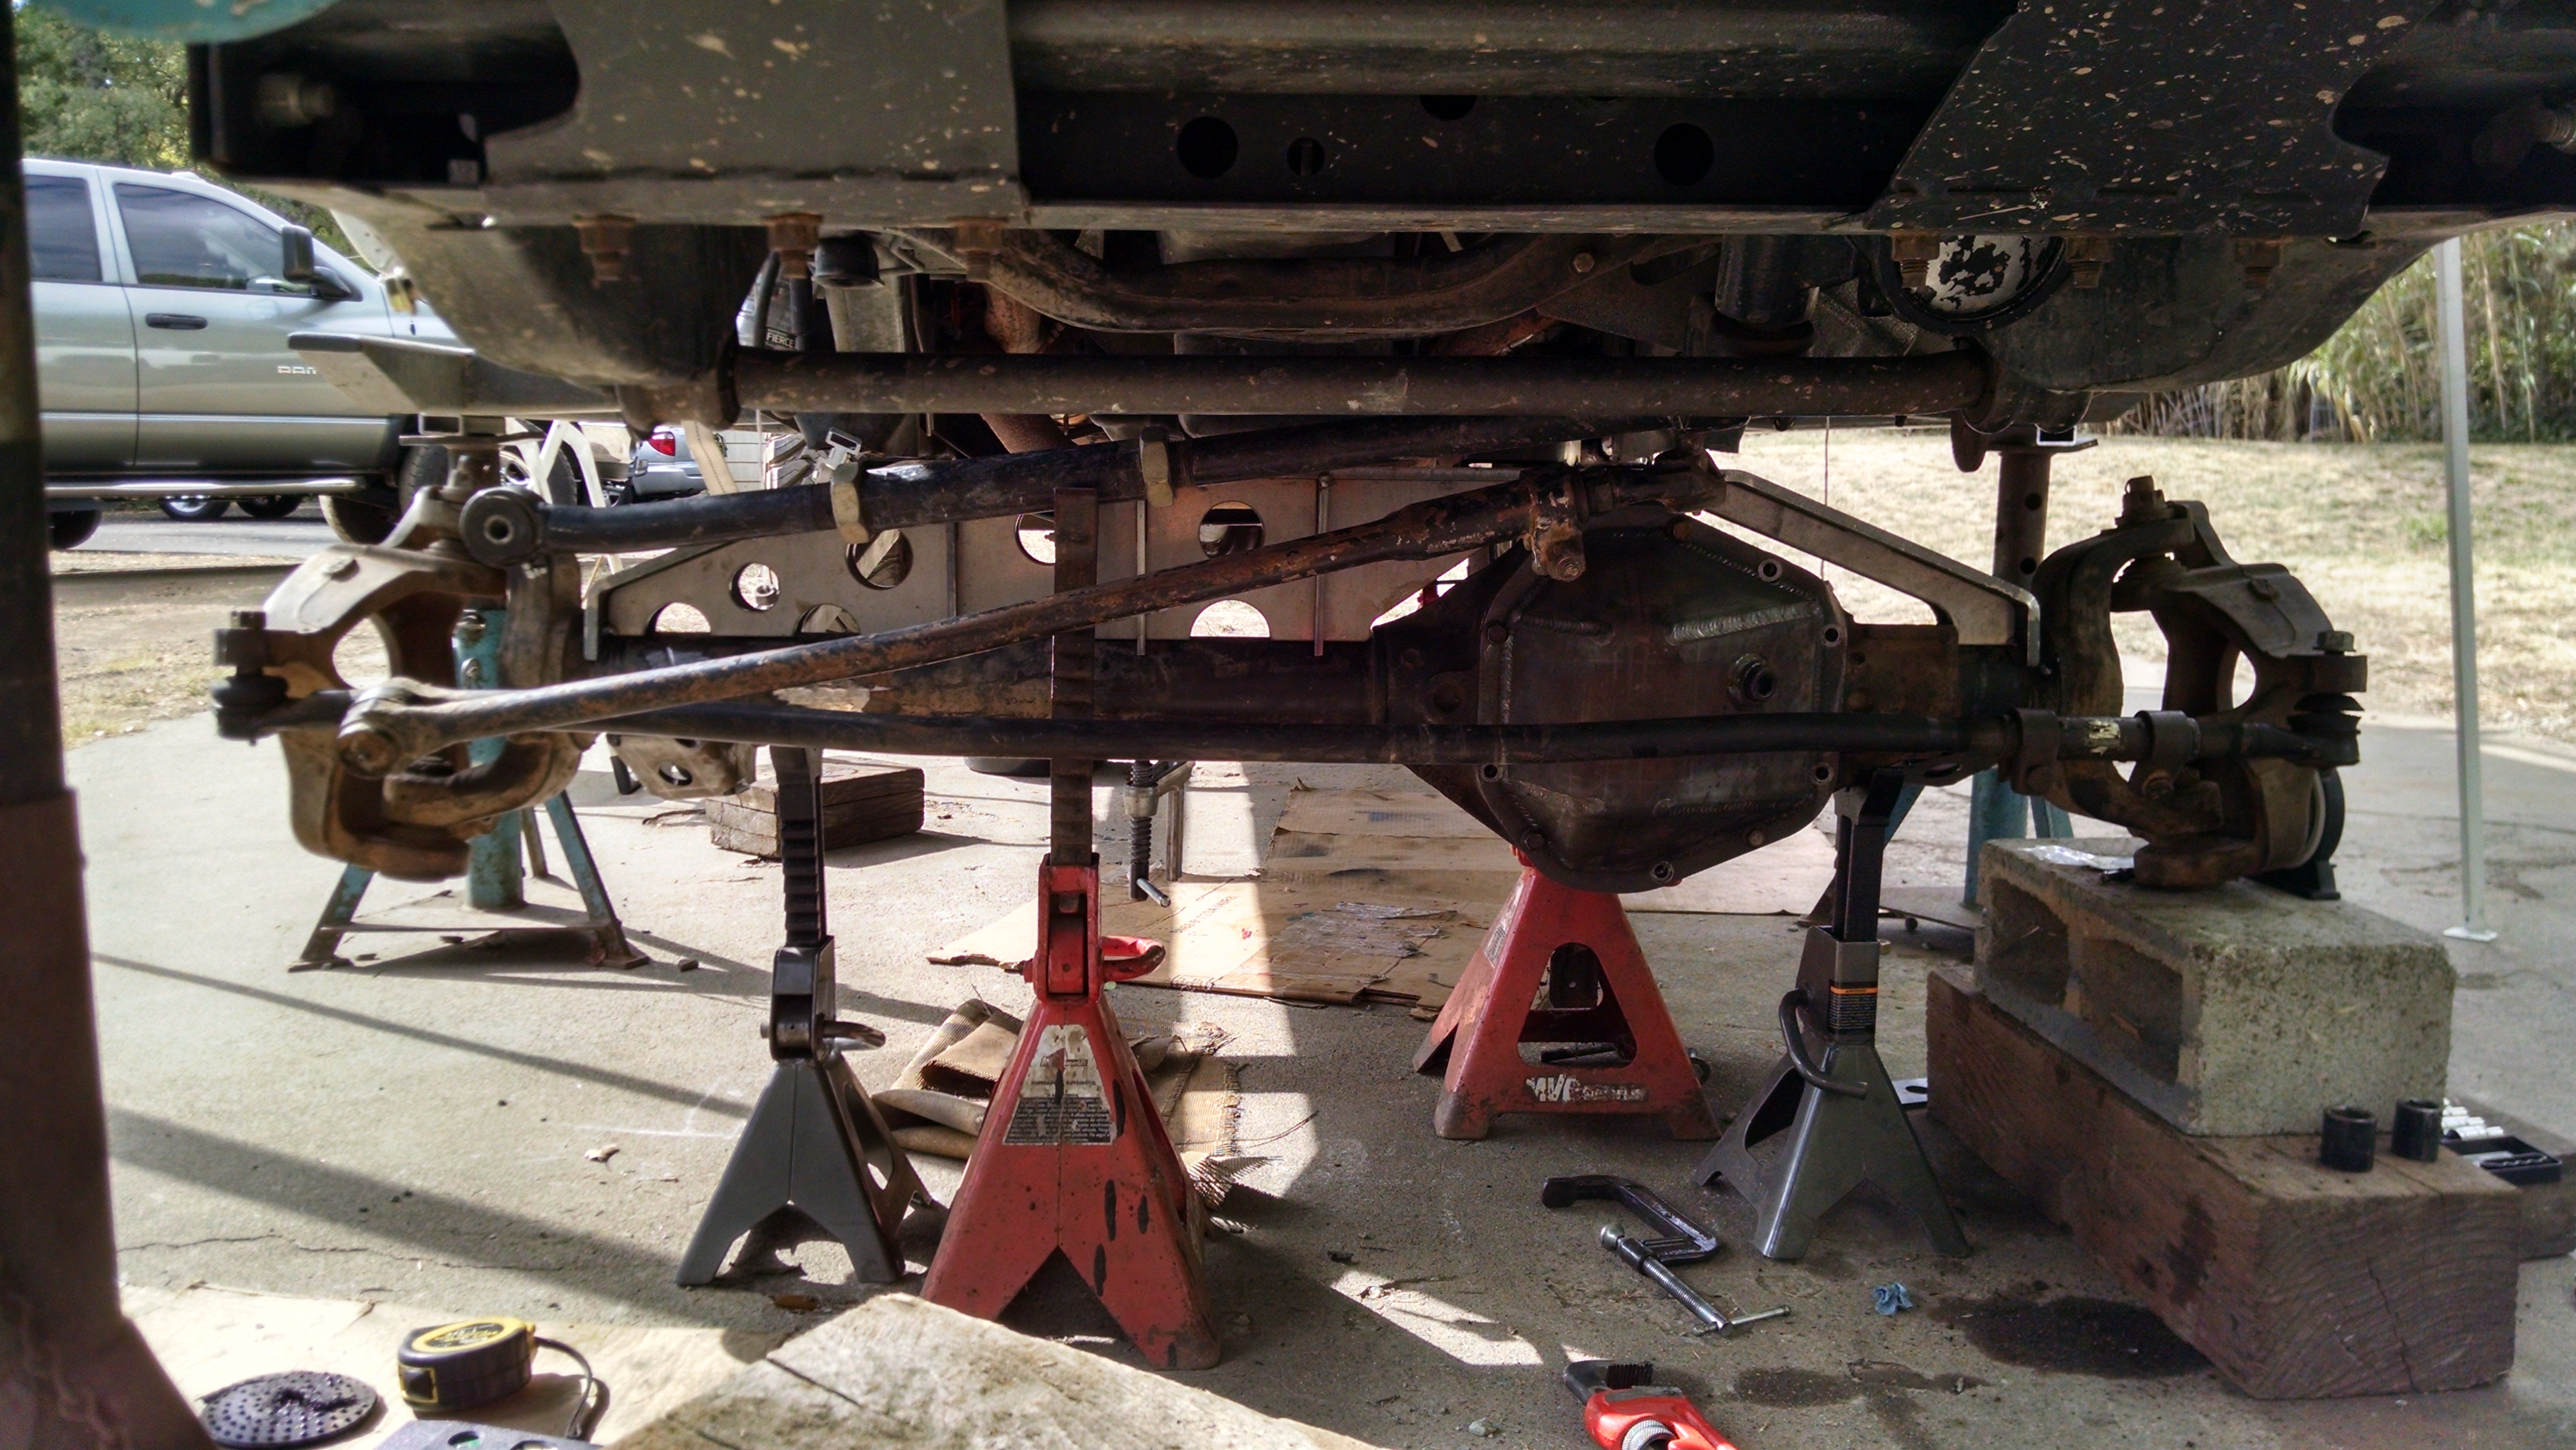
Upper link cut to length and joints smacked in.
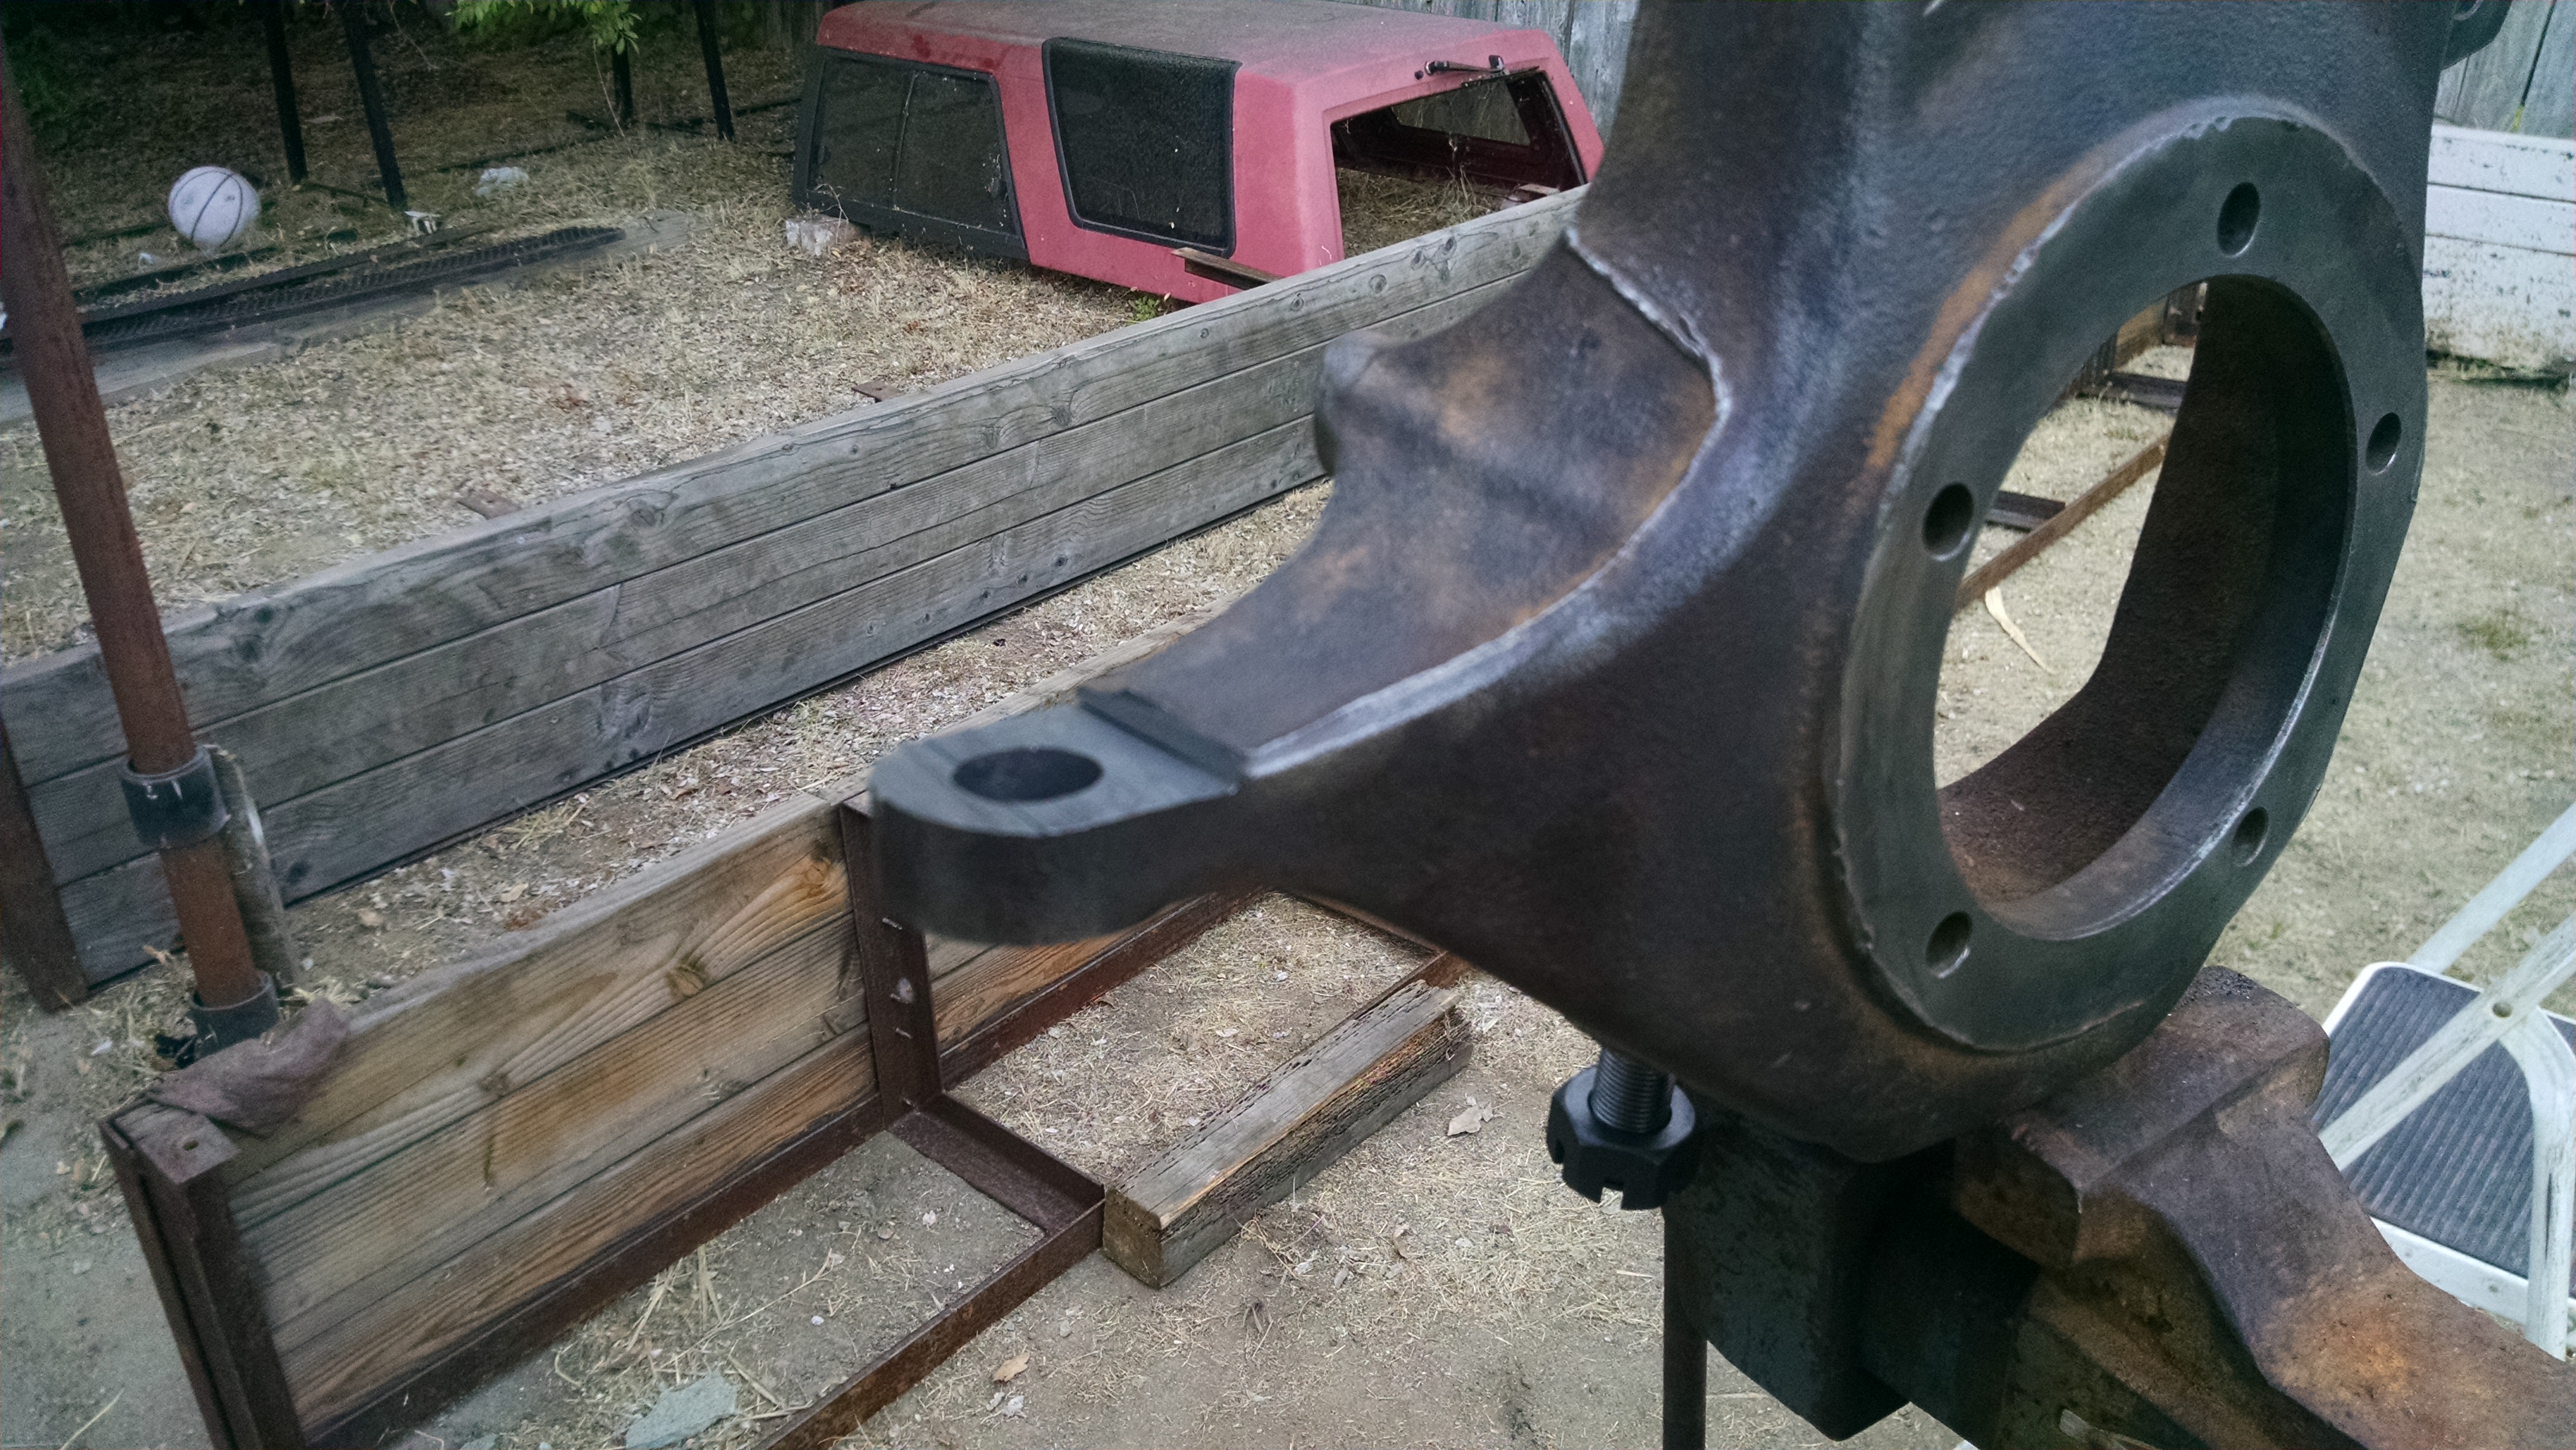
Upper frame bracket notched and tacked onto frame just forward of tcase output.
Truss is clamped on. The upper link bracket is tacked to it.
Lower link brackets tacked on.
All links are bolted up.
Today's plan --
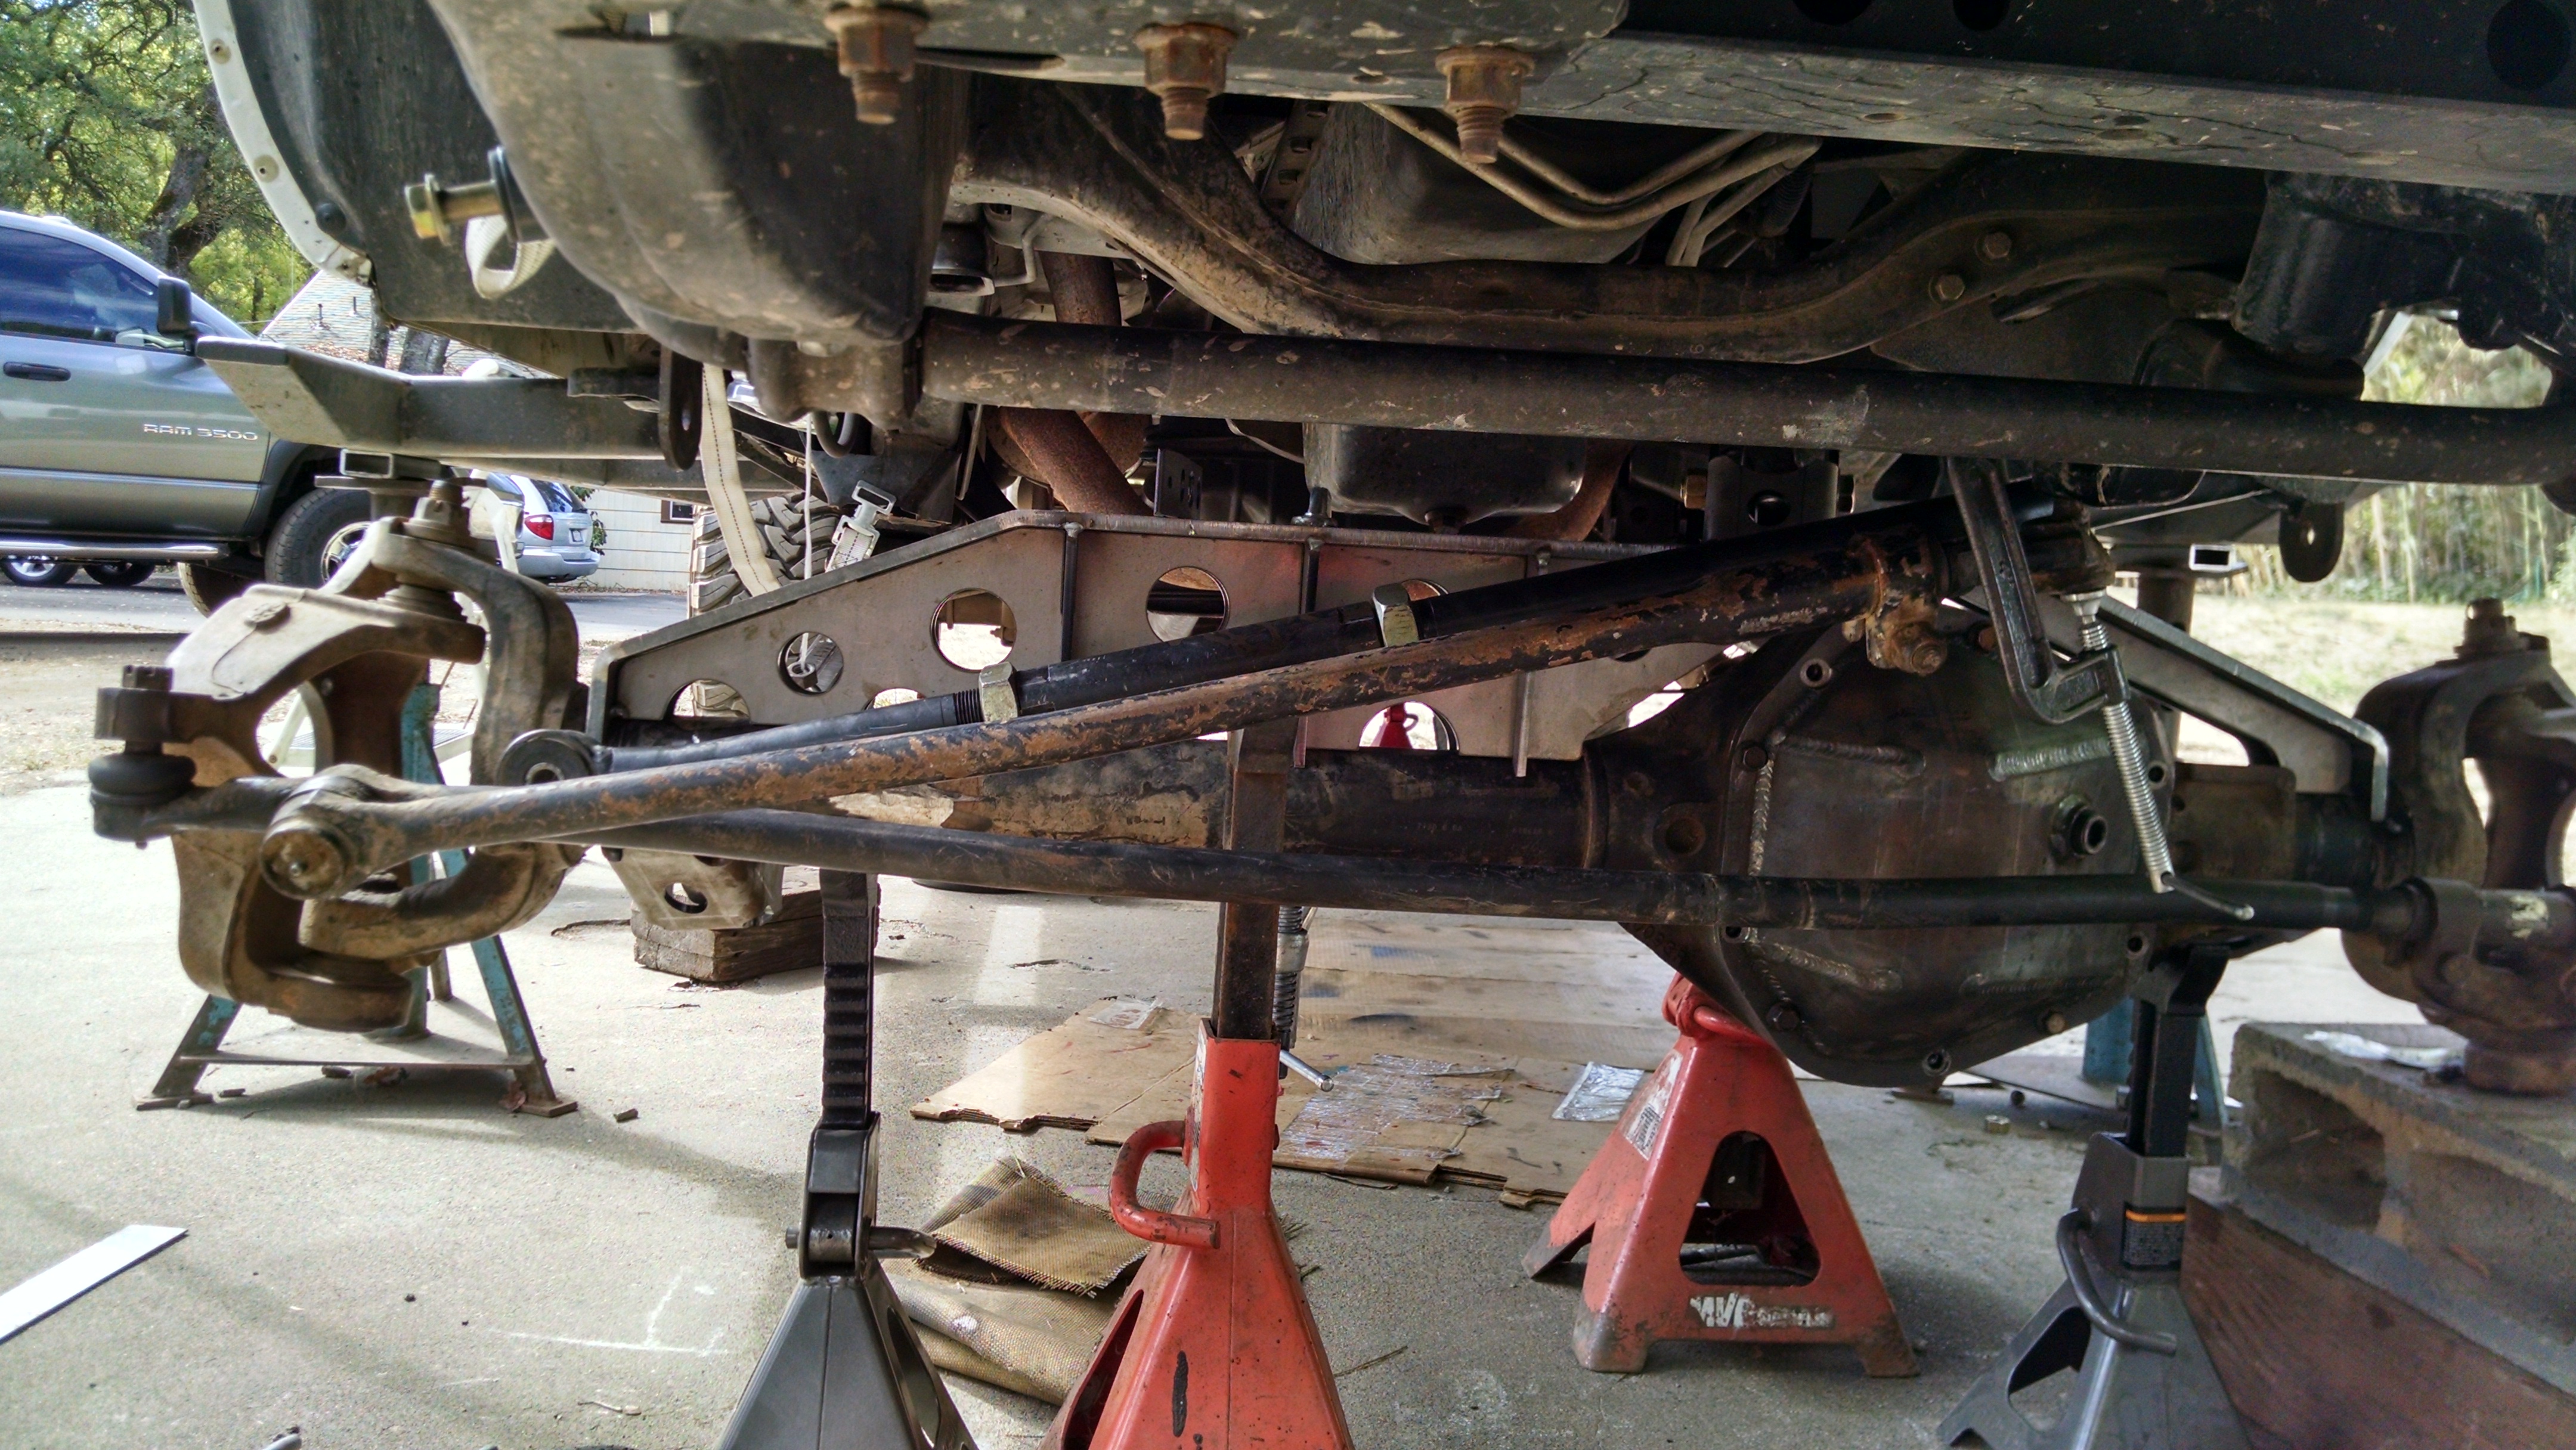
Axle side trackbar bracket needs modification.
Trackbar will be shortened.
Put stock Ford steering on.
Ready to cycle the front axle for clearances.
So far main clearance issue is upper link to driver side down pipe....grrrr
Here is earlier pic of upper link frame bracket before link put in and other things.

No pics yesterday b/c the light went away.
Progress was:
Upper link cut to length and joints smacked in.
Upper frame bracket notched and tacked onto frame just forward of tcase output.
Truss is clamped on. The upper link bracket is tacked to it.
Lower link brackets tacked on.
All links are bolted up.
Today's plan --
Axle side trackbar bracket needs modification.
Trackbar will be shortened.
Put stock Ford steering on.
Ready to cycle the front axle for clearances.
So far main clearance issue is upper link to driver side down pipe....grrrr
Here is earlier pic of upper link frame bracket before link put in and other things.
Champion


Joined: Oct 2009
Posts: 4,717
Likes: 10
From: N/A
So as not to pooch this thread I will send you a pm in a day or two. Or pm me your email.
Thread Starter
|
Champion
Joined: Sep 2011
Posts: 3,891
Likes: 8
From: NorCal

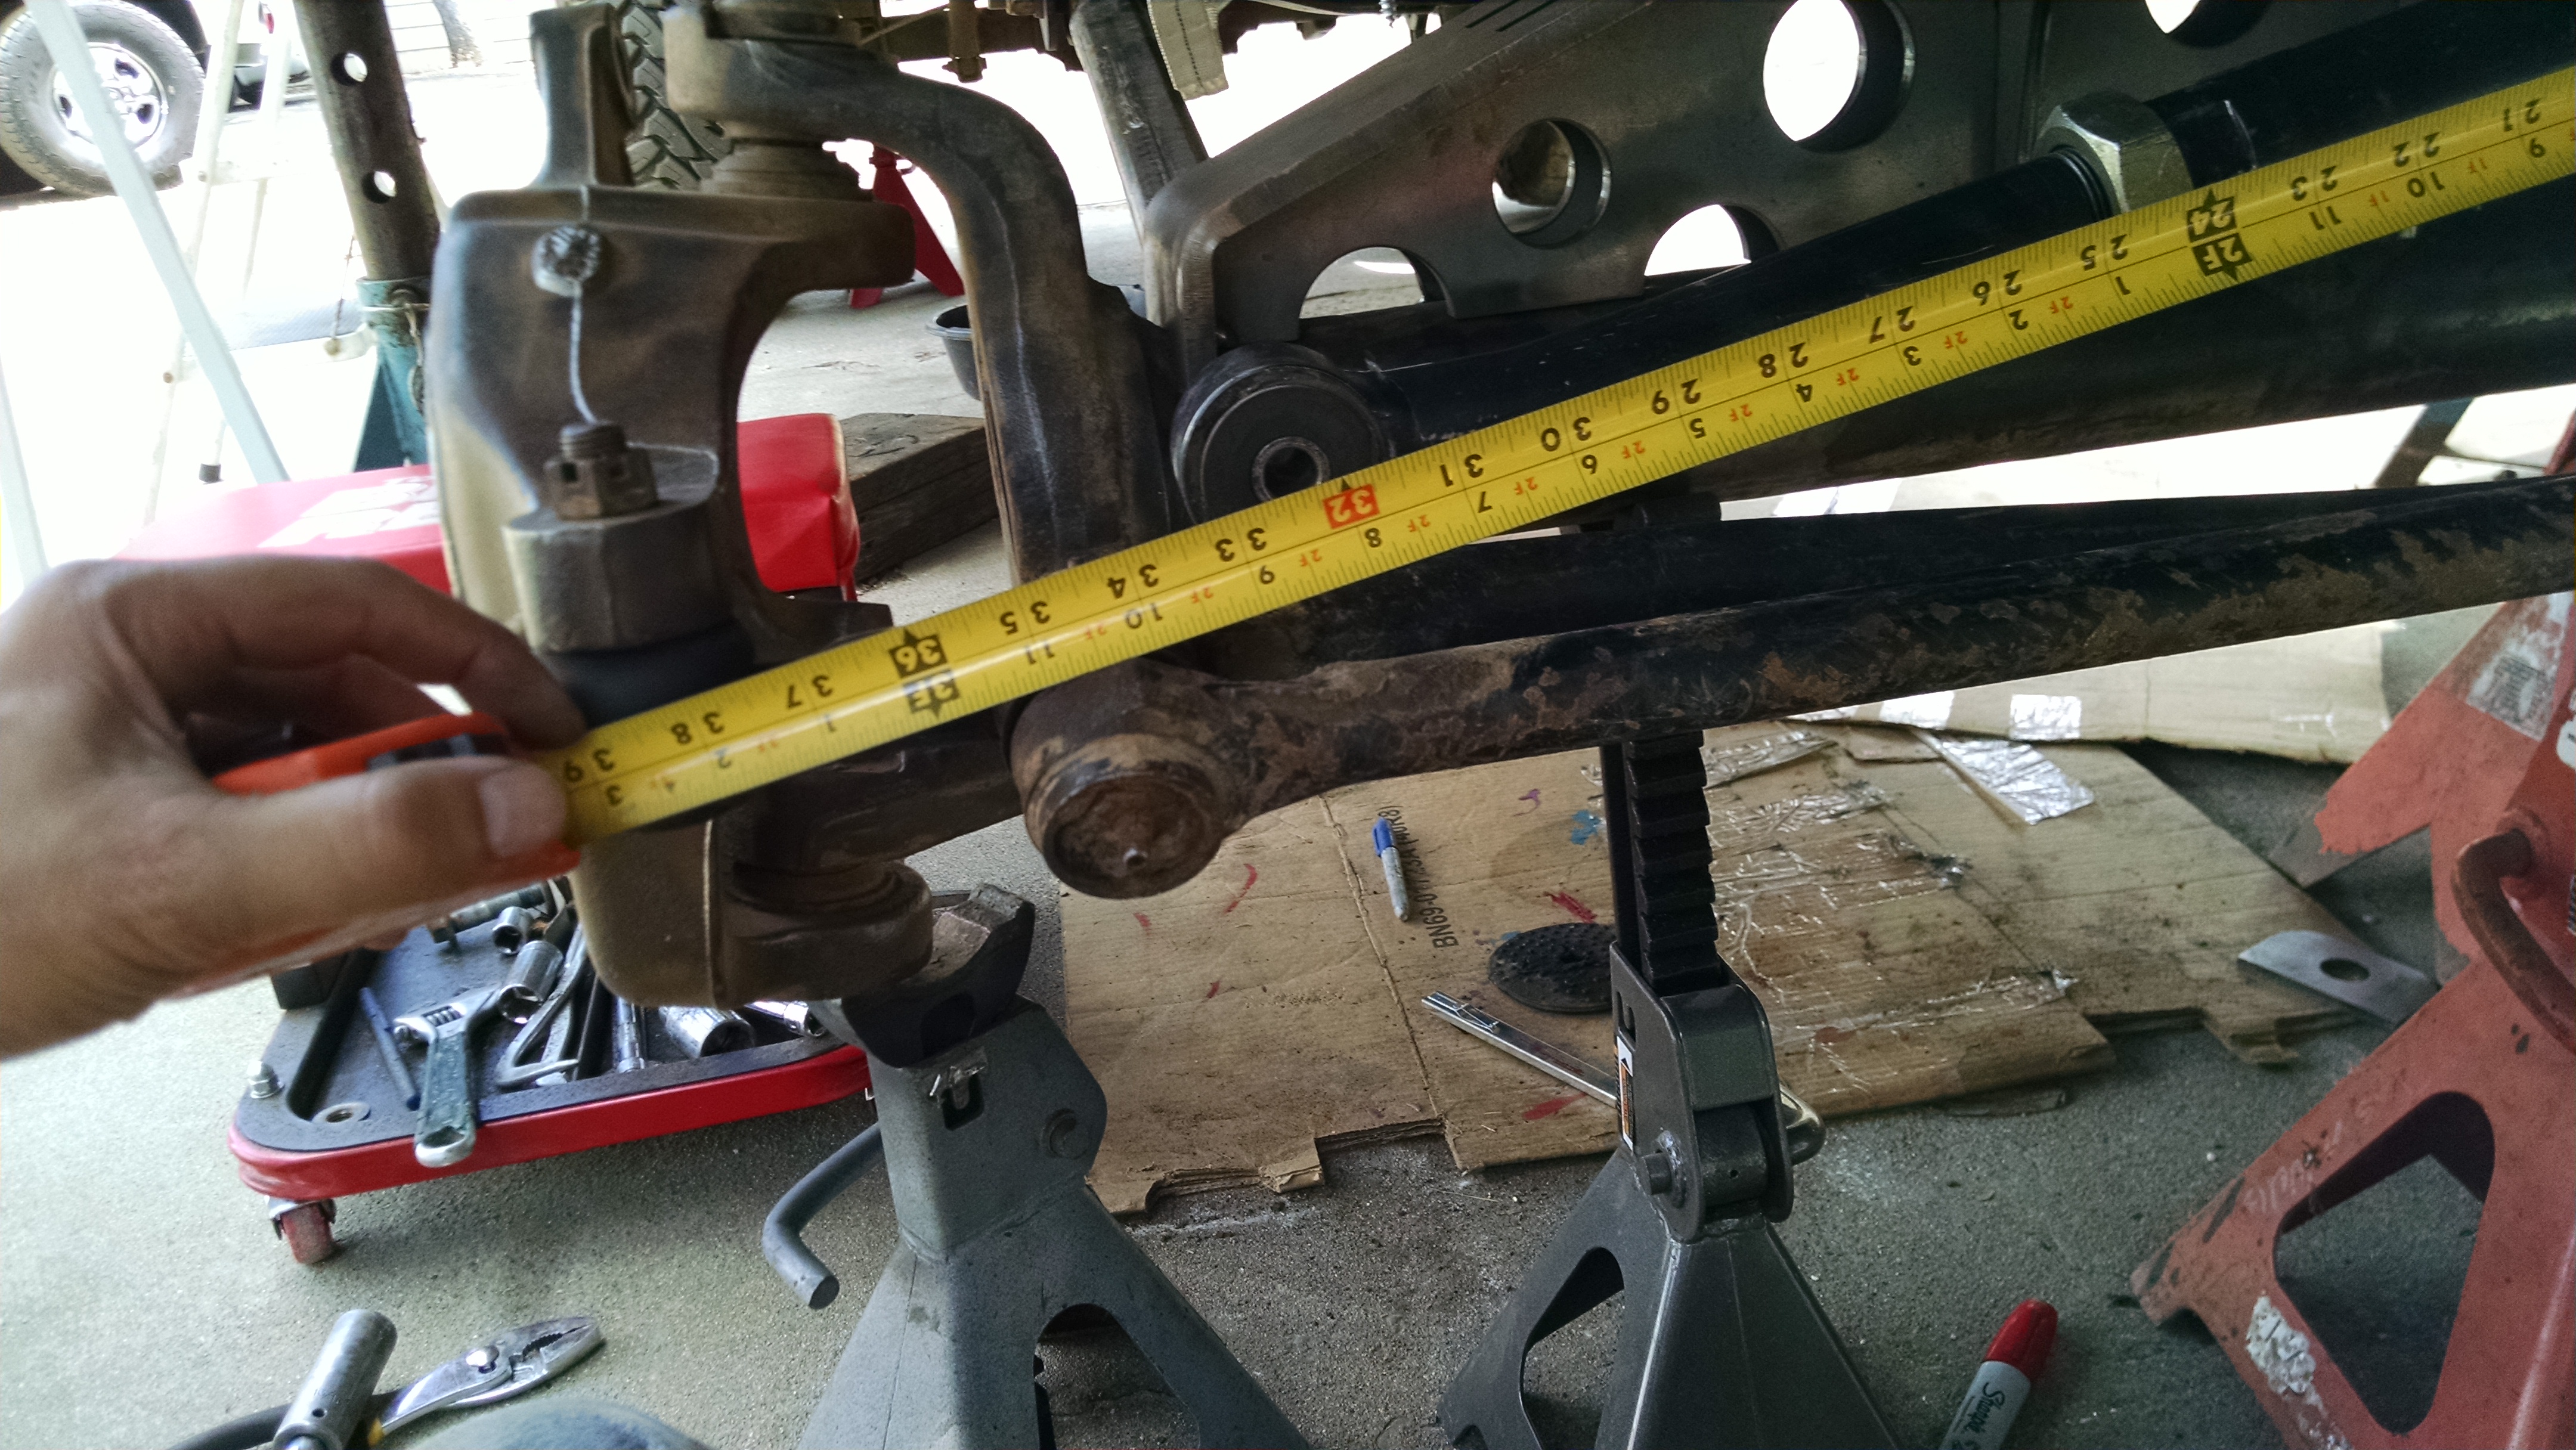


Picture for upper link is using the top most hole. I moved it down to the bottom hole for more clearance from the exhaust.
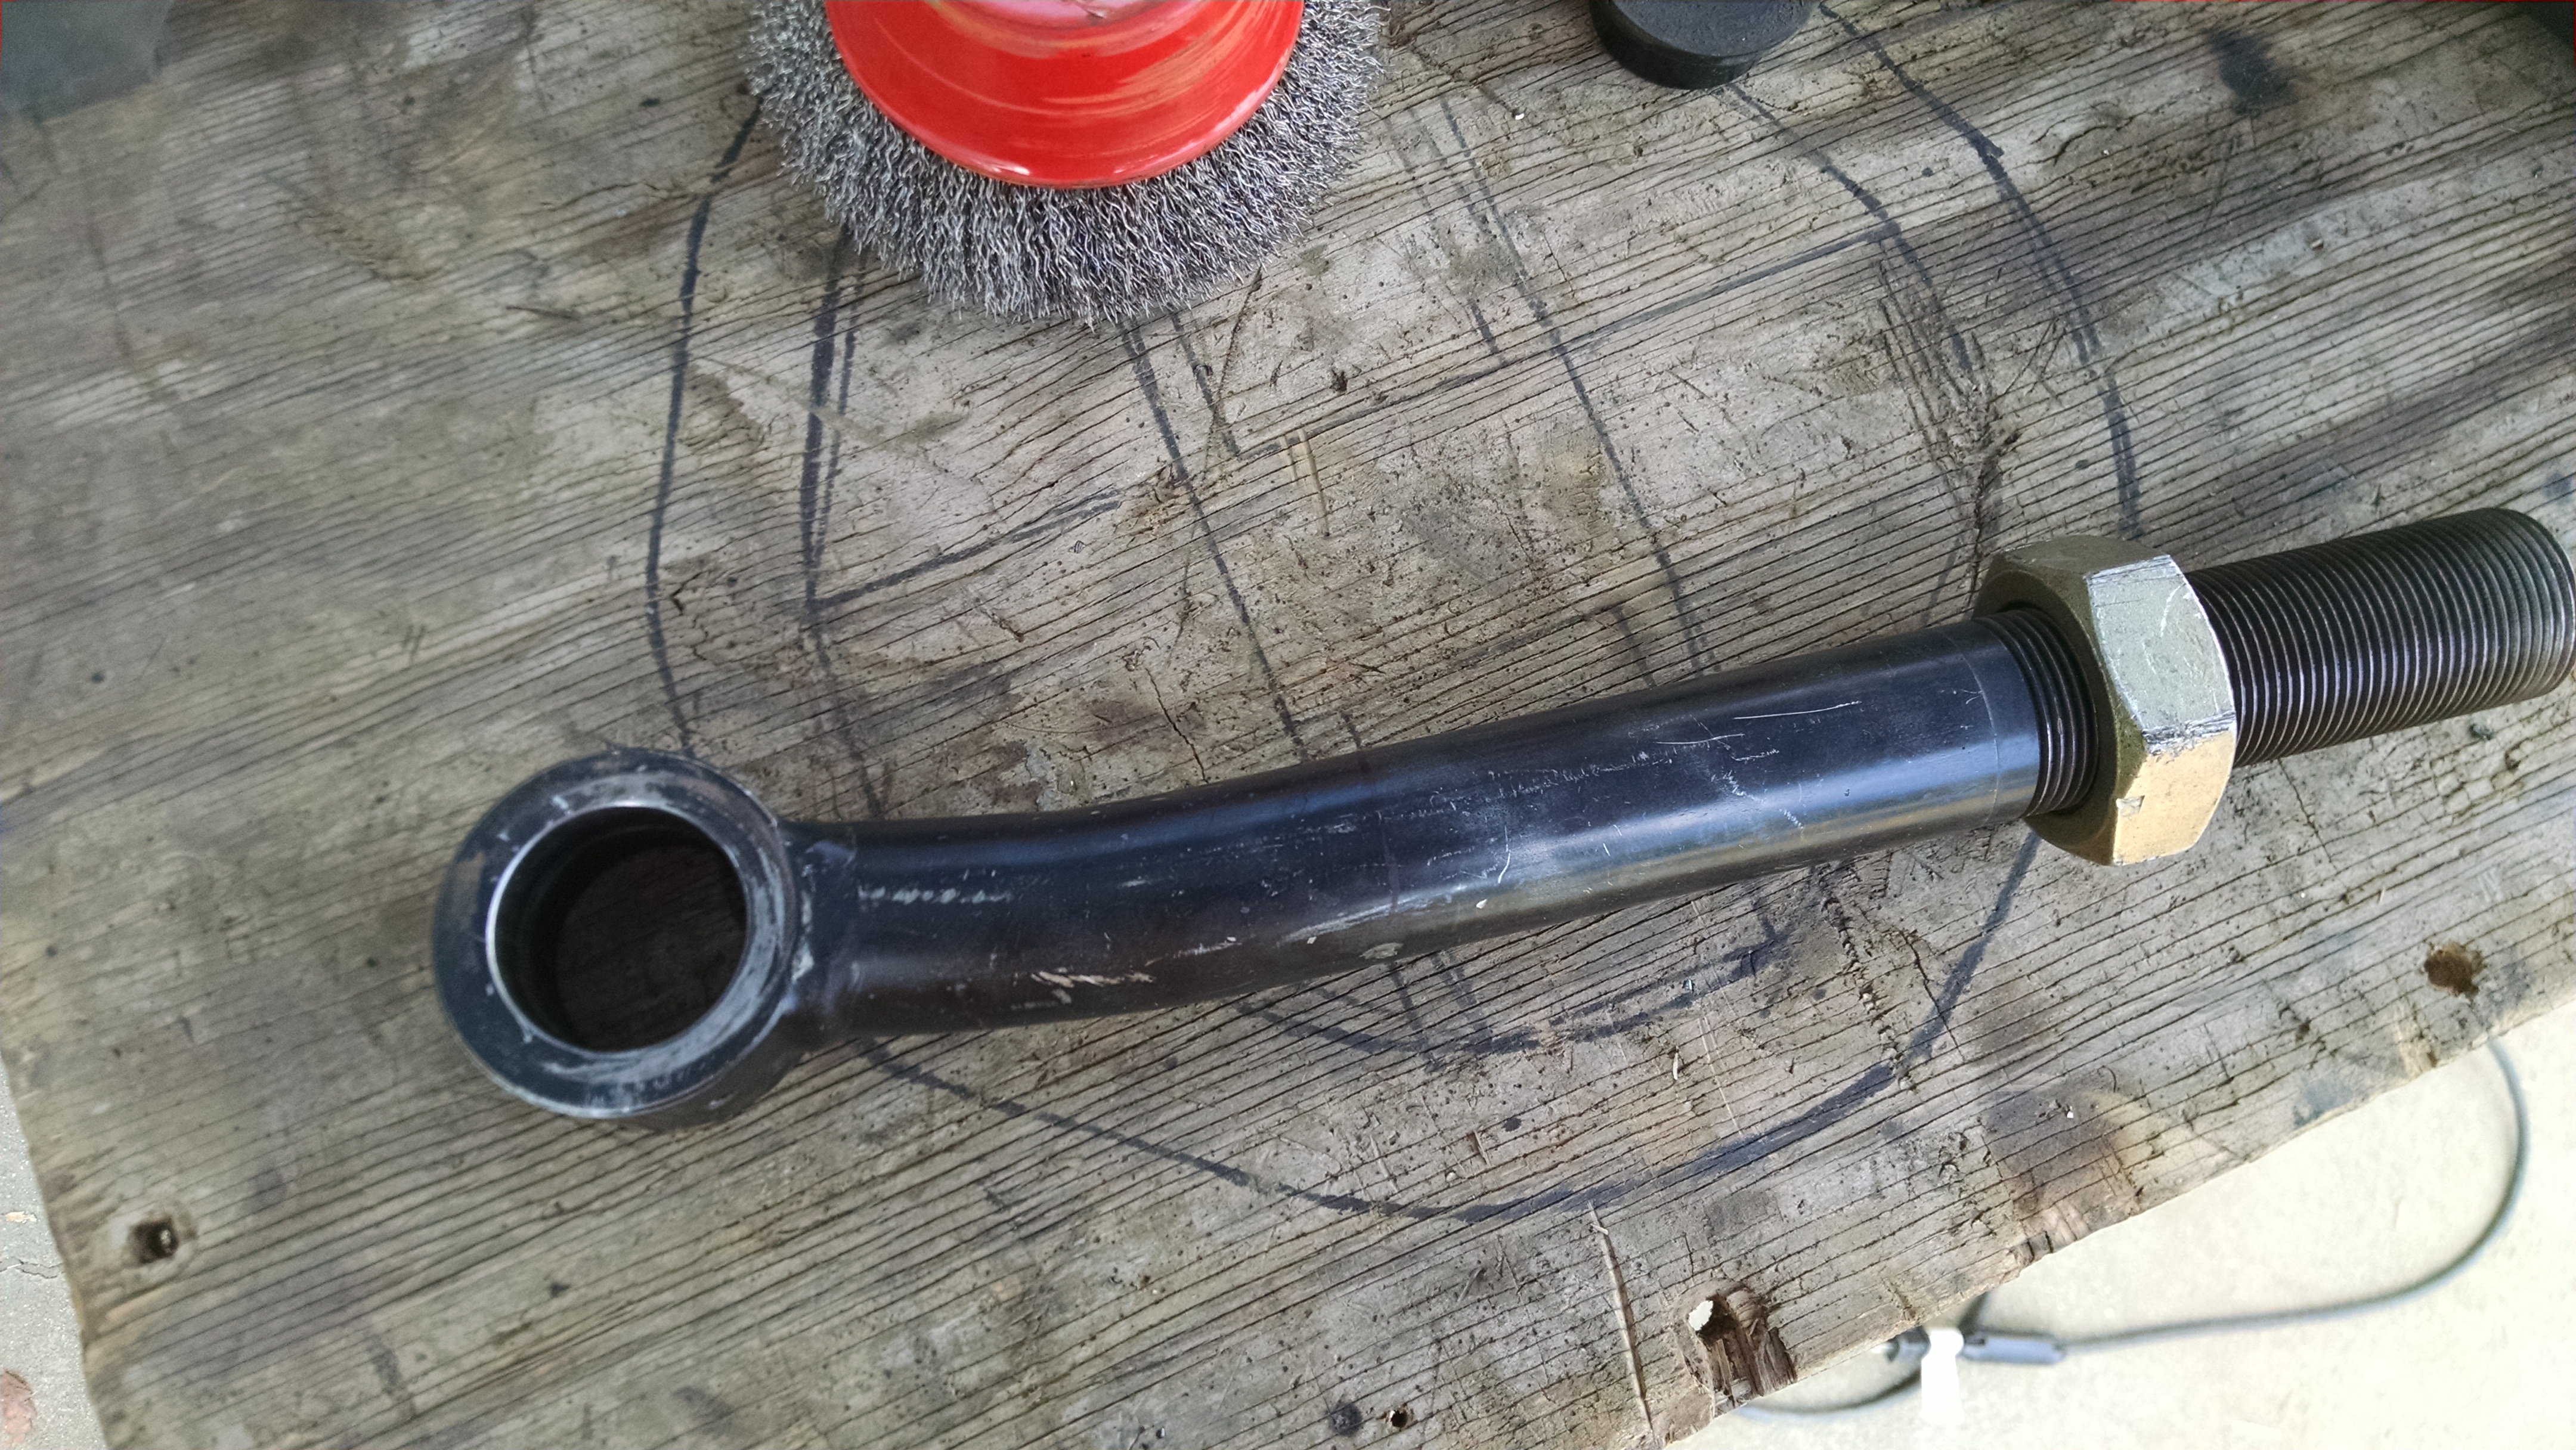
I thought I got a picture of it.Ford steering no workie. Drag link about 3-4" too long.
Trimmed up the trackbar 6". Very happy with that piece as it's about 3/8" thick and tons of thread for adjustment. Making drag link and trackbar parallel and the same length mitigates bumpsteer.
Picked up the RuffStuff Y-link Kit.
http://www.ruffstuffspecialties.com/catalog/YLINK.html
Drill out the knuckles now for it to get the steering locked down.


Registered User
Joined: Jun 2014
Posts: 10
Likes: 0
From: Guam
Looks real good Nukle, that'll be trick if you could squeeze that link in there without redoing the down pipes. I couldn't. Your gonna love that axle. Will your truss and upper link mount clear that stock x-member? Keep the updates coming!
Thread Starter
|
Champion
Joined: Sep 2011
Posts: 3,891
Likes: 8
From: NorCal
hahaha...just no water around here...this year.
fingers crossed
Yes, the xmember is good to go. It's set back far enough to have room upon full bump. Won't know for sure until time to cycle the axle though. That is proof in the pudding, right?

thx
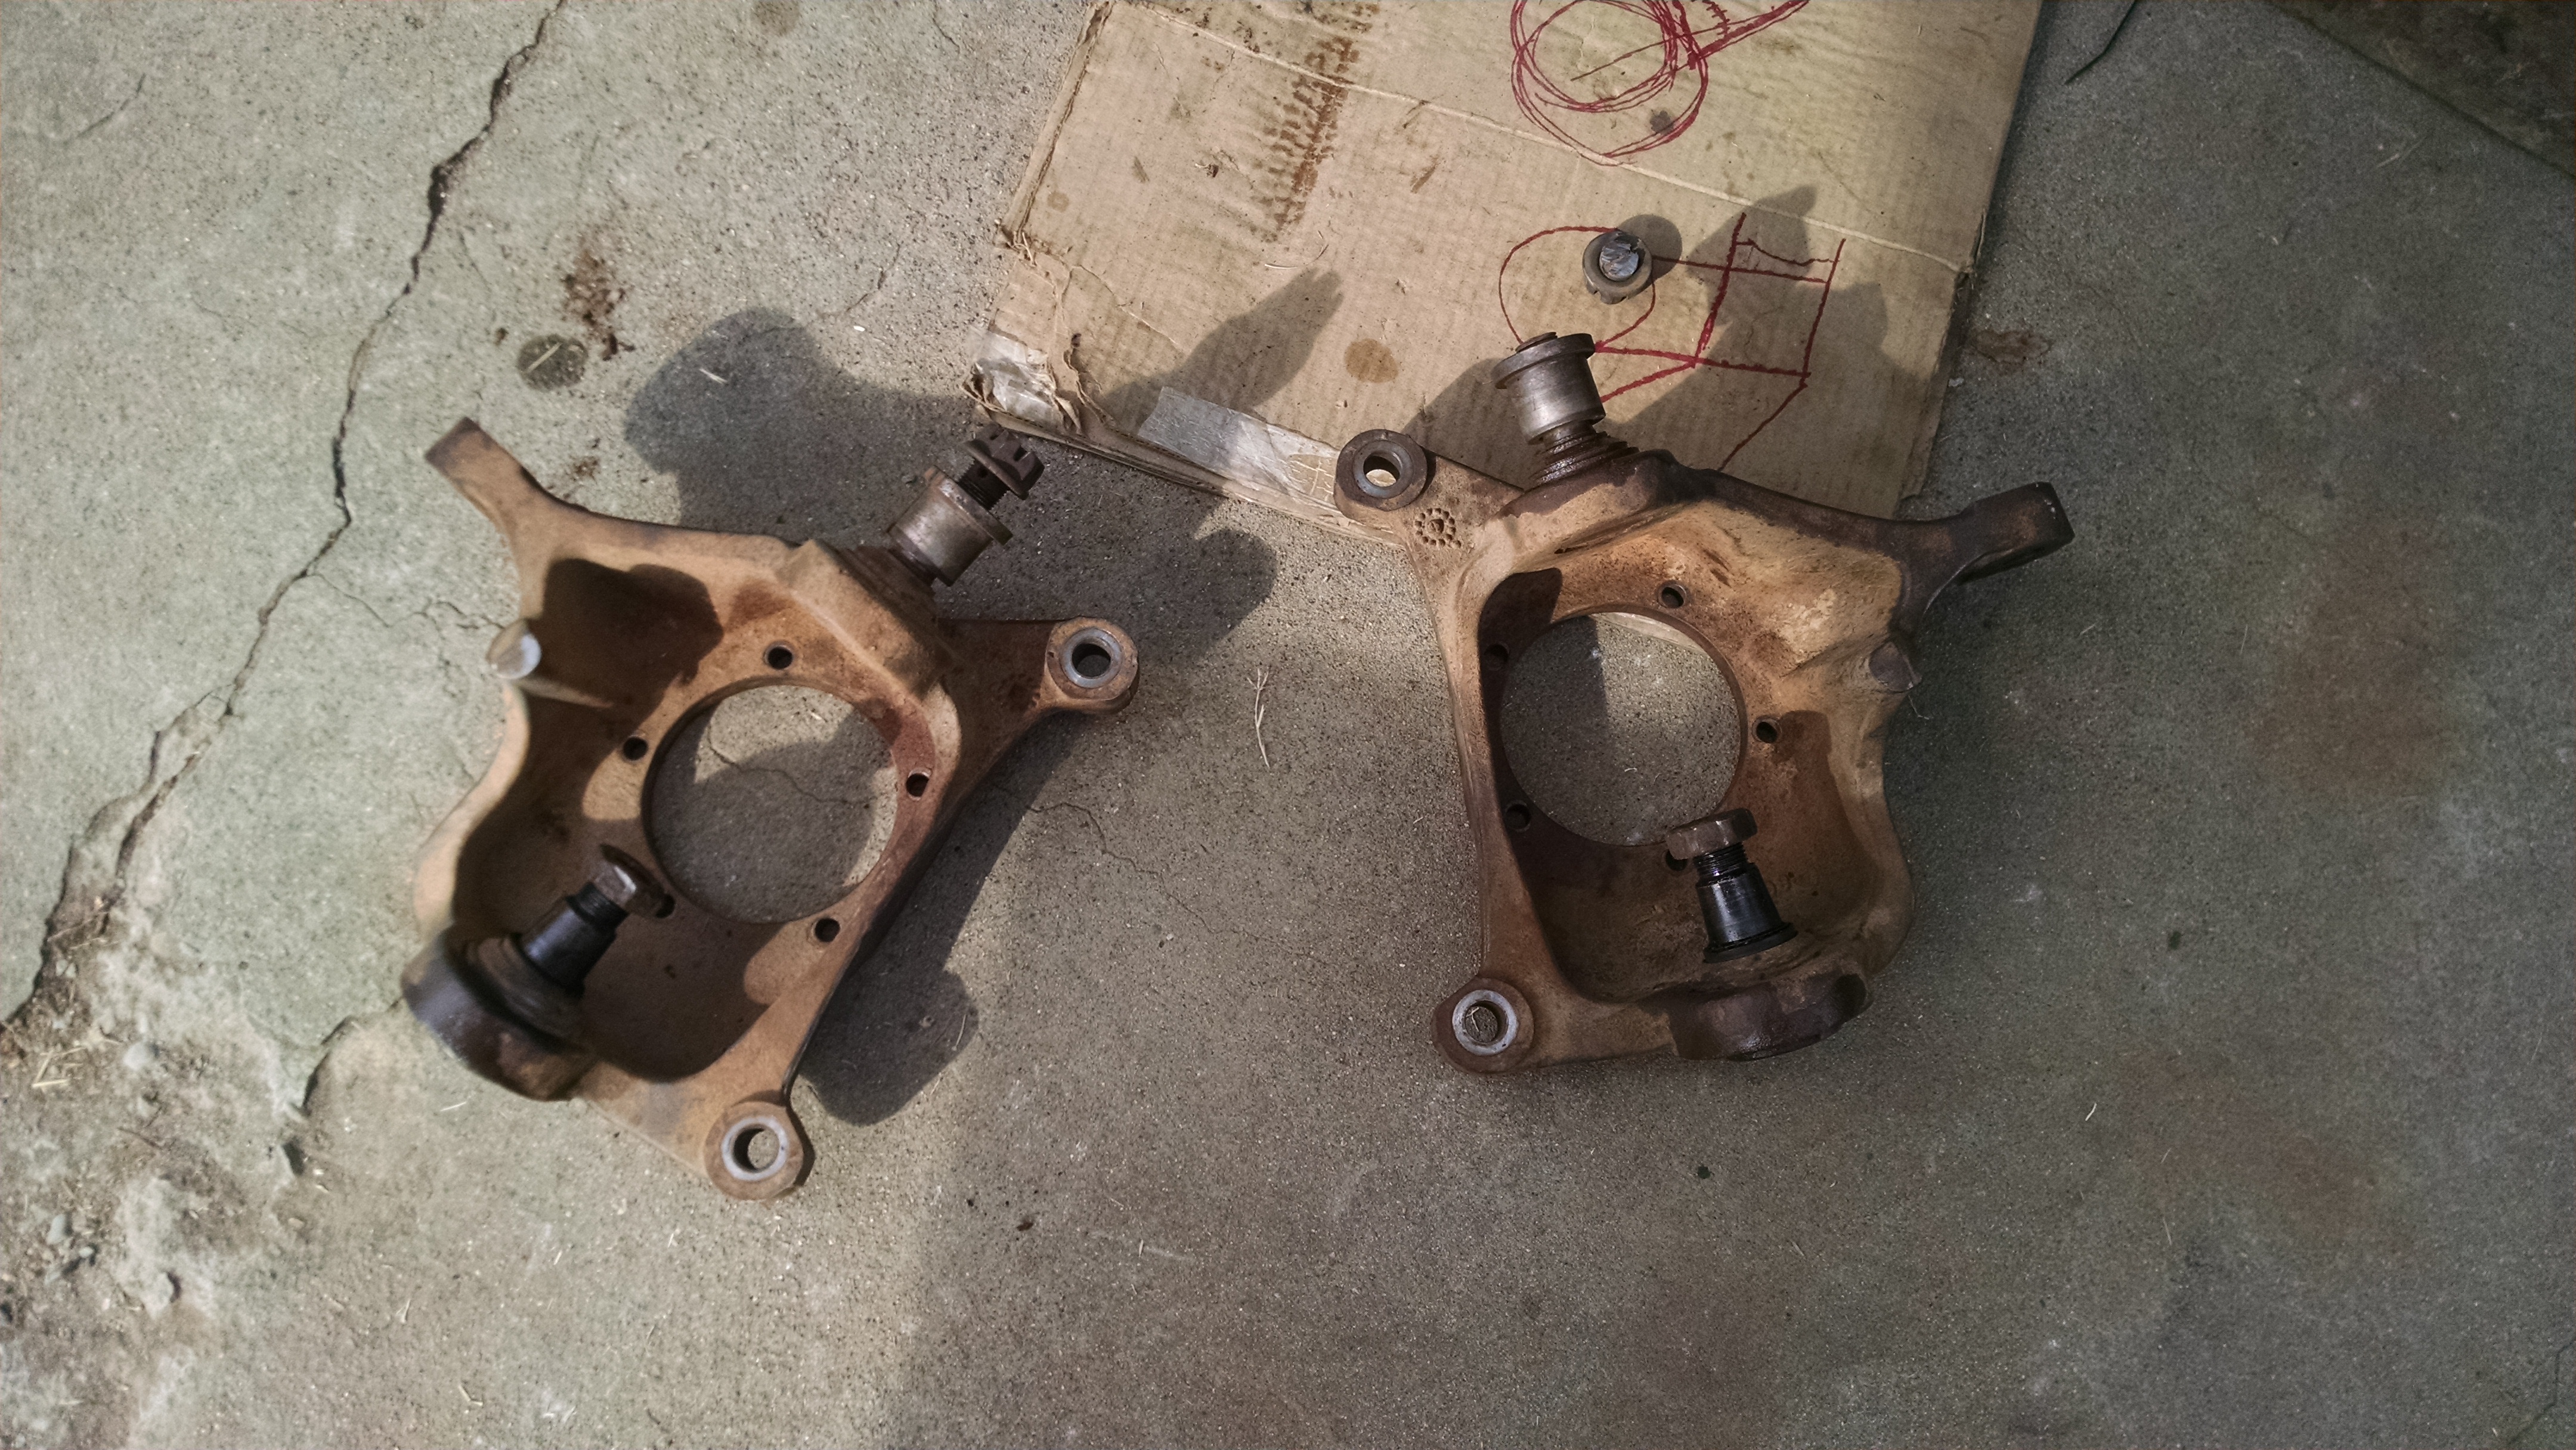
End up replacing the ball joints completely. I was intending to use old ones until they failed. This didn't come to light until the steering had to be done, which requires drilling out the knuckle TRE hole to 7/8" to accept a taper insert that matches the GM 1 ton TRE ends. The factory hole is about 1/2" so that is a bit of metal to remove. So chucked into the drill press. Also had to trim the thickness of the TRE mounting arm from 1" to 0.75" to match the taper insert length, thus the TRE would mount properly.
Need to do this for the pitman arm still.


Get new spindle studs and press in.
Bolt up knuckles.
Ream pitman arm.
Measure for drag link and tie rod from the DOM in the steering kit (1.5"x.25" wall). Cut and tack inserts and mount up.
Fab up the Track bar axle mount. Tack on.
Cycle the axle!
fingers crossed
Yes, the xmember is good to go. It's set back far enough to have room upon full bump. Won't know for sure until time to cycle the axle though. That is proof in the pudding, right?
thx
End up replacing the ball joints completely. I was intending to use old ones until they failed. This didn't come to light until the steering had to be done, which requires drilling out the knuckle TRE hole to 7/8" to accept a taper insert that matches the GM 1 ton TRE ends. The factory hole is about 1/2" so that is a bit of metal to remove. So chucked into the drill press. Also had to trim the thickness of the TRE mounting arm from 1" to 0.75" to match the taper insert length, thus the TRE would mount properly.
Need to do this for the pitman arm still.
Get new spindle studs and press in.
Bolt up knuckles.
Ream pitman arm.
Measure for drag link and tie rod from the DOM in the steering kit (1.5"x.25" wall). Cut and tack inserts and mount up.
Fab up the Track bar axle mount. Tack on.
Cycle the axle!