


weird pinging issues...need help.


Thread Starter
|
Legend
Joined: Jul 2007
Posts: 7,843
Likes: 13
From: DFW, Texas
Well,
I've finally had some time to get to this, I'm eating lunch right now and All I have left to do it pull the old mani off and slap on the new one. There's going to be a slight "fabrication" of the accessory bracket that I will have to do to get the heater return hose to fit in it's current location, but that shouldn't take too long.
Let me start by saying that if you're going to do this, I HIGHLY recommend you get the Hughes Engines Kit. The one that Marty sent me is really a nice piece, but it's required a lot of retrofitting and modification of stock parts to get it to go on and do what it's supposed to. You might find (like me) halfway thru the install that there's a "make it fit, damnit" mentality that comes with some of these MOPAR pieces. The Hughes Kit was designed to be bolt on and should be a much easier install. As a matter of fact, I broke down and bought the adapter plate and fuel rail mounts from them, I just wasn't comfortable with the 2 point mount that Marty's plate had.
Now for the pics:
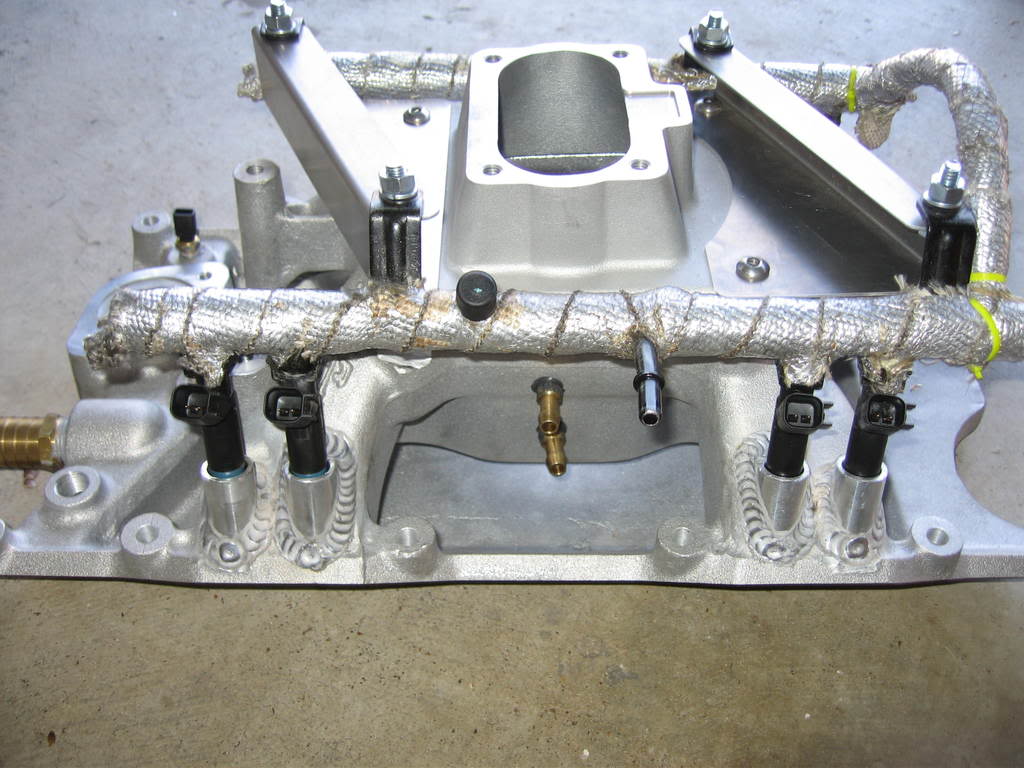
First is the intake with the PCV, Brake booster, and accessory bungs already drilled and tapped into the manifold. I have also installed the coolant temp sensor and the plug for the secondary temp sensor which I do not have.

I just used some 5/16th bolts, lockwashers, and nuts to mount the fuel rail. I think I needed 3X 3/4" long bolts and 1X 1" long bolt.
The next 2 pics are of the vac ports and PVC blowby. Notice I accidentally drilled and tapped one hole at an angle. Oh well, it offsets the bent fuel rail nicely.

I had to relocate the IAT to the air hat. I tried the #8 runner, but the IAT was too small to fit into the available hole, and the brass collar I bought to act as an adapter didn't allow enough of the IAT to show thru, plus it buckled and bent in the #8 runner when I installed it.

I just put a small hole in the bottom of the air hat housing and threaded it in. This was the only place on the air hat that was flat enough to drill and would still allow me to plug in the IAT (I did end up extending the plug with some 16 guage red and blue promary wire.) I can hook up the IAT wherever it fits the best. Dab of RTV on the threads and a locknut in the top to hold it in place (I found the right size locknut in the Lighting Accessories section at Home Depot)
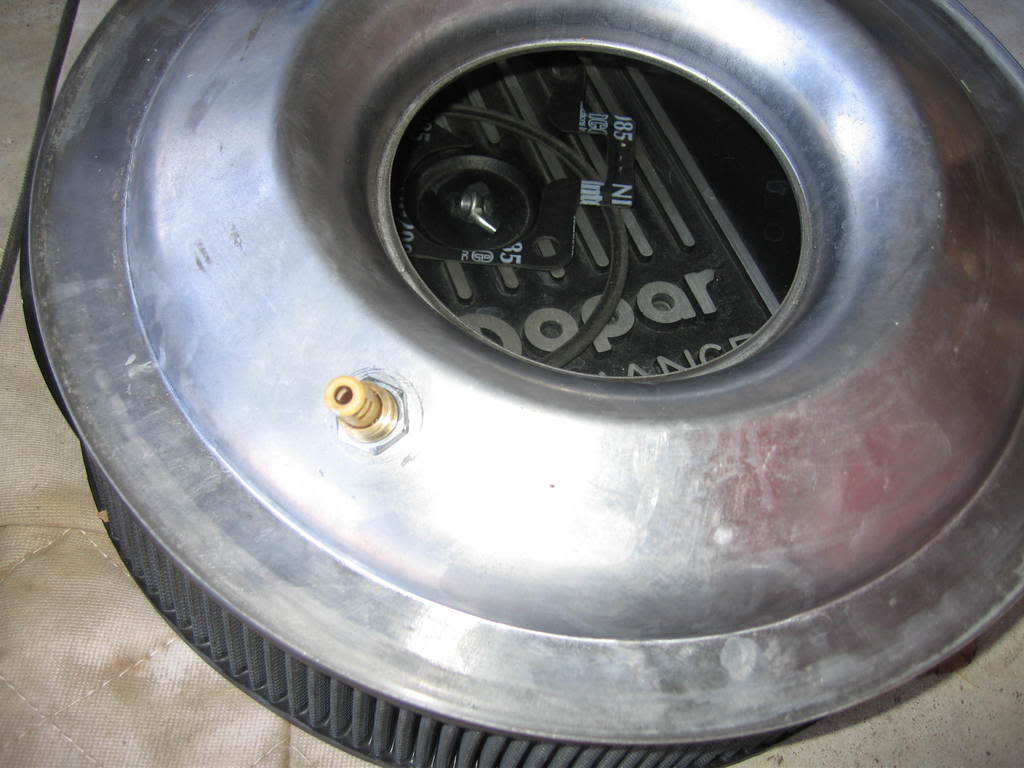
Note that the IAT is post filter but pre-TB, It should get the same temp (if not a little cooler) air as in the runner, and still be filtered air. It might actually stay cleaner than it was in the Intake manifold, as there will be no PCV blowby or EGR gasses (if you have that) mixing in there. The RTV helps insure that no unflitered air gets into the engine thru the tiny cracks in the threads.
Here's a pic of the locknut box from Home Depot for those needing it:

Back to the grindstone! Hope to get to drive it later today for an initial impression!
I've finally had some time to get to this, I'm eating lunch right now and All I have left to do it pull the old mani off and slap on the new one. There's going to be a slight "fabrication" of the accessory bracket that I will have to do to get the heater return hose to fit in it's current location, but that shouldn't take too long.
Let me start by saying that if you're going to do this, I HIGHLY recommend you get the Hughes Engines Kit. The one that Marty sent me is really a nice piece, but it's required a lot of retrofitting and modification of stock parts to get it to go on and do what it's supposed to. You might find (like me) halfway thru the install that there's a "make it fit, damnit" mentality that comes with some of these MOPAR pieces. The Hughes Kit was designed to be bolt on and should be a much easier install. As a matter of fact, I broke down and bought the adapter plate and fuel rail mounts from them, I just wasn't comfortable with the 2 point mount that Marty's plate had.
Now for the pics:
First is the intake with the PCV, Brake booster, and accessory bungs already drilled and tapped into the manifold. I have also installed the coolant temp sensor and the plug for the secondary temp sensor which I do not have.
I just used some 5/16th bolts, lockwashers, and nuts to mount the fuel rail. I think I needed 3X 3/4" long bolts and 1X 1" long bolt.
The next 2 pics are of the vac ports and PVC blowby. Notice I accidentally drilled and tapped one hole at an angle. Oh well, it offsets the bent fuel rail nicely.
I had to relocate the IAT to the air hat. I tried the #8 runner, but the IAT was too small to fit into the available hole, and the brass collar I bought to act as an adapter didn't allow enough of the IAT to show thru, plus it buckled and bent in the #8 runner when I installed it.
I just put a small hole in the bottom of the air hat housing and threaded it in. This was the only place on the air hat that was flat enough to drill and would still allow me to plug in the IAT (I did end up extending the plug with some 16 guage red and blue promary wire.) I can hook up the IAT wherever it fits the best. Dab of RTV on the threads and a locknut in the top to hold it in place (I found the right size locknut in the Lighting Accessories section at Home Depot)
Note that the IAT is post filter but pre-TB, It should get the same temp (if not a little cooler) air as in the runner, and still be filtered air. It might actually stay cleaner than it was in the Intake manifold, as there will be no PCV blowby or EGR gasses (if you have that) mixing in there. The RTV helps insure that no unflitered air gets into the engine thru the tiny cracks in the threads.
Here's a pic of the locknut box from Home Depot for those needing it:
Back to the grindstone! Hope to get to drive it later today for an initial impression!

Thread Starter
|
Legend
Joined: Jul 2007
Posts: 7,843
Likes: 13
From: DFW, Texas
They did this time. no leaks.
Got one minor problem:
The spot where I had initially wanted to place the heater return hose will be blocked by the A/C compressor on reassembly. I'll have to buy a pipe plug for that spot and either neck down the heater return line to fit the spare port (the extra coolant temp sensor port which is necked to 1/4"), or try to tap it bigger to accept the 3/8" return line fitting. I'm a little leary of tapping that hole as it's already threaded and I might lose control of the drill and gall the opening, and then I'm screwed.
As far as I can tell, buying a pipe adapter and choking it down will only cause the coolant to progress thru the heater core slower, which would mean the truck would take a bit longer to start pumping heat. I'm fine with that as it doesn't get that cold down here in Texas, but is there anything else I'm missing there? Will I have to bore out that second hole?
Captain
Joined: Jul 2008
Posts: 678
Likes: 1
From: Houston, TX
I think what you are calling the heater return line is actually the supply line. At any rate, I would move the CTS into the other 1/4" hole (inboard of thermostat), and then drill/tap the normal CTS hole to accept the larger heater hose fitting. I wouldn't purposely put a restriction in the heater circuit because you won't get enough hot water through the core when the temp is below freezing. Won't be comfortable in the cab and you won't be able to de-ice the windshield as well, etc.
Thread Starter
|
Legend
Joined: Jul 2007
Posts: 7,843
Likes: 13
From: DFW, Texas
I tapped it. It went much smoother than I had anticipated. The larger taps are actually easier to use than the small ones.
She's done! Just a few double checks and fill up with coolant and she'll be good to go.
She's done! Just a few double checks and fill up with coolant and she'll be good to go.
Captain
Joined: Jul 2008
Posts: 678
Likes: 1
From: Houston, TX
Don't forget the pics!
Thread Starter
|
Legend
Joined: Jul 2007
Posts: 7,843
Likes: 13
From: DFW, Texas
I bet they loved the angle grinder action at about 9:45 or so. I ground down the accessory bracket a bit as the T-stat housing kept catching on the small lip.

I let the truck sit dry overnight. I used that Permatex radiator RTV on the T-stat housing, brass 3/8ths plug, and heater supply fitting. That stuff seals really well if you give it a few hours to set up. Here's a pick of the relocation of the heater supply line:

I'm going to try to "clean up" the install a bit this morning. The new manifold sits way lower than the old one, you don't see much from the front as it is behind the accessory bracket. The heater hose is a little too high and I have some wire and vac line rerouting to do to clean it up a bit.
I ground down the accessory bracket a bit as the T-stat housing kept catching on the small lip.I let the truck sit dry overnight. I used that Permatex radiator RTV on the T-stat housing, brass 3/8ths plug, and heater supply fitting. That stuff seals really well if you give it a few hours to set up. Here's a pick of the relocation of the heater supply line:
I'm going to try to "clean up" the install a bit this morning. The new manifold sits way lower than the old one, you don't see much from the front as it is behind the accessory bracket. The heater hose is a little too high and I have some wire and vac line rerouting to do to clean it up a bit.
Last edited by aim4squirrels; Dec 31, 2008 at 06:59 AM.