Hughes FI Airgap inwork

Grand Champion
Joined: Apr 2008
Posts: 7,055
Likes: 7
From: Lee County, North Carolina
I'm doing the exact same thing, I started yesterday and I'm finishing today.
The injectors were a pain. I put all of them in the intake on one side then pushed the rail down on top of them. The other side I pushed them into the rail then pushed them into the intake with the rail attached and it was much easier. I also oiled the o-rings before putting them on and I put a finger tip full of oil in the holes on the rail and the intake and it made it easier.
The crossover fuel line was what gave me a bit of a fuss. It's a pain to get warm enough to slide on. I got one side on no problem because I had my dad heat one end up with a lighter. Then the other side didn't want to go on with oil on the rails nipple. After messing with it a little bit and dipping it in boiling hot water for a minute I ended up kinking it so I got the other half of the hose and had my dad standing guard with the fire extinguisher and just heated each end with a lighter when it was attached to the rail.
All I have left to do is drill my air hat for the IAT and fill it with coolant.
I'm thinking that I'll put a washer on the IAT and put an o-ring over that, then put a nut on the inside of the air hat, that ought to hold it pretty good.
So being in Nevada, what did you think about how hot all your parts were getting sitting in the sun? I burned my hands a few times picking up tools and the intake because they were baking in the sun.


Record Breaker
Joined: Apr 2008
Posts: 1,899
Likes: 2
From: ohio
i lubed the orings up twice and they were still a real biotch to get pushed in.thought i was gonna break 'em.
after i got mine installed(airgap) it actually kinda ran like crap for a couple hundred miles. it made me worry i did something wrong, or ruined a oring. i checked it out a few times and couldnt see anything wrong. after a couple hundred miles everything smoothed out and ran great. so donnt take what you feel right off the bat until you give the computer time to learn it. mine runs better with the airgap. my plenum wasnt bad to begin with.
and you think the inside of his motor was clean, you should have seen the inside of mine. it looked great.
Last edited by talon6; Jun 13, 2010 at 12:47 PM.

Thread Starter
|
Captain
Joined: Jun 2007
Posts: 520
Likes: 1
From: Las Vegas, NV
Yea I started again and I only have the back driverside two to go still, they wont go in. I get them in far enough that they'll stay but I still see the top of the o-rings otherwise almost everything else is done. Found out I need to shave the small spacer for the a/c compressor bracket and will probably have to shave the throttle body bracket deal.
Grand Champion
Joined: Apr 2008
Posts: 7,055
Likes: 7
From: Lee County, North Carolina
And you'll probably have to wallow out the hole for the a/c compressor bracket because the bolt is too big. I didn't have to put a notch in the spacer but I did have to notch the throttle bracket for the back left fuel rail bolt to clear it.
My fuel injectors went into the airgap with just a little effort because I removed the sharp lip that was on the injector holes with a fine wire wheel on the Dremel.
My fuel injectors went into the airgap with just a little effort because I removed the sharp lip that was on the injector holes with a fine wire wheel on the Dremel.
Thread Starter
|
Captain
Joined: Jun 2007
Posts: 520
Likes: 1
From: Las Vegas, NV
And I'm done! Finally, those injectors kicked my *** for awhile but I final got tired of it and went retarded monkey strength and they eventually went in  I've already filled and bleed the coolant all thats left is for me to install my old AEM brute force intake after drilling a hole and installing the IAT probe. Yes...I have to ditch my mopar air hat for awhile because I forgot to buy some cables to extend my probe connector because it's too short to get to a goos spot on the air hat. All I'm waiting for to finish is for my drill battery to charge so I can finish drilling the hole in the tube then I can install and I'm good to go
  Oh and yes Sheriff, I have to wallow out the bracket also but like the IAT probe, I need to wait for my drill batteries to charge before I can do it. Oh and I did not need to shave the throttle bracket at all, it's really close but it clears enough for me to be able to fenagle the bracket on. So yea, all thats left really actually is for me to drill a hole in the intake tube, install the probe, wallow out the a/c bracket, and shave the spacer...
Oh and no leaks on the fuel injectors....thank god. I was sure I'd cut one or rub one the wrong way but I didn't.
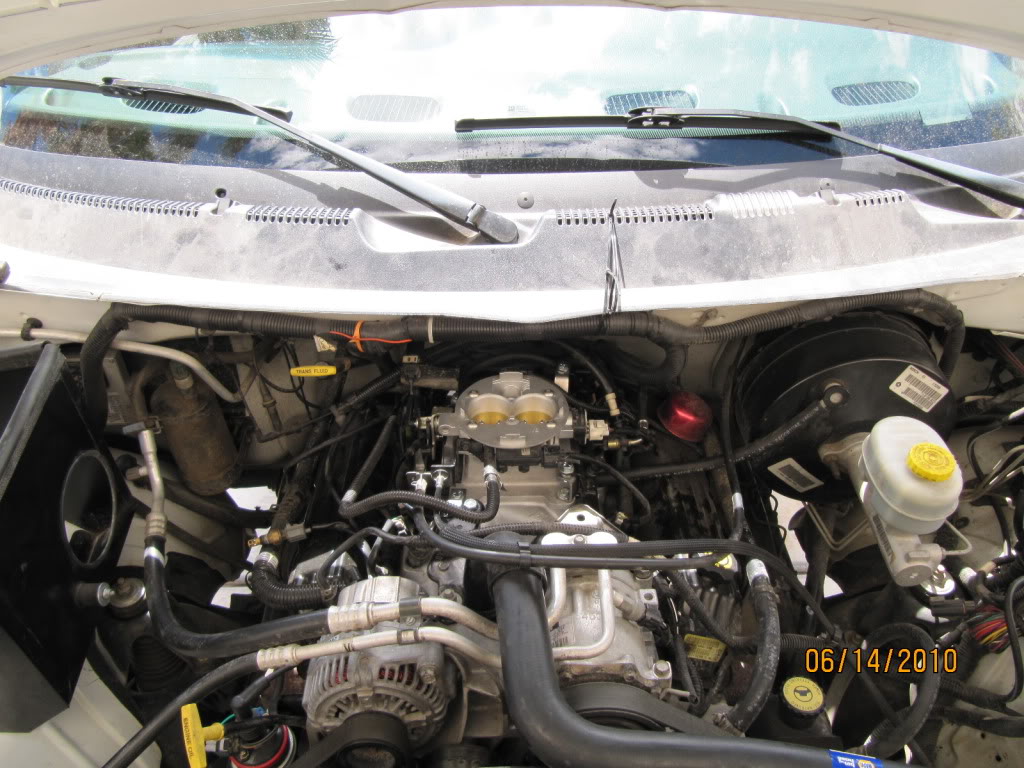
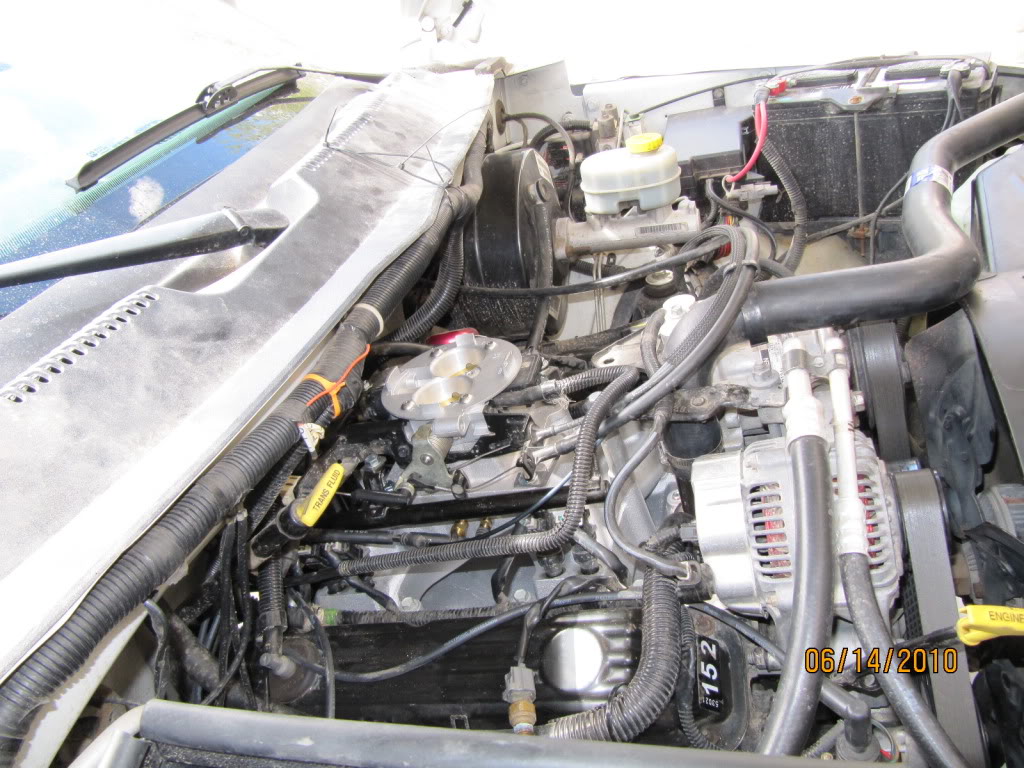
PICS


Oh and no leaks on the fuel injectors....thank god. I was sure I'd cut one or rub one the wrong way but I didn't.
PICS
Last edited by 2k10HemiRam; Jun 13, 2010 at 06:26 PM.
Grand Champion
Joined: Apr 2008
Posts: 7,055
Likes: 7
From: Lee County, North Carolina
I'm going to just bust the wire out of the convolute for the IAT so I can run it in front of the MAP sensor. I think it'll reach if I go under the fuel rail.
I went to lowes this morning and got a 1/4" brass coupling nut in the plumbing fittings and cut about 1/3" off it and it is a perfect fit for the IAT.
I went to lowes this morning and got a 1/4" brass coupling nut in the plumbing fittings and cut about 1/3" off it and it is a perfect fit for the IAT.
Last edited by Sheriff420; Jun 13, 2010 at 07:25 PM.