


Hughes FI Airgap inwork


Thread Starter
|
Captain
Joined: Jun 2007
Posts: 520
Likes: 1
From: Las Vegas, NV
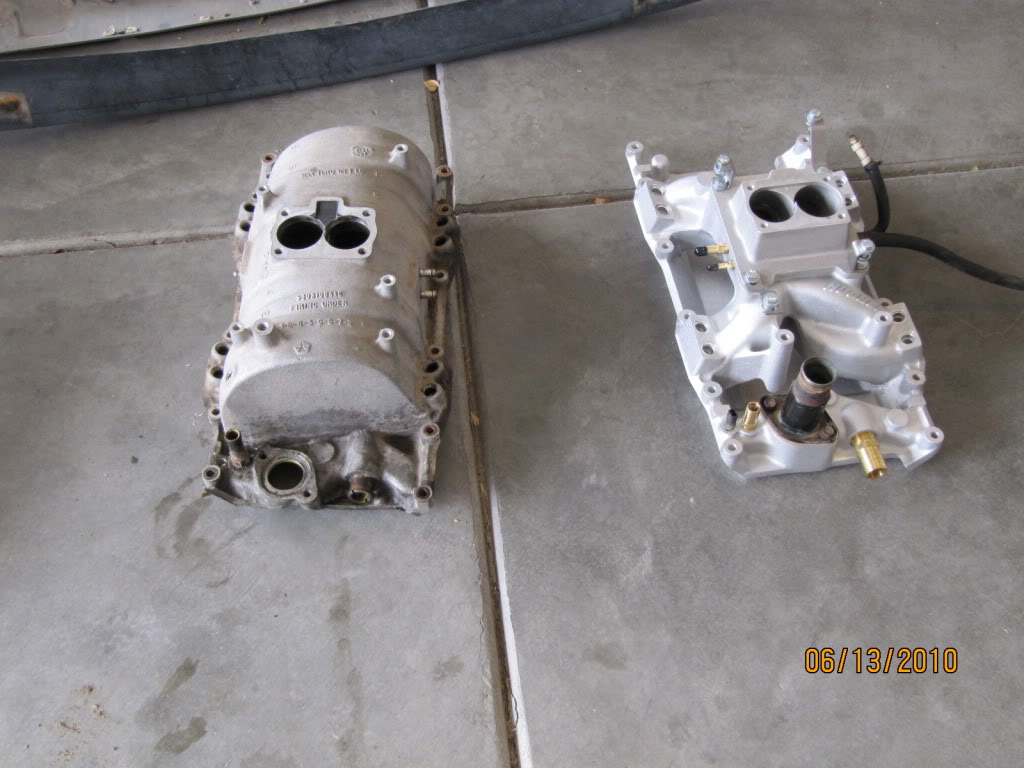
Alright so I started installing my Airgap today finally! Got about two hours into the project and the weather took a dump on me in a matter of minutes. Went outside to start and it was nice a sunny then 2 hours go by and in a matter of 5 minutes, clouds rolled in and down came the rain. But however, I love Vegas for this fact, it stopped raining about 10 minutes after I went inside and a little later, it's dry. So I went back out awhile ago and started again. I now have the old manifold out sitting in the garage with NO OIL and all original. That's right...146k and plenum isn't blown. Oh and my gaskets all came off super clean. Hell, 3 of the 4 came off with the manifold so that made the prep work for the install that much easier.
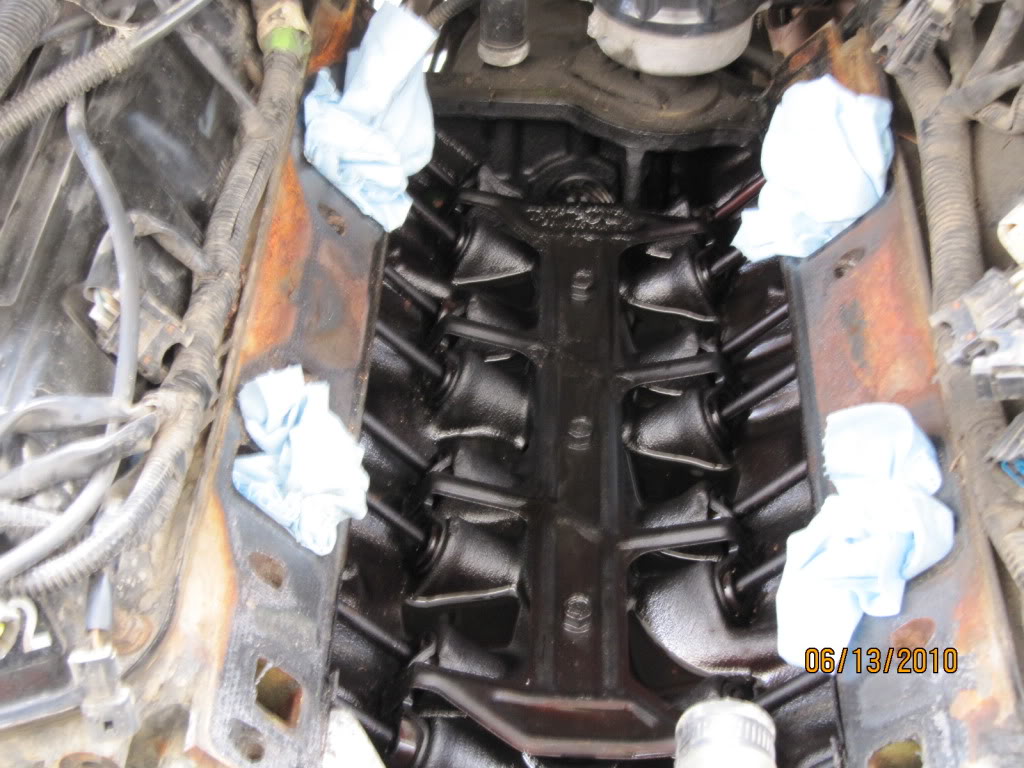
So far the biggest pain in the *** parts have been removing the injectors, those guys were in there, getting the back two bolts on the manifold, and removing the hose that goes to the heater core. I had to cut a slit in that hose to get it off and even then it still didn't want to come off. Otherwise everything else isn't that bad. Moving the fuel rails/injectors off the the side was a pain also, had no slack in the supply line so moving it was a pain.
Now here's pics so far...haven't taken many yet.


Oh and I know I'll probably get a little something something for this but no I'm not replacing the waterpump, hoses, and timing chain this go around. Need a few more things before I can do all that and I'm in a little bit of a money crunch so I'm planning on hitting those up sometime next month.
So far the biggest pain in the *** parts have been removing the injectors, those guys were in there, getting the back two bolts on the manifold, and removing the hose that goes to the heater core. I had to cut a slit in that hose to get it off and even then it still didn't want to come off. Otherwise everything else isn't that bad. Moving the fuel rails/injectors off the the side was a pain also, had no slack in the supply line so moving it was a pain.
Now here's pics so far...haven't taken many yet.
Oh and I know I'll probably get a little something something for this but no I'm not replacing the waterpump, hoses, and timing chain this go around. Need a few more things before I can do all that and I'm in a little bit of a money crunch so I'm planning on hitting those up sometime next month.
Thread Starter
|
Captain
Joined: Jun 2007
Posts: 520
Likes: 1
From: Las Vegas, NV
Yea I was pretty surprised at that when I lifted the manifold off. I took that 3 second pause as I lifted the manifold off and just looked at it with the "wow" look on my face...lol. The reason I'm surprised is because the outside of my engine is just...wow...it needs some work. When I tear into the engine again next month, whatever hoses I'm not replacing right now will be replaced later and I'll be cleaning off all the build up from coolant leaks.

Champion


Joined: Jul 2005
Posts: 2,966
Likes: 3
From: Greeneville, TN
make sure you center the intake when you install it. Mine didn't fit tight and when I bolted it down it shifted to one side and snapped a bolt off in my new head. Centered it up the next time and it bolted down fine
All Star
Joined: Jun 2009
Posts: 970
Likes: 0
From: Dacula GA
Glad to see another Ram with the Airgap install. Make sure you keep us updated and post plenty of pics! Looks like you doing great so far!
Trending Topics
Thread Starter
|
Captain
Joined: Jun 2007
Posts: 520
Likes: 1
From: Las Vegas, NV
Alright well I was hoping to be done by now but...the injectors are being a pain in my *** right now. I can't get those things to go in for **** right now. Well, actually the passenger side is done, at least I'm hoping they're in far enough, they seem to be in pretty god so. The driver side on the other hand, those are the problem. I think I got the front ones down far enough now it's just the back two, those guys will not go into the holes. I'm fearing a fuel leak when I go to start her up tomorrow, if I get that far. All thats left is to attach the accessory bracket, alt, a/c, throttle body, drill a hole in the iar hat for the iat probe, then install. So as long as I can get those two back one's down, it shouldn't take me too long to finish after I'm done doing some indoor skydiving.
Will be posting more pictures and a video clip of how she runs. Wonder what the sound difference will be.
Will be posting more pictures and a video clip of how she runs. Wonder what the sound difference will be.