


E-Fan Kit Install

Administrator
Joined: Jul 2007
Posts: 24,686
Likes: 21
From: South Georgia/East Florida
That FF setup is VERY nice looking. I believe it got Flex-a-Lite hopping, because they just released a very similar setup although theirs has a pretty nice aluminum replacement shroud in the kit. 5500 cfm and is marketed to keep even diesels cool while hauling/towing and actually has been dyno tested for 27 free'd up HP on an '02 Cummins Ram...
For 2nd Gen Rams:

For 2nd Gen Rams:

Captain
Joined: Jun 2007
Posts: 520
Likes: 1
From: Las Vegas, NV
Found this full set-up by the same guy that sells the shroud on page 2 for $160 but he wants $400 more for a full set-up. That's ridiculous considering you could take his $160 shroud and for like another 100-150 bucks you could by your own stuff and have the same set-up.
http://cgi.ebay.com/ebaymotors/Dodge...item2a0838b50f
http://cgi.ebay.com/ebaymotors/Dodge...item2a0838b50f
Champion
Joined: Feb 2009
Posts: 3,416
Likes: 4
From: Bay Area, CA
Found this full set-up by the same guy that sells the shroud on page 2 for $160 but he wants $400 more for a full set-up. That's ridiculous considering you could take his $160 shroud and for like another 100-150 bucks you could by your own stuff and have the same set-up.
http://cgi.ebay.com/ebaymotors/Dodge...item2a0838b50f
http://cgi.ebay.com/ebaymotors/Dodge...item2a0838b50f
Champion
Joined: Jun 2004
Posts: 2,811
Likes: 2
From: Ft Campbell, KY/TN
Found this full set-up by the same guy that sells the shroud on page 2 for $160 but he wants $400 more for a full set-up. That's ridiculous considering you could take his $160 shroud and for like another 100-150 bucks you could by your own stuff and have the same set-up.
http://cgi.ebay.com/ebaymotors/Dodge...item2a0838b50f
http://cgi.ebay.com/ebaymotors/Dodge...item2a0838b50f
Captain
Joined: Oct 2009
Posts: 607
Likes: 0
From: Moncton , New Brunswick
I have ordered the same kit as BIGSLICK.....Should arrive in a few days , but will be August before I get a chance to install them. I will Post pictures and a poormans DIY. I live in Canada and to save on duty and taxes i had them shipped to a friends place in Maine....I have to find the time to make the 5 hour trip to get them. I have the dual fan kit, hughes plenum kit , and a set of Pacesetter longtubes waiting for me. Can't wait!!!
Thread Starter
|
All Star
Joined: Jun 2009
Posts: 970
Likes: 0
From: Dacula GA
Ok guys the fans are finally installed and working great! I had a good friend of mine to do all the electrical wiring for this kit, so it was a great help...I can't wire worth a shiz...(plus he is going to college to major in diesel technology and has a brackground of electrical enginering.
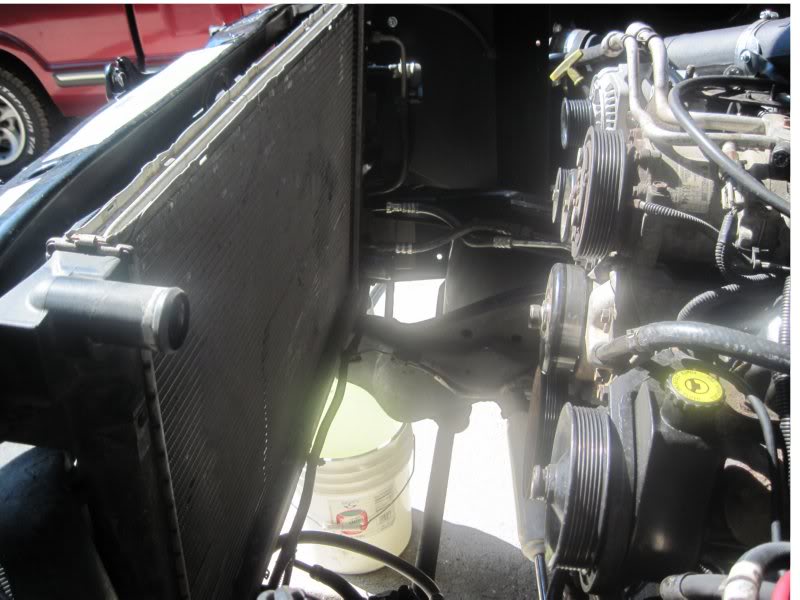
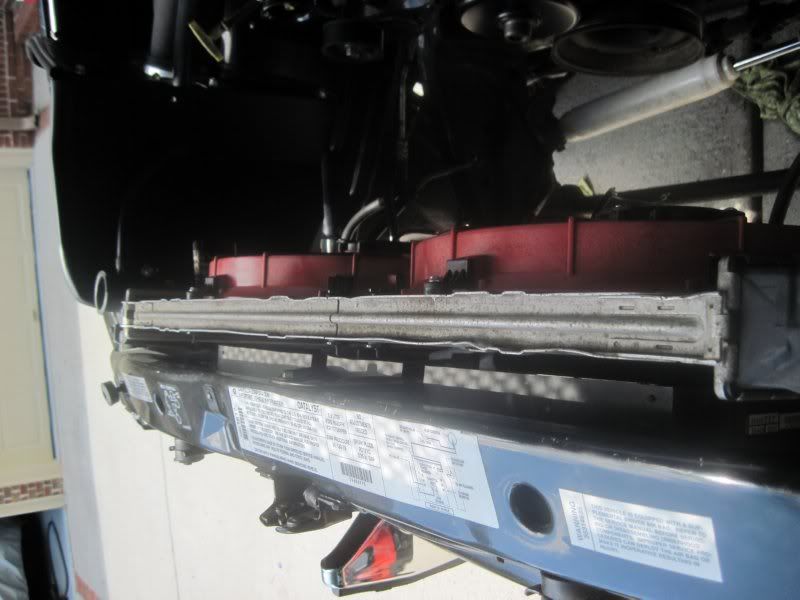
So to start off, we drained the coolant in resovoir and radiator, as well as the washer fluid. Then we removed upper and lower radiator lines, both resoviors, fan shroud, and then the fan clutch...yay never have to use that again...also popped the battery out for safe measure. This alone took about an hour and a half.
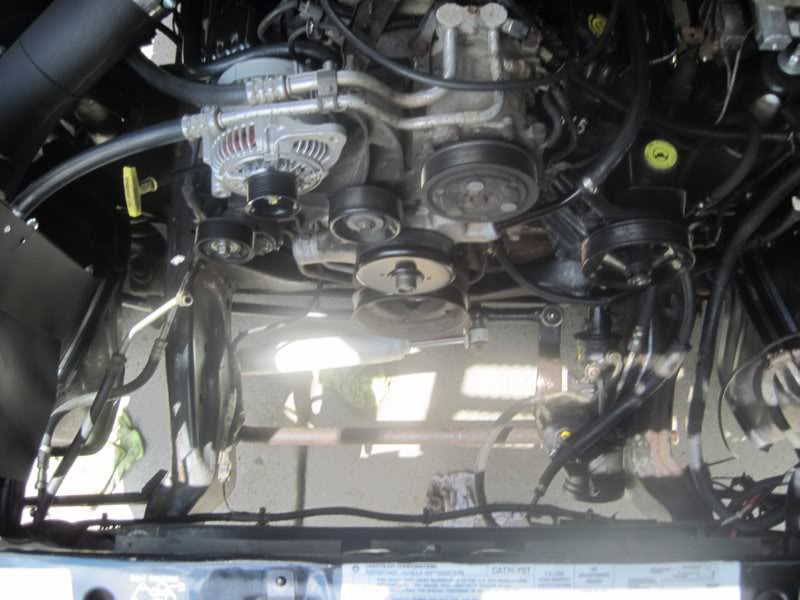
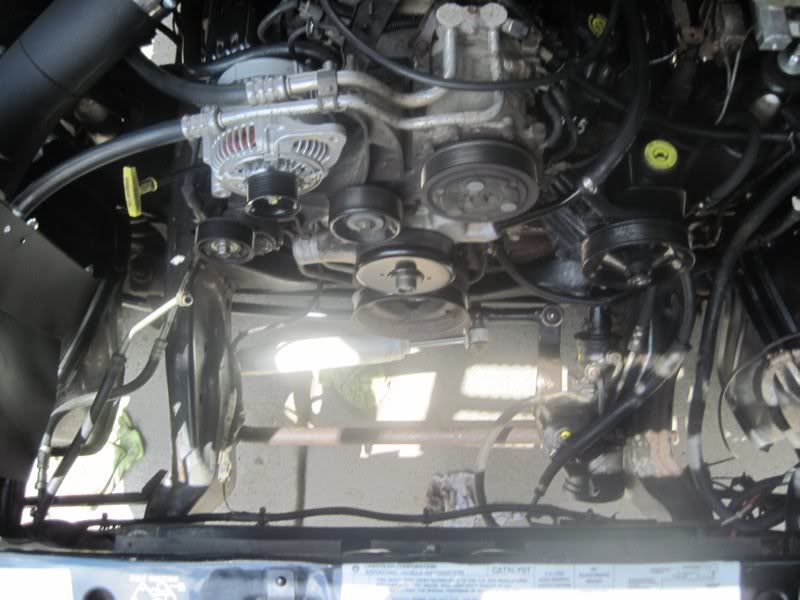
Next, we proceeded to do the best coolant flush ever done to Betty. So everything is super clean now... Then we popped out the radiator to make the fan installation much easier. While I had my engine compartment torn out, I also detailed everything with a engine degreaser.
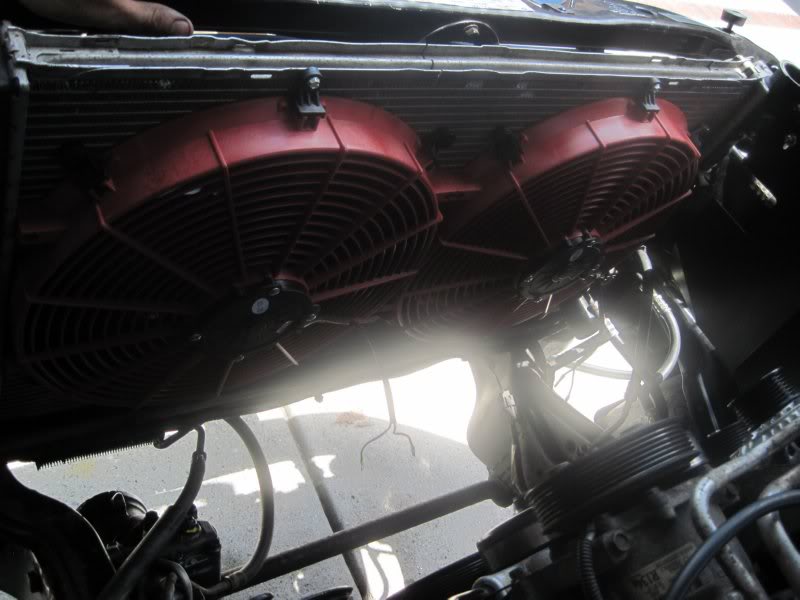
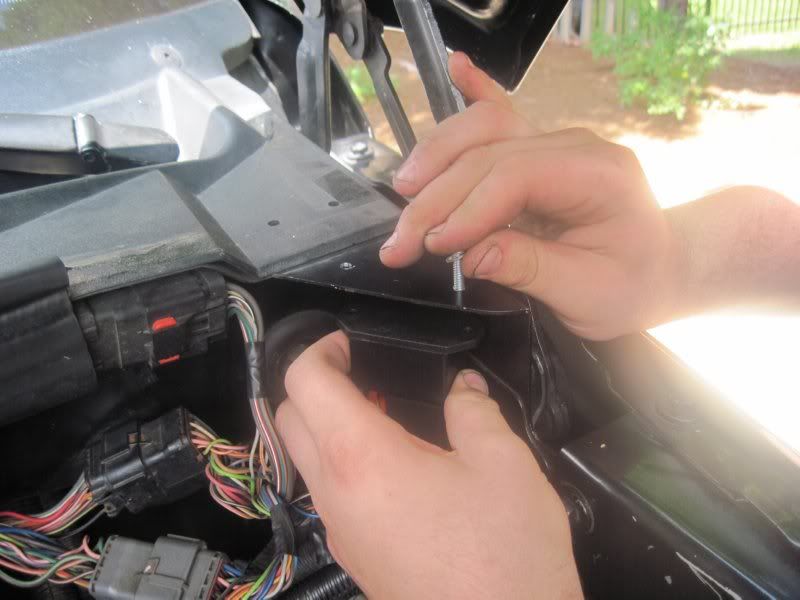
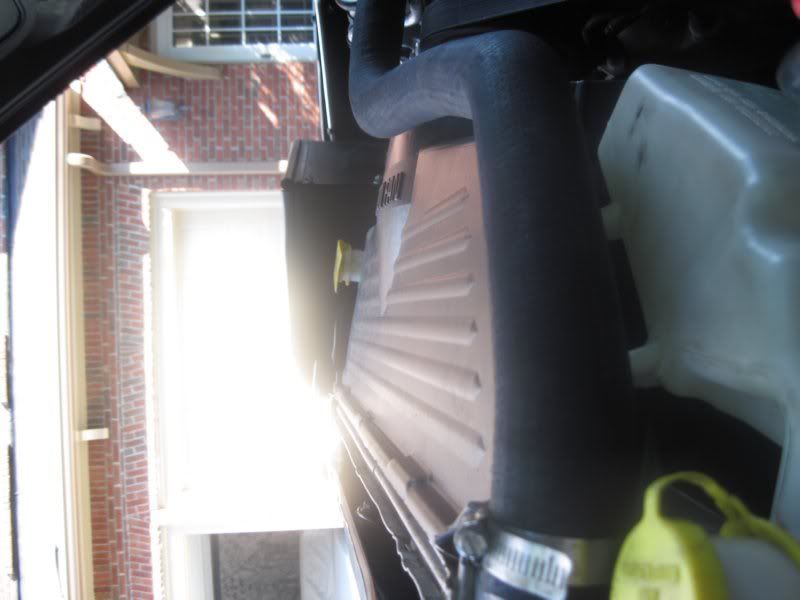
So the fans were installed on the radiator using the provided hardware and then put the radiator back in the truck. So basically all was left to do to get em running was doing the wiring. Found a good spot to mount up the control module and began running the wiring. I let my electrician guru handle 100% of this job (i was clueless about wiring anyways) and basically got it all working. Popped the shroud back on, the serp belt, fluid containers, filled all fluids back up, and also put in a new 180 stant thermostat on before putting the upper rad hose and alternator back on. Basically had everything back the way it was but with no fan clutch, new 180 thermo, new upper rad hose, new e-fans, and entire coolant flush.
The only thing that I was not happy about after we finished was the green wire being spliced into a wire off the ac clutch...so there is a random green wire hanging in there and also my low wash light is on in my dash (yes there is full fluid) and we couldn't figure out why this was tripping. We did splice a wire into the low wash connector to get 12V of power to the fans with the key in the ON position, and could not find another convinient spot to pull that power from...any ideas on this guys??
Well, all-in-all I was very happy about this setup. So far on the initial 25 mile test drive, I have noticed the system runs 5-7 degrees cooler, improved trhottle response, and can also feel slight power gain (everything just feels smoother) and hopefully I will gain some MPG. Won't be testing for that until the next tank of gas. Currently I get 12.2 city, 13.7 highway, I hope to see improvements. BTW, I have set my control module to 165 for the fans to kick on. I will be doing extensive testing on this and keep ya'll updated. Here are some pics....


So to start off, we drained the coolant in resovoir and radiator, as well as the washer fluid. Then we removed upper and lower radiator lines, both resoviors, fan shroud, and then the fan clutch...yay never have to use that again...also popped the battery out for safe measure. This alone took about an hour and a half.
Next, we proceeded to do the best coolant flush ever done to Betty. So everything is super clean now... Then we popped out the radiator to make the fan installation much easier. While I had my engine compartment torn out, I also detailed everything with a engine degreaser.
So the fans were installed on the radiator using the provided hardware and then put the radiator back in the truck. So basically all was left to do to get em running was doing the wiring. Found a good spot to mount up the control module and began running the wiring. I let my electrician guru handle 100% of this job (i was clueless about wiring anyways) and basically got it all working. Popped the shroud back on, the serp belt, fluid containers, filled all fluids back up, and also put in a new 180 stant thermostat on before putting the upper rad hose and alternator back on. Basically had everything back the way it was but with no fan clutch, new 180 thermo, new upper rad hose, new e-fans, and entire coolant flush.
The only thing that I was not happy about after we finished was the green wire being spliced into a wire off the ac clutch...so there is a random green wire hanging in there and also my low wash light is on in my dash (yes there is full fluid) and we couldn't figure out why this was tripping. We did splice a wire into the low wash connector to get 12V of power to the fans with the key in the ON position, and could not find another convinient spot to pull that power from...any ideas on this guys??
Well, all-in-all I was very happy about this setup. So far on the initial 25 mile test drive, I have noticed the system runs 5-7 degrees cooler, improved trhottle response, and can also feel slight power gain (everything just feels smoother) and hopefully I will gain some MPG. Won't be testing for that until the next tank of gas. Currently I get 12.2 city, 13.7 highway, I hope to see improvements. BTW, I have set my control module to 165 for the fans to kick on. I will be doing extensive testing on this and keep ya'll updated. Here are some pics....
Legend
Joined: Jul 2007
Posts: 7,843
Likes: 13
From: DFW, Texas
The wire you spliced into the washer fluid wire:
You're not trying to pull power for the unit; that comes from the large red wire on the battery. All you're doing is just letting the unit know that the key is on. My guess is that you either tapped the wrong wire (negative instead of the positive feed to the washer sensor), plugged into the wrong pin on the fan controller, or made a complete circuit: constantly supplying some positive feed to the sensor and completing the circuit. Did you make a "loop" of red positive wire from the battery to the sensor splice to the prong on the fan controller?
Try this: run one single red wire from the windshield wiper's positive line to the appropriate pin on the fan controller. On my 2001, I believe it was dark green and very accessible at the fire wall coming out of a small hole under the driver's side the hood spring. It was wrapped in tape which I carefully cut open and spliced into and rewrapped.
I prefer the wiper motor as it has a rather large fuse.
Legend
Joined: Jul 2007
Posts: 7,843
Likes: 13
From: DFW, Texas
I would like to publicly thank Matt for his advice. I reinstalled my factory shroud over my electric fan tonight. Was a bit of a pain getting it to fit over the universal brackets at a few points, but now not only do I not have zip ties holding my coolant bottle and washer fluid bottle (so it looks a lot better), but I took it for a decent test drive and it actually DOES seem cool better.

Hey Jason, now that you've tested it out, how's it holding up? Still cooling better? I thought it has worked better for me, but I'm only a single case study, not a trend.
My thought was that the force of air being constricted and blown out of the shroud would do 2 things:
1. Deflect some of that hotter used radiator air away from my round filter intake. If that air wasn't so hot, I might have tried to devise a way to make that a bit of "boost" by funneling that into the intake. As it is, I think the air is hot enough to negate the effort of making any sort of rig to channel that air into the intake.
2. The fast moving air from the fans would actually pull a small amount of air through the radiator fins that weren't covered, kind of like the way all the water in a pool can move around by just some of it being pulled through the filter system. Because the pool is a closed system, it works. The shroud makes a closed system to make that possible. No shroud would be too open and it wouldn't work.
Just a theory that worked for me. I'm curious if was still showing any benefit for you?
Rookie
Joined: Oct 2008
Posts: 57
Likes: 0
From: Ft Campbell ky/ Clarksville TN
check the electrical connectors on the washer pump you may have them switched.
Ok guys the fans are finally installed and working great! I had a good friend of mine to do all the electrical wiring for this kit, so it was a great help...I can't wire worth a shiz...(plus he is going to college to major in diesel technology and has a brackground of electrical enginering.
So to start off, we drained the coolant in resovoir and radiator, as well as the washer fluid. Then we removed upper and lower radiator lines, both resoviors, fan shroud, and then the fan clutch...yay never have to use that again...also popped the battery out for safe measure. This alone took about an hour and a half.
Next, we proceeded to do the best coolant flush ever done to Betty. So everything is super clean now... Then we popped out the radiator to make the fan installation much easier. While I had my engine compartment torn out, I also detailed everything with a engine degreaser.
So the fans were installed on the radiator using the provided hardware and then put the radiator back in the truck. So basically all was left to do to get em running was doing the wiring. Found a good spot to mount up the control module and began running the wiring. I let my electrician guru handle 100% of this job (i was clueless about wiring anyways) and basically got it all working. Popped the shroud back on, the serp belt, fluid containers, filled all fluids back up, and also put in a new 180 stant thermostat on before putting the upper rad hose and alternator back on. Basically had everything back the way it was but with no fan clutch, new 180 thermo, new upper rad hose, new e-fans, and entire coolant flush.
The only thing that I was not happy about after we finished was the green wire being spliced into a wire off the ac clutch...so there is a random green wire hanging in there and also my low wash light is on in my dash (yes there is full fluid) and we couldn't figure out why this was tripping. We did splice a wire into the low wash connector to get 12V of power to the fans with the key in the ON position, and could not find another convinient spot to pull that power from...any ideas on this guys??
Well, all-in-all I was very happy about this setup. So far on the initial 25 mile test drive, I have noticed the system runs 5-7 degrees cooler, improved trhottle response, and can also feel slight power gain (everything just feels smoother) and hopefully I will gain some MPG. Won't be testing for that until the next tank of gas. Currently I get 12.2 city, 13.7 highway, I hope to see improvements. BTW, I have set my control module to 165 for the fans to kick on. I will be doing extensive testing on this and keep ya'll updated. Here are some pics....