


in a bind...
#51
 03-14-2013 | 05:51 PM

Thread Starter
|
Veteran
Joined: Jul 2011
Posts: 317
Likes: 0
From: Gagetown, New Brunswick, Canada
I'm going to look on RockAuto right now for the bushings... And, I'm thinking my rough ride (I still haven't installed the lift either) is contributing to it all. Need to smooth out that ride so the truck isn't one big bump after another.
InfO.
#52
03-30-2013 | 10:15 AM
Thread Starter
|
Veteran
Joined: Jul 2011
Posts: 317
Likes: 0
From: Gagetown, New Brunswick, Canada
Need a bit of help/suggestion.
I ended up on course pretty much after parking the truck and having shift issues. I got back mid-last week, so now that it's the long weekend I was preparing to adjust the shift linkage which I assumed was all I required.
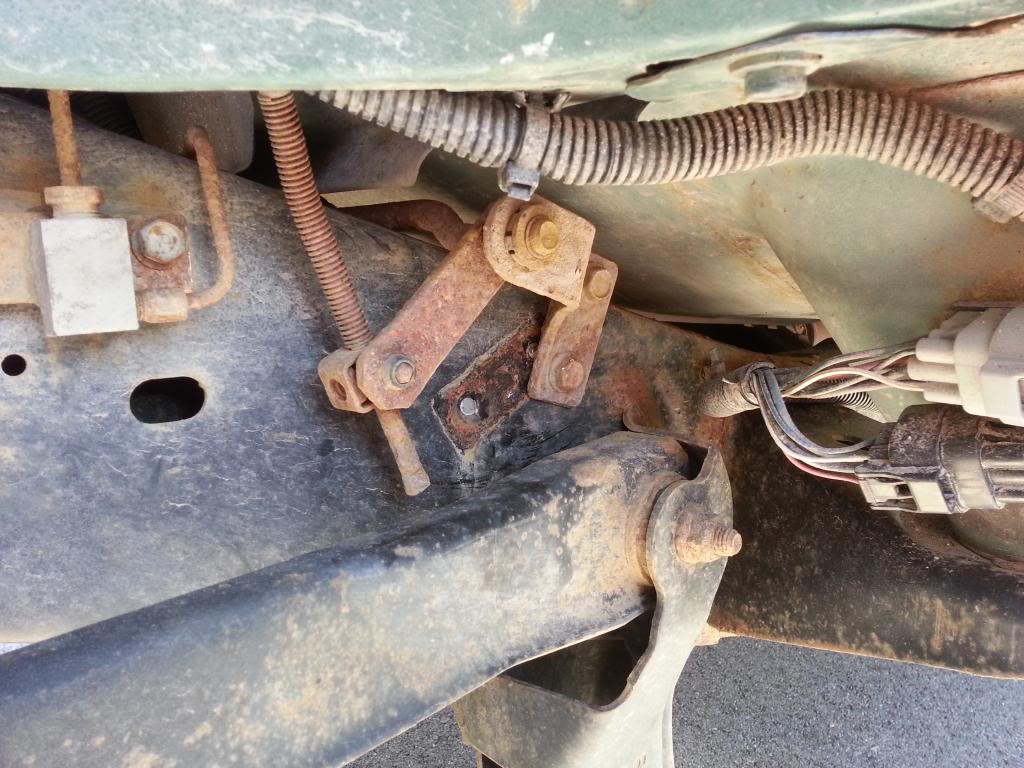
As I got under there, started familiarizing myself with the parts I started to think "Wow... for something so important, this entire shift linkage setup seems very flimsy." - turns out, it SHOULDN'T be. I noticed that the 90 degree angle change in the shift linkage (coming down from the steering shaft to where there is a bracket bolted to the frame, then the linkage heads towards the transmission) is ****ed. The two bolts that hold the bracket to the frame and keep the shift linkage all tight are sheered right off. The bolt heads are still on the bracket, the bolt bodies are in the frame.
Suggestions for getting that all out?
Thanks,
InfO.
I ended up on course pretty much after parking the truck and having shift issues. I got back mid-last week, so now that it's the long weekend I was preparing to adjust the shift linkage which I assumed was all I required.
As I got under there, started familiarizing myself with the parts I started to think "Wow... for something so important, this entire shift linkage setup seems very flimsy." - turns out, it SHOULDN'T be. I noticed that the 90 degree angle change in the shift linkage (coming down from the steering shaft to where there is a bracket bolted to the frame, then the linkage heads towards the transmission) is ****ed. The two bolts that hold the bracket to the frame and keep the shift linkage all tight are sheered right off. The bolt heads are still on the bracket, the bolt bodies are in the frame.
Suggestions for getting that all out?
Thanks,
InfO.
#55
03-30-2013 | 11:46 AM
Thread Starter
|
Veteran
Joined: Jul 2011
Posts: 317
Likes: 0
From: Gagetown, New Brunswick, Canada
Also going to pick up a rivet gun to put the rivets back in for the inner fender well.
Random note... I _CANNOT_ wait to install the lift kit/HD front end parts/manual locking hub. She is in sad shape up front:


InfO.
#56
03-30-2013 | 11:59 AM
Champion
Joined: Oct 2009
Posts: 4,712
Likes: 9
From: N/A
Drill them out to almost the threads then try the ez out, don't leave lots of meat in there. To be honest I would just drill oversize and tap new threads, then drill out the bracket to match the new bolt size. Just over the current bolt size nothing too big.
I thought you guy's were going to be getting a big storm?
Edit; Gotta welder might be ez'er just to weld that back to the frame in a couple of spots, 10 min repair compared to messing with bolts.
I thought you guy's were going to be getting a big storm?
Edit; Gotta welder might be ez'er just to weld that back to the frame in a couple of spots, 10 min repair compared to messing with bolts.
Last edited by merc225hp; 03-30-2013 at 12:11 PM. Reason: spelling
#57
03-30-2013 | 12:03 PM
Thread Starter
|
Veteran
Joined: Jul 2011
Posts: 317
Likes: 0
From: Gagetown, New Brunswick, Canada
Drill them out to almost the threads then try the ez out, don't leave lots of meat in there. To be honest I would just drill oversize and tap new threads, then drill out the bracket to match the new bolt size. Just over the currant bolt size nothing too big.
I thought you guy's were going to be getting a big storm?
I thought you guy's were going to be getting a big storm?
I'm pretty sure we're good for the next 14 days, but I could be completely wrong! There's barely any snow on the ground as is. I know there was a storm while I was gone in Canmore, AB ice climbing, but luckily the Misses had the clean that one up ;o)
InfO.
#59
04-02-2013 | 04:21 PM
Thread Starter
|
Veteran
Joined: Jul 2011
Posts: 317
Likes: 0
From: Gagetown, New Brunswick, Canada
Picked up a few tools on the long weekend and got the bolts out. For those that ever tackle this issue, do _NOT_ pull the gearshift control rod vertical link which the instructions say can be done.

I cannot for the _LIFE_ of me put that back in. Further, though they say replace the grommet, the new ones are hard plastic and have no give. I cannot even get a new one onto the pin. Go figure.
InfO.
I cannot for the _LIFE_ of me put that back in. Further, though they say replace the grommet, the new ones are hard plastic and have no give. I cannot even get a new one onto the pin. Go figure.
InfO.