


Removing Broken Exhaust Manifold Studs


Thread Starter
|
Veteran
Joined: Oct 2008
Posts: 279
Likes: 0
From: Mass.
After much searching, I have come to the conclusion that I am not the first Dodge Ram owner to deal with these crappy studs, nor will I be the last.
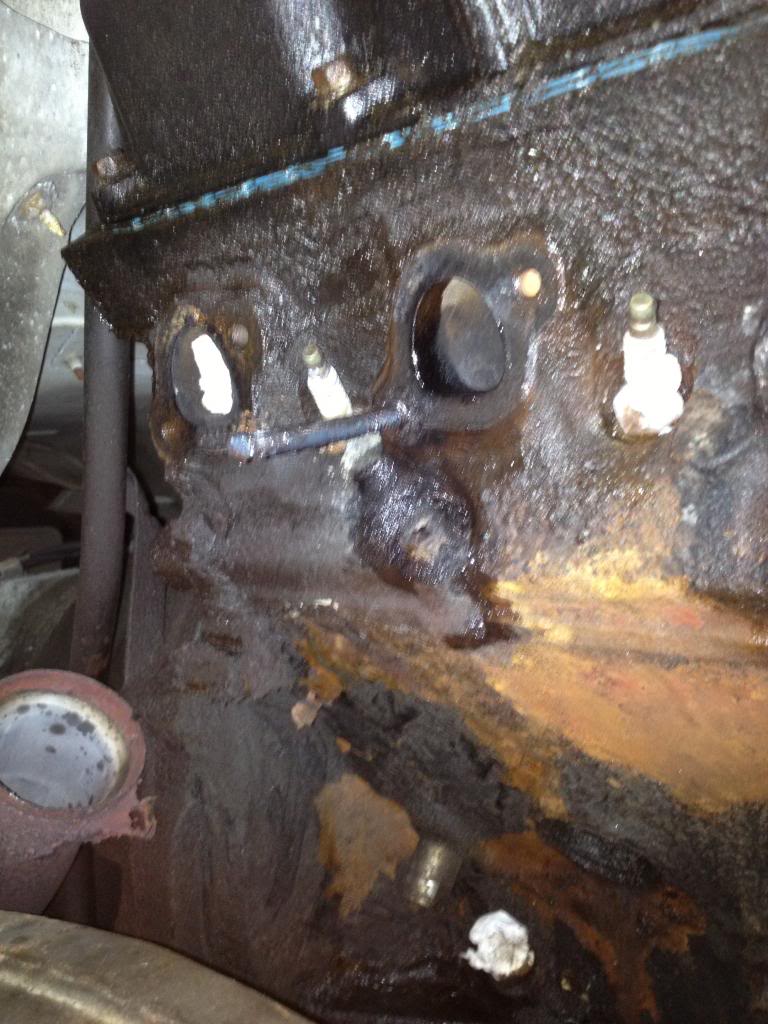
I was able to remove my stock exhaust manifold on the passenger side by cutting the heads off of the studs with my torch and sliding the whole manifold off.
Once the cast manifold was removed, I soaked the remaining studs in a 50/50 ATF/ Acetone mixture (a penetrant that I have found to be particularly effective).
I was able to remove all but one of the studs.
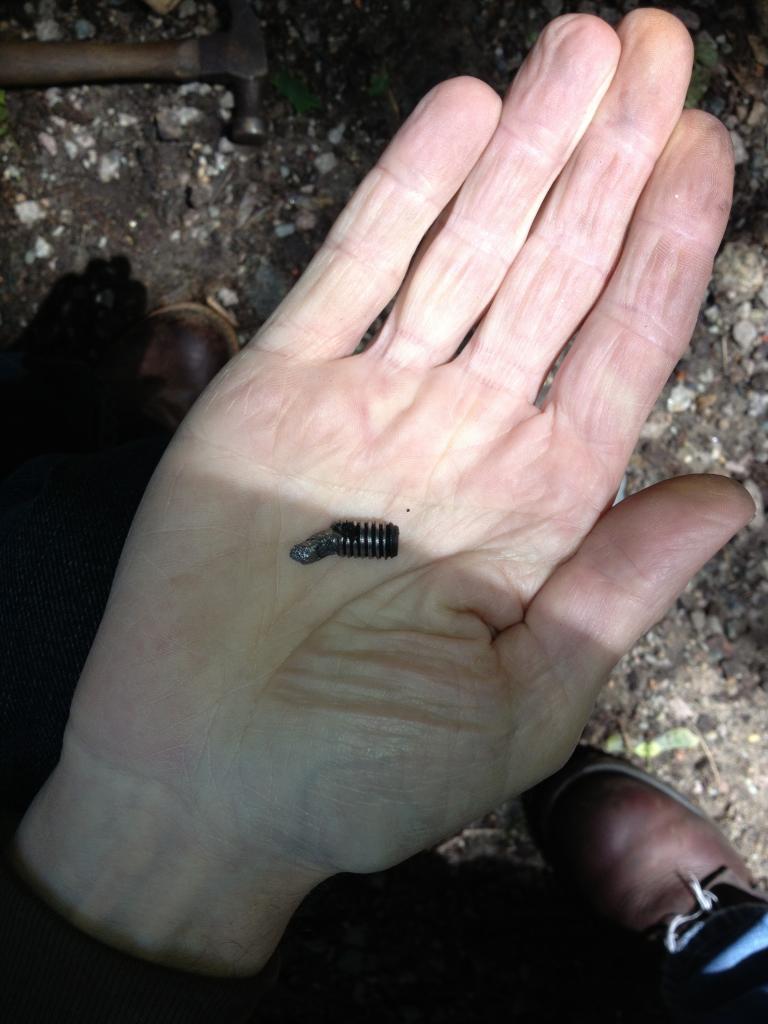
Here is a picture of the only remaining stud, minus a head to turn it with:
After a ton of penetrating oil, heat, cursing, and turning with the vice grips, the stud finally broke off about 1/16" within the head. Unfortunately, I do not have a picture of this particular event.
First, I attempted to drill it out, but I ended up snapping 2 bits off inside of the stud. After the second bit broke, I gave up on drilling and switched to the torch.
Unfortunately,the torch was not up to the task either and I began to melt part of the head around the bolt hole. I promptly stopped that before it could do any real damage.
At this point, I was out of options and was preparing to pull the heads and have a friend machine out the broken stud so my new headers would not leak when I mounted them.
Before I began the tear down, I gave the broken stud one last try- except this time, I was using my MIG welder. I put a fresh spool of .035 gauge flux cored wire in, cranked the welder up to full power, set the wire speed low, and began tacking on top of the broken stud. Once I had enough tacks, there was enough metal sticking out of the hole to grab with a pair of vise grips.
I gently rocked it back and forth in the hole until it began to move! More penetrating oil, a steady hand, and patience allowed me to successfully remove the broken stud:
Once the remaining stud was out, my father ran a tap through the hole (and all the others) to clean out the threads and ensure a proper install.
To my surprise, the threads were not damaged at all, despite the melted portion of the head around the hole:
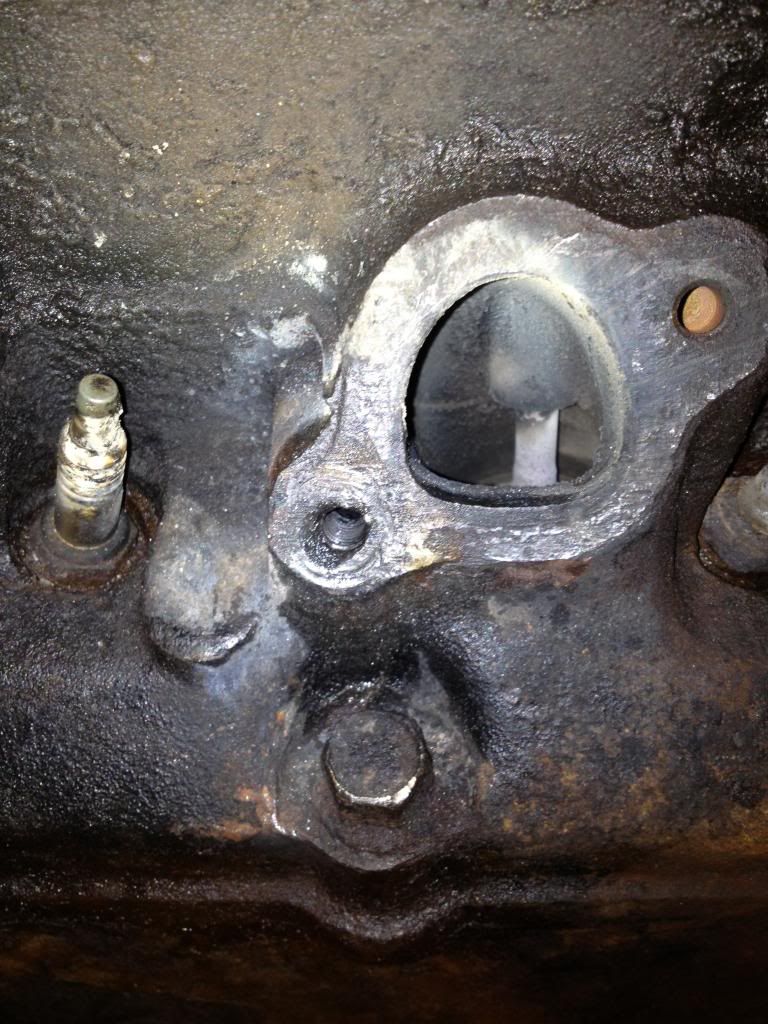
The hole in question is the lower one on the above picture.
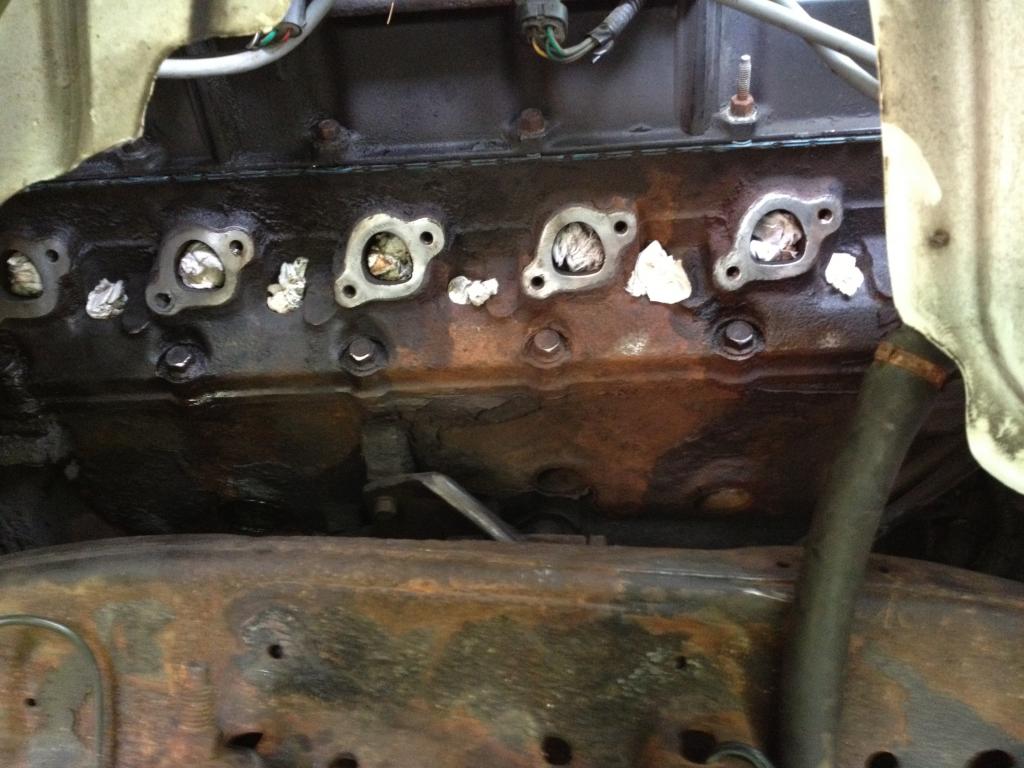
I then removed all of the plugs and ground down the mating surfaces on the exhaust ports. I think it came out pretty well:
So, the most important thing that we can take away from this debacle is:
Chrysler exhaust studs suck.
-I hope that the above information can be of use to someone in a similar predicament.-
I was able to remove my stock exhaust manifold on the passenger side by cutting the heads off of the studs with my torch and sliding the whole manifold off.
Once the cast manifold was removed, I soaked the remaining studs in a 50/50 ATF/ Acetone mixture (a penetrant that I have found to be particularly effective).
I was able to remove all but one of the studs.
Here is a picture of the only remaining stud, minus a head to turn it with:

After a ton of penetrating oil, heat, cursing, and turning with the vice grips, the stud finally broke off about 1/16" within the head. Unfortunately, I do not have a picture of this particular event.
First, I attempted to drill it out, but I ended up snapping 2 bits off inside of the stud. After the second bit broke, I gave up on drilling and switched to the torch.
Unfortunately,the torch was not up to the task either and I began to melt part of the head around the bolt hole. I promptly stopped that before it could do any real damage.
At this point, I was out of options and was preparing to pull the heads and have a friend machine out the broken stud so my new headers would not leak when I mounted them.
Before I began the tear down, I gave the broken stud one last try- except this time, I was using my MIG welder. I put a fresh spool of .035 gauge flux cored wire in, cranked the welder up to full power, set the wire speed low, and began tacking on top of the broken stud. Once I had enough tacks, there was enough metal sticking out of the hole to grab with a pair of vise grips.
I gently rocked it back and forth in the hole until it began to move! More penetrating oil, a steady hand, and patience allowed me to successfully remove the broken stud:

Once the remaining stud was out, my father ran a tap through the hole (and all the others) to clean out the threads and ensure a proper install.
To my surprise, the threads were not damaged at all, despite the melted portion of the head around the hole:

The hole in question is the lower one on the above picture.
I then removed all of the plugs and ground down the mating surfaces on the exhaust ports. I think it came out pretty well:

So, the most important thing that we can take away from this debacle is:
Chrysler exhaust studs suck.
-I hope that the above information can be of use to someone in a similar predicament.-
Last edited by clipper77; Jun 15, 2013 at 02:04 PM. Reason: typo

Thread Starter
|
Veteran
Joined: Oct 2008
Posts: 279
Likes: 0
From: Mass.
I agree. I don't think the torch was able to heat the portion of the stud in the block quite as well as the MIG.
Thread Starter
|
Veteran
Joined: Oct 2008
Posts: 279
Likes: 0
From: Mass.

Dad picked the headers up off of Ebay a few years ago. I'm just getting time to install them now.
Here is a pic:

They were used. The previous owner ran them for about a year on his 3500.
I'm not sure why he had them taken off, but I'm not convinced that the flange isn't warped to some degree.
I believe he said that they were t304 stainless or something like that, but I can't really remember.
Also, would I be better off heat wrapping them or not? I have read that heat wrap can cause hot spots leading to cracking, etc.
Champion


Joined: Sep 2012
Posts: 4,868
Likes: 434
From: Central VA
I would not heat-wrap them - tends to lead to rust issues over time. If you can have them cleaned and coated, that would be a better option.
Trending Topics
Thread Starter
|
Veteran
Joined: Oct 2008
Posts: 279
Likes: 0
From: Mass.
my only concern is that the driver's side header mounts directly under the brake booster/MC.
Is it possible that the header(s) could get hot enough during normal operation (or under heavy towing/ hauling) to cause any sorts of problems in the engine compartment?
Administrator


Joined: Apr 2010
Posts: 87,433
Likes: 4,216
From: Clayton MI
Any idea what it costs to have them coated?
my only concern is that the driver's side header mounts directly under the brake booster/MC.
Is it possible that the header(s) could get hot enough during normal operation (or under heavy towing/ hauling) to cause any sorts of problems in the engine compartment?
my only concern is that the driver's side header mounts directly under the brake booster/MC.
Is it possible that the header(s) could get hot enough during normal operation (or under heavy towing/ hauling) to cause any sorts of problems in the engine compartment?
So long as the engine is running properly, exhaust heat shouldn't really be a problem. I agree on the 'don't wrap' thing. All that does is trap moisture against the tubes.

All Star
Joined: Jul 2011
Posts: 901
Likes: 3
From: Dayton, TX.
You can make a heat shield with a piece of gasket material if you think the header is close enough to transfer heat to the brake booster/MC. I did that to a starter motor on a 351C that I put headers on, worked great.