
HOW TO: Cut and Pull bedsides to clear big tires
#1
 02-10-2012, 09:04 PM

Figured id write up this little mini article for the curious cats out there. common in the off road race scene is to either get fiberglass bedsides (which dont exists) or cut and pull your bedsides. you ask, why not just body lift and put blocks etc etc. because when you want to go fast over very rough terrain...the last thing you want is a high center of gravity. so with the low, wide stance of a race truck...or prerunner in this case. the only way to stuff big tires is to clear up some inner fender space.
like everything there is probably a million ways to do something. this is how we did it. and since its never been done unlike rangers. you dont really know how far to spread them before it creases. so we took the guess work out for you
Tools needed:
ok lets make this quick and simple so you can get out there and start cutting up your beautiful freshly off the lot truck
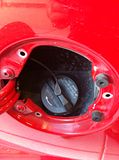
first things first! open that cool little door on your driver side that you put fluid into....you know, the gas door. remove the 3 torx screws so you dont rip out your gas hose. Beautiful! oh yea and remove all 4 of those cheesy plastic mudflap...whatever they are. they suck!
Now take your bumper off (4 bolts...come on!)
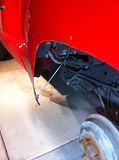
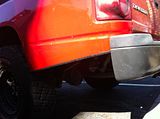
This next part makes the weak knot up and get sick....well....do you wanna tuck 33s or not? hahah ok so mark how low below your tail gate you want you caps. the cut your making (to the bros is just called angled cut) in racing its your departure angle...as common sense kicks it...its the angle that save your body as you "depart" from the obstacle. so we went with 2" below the gate so we can make a tube bumper look really sexy. some people run the cut up to the gate. its up to you. the MAIN reason for these upcoming cuts. is to get rid of the part of the bedside that "rolls" underneath. that stuff gets in the way and it wont let you pull if theyre there. so have at it! we used tape to mark it all up. getting rid of this ***-end also adds to your ground clearance. if you wheel you know what i mean. ever try going up a steep hill and scrap your bumper or smash out your quarters?
now shes sexier than that drunk mistake in cabo.....i mean....on to the next step!
this part isnt REALLY needed. but HIGHLY recommended. rolling your lip. we pie cut slits every few inches but however you want to do it thats cool too.
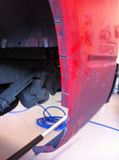
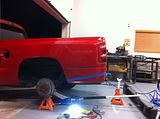
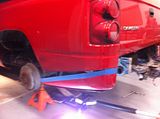
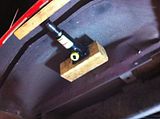
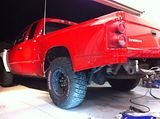
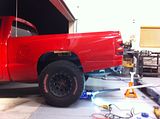
now the fun part! watching the transformation begin. you need to take your cutting apparatus and slice i nice line around the inner fender. youll see the line where the outter skin meets with the inner fender well that creates the hump in your bed. stay to the outside of that line. just go from front to back. baking a pie might just be easier for real this time! when your done with that massacre. stick your bottle jack and your wood blocks up there and tighten her up nice and slow! we spread 2 inches up top which equates to about 4 down at the quarters...youll see what i mean.
now i forgot to take a picture of this step but super easy. just slice up some flat plate. and weld in where the gap is. you DONT need to fill the entire gap! 2 pieces per side is plenty strong. we had some 4x4" 1/8" flat plate scrap laying around. it fit perfect. dont forget to prep your surface prior to welding. flap discs work wonders!
when thats all done you can remove grandmas jack so she can get back to changing her tire on the side of the freeway you left her at
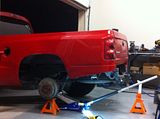
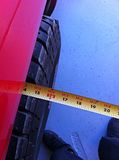
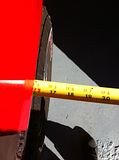
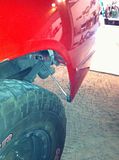
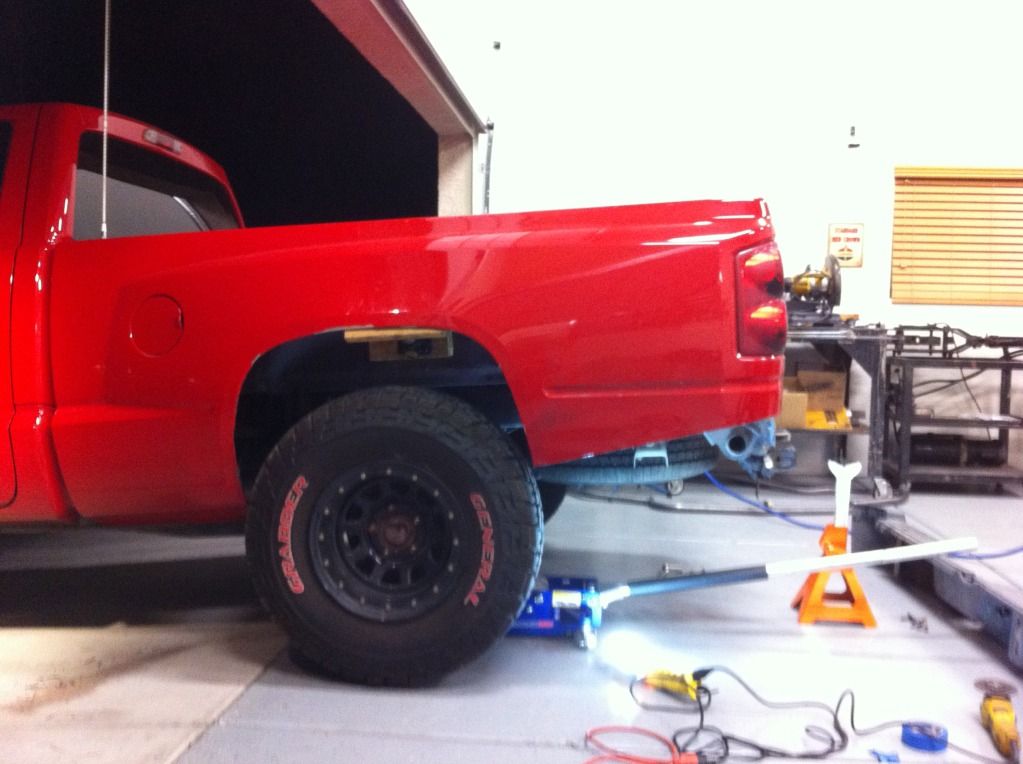
now just slap your tire on to see how far you want to pull the lower portion out. pick your favorite spot on the bed (where the bolt holes are from the plastic flaps) and measure down to the bottom of the quarter. this will be your solid rod length. we just bent one of the pie cut tabs back to normal for this. make sure your tire will clear the fender AND the rod! lol. i cant stress welding the rod from bed to bed and NOT bed to frame! this makes removing the bed much easier....trust me. now weld away.
now if you spread only as far as we recommended....your gas filler should stretch up to the new spot and you can tighten up your torx screws.
if you fancy clean edges like us....the hardware store sells stuff called trim lock. excellent stuff. cap up your edges and your ready to tuck some big tires after landing the huck wall trying to impress that girl!
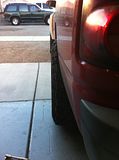
BEFORE
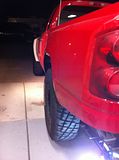
AFTER
now you can slap your bumper back on...might look a little weird...or get yourself a tube bumper. enjoy! another low quality mod by PD
like everything there is probably a million ways to do something. this is how we did it. and since its never been done unlike rangers. you dont really know how far to spread them before it creases. so we took the guess work out for you
Tools needed:
- Your basic set of shade tree hand tools
- some blocks of wood
- bottle jack found in granny's buick....(or wherever you prefer)
- Various cutting tools (angle grinders, cut off wheels, plasmas (our favorite) BUT DONT USE PLASMAS ON OUTTER PANELS! THEY LEAVE BURN MARKS! COOL
- (2) 48" 5/16 solid rod sticks....can be found at the depot for dirt cheap.
- rubber mallet (if you want to roll your lip to clear the wide ones)
- welder......or bolts if you want to be ghetto
- and a tape measure if you want your goods to come out right
- some flat plate (1/16 or 1/8) whatever your fancy is
ok lets make this quick and simple so you can get out there and start cutting up your beautiful freshly off the lot truck
first things first! open that cool little door on your driver side that you put fluid into....you know, the gas door. remove the 3 torx screws so you dont rip out your gas hose. Beautiful! oh yea and remove all 4 of those cheesy plastic mudflap...whatever they are. they suck!

Now take your bumper off (4 bolts...come on!)
This next part makes the weak knot up and get sick....well....do you wanna tuck 33s or not? hahah ok so mark how low below your tail gate you want you caps. the cut your making (to the bros is just called angled cut) in racing its your departure angle...as common sense kicks it...its the angle that save your body as you "depart" from the obstacle. so we went with 2" below the gate so we can make a tube bumper look really sexy. some people run the cut up to the gate. its up to you. the MAIN reason for these upcoming cuts. is to get rid of the part of the bedside that "rolls" underneath. that stuff gets in the way and it wont let you pull if theyre there. so have at it! we used tape to mark it all up. getting rid of this ***-end also adds to your ground clearance. if you wheel you know what i mean. ever try going up a steep hill and scrap your bumper or smash out your quarters?


now shes sexier than that drunk mistake in cabo.....i mean....on to the next step!
this part isnt REALLY needed. but HIGHLY recommended. rolling your lip. we pie cut slits every few inches but however you want to do it thats cool too.

now the fun part! watching the transformation begin. you need to take your cutting apparatus and slice i nice line around the inner fender. youll see the line where the outter skin meets with the inner fender well that creates the hump in your bed. stay to the outside of that line. just go from front to back. baking a pie might just be easier for real this time! when your done with that massacre. stick your bottle jack and your wood blocks up there and tighten her up nice and slow! we spread 2 inches up top which equates to about 4 down at the quarters...youll see what i mean.


now i forgot to take a picture of this step but super easy. just slice up some flat plate. and weld in where the gap is. you DONT need to fill the entire gap! 2 pieces per side is plenty strong. we had some 4x4" 1/8" flat plate scrap laying around. it fit perfect. dont forget to prep your surface prior to welding. flap discs work wonders!
when thats all done you can remove grandmas jack so she can get back to changing her tire on the side of the freeway you left her at
now just slap your tire on to see how far you want to pull the lower portion out. pick your favorite spot on the bed (where the bolt holes are from the plastic flaps) and measure down to the bottom of the quarter. this will be your solid rod length. we just bent one of the pie cut tabs back to normal for this. make sure your tire will clear the fender AND the rod! lol. i cant stress welding the rod from bed to bed and NOT bed to frame! this makes removing the bed much easier....trust me. now weld away.


now if you spread only as far as we recommended....your gas filler should stretch up to the new spot and you can tighten up your torx screws.
if you fancy clean edges like us....the hardware store sells stuff called trim lock. excellent stuff. cap up your edges and your ready to tuck some big tires after landing the huck wall trying to impress that girl!
BEFORE

AFTER


now you can slap your bumper back on...might look a little weird...or get yourself a tube bumper. enjoy! another low quality mod by PD
#3
02-10-2012, 10:22 PM
#4
02-10-2012, 10:37 PM
yea we are doing tube bumpers front and rear. possibly doing a bolt in tire rack. a more beefy version of the fabtech carrier. and no we havent messed with the rear suspension yet. not sure why everyone thinks its too stiff from the factory. its fine.
#5
02-10-2012, 11:04 PM
King Jackass
#6
02-10-2012, 11:11 PM
none....the paint chipped because we hammered the lip along the fender line. the pulling doesnt actually do anything to the paint. if you can get your hands on those fender rollers. that might do the trick.
#7
02-10-2012, 11:14 PM
King Jackass
Ok, I think I might just cut them out. It would be nice if Hannemann would make us bedsides to match the front fenders.
Trending Topics
#8
02-10-2012, 11:22 PM
King Jackass
#9
02-10-2012, 11:29 PM
#10
02-10-2012, 11:57 PM
DSC04581.jpg