


Sound system complete finally & Some other mods. Lots of Pics

Thread Starter
|
Veteran
Joined: Apr 2009
Posts: 497
Likes: 1
You guys may have remembered I was working on a sound system for my truck. Well I have just been waiting one of the subs to come in, and now I got it, put in in and its complete. The sound system consists of;
The install was pretty simple, the hardest part was getting the doors and the rear wall covered with the fat mat. This was the most time consuming. The speakers as well as the sub box dropped right in no problems. The amp was a pretty easy to install since its right under the front seat, so the wires were not run very far. SOUNDS AWESOME, well worth it.
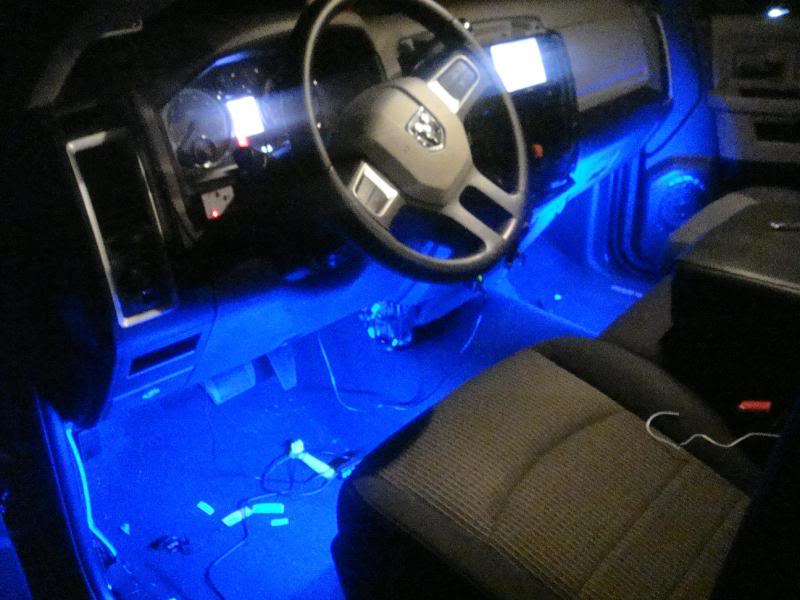
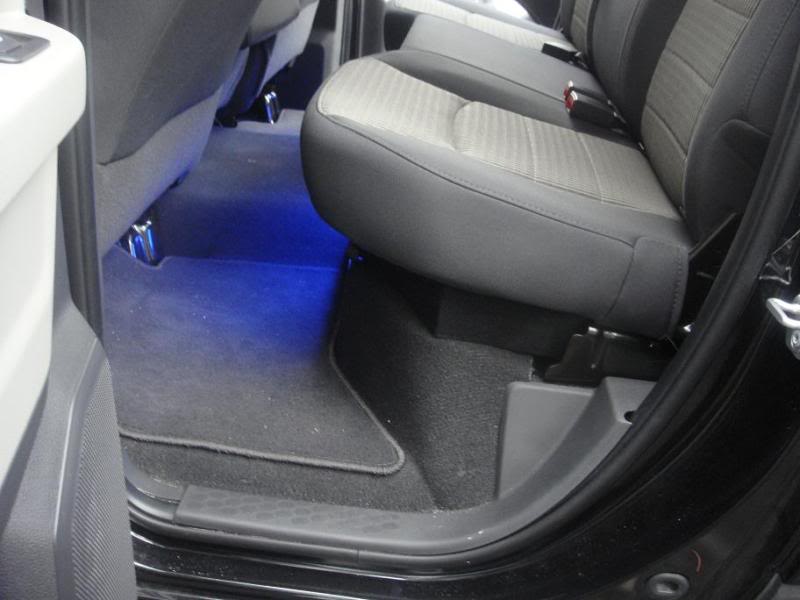
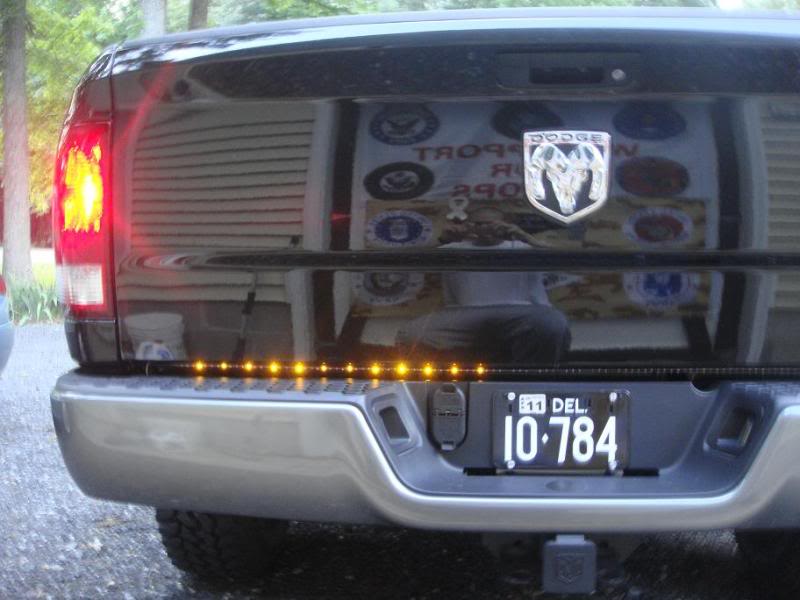
In addition to the system I also installed a Recon Extreme tailgate LED bar, and also an interior LED kit off of Ebay. The tailgate bar was simple enough, the easiest thing to do is to wire directly into the back of the towing harness. The interior kit was straight forward and decent quality for its price. Accomplishes what I wanted; lights up the foot wells.
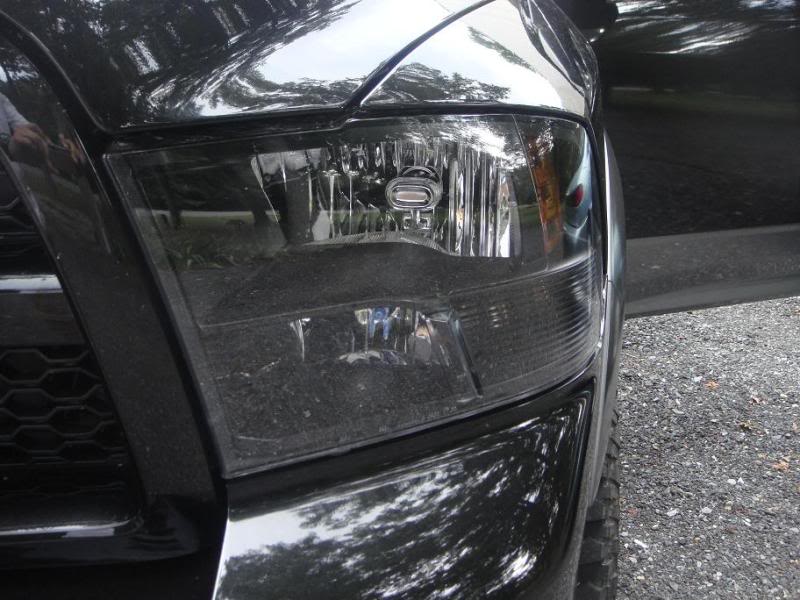
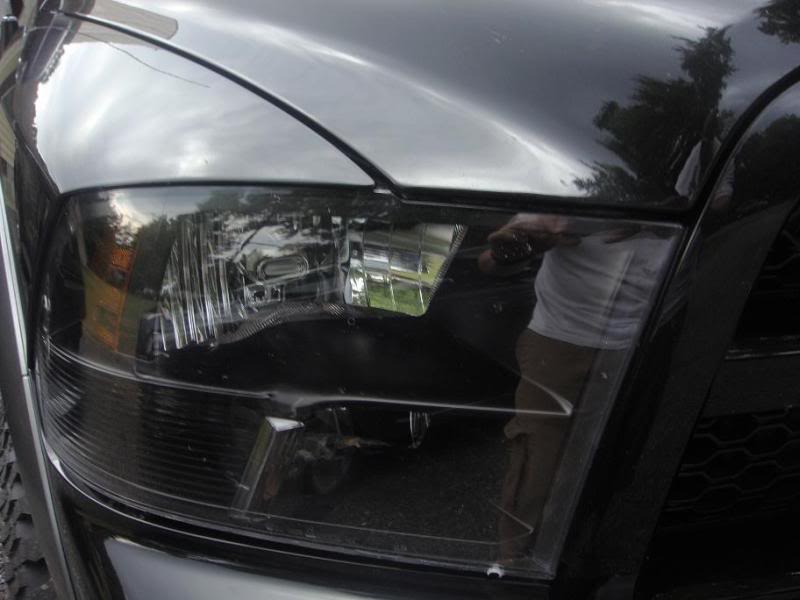
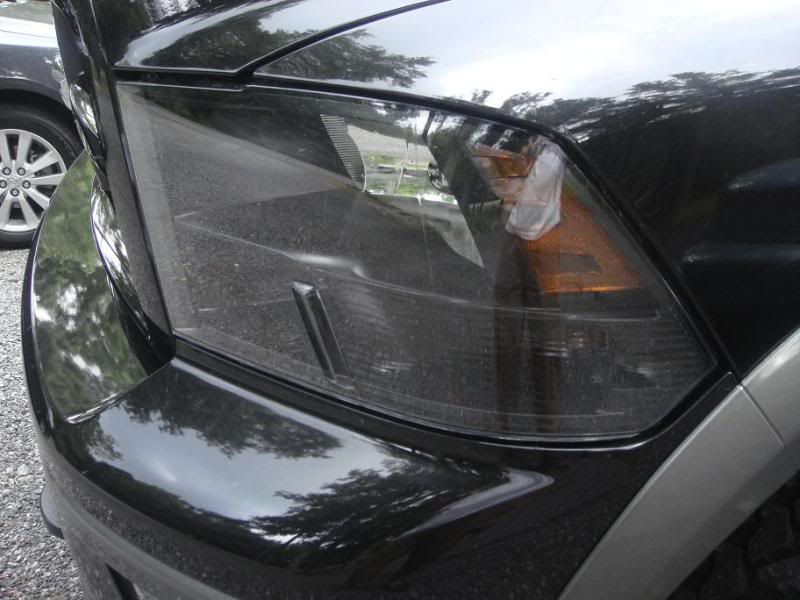
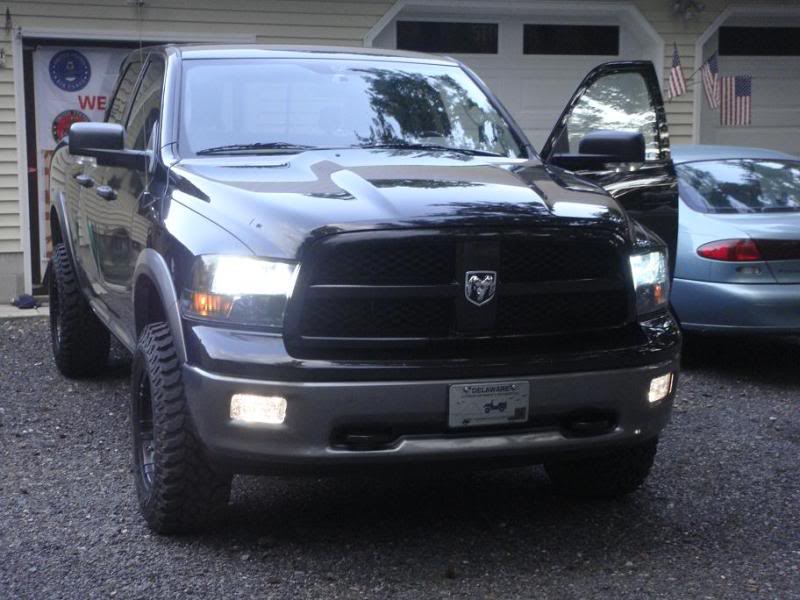
Next I wanted to black out my headlights. Honestly it is almost worth it to send them off for 200 bucks. What I did was bake on 200 degrees for 15 minutes, took them out, picked at the glue, put them back in for 15 minutes and so on. I repeated this cycle probably a dozen times with each headlight until it finally popped apart. I then sanded it with a fine grit sanding block (pretty much taking off the chrome finish), I then paint them with low gloss engine paint. I went back to the store and got a can of semi gloss engine paint and this looked much better on my truck so I paint right over the low gloss with this. I then bought RTV gasket maker, and filled the connecting point with this, and put the lenses back on and clamped them down. Let it dry and then I used more silicone RTV gasket maker to fill the cracks and pretty much just put a back up layer on each headlight. Finally that was done.
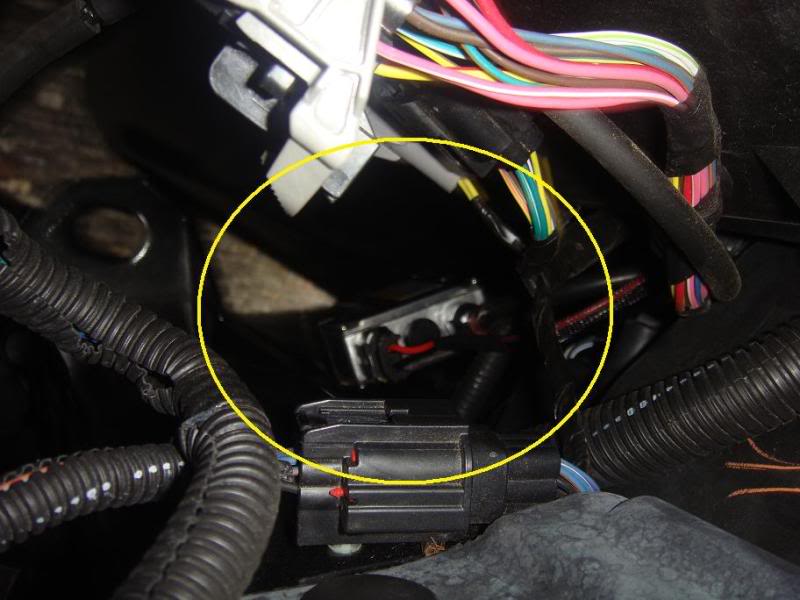
While the headlights were out I decided to upgrade the lighting to HID's. I bought a kit off of Twiggy. All I wanted was low beams, because thats plenty I bought the 6000k kit. I got 6000k fake HIDs for the fogs and high beams just so it looks decent. The fogs actually throw a good amount of light out though, I was impressed with my $5 Ebay bulbs. Anyway the HIDs are plug and play, with this particular kit you have to drill a hold in the headlight cap for the wires, no biggie it comes with the grommet to make it water tight. You can see the ballast in the picture, I just found a safe place and zipped them.
Below I have posted pictures for your enjoyment, and hopefully this will help someone wanting to mod their truck. I'm about done with her for now....
Thanks to all you guys that offered help during these projects!!!
Door fatmatted
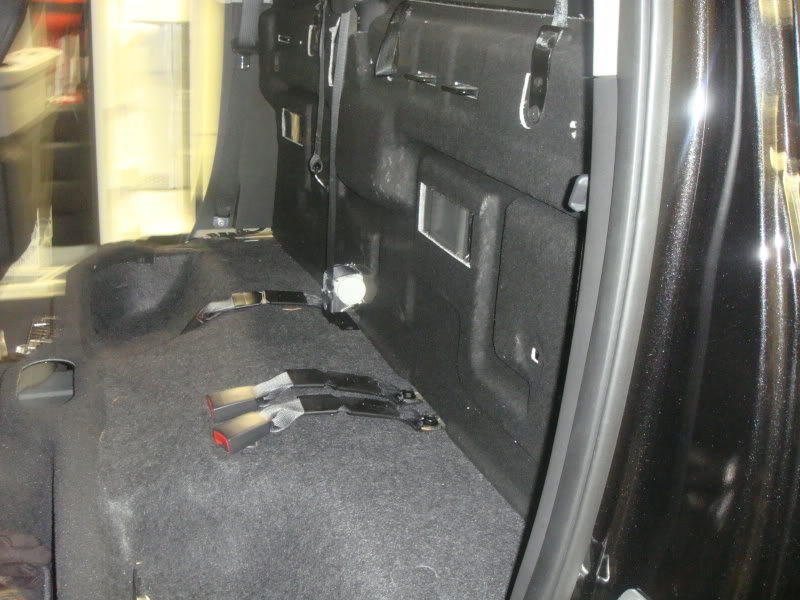
Rear seat removed
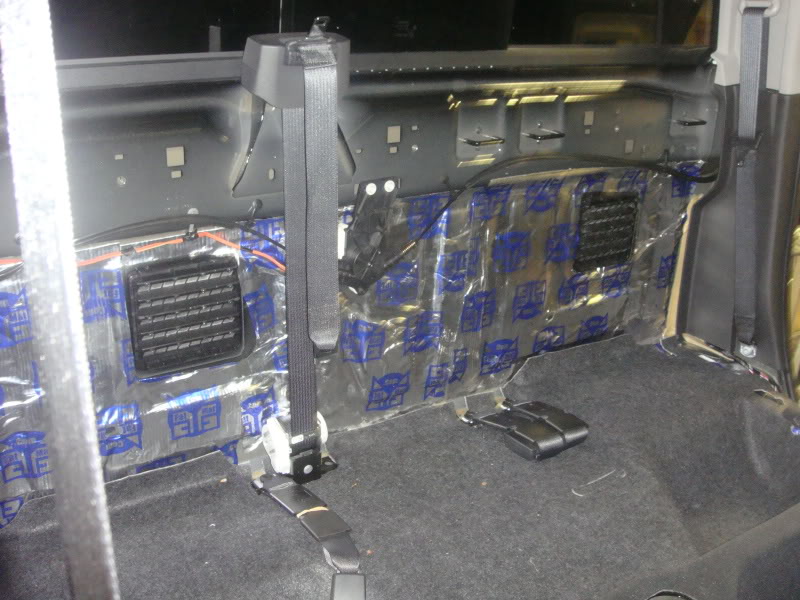
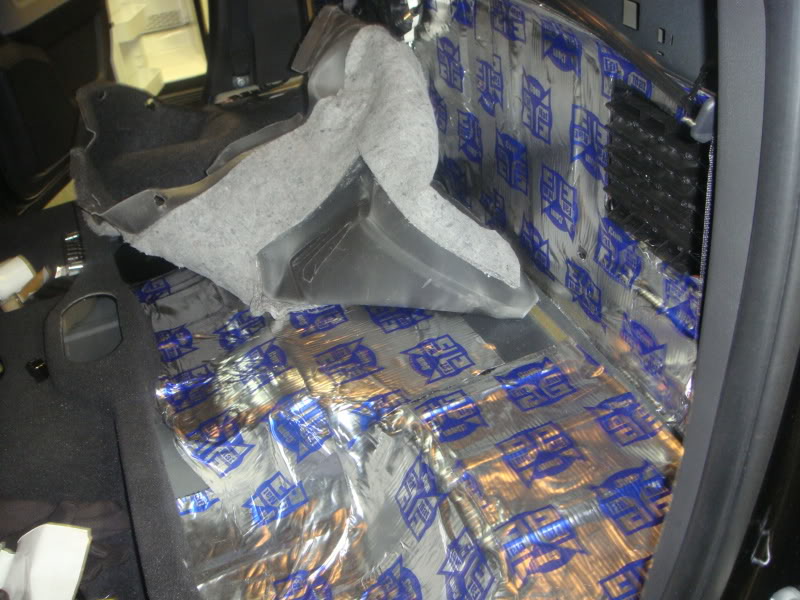
Fatmat getting put in place
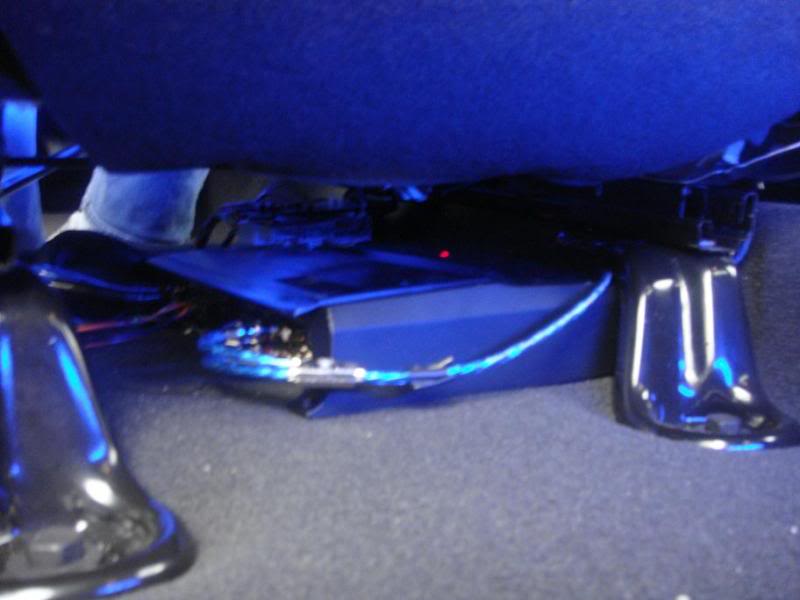
LED under seat installed

Plenty of light
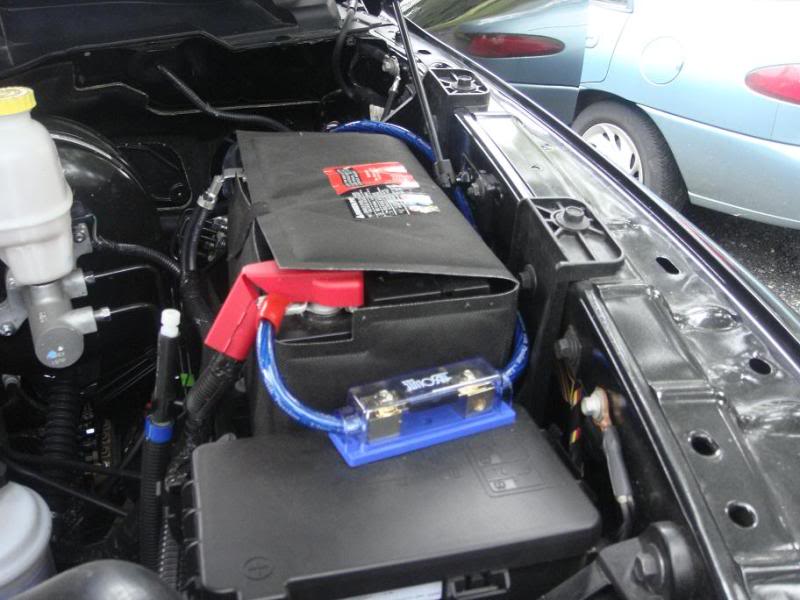
My GIG put in

Amp under the seat
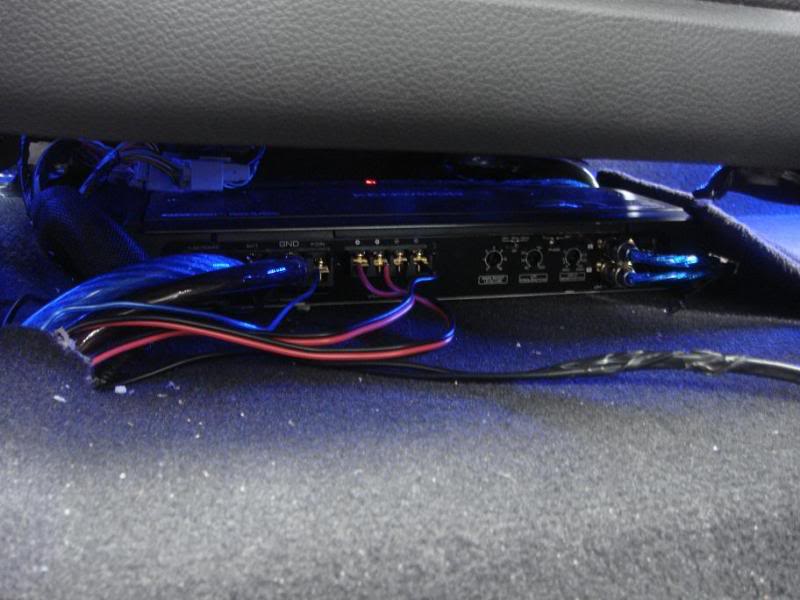
Another shot of the amp
Under the seat subs
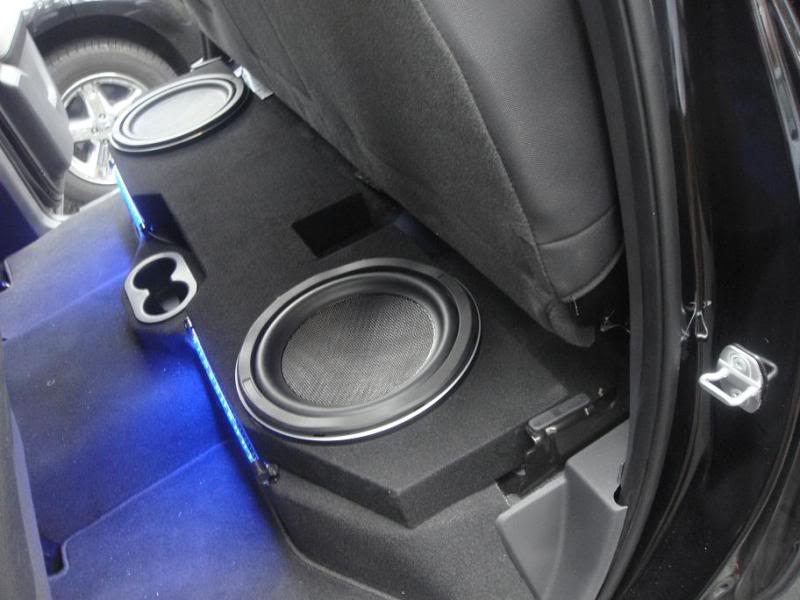
Close up of sub

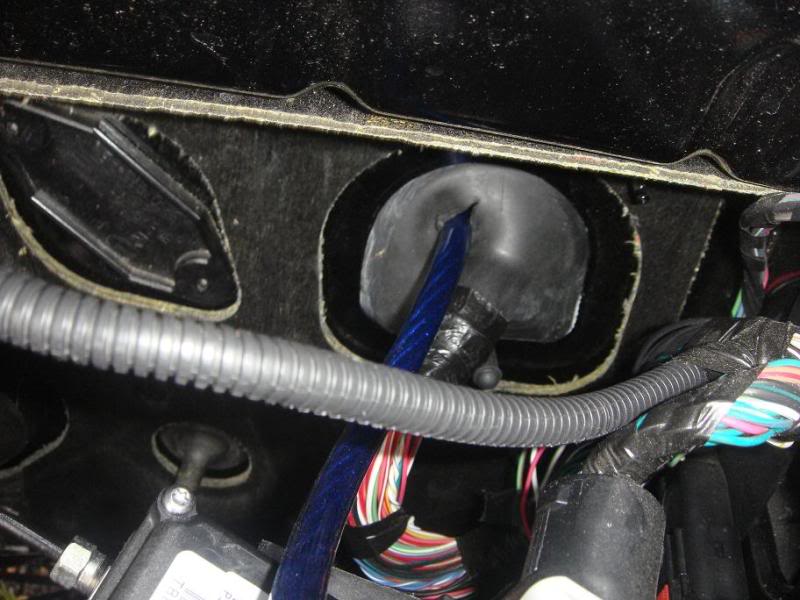
power wire through firewall
nothing fancy
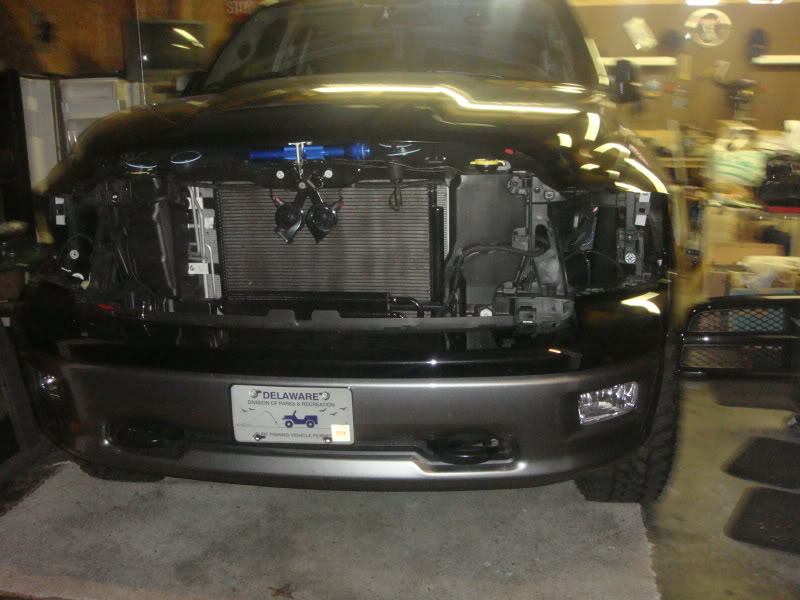
Starting headlights
Painting
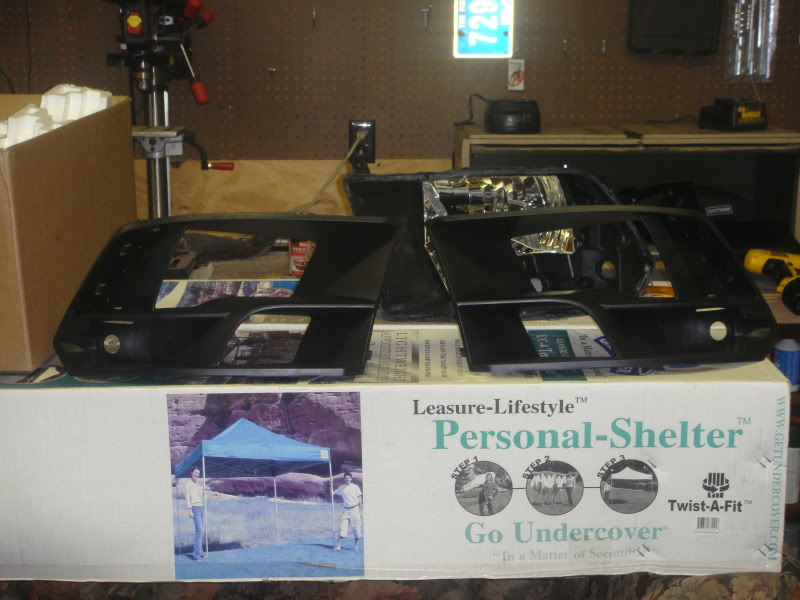
Done
HID ballast
HIDS
Finally the Recon "scanning" LED bar in action
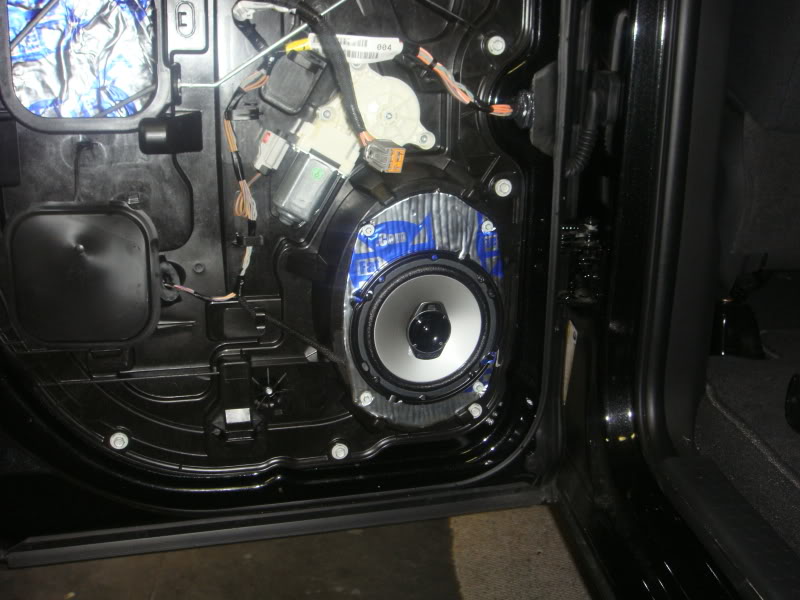
- Kenwood KFC-1662S 3-way speakers front & rear doors
- (2) Kenwood Excelon KFC-XW1200F mount subs
- Musicmoose Audio custom enclosure
- Mygig OEM Stereo w/ PAC adapter
- Kenwood KAC-9104D mono amp
- 2 guage wiring
- All doors, rear wall, and under rear seat FATMATTED (like dynamat)
The install was pretty simple, the hardest part was getting the doors and the rear wall covered with the fat mat. This was the most time consuming. The speakers as well as the sub box dropped right in no problems. The amp was a pretty easy to install since its right under the front seat, so the wires were not run very far. SOUNDS AWESOME, well worth it.
In addition to the system I also installed a Recon Extreme tailgate LED bar, and also an interior LED kit off of Ebay. The tailgate bar was simple enough, the easiest thing to do is to wire directly into the back of the towing harness. The interior kit was straight forward and decent quality for its price. Accomplishes what I wanted; lights up the foot wells.
Next I wanted to black out my headlights. Honestly it is almost worth it to send them off for 200 bucks. What I did was bake on 200 degrees for 15 minutes, took them out, picked at the glue, put them back in for 15 minutes and so on. I repeated this cycle probably a dozen times with each headlight until it finally popped apart. I then sanded it with a fine grit sanding block (pretty much taking off the chrome finish), I then paint them with low gloss engine paint. I went back to the store and got a can of semi gloss engine paint and this looked much better on my truck so I paint right over the low gloss with this. I then bought RTV gasket maker, and filled the connecting point with this, and put the lenses back on and clamped them down. Let it dry and then I used more silicone RTV gasket maker to fill the cracks and pretty much just put a back up layer on each headlight. Finally that was done.
While the headlights were out I decided to upgrade the lighting to HID's. I bought a kit off of Twiggy. All I wanted was low beams, because thats plenty I bought the 6000k kit. I got 6000k fake HIDs for the fogs and high beams just so it looks decent. The fogs actually throw a good amount of light out though, I was impressed with my $5 Ebay bulbs. Anyway the HIDs are plug and play, with this particular kit you have to drill a hold in the headlight cap for the wires, no biggie it comes with the grommet to make it water tight. You can see the ballast in the picture, I just found a safe place and zipped them.
Below I have posted pictures for your enjoyment, and hopefully this will help someone wanting to mod their truck. I'm about done with her for now....
Thanks to all you guys that offered help during these projects!!!
Door fatmatted
Rear seat removed
Fatmat getting put in place
LED under seat installed
Plenty of light
My GIG put in
Amp under the seat
Another shot of the amp
Under the seat subs
Close up of sub
power wire through firewall
nothing fancy
Starting headlights
Painting
Done
HID ballast
HIDS
Finally the Recon "scanning" LED bar in action
Captain
Joined: Mar 2008
Posts: 609
Likes: 0
From: Cedar Rapids, Ia
Nice!!!! How well did that light bar fit over the cap where you would plug a factory back-up camera into. It's just off midline on the drivers side. I've been wanting to put one of those on too.


Record Breaker
Joined: Mar 2009
Posts: 1,250
Likes: 0
From: Apopka FL
Trending Topics
Thread Starter
|
Veteran
Joined: Apr 2009
Posts: 497
Likes: 1
Thanks guys! I will try to answer all your questions, let me know if I forgot.
1. There is not much to show of the recon light bar as far as the wiring. I did it late at night and didn't think to write down which color ect. Easiest thing to do is to unplug the towing harness from the in bumper outlet. Then hook up power and negative wires on the LED bar. Then I would turn my turn signal on and take the LED turn signal wire and hold it to the towing harness plug until it lit up correctly, then splice it to that wire. All the wires are there, and don't go by a generic towing harness it will not be right, seems like dodge did there own thing. I am not sure about the camera plug? Maybe I don't have it since I don' have the back up camera.
2. The box is made by Music Moose Audio, I have used their boxes before and was happy and am happy once again. They are built well and decently priced. The actual seat seat does not rest on the subs, now on the bottom of the seat is that sheet of fabric that does hides the springs and foam and that rests on it. Does not effect the performance from my standpoint. I can see how the thunderbox would be a better design but I think I looked at it and its a tad more in price..
3. This amp thus far has been running pretty cool. It actually has a dedicated fan for keeping it cool, and I have been feeling it and it has not gotten that hot yet.
yeah the mtx is expensive..
crutchfield has it for $650... it does come with an amp though
http://www.crutchfield.com/p_236DRQ2...al.html?tp=113
luckily i found a buy it now option for $200 on ebay brand new in box.. im swapping the subs with hertz, fi or re when it comes in tomorrow...
i gota find out how much cu ft is in there first
Last edited by Doc Fluty; Jul 14, 2009 at 06:12 PM.
Professional
Joined: Dec 2006
Posts: 247
Likes: 0
From: Edmonton, Alberta
AWESOME MAN, LOVING THE HEADLAMPS!!!... you gave me an idea with them actually, but we will have to wait...
Can you do vid of the RECON in action, looks sweet... Last and final question is, does the recon bar cover the access to get the spare tire down???
Can you do vid of the RECON in action, looks sweet... Last and final question is, does the recon bar cover the access to get the spare tire down???