


5.9 Rebuild on the cheap: Now Just Empty Every Pocket build.

Thread Starter
|
Record Breaker


Joined: Nov 2011
Posts: 1,898
Likes: 162
From: Cle Elum, WA
Well I got back on it today and first things first I setup two of my old lifters as solid so that I could check the springs on my heads. I also remembered talking with Odessa about these heads and had told them that I was going to run a cam with similar profiles. I got my heads all torqued down (wasted a set of head gaskets) and checked the springs. No clearance issues.
So on to the fun stuff. Oiled each lifter as I installed them and then put the retainer on each pair. When I got done installing all 16 lifters and the 8 retainers I bolted down the spider retainer.
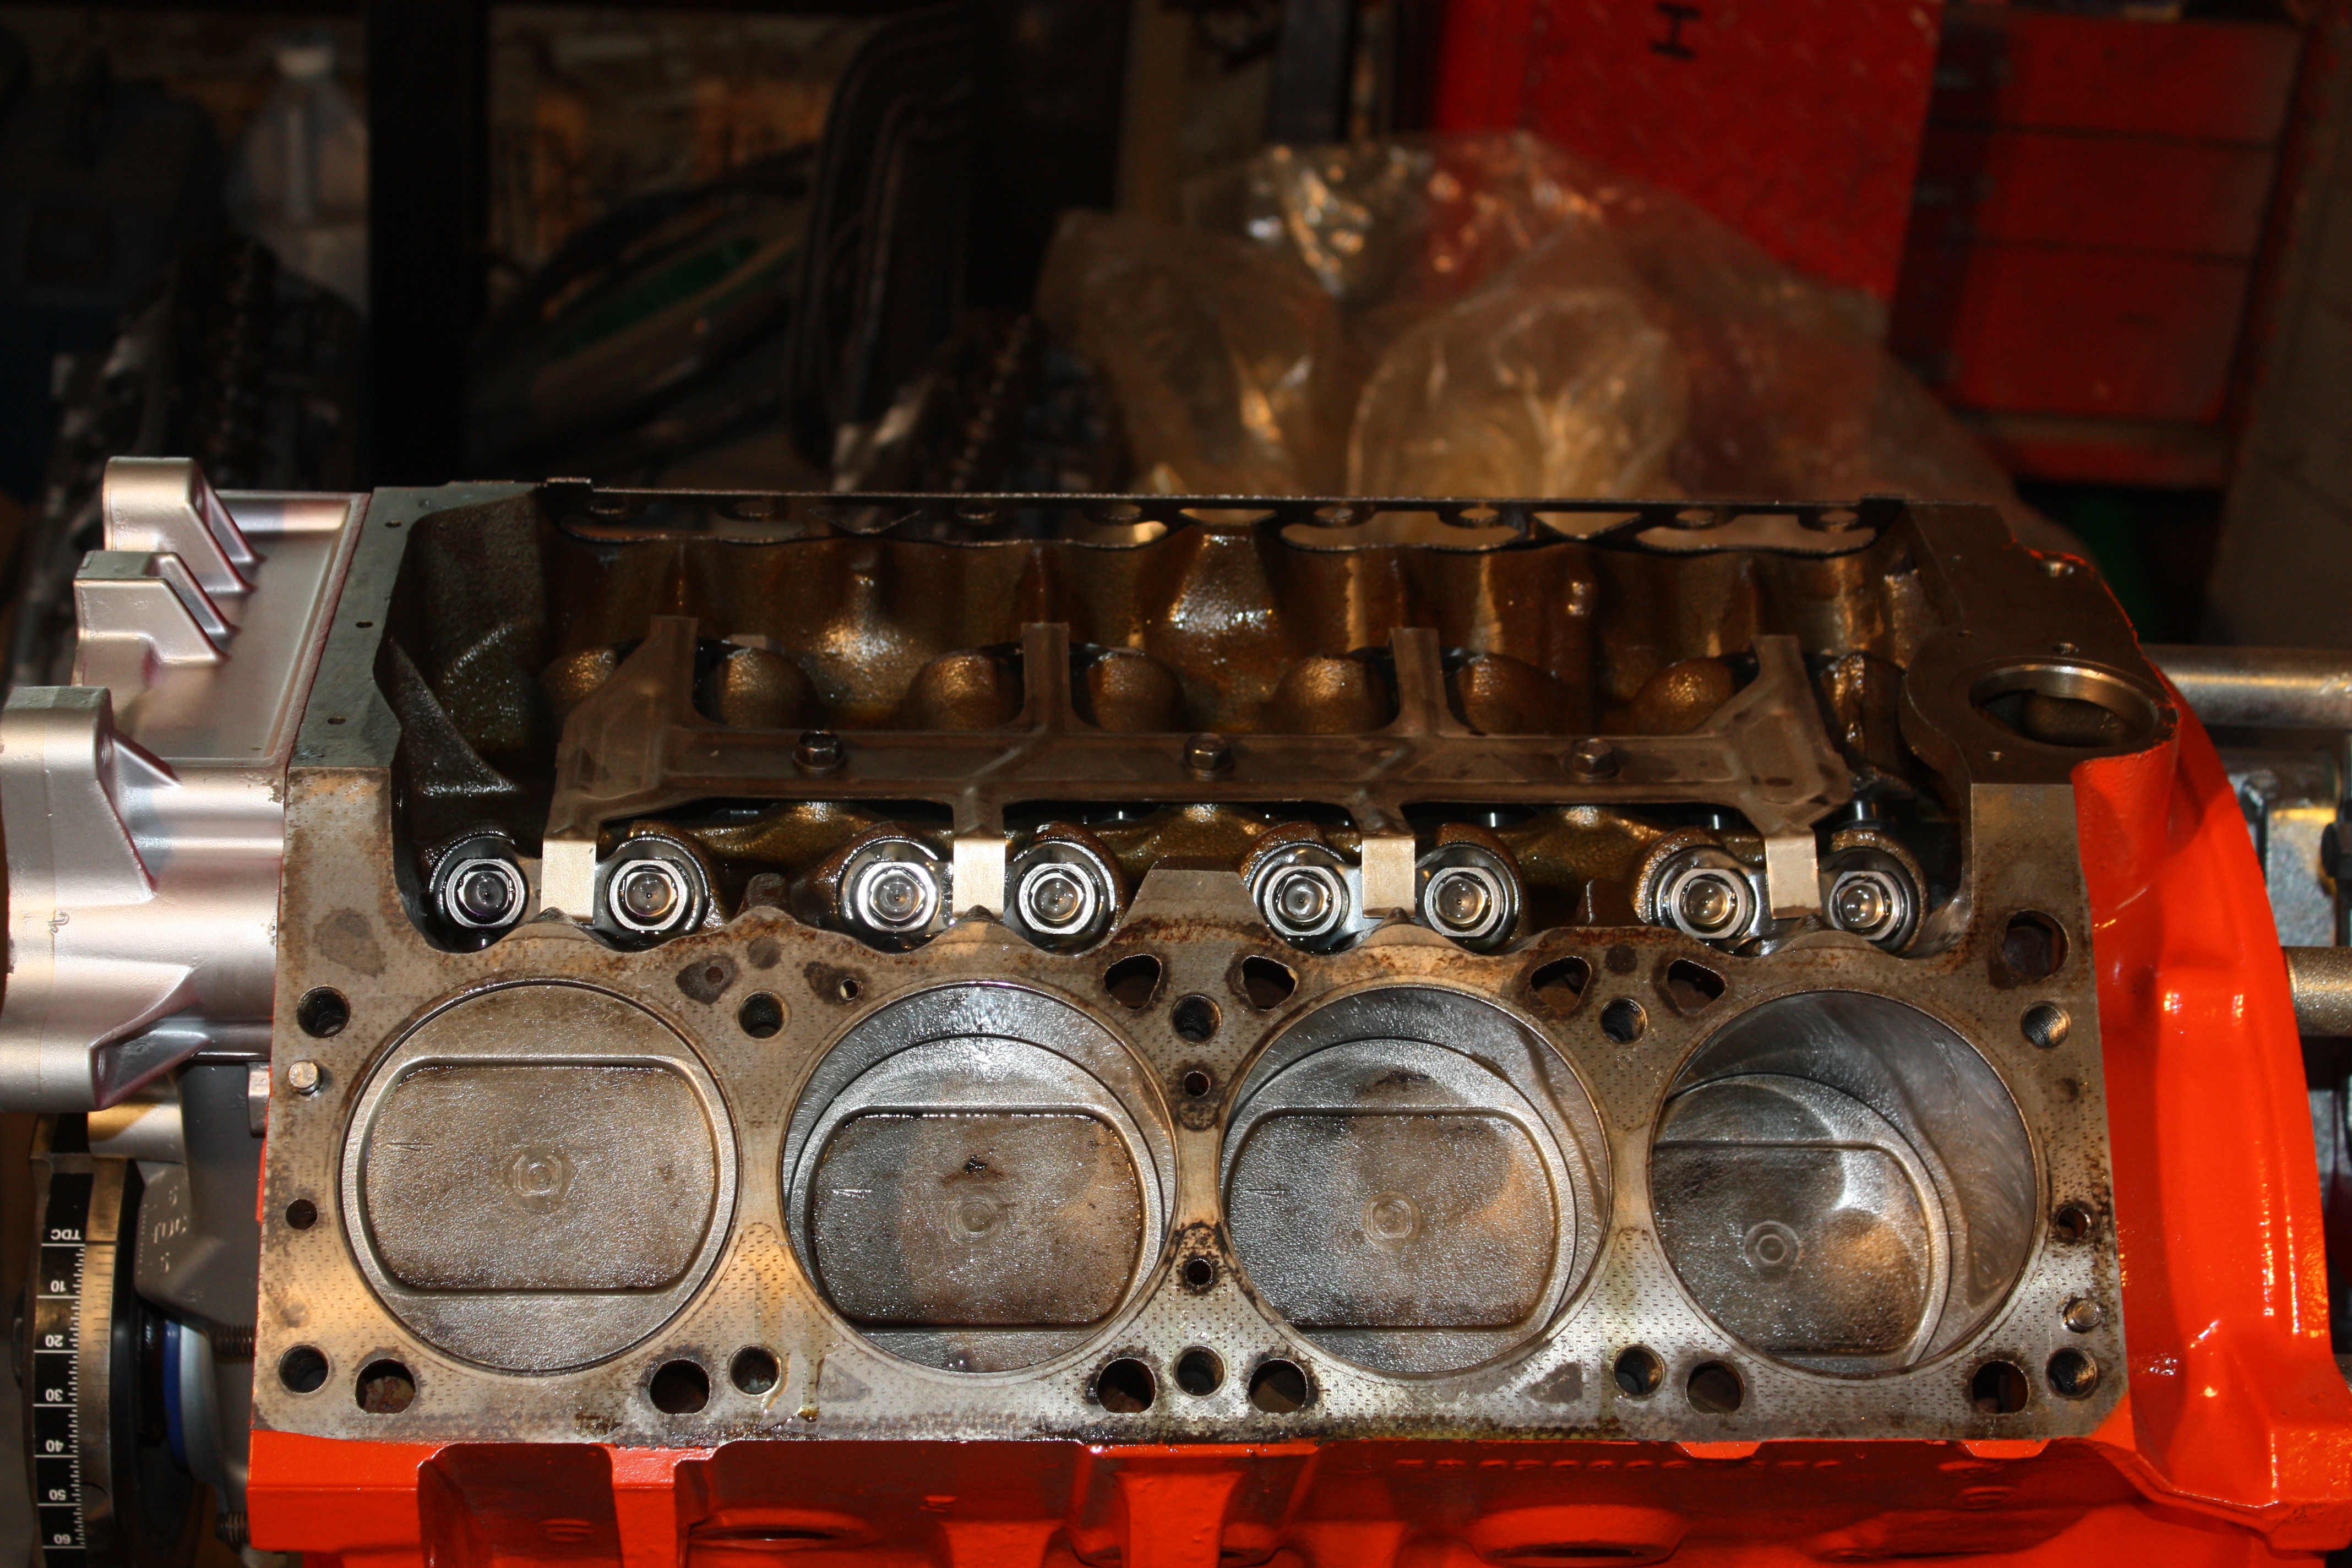
Head gaskets are next.
And then come the heads.
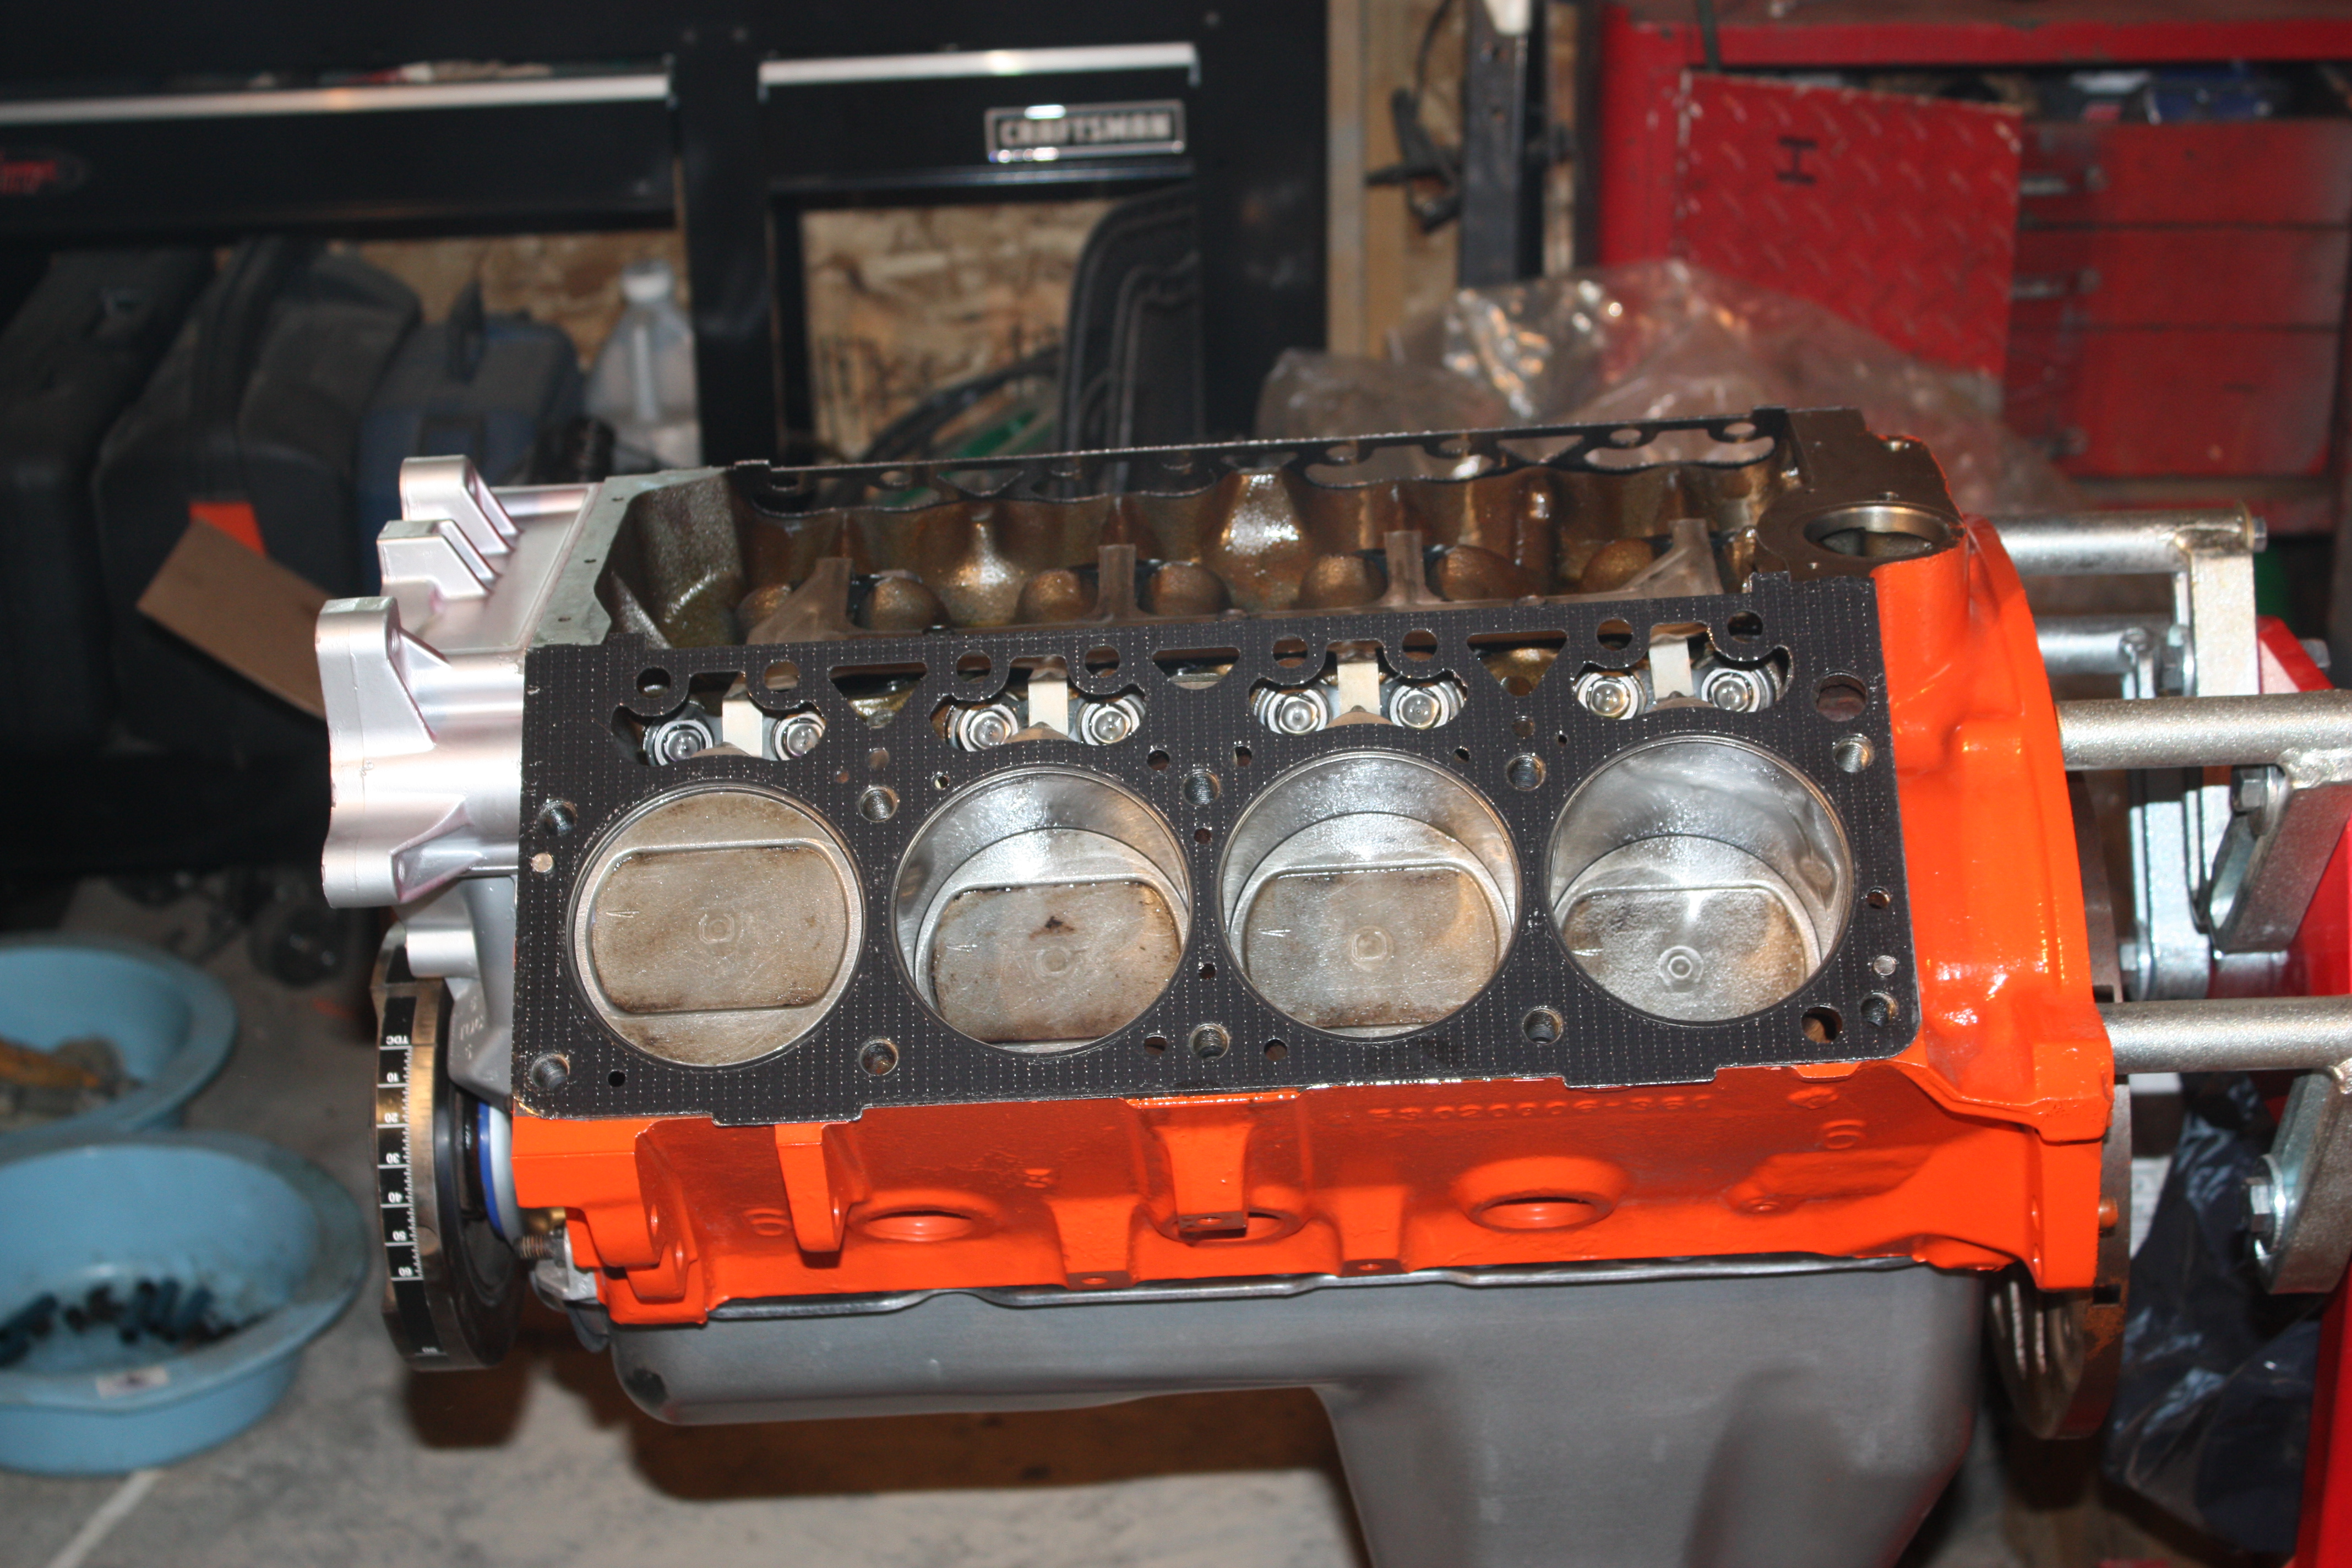
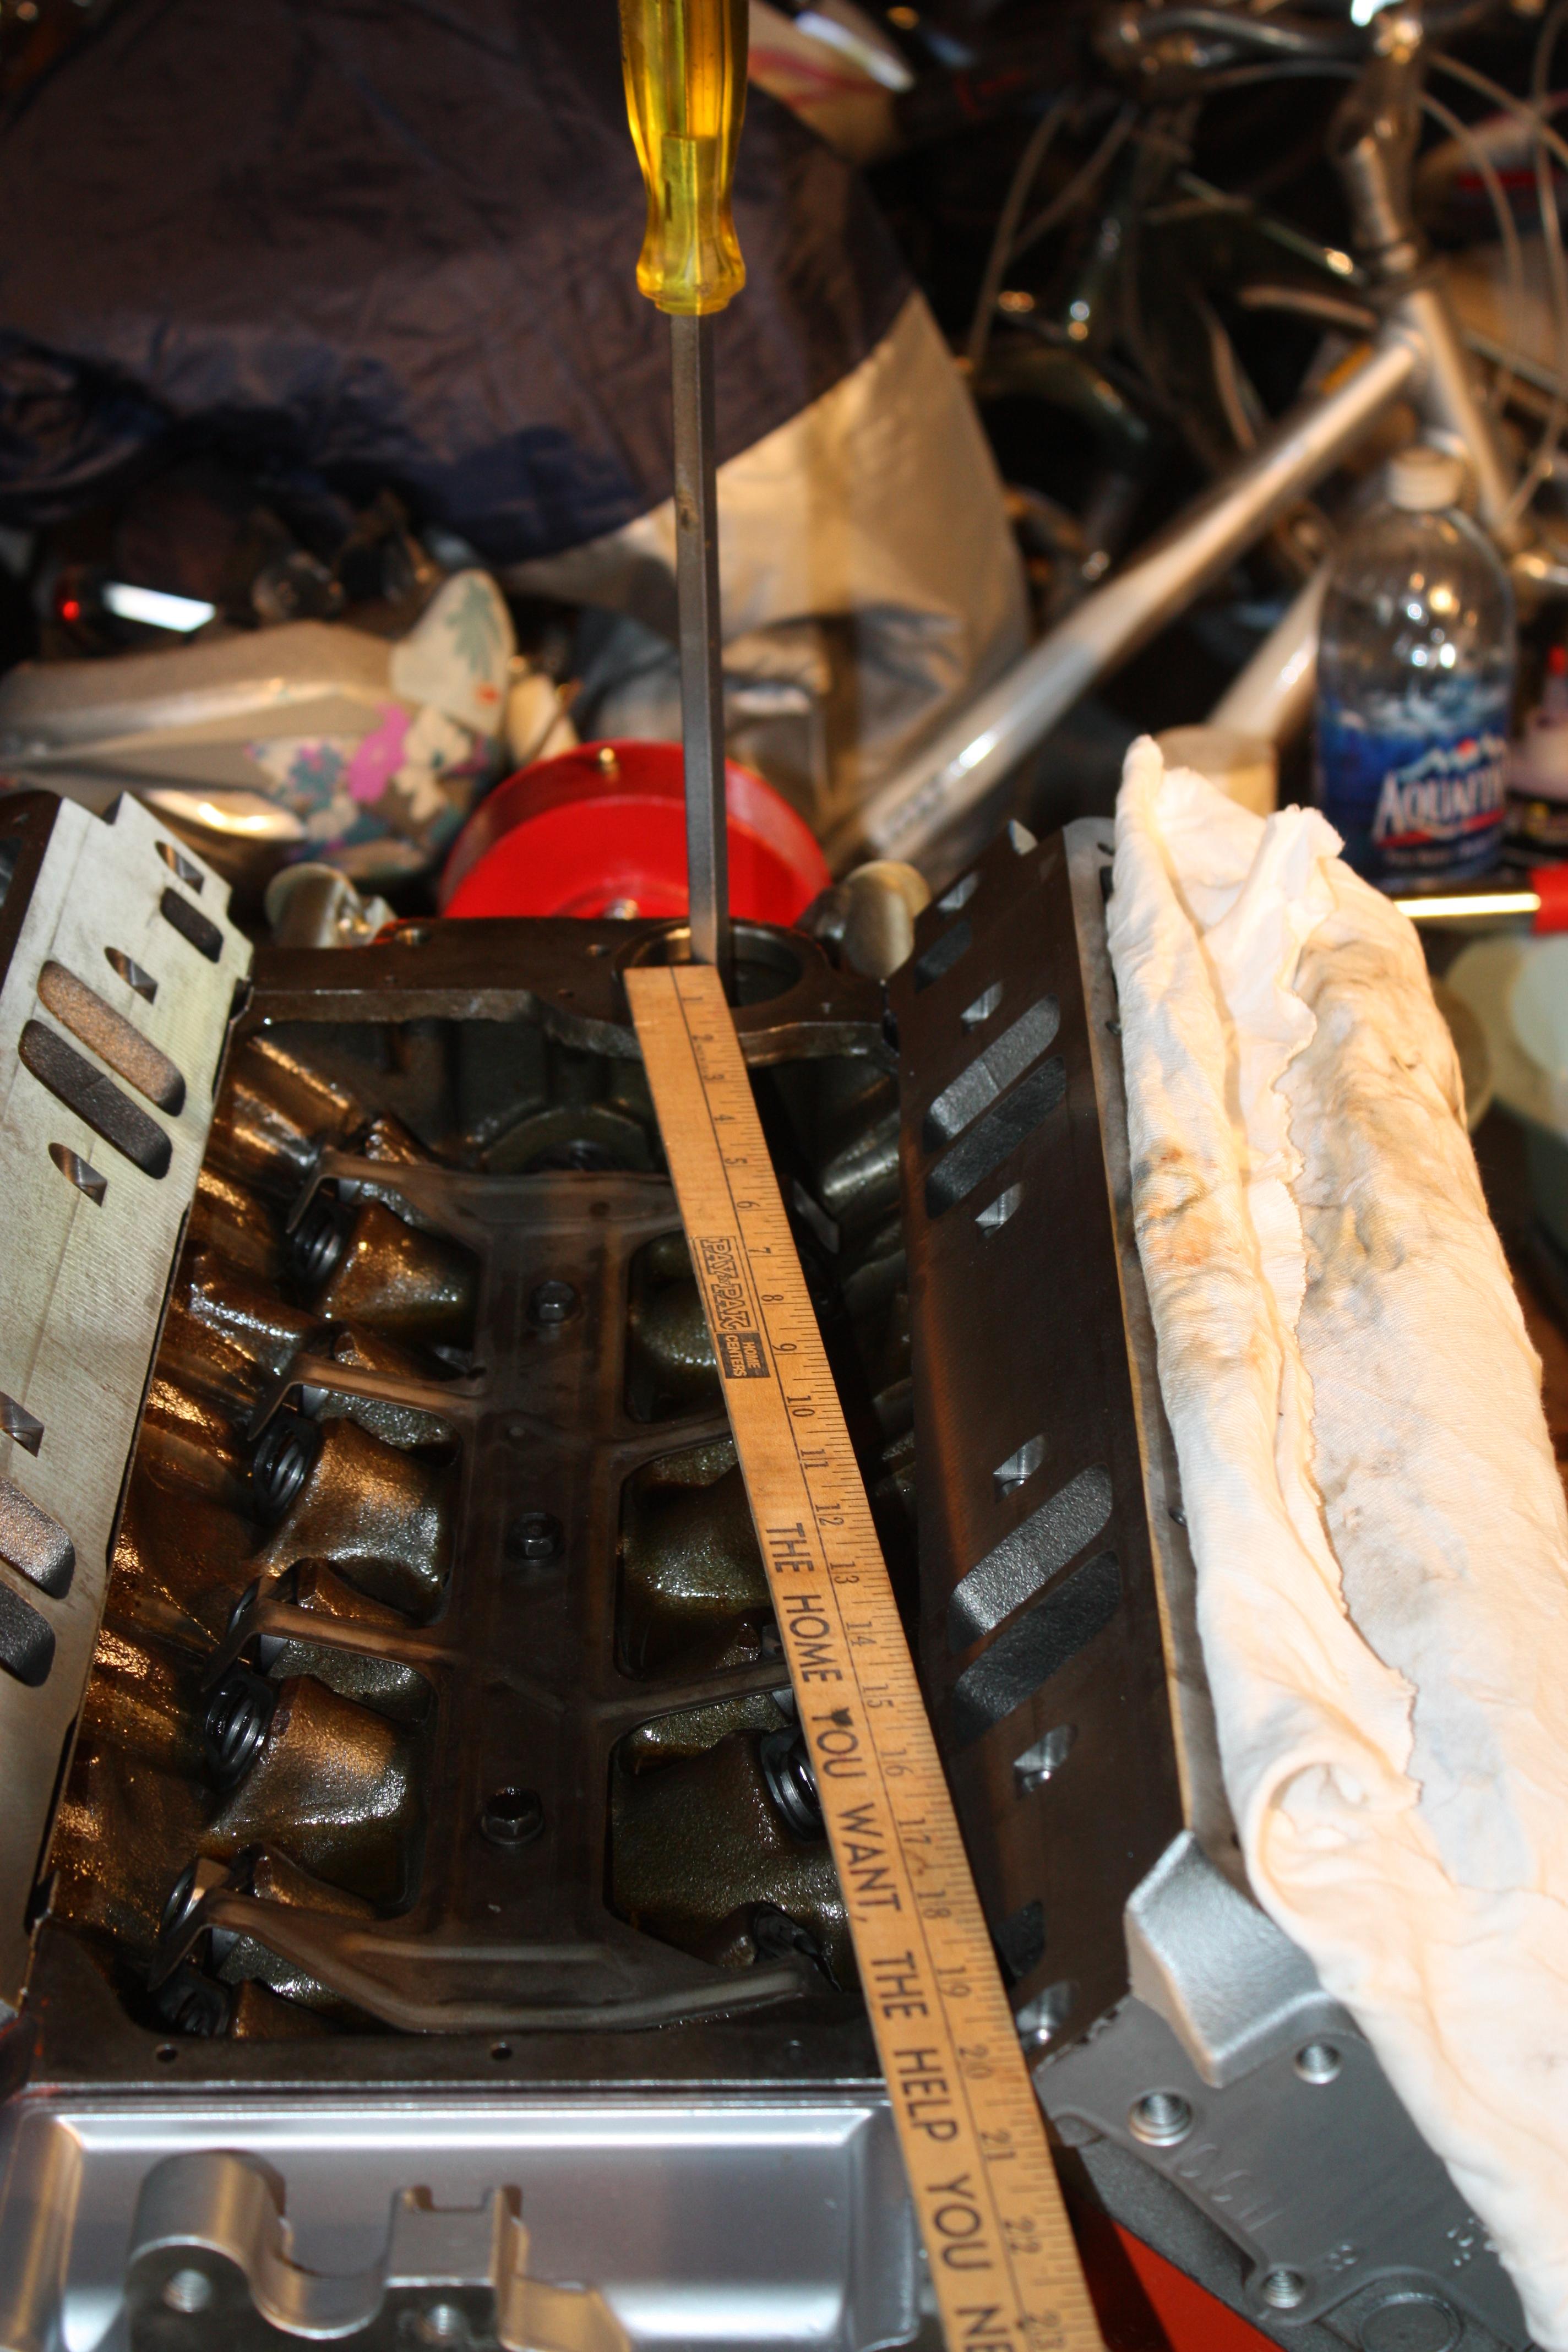
Next on my list was to install the intermediate drive, with the notch for the distributor pointing towards the 1st intake manifold bolt hole. The screwdriver is in the slot and the edge is pointing the direction of the slot. So the ruler is lined up right towards the 1st bolt hole for the intake manifold.
And of course next comes the intake manifold installed. I got everything in place and all the bolts snugged down. Didn't get a chance to torque the bolts down cause it was time to stop for dinner.
So that's it for now I'll get back on it tomorrow.
So on to the fun stuff. Oiled each lifter as I installed them and then put the retainer on each pair. When I got done installing all 16 lifters and the 8 retainers I bolted down the spider retainer.
Head gaskets are next.
And then come the heads.
Next on my list was to install the intermediate drive, with the notch for the distributor pointing towards the 1st intake manifold bolt hole. The screwdriver is in the slot and the edge is pointing the direction of the slot. So the ruler is lined up right towards the 1st bolt hole for the intake manifold.
And of course next comes the intake manifold installed. I got everything in place and all the bolts snugged down. Didn't get a chance to torque the bolts down cause it was time to stop for dinner.
So that's it for now I'll get back on it tomorrow.
Thread Starter
|
Record Breaker
Joined: Nov 2011
Posts: 1,898
Likes: 162
From: Cle Elum, WA
Hey folks,
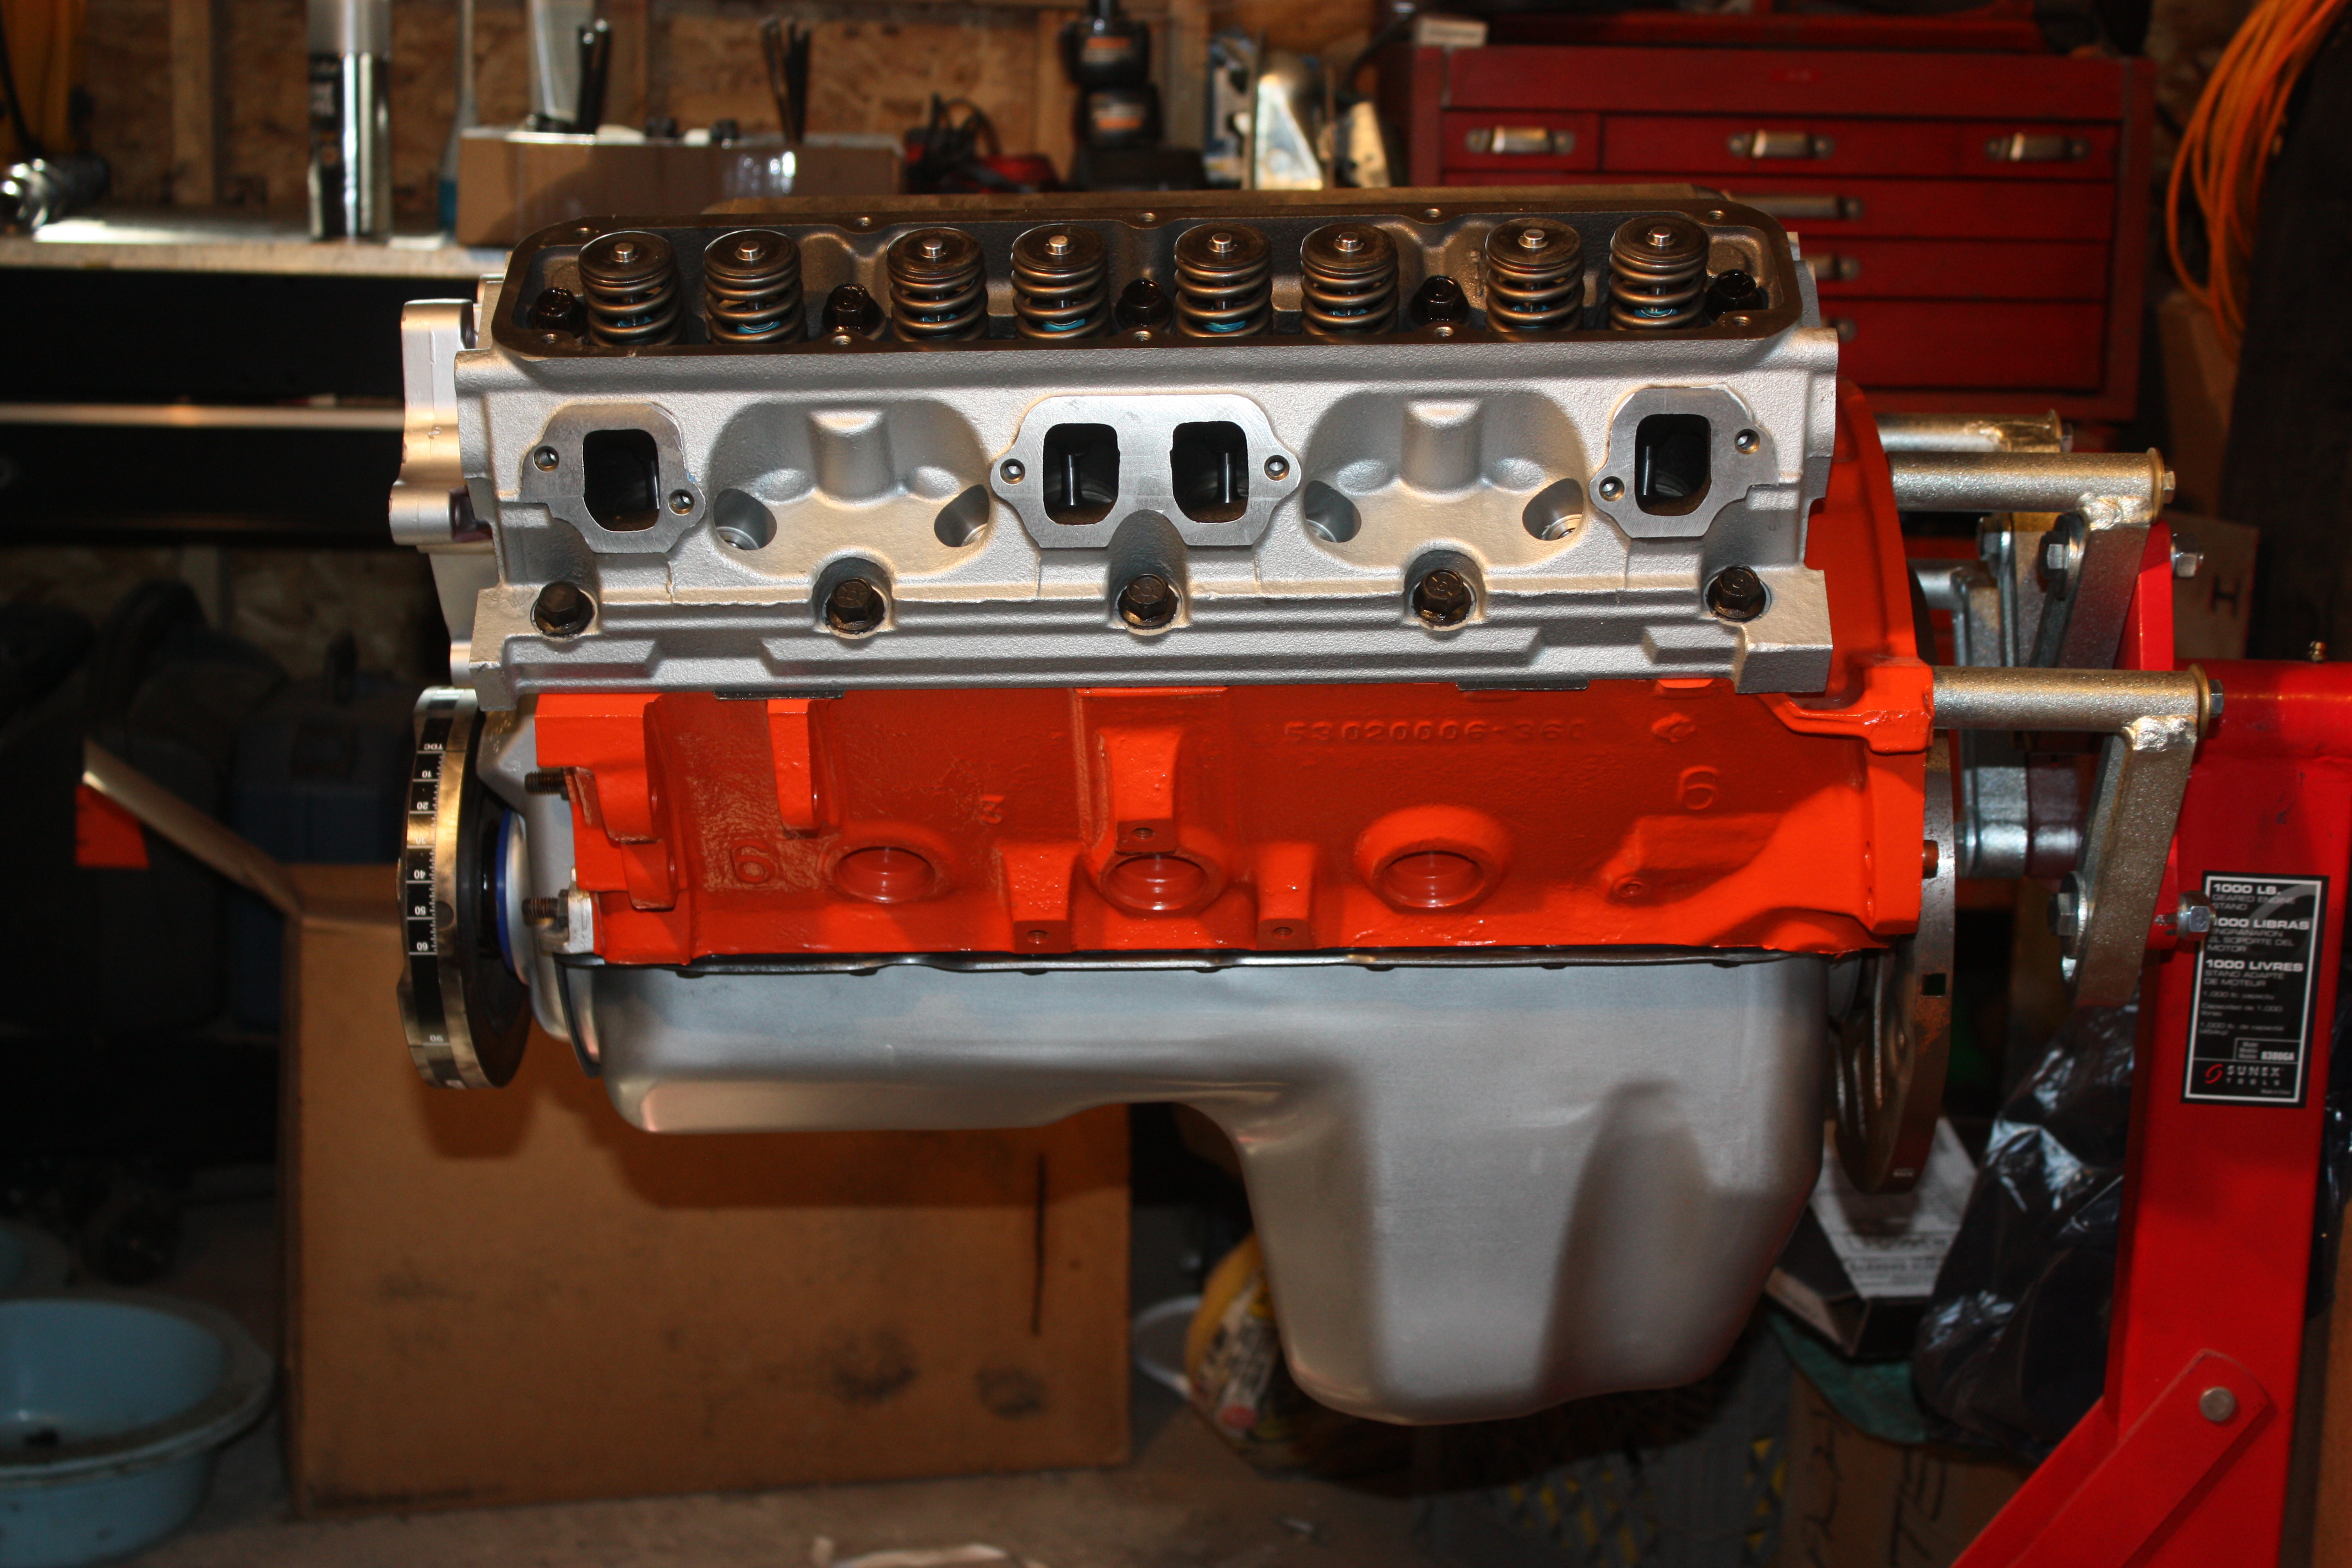
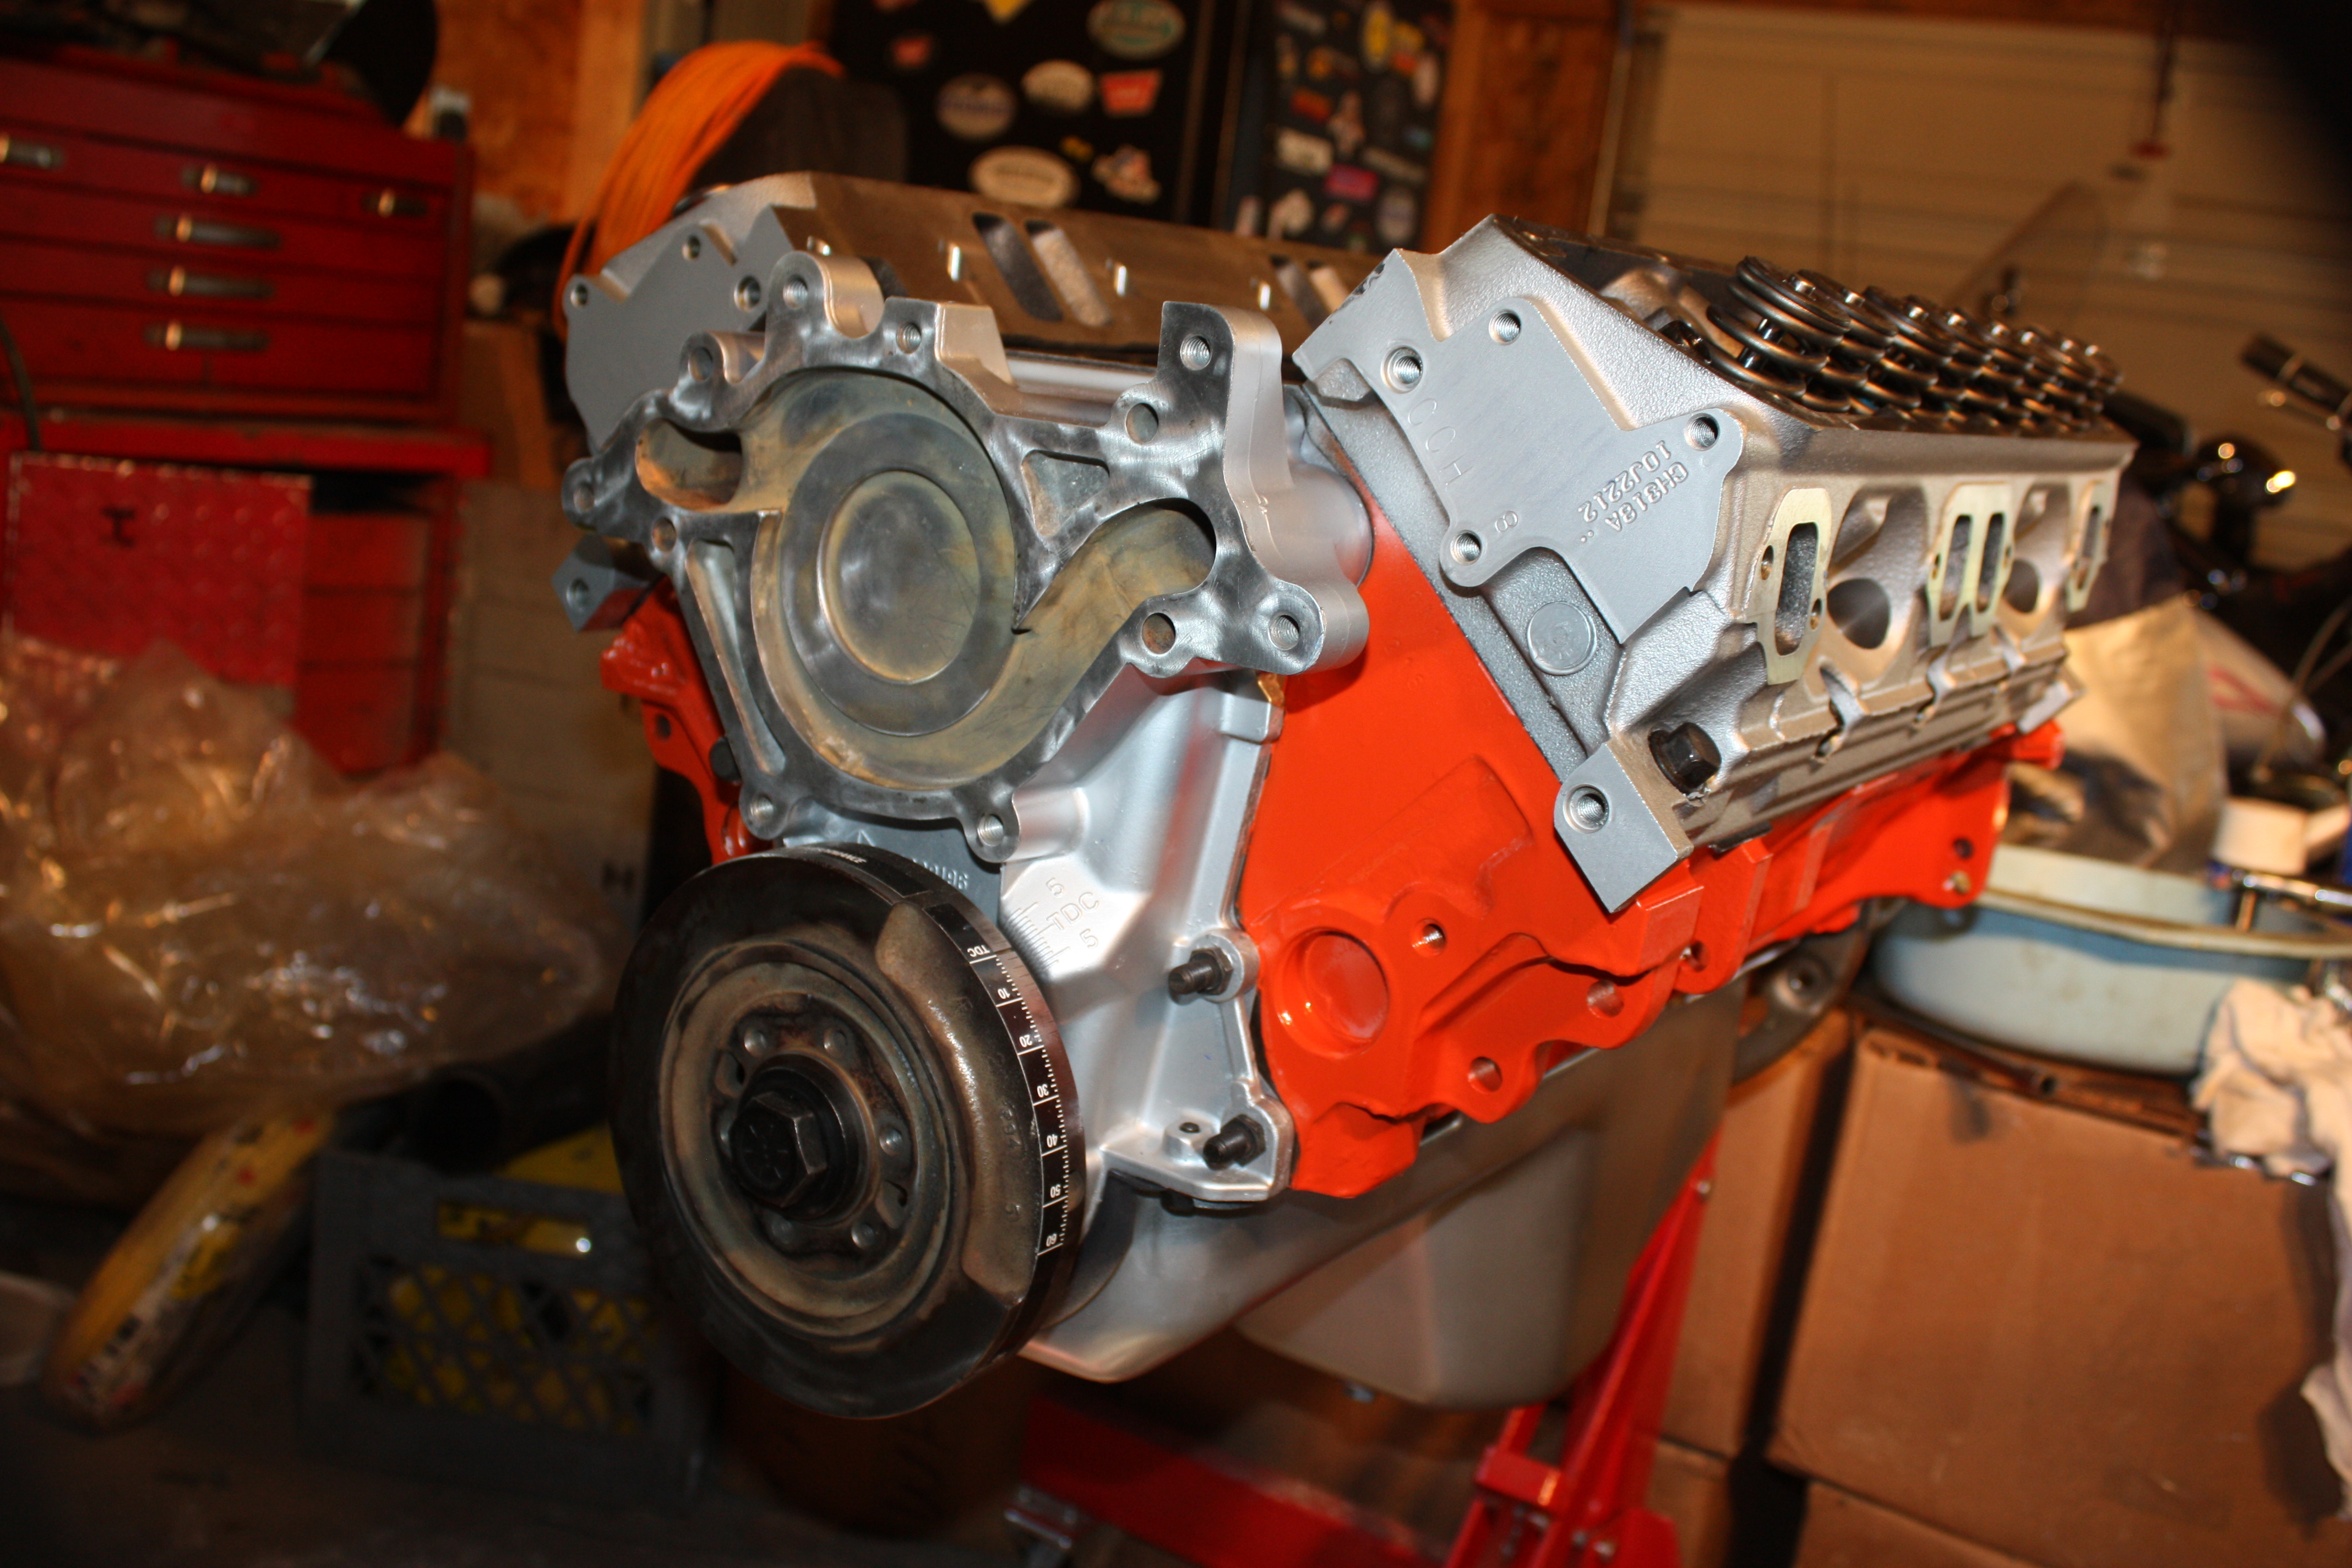
Well I m pretty much done with the engine at this point. I have got all the parts I could install done at this point. I have ordered some more parts to finish things off with. Got a new thermostat housing coming, a distributor clamp, plugs for the unused plugs on the intake & a temp sensor for the second water passage hole for my electric fans.
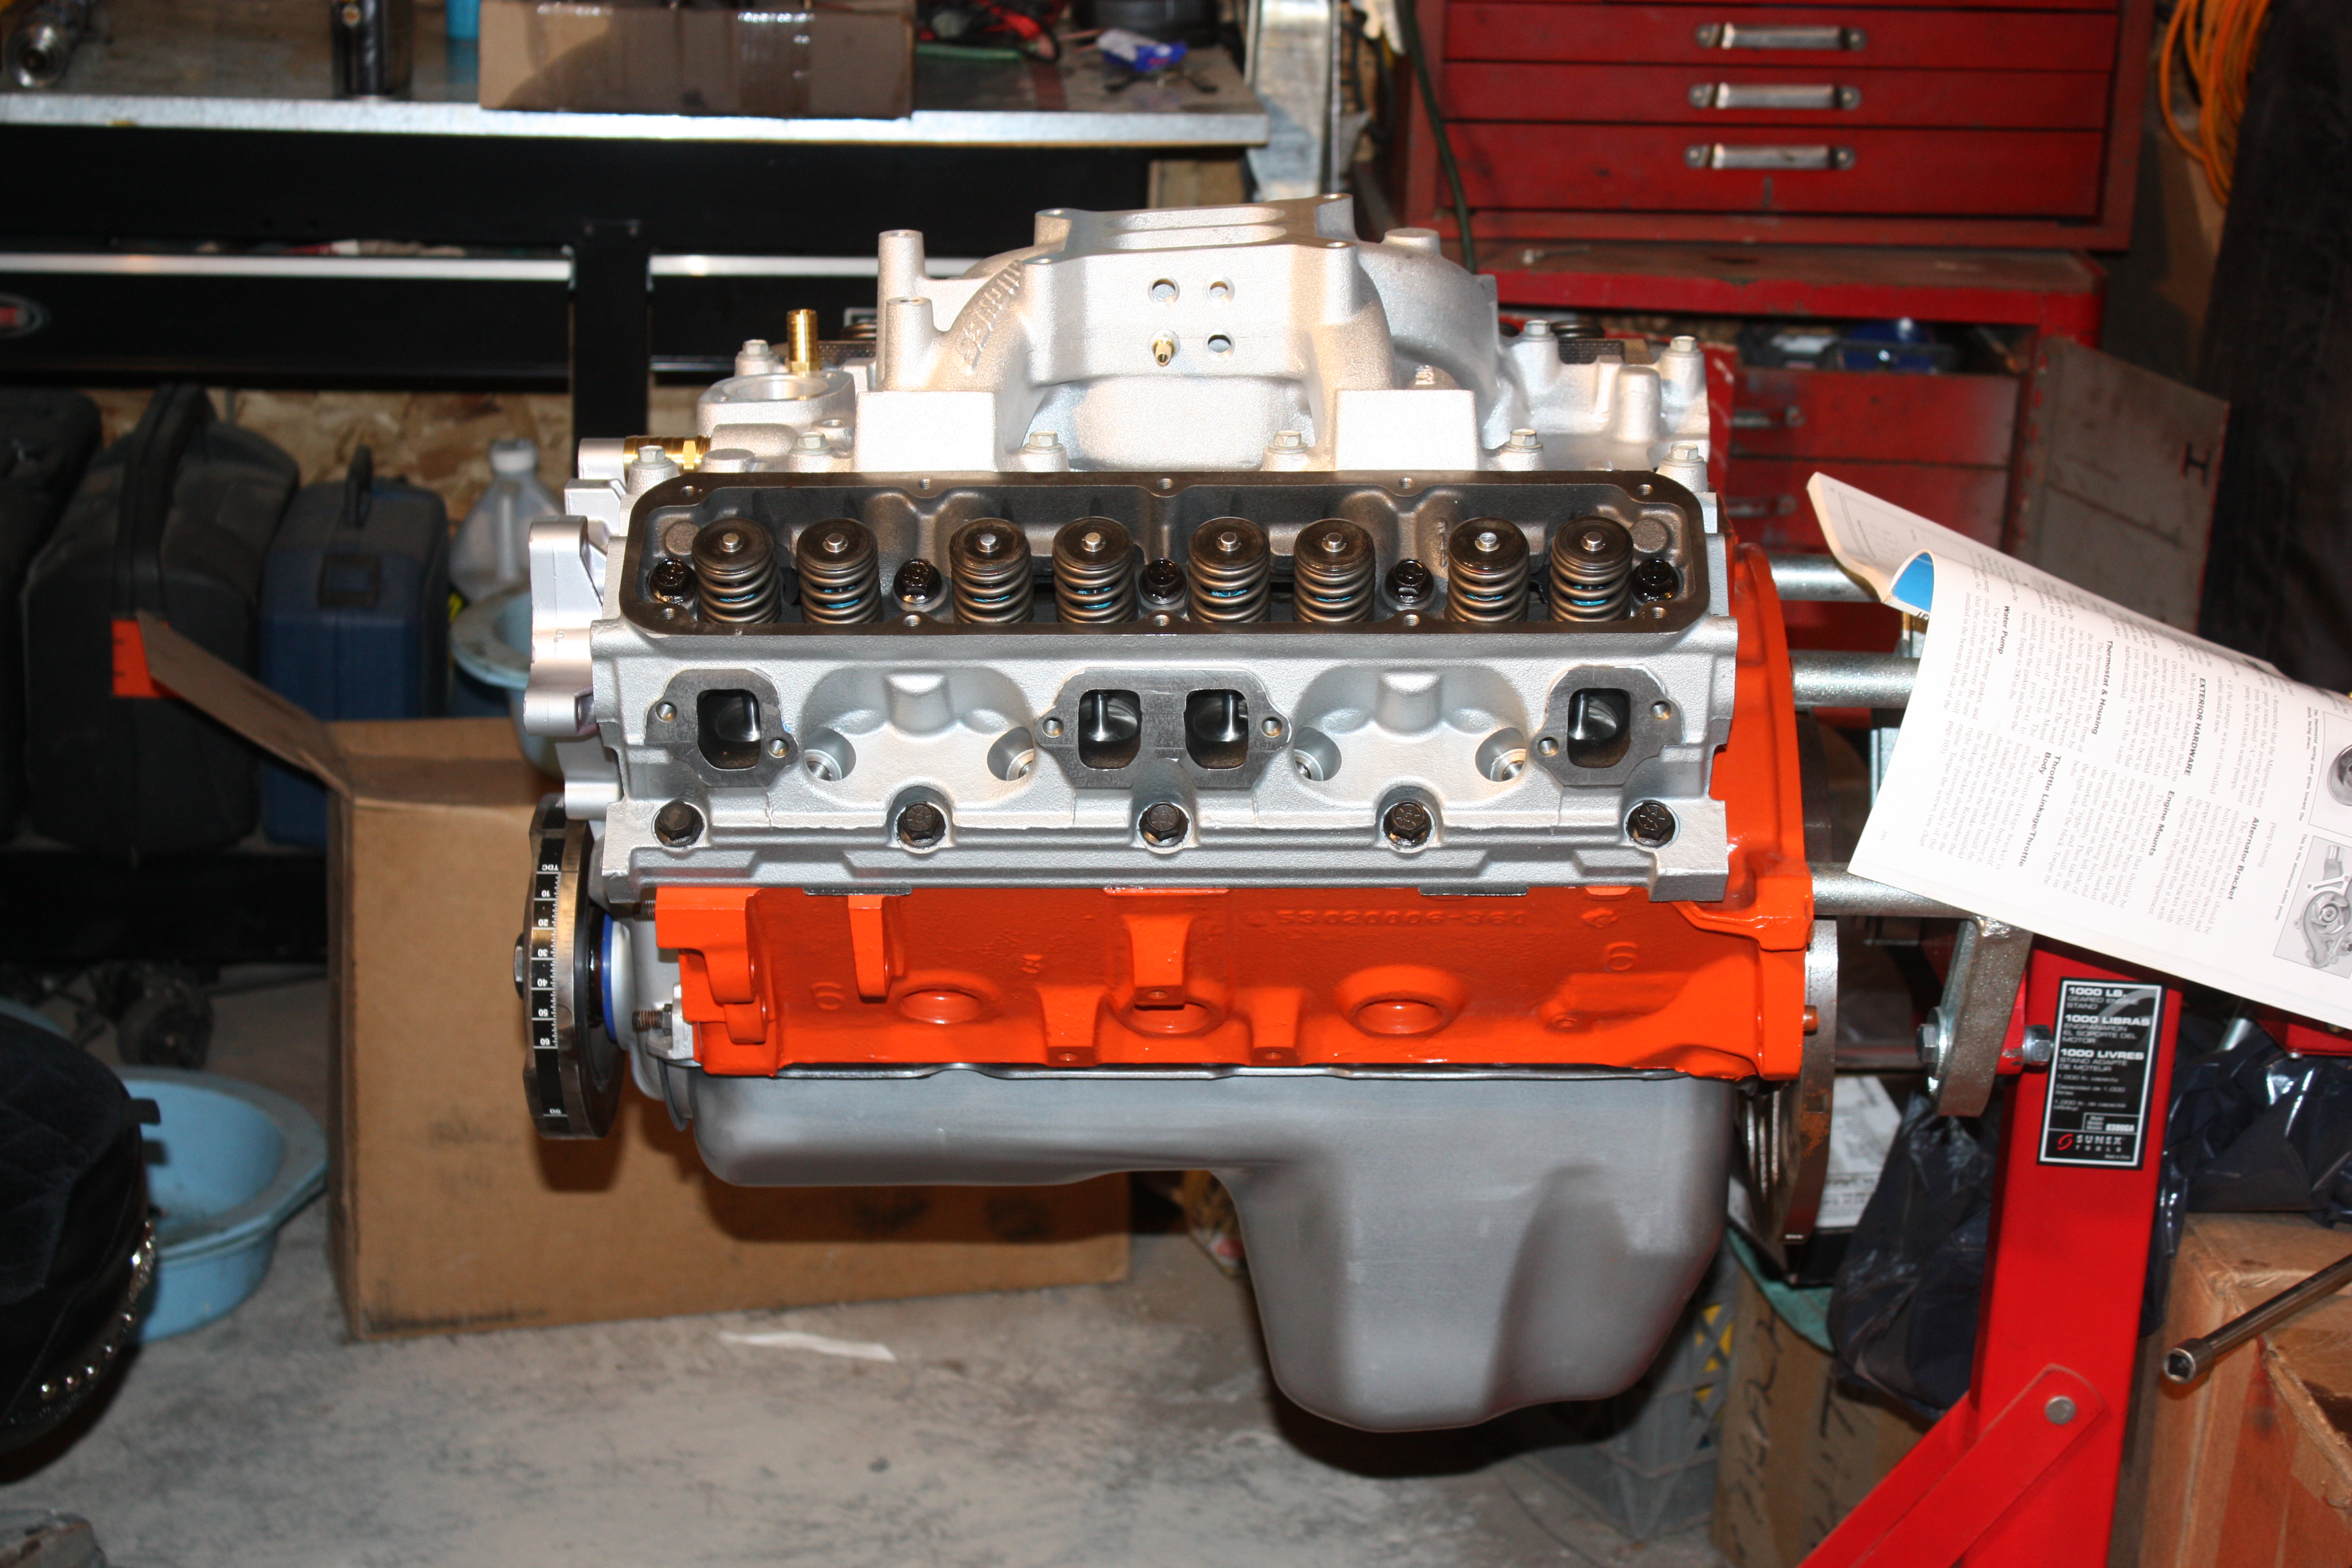
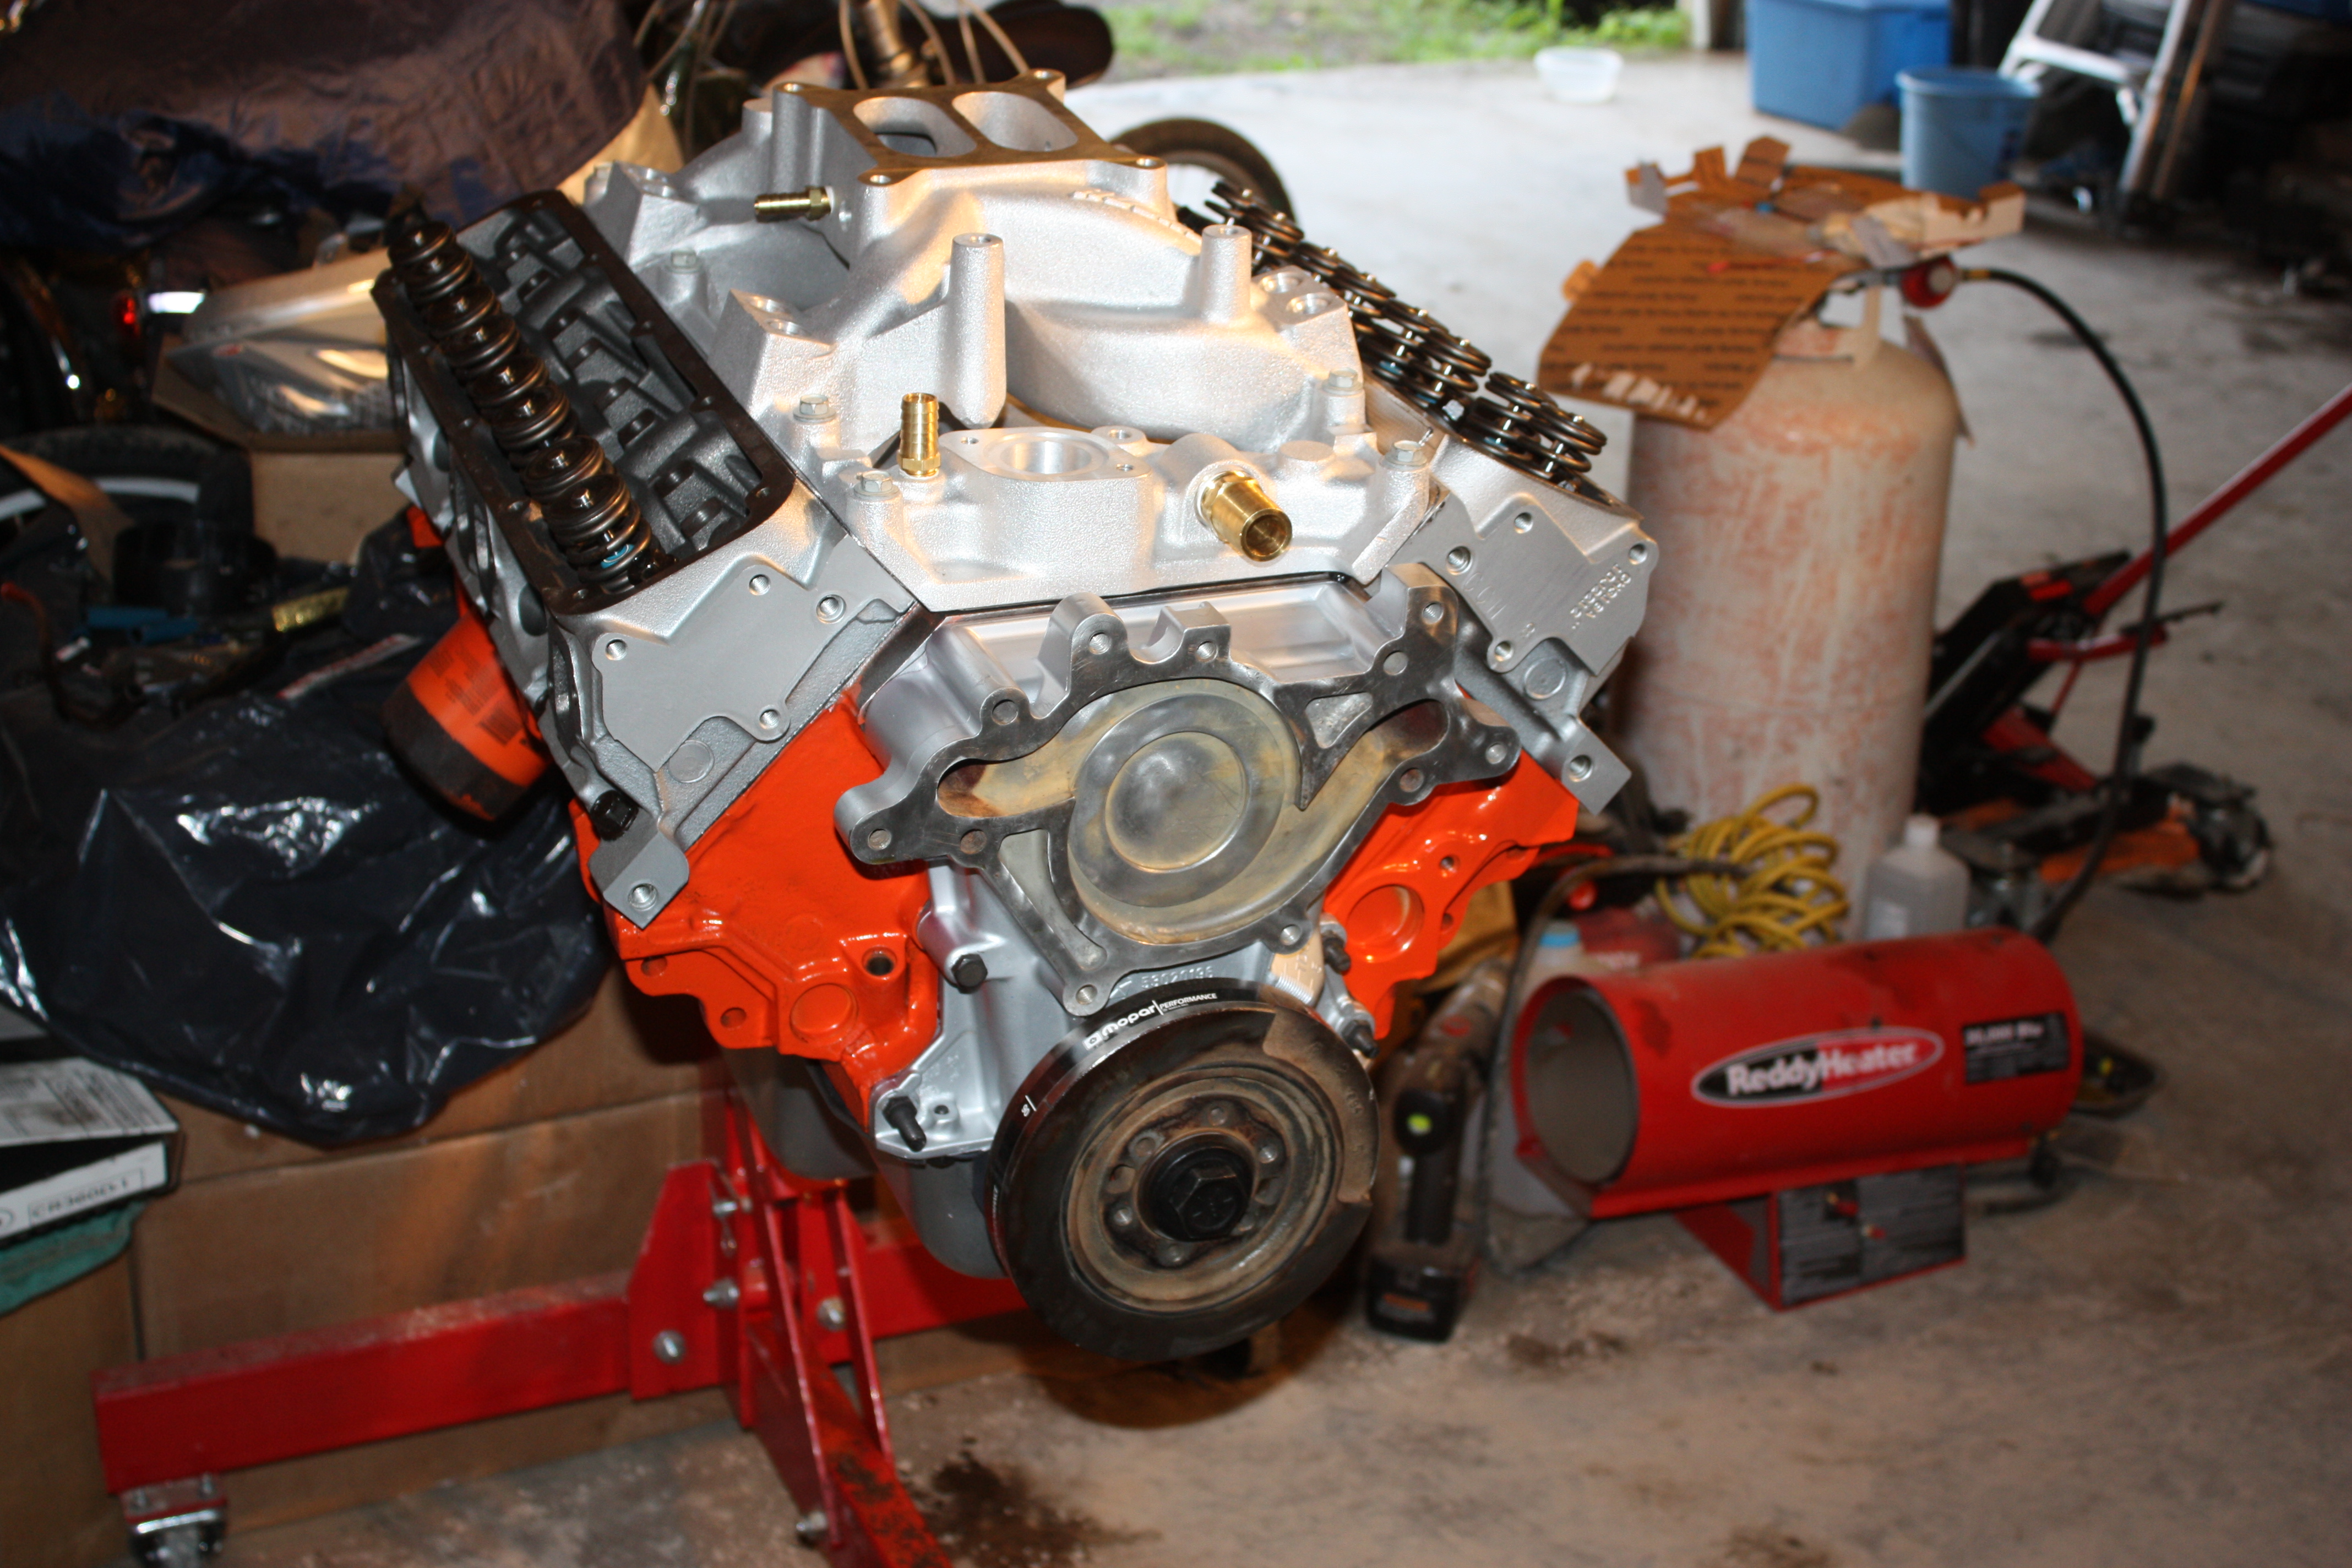
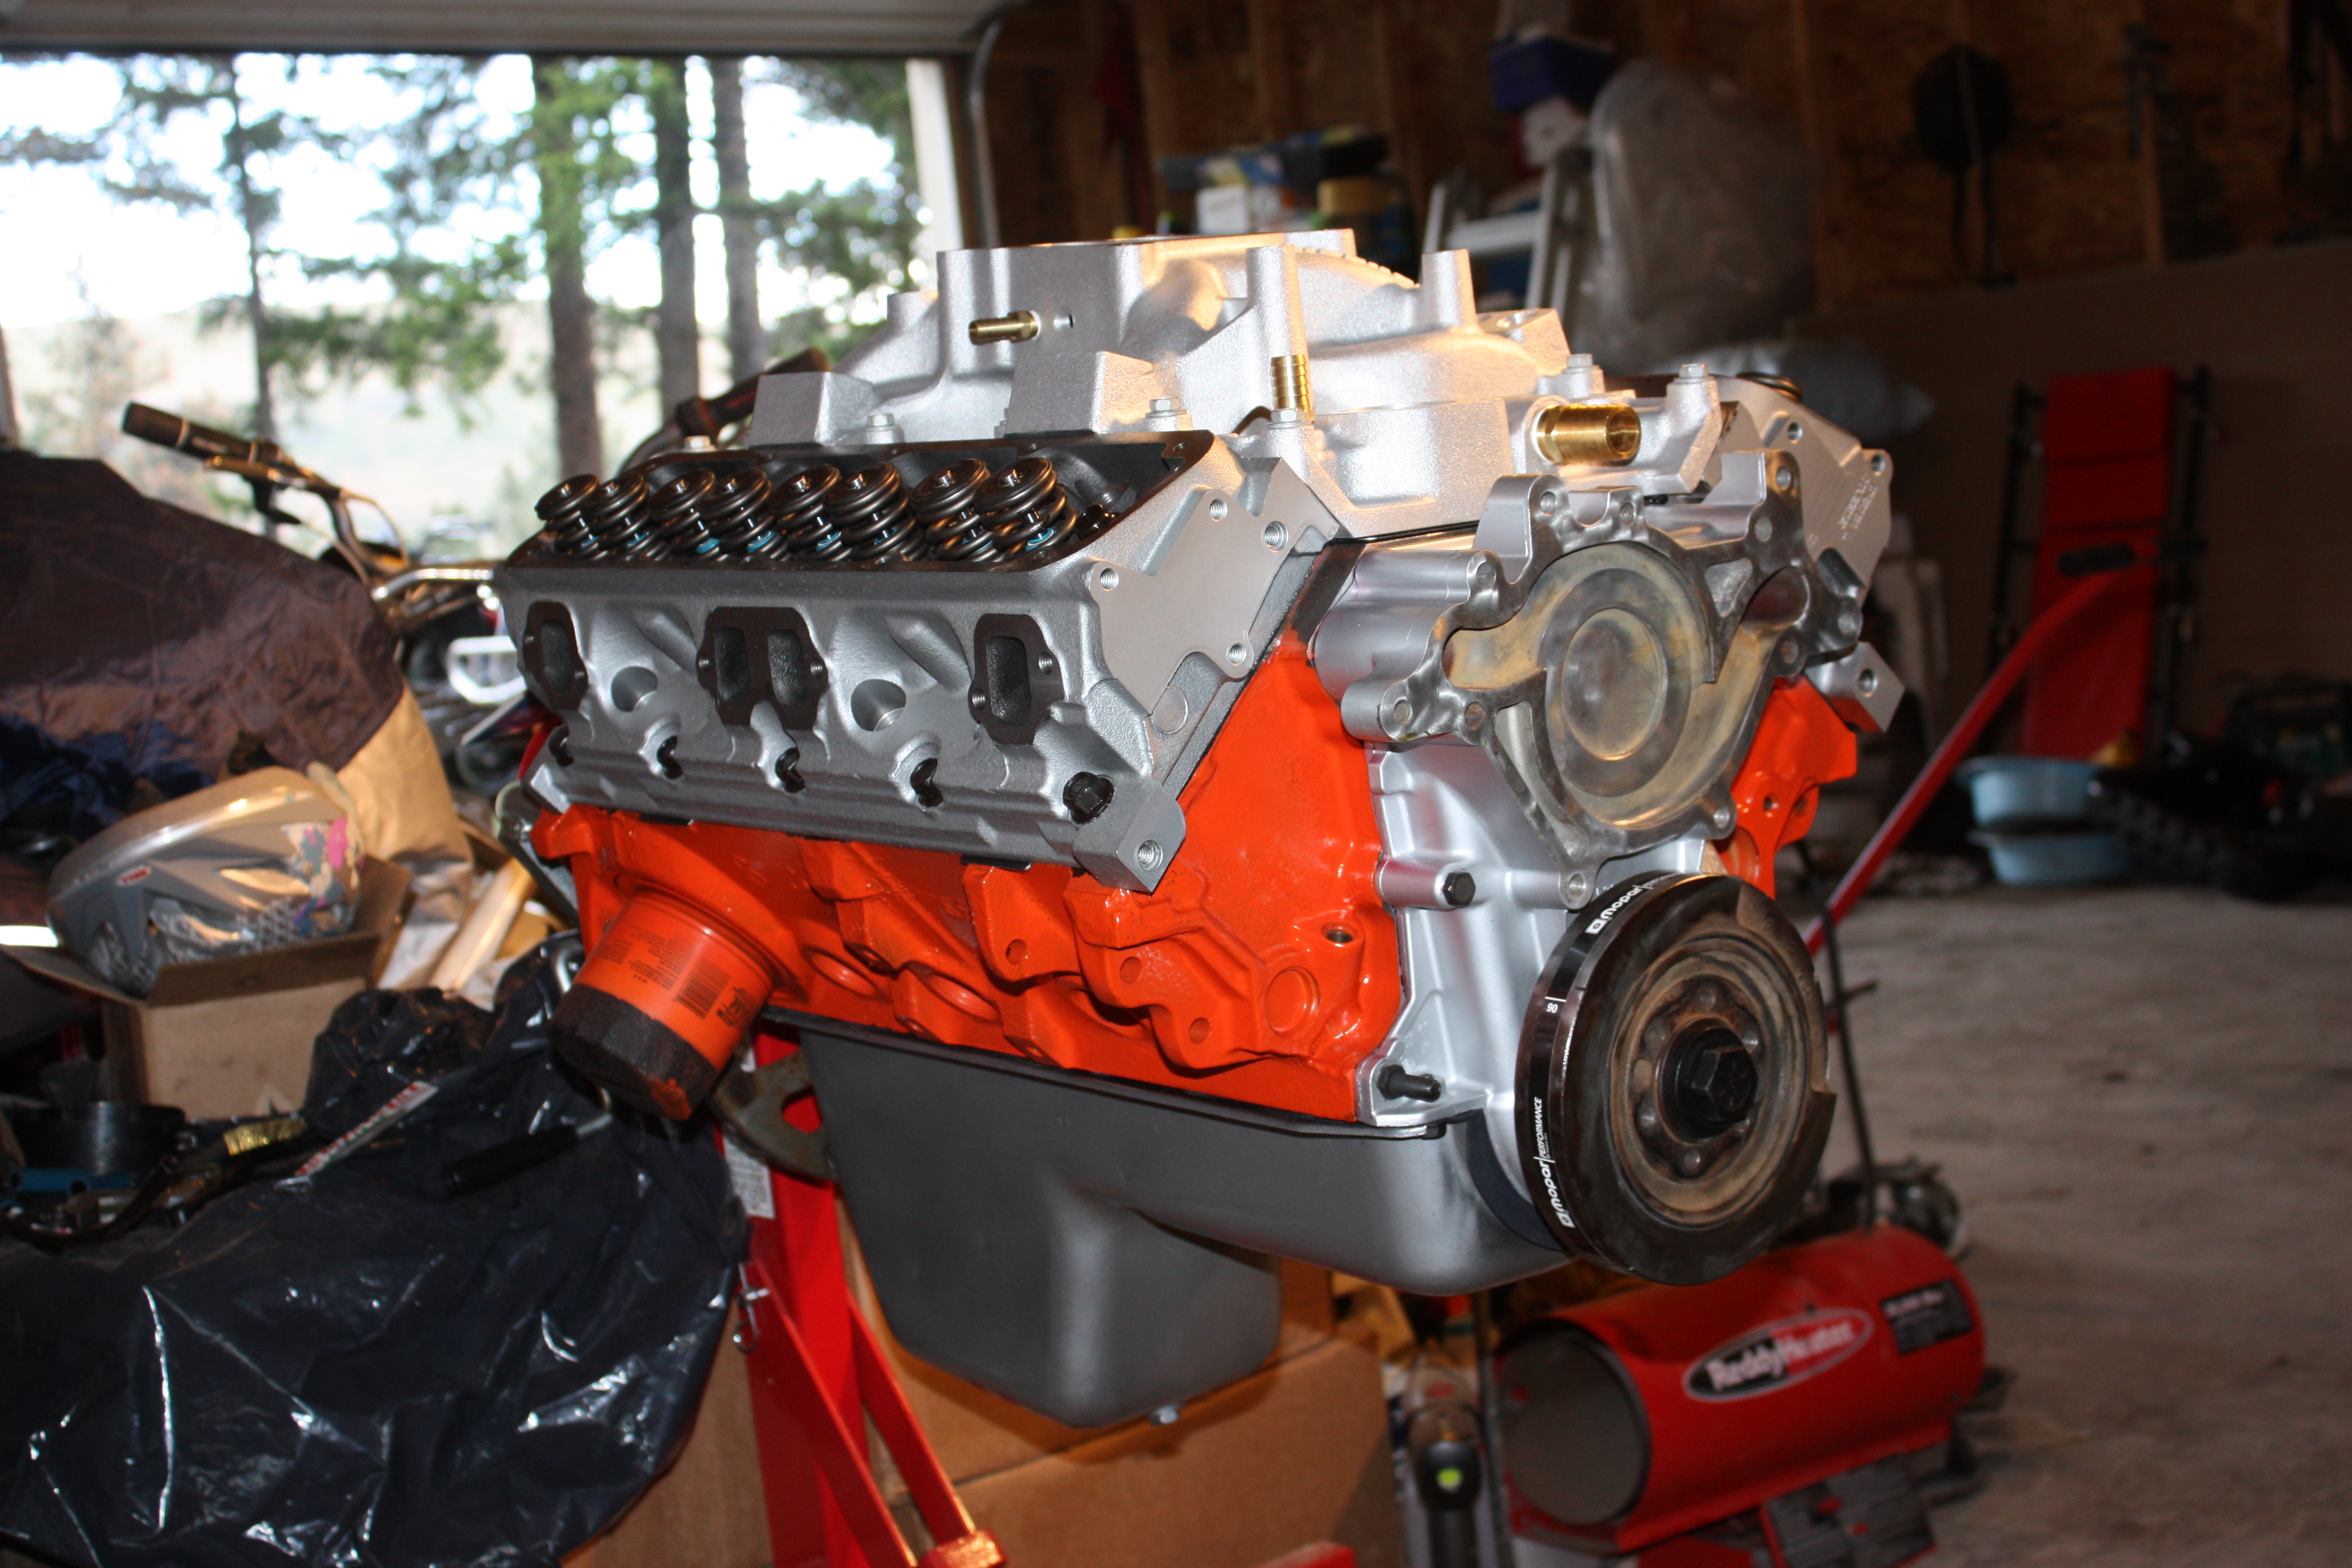
So today I got the intake manifold torqued down & the fuel injector & fuel rails installed. So here are some pictures of the finished engine. Once the pushrods get here I can install them and the rocker arms. Then I can get the valve covers installed too.

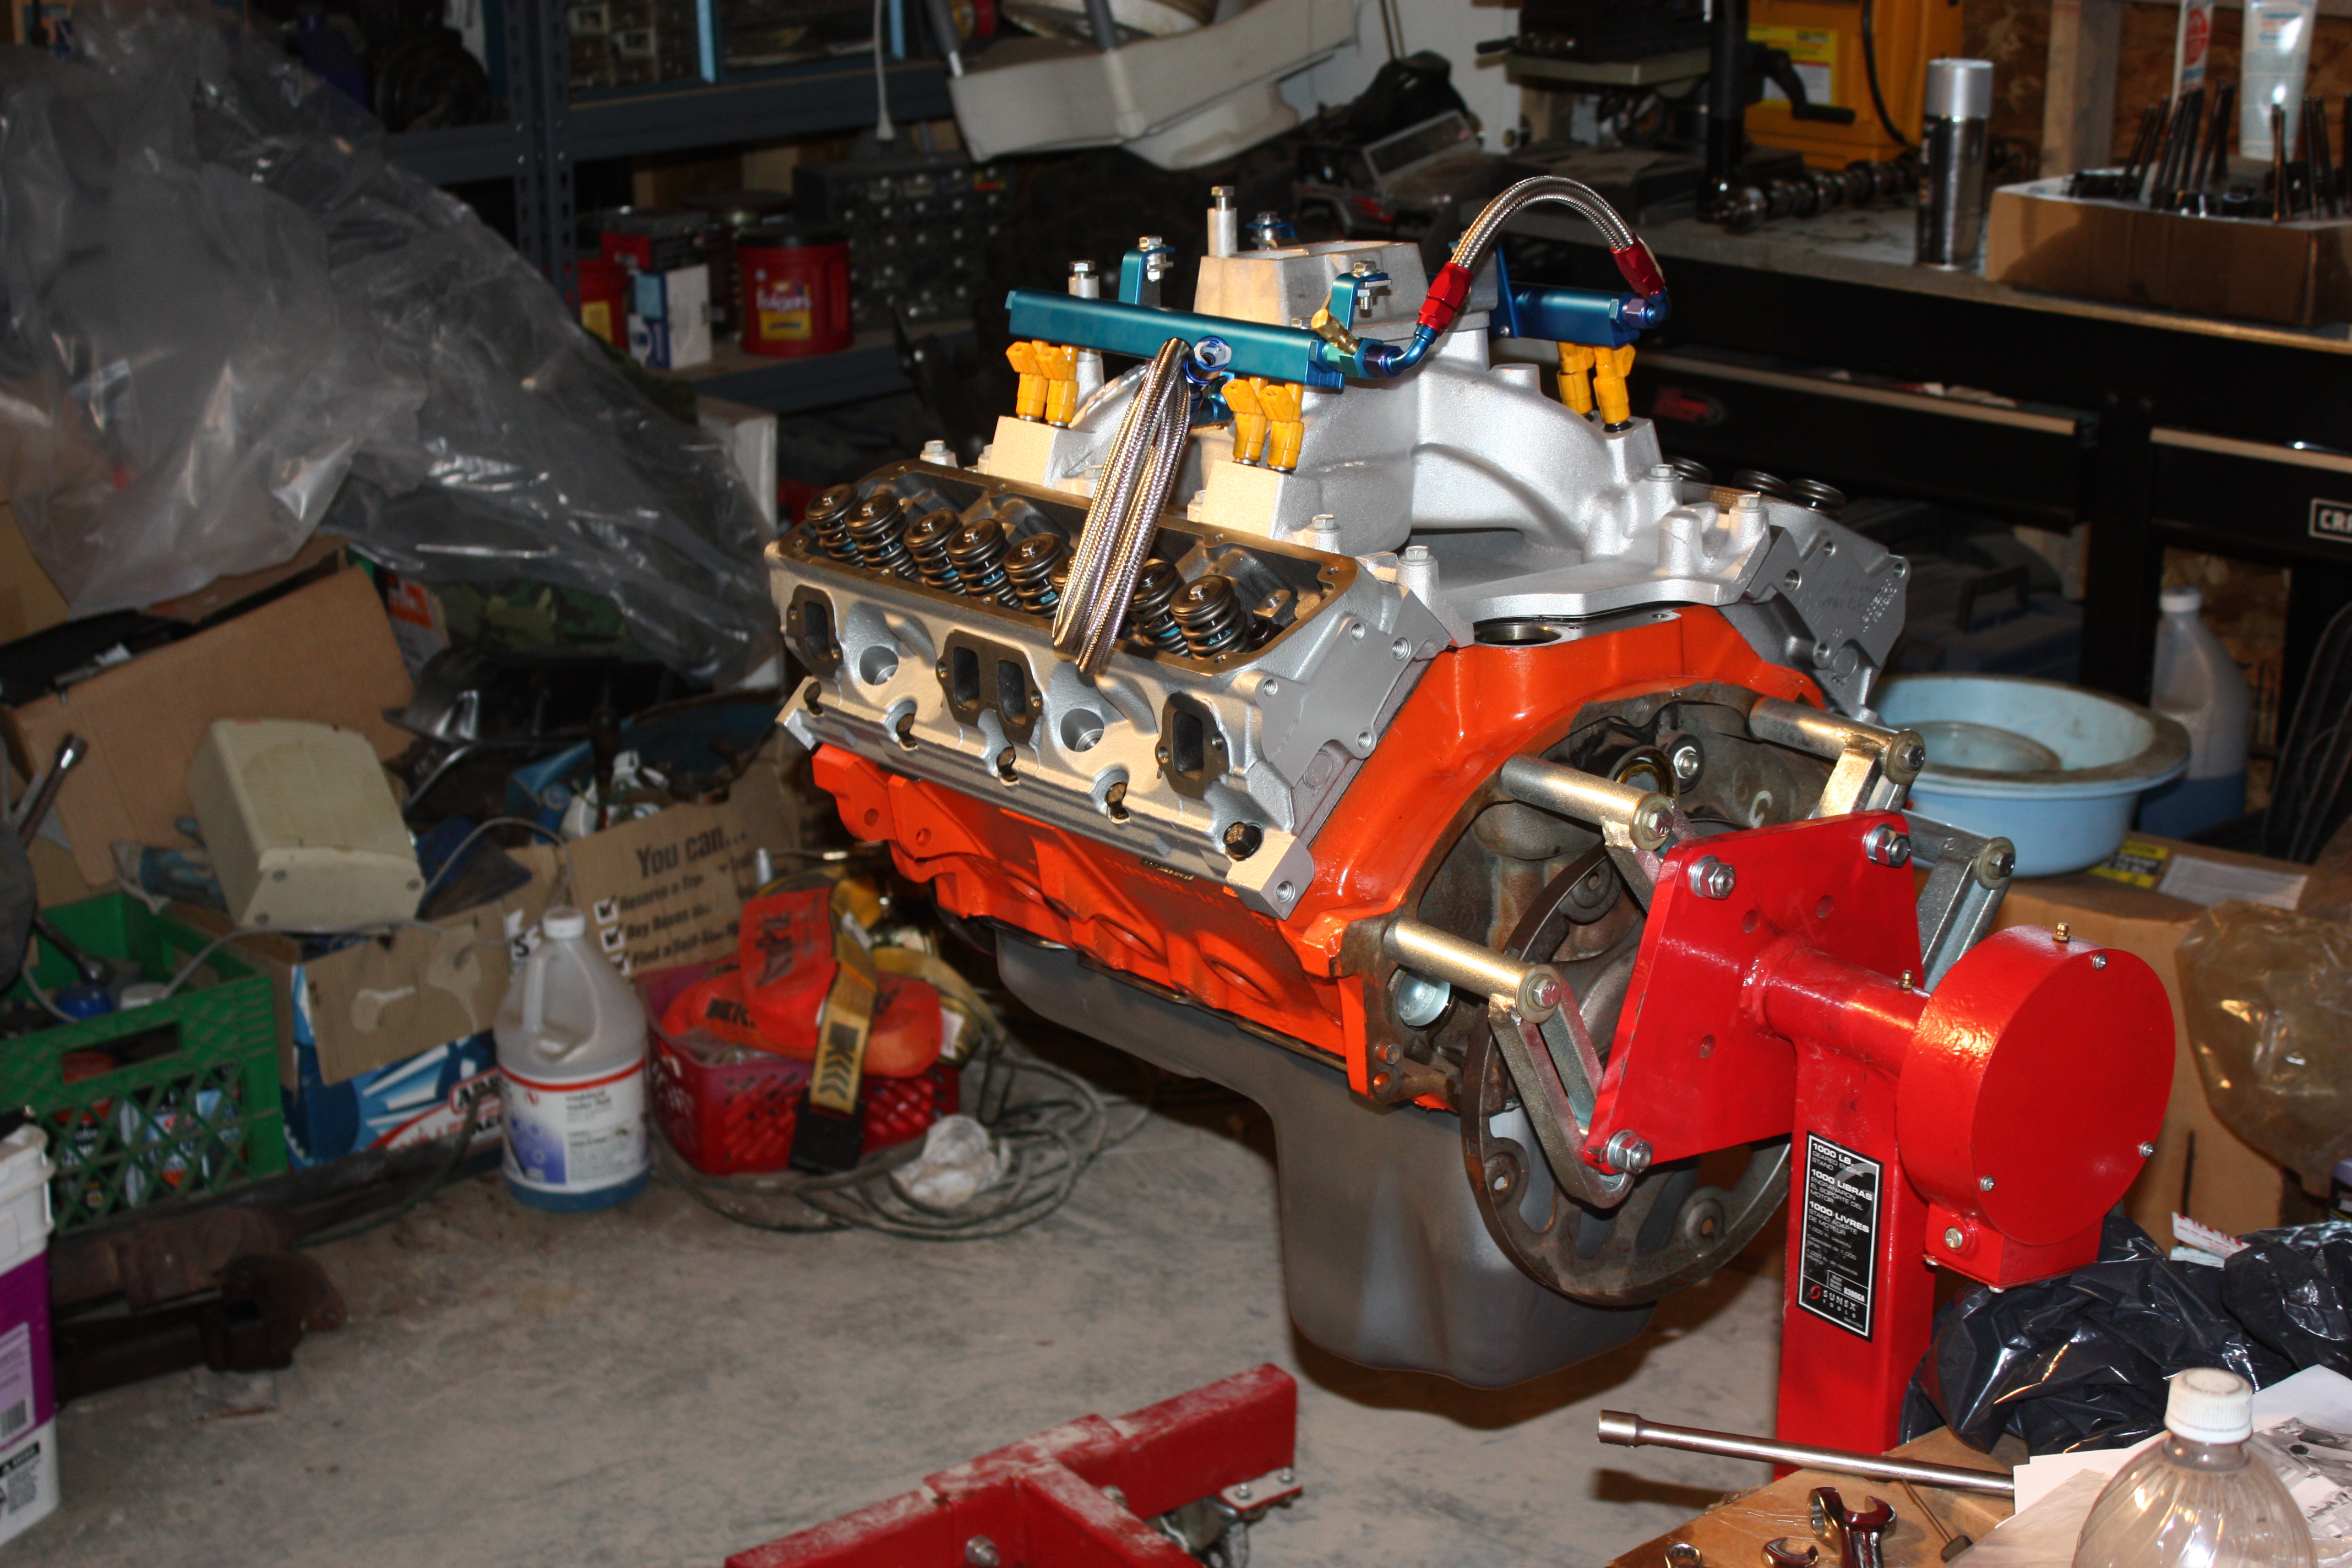
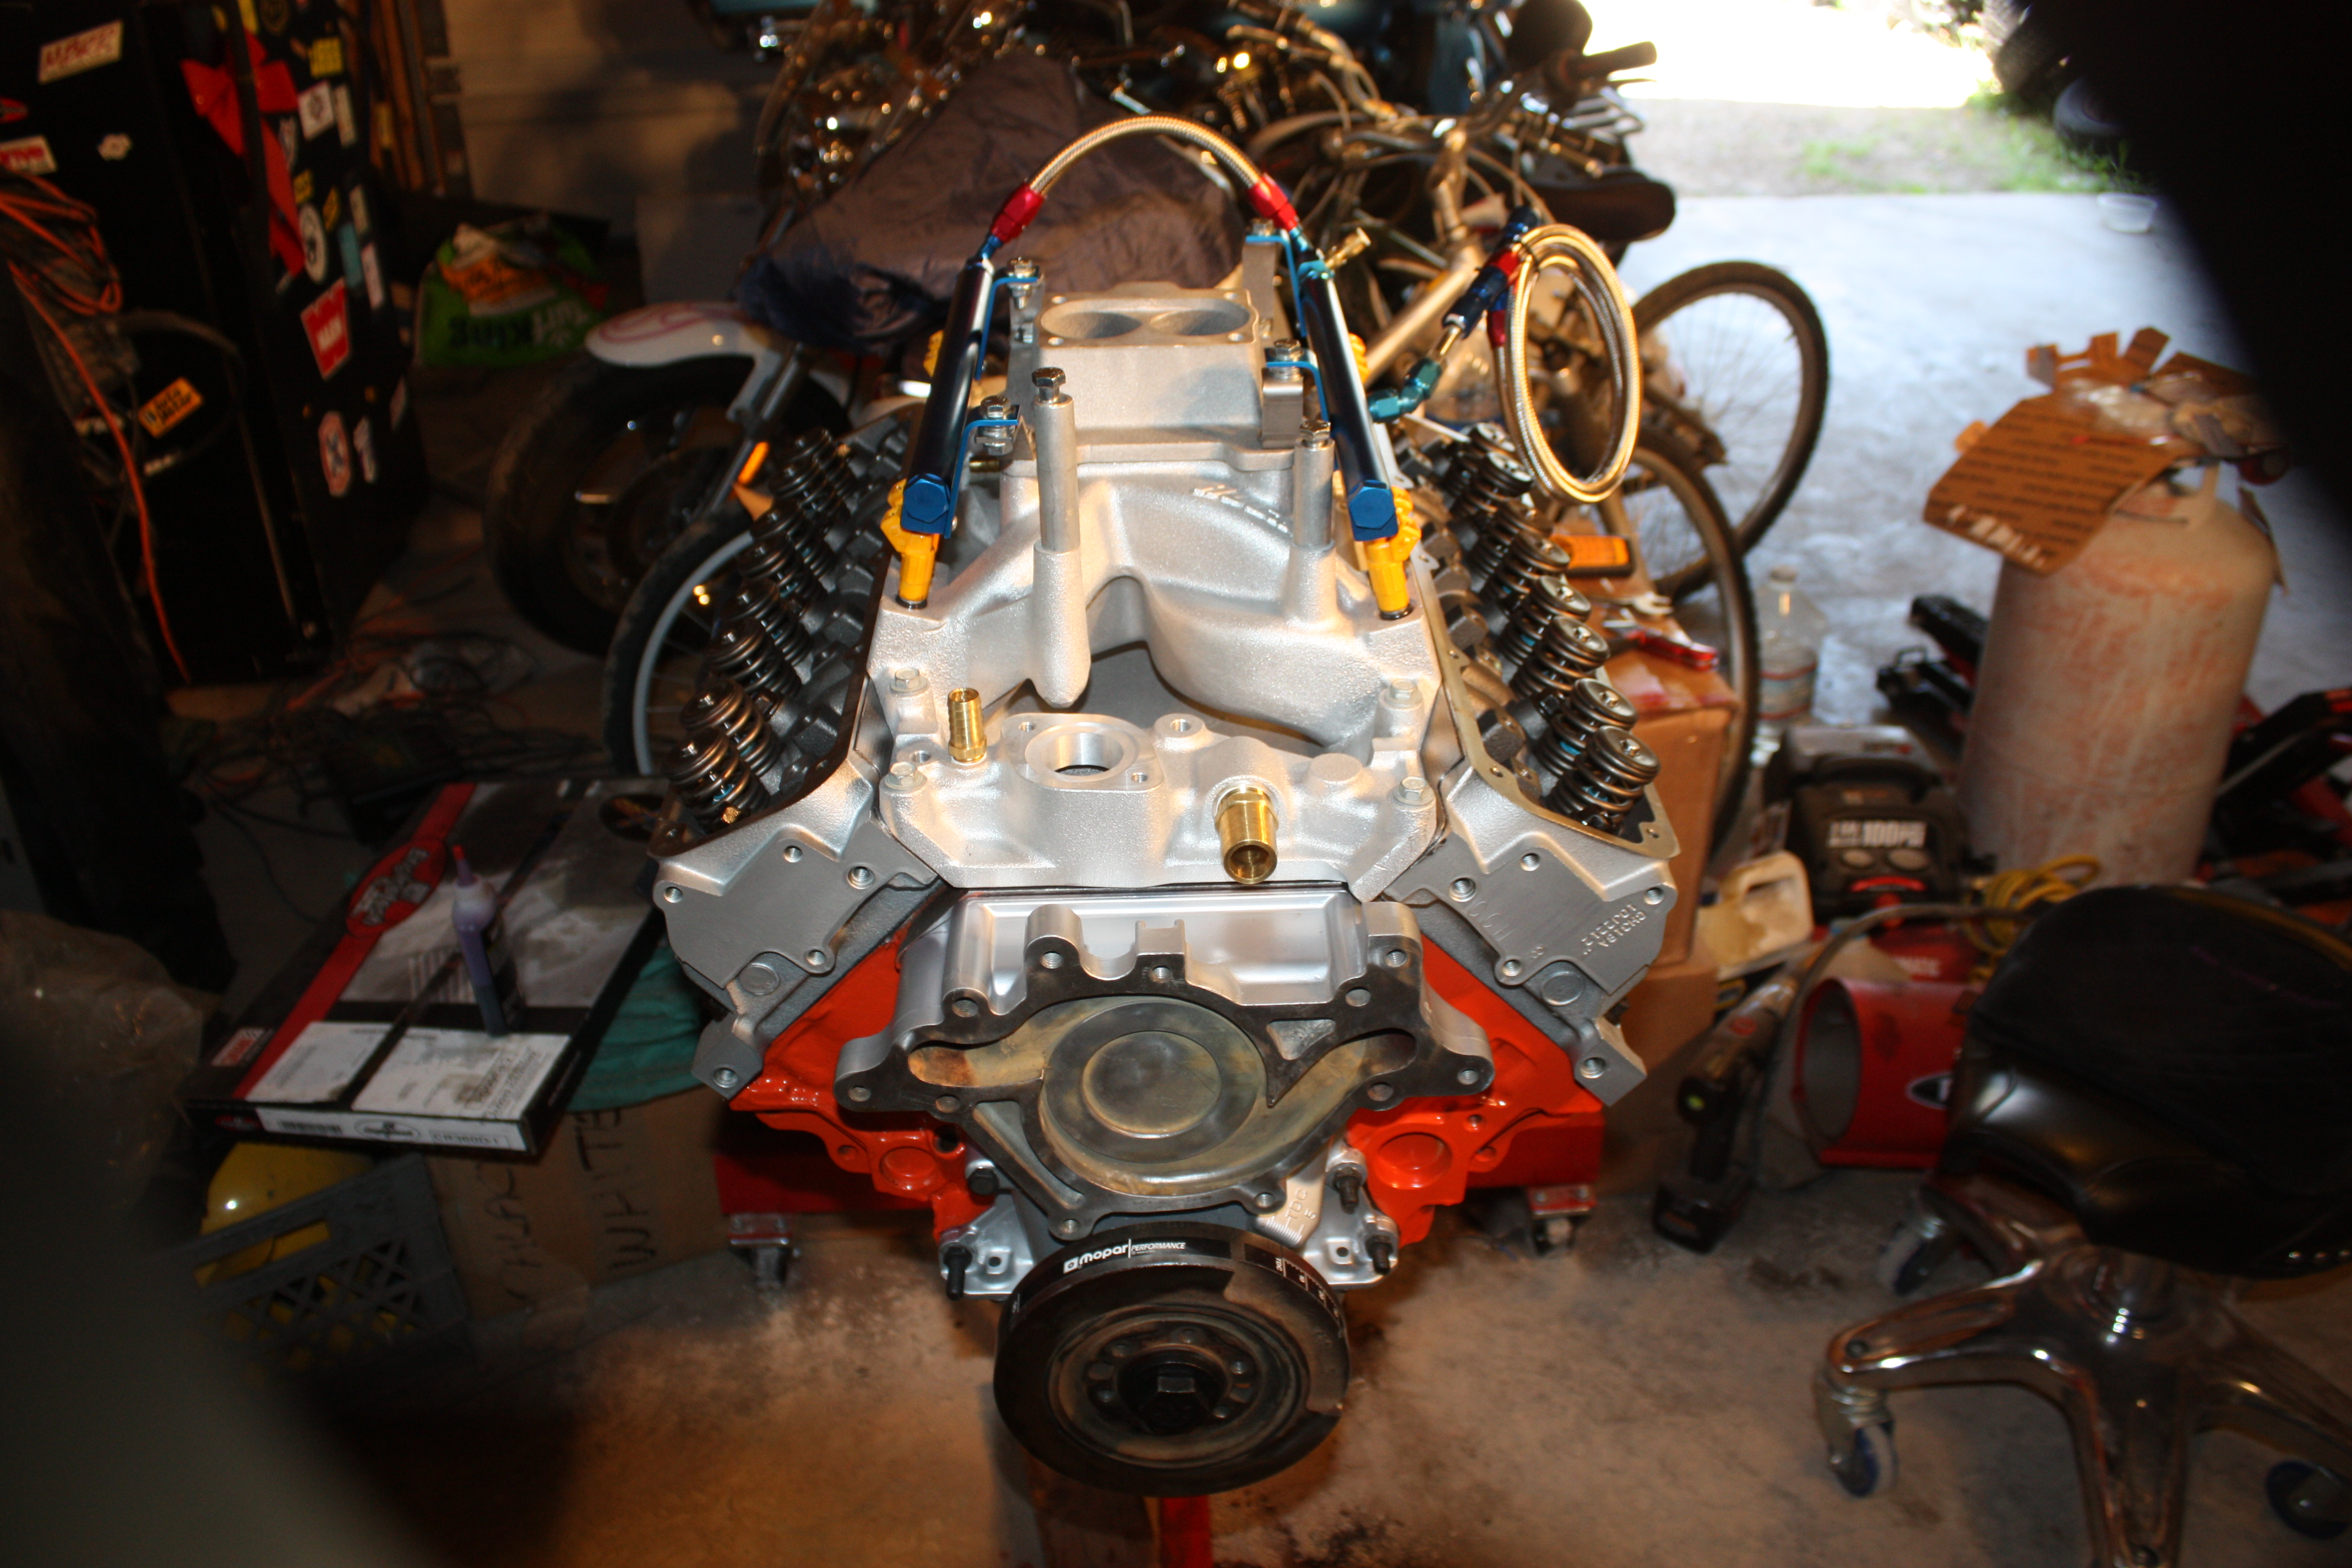
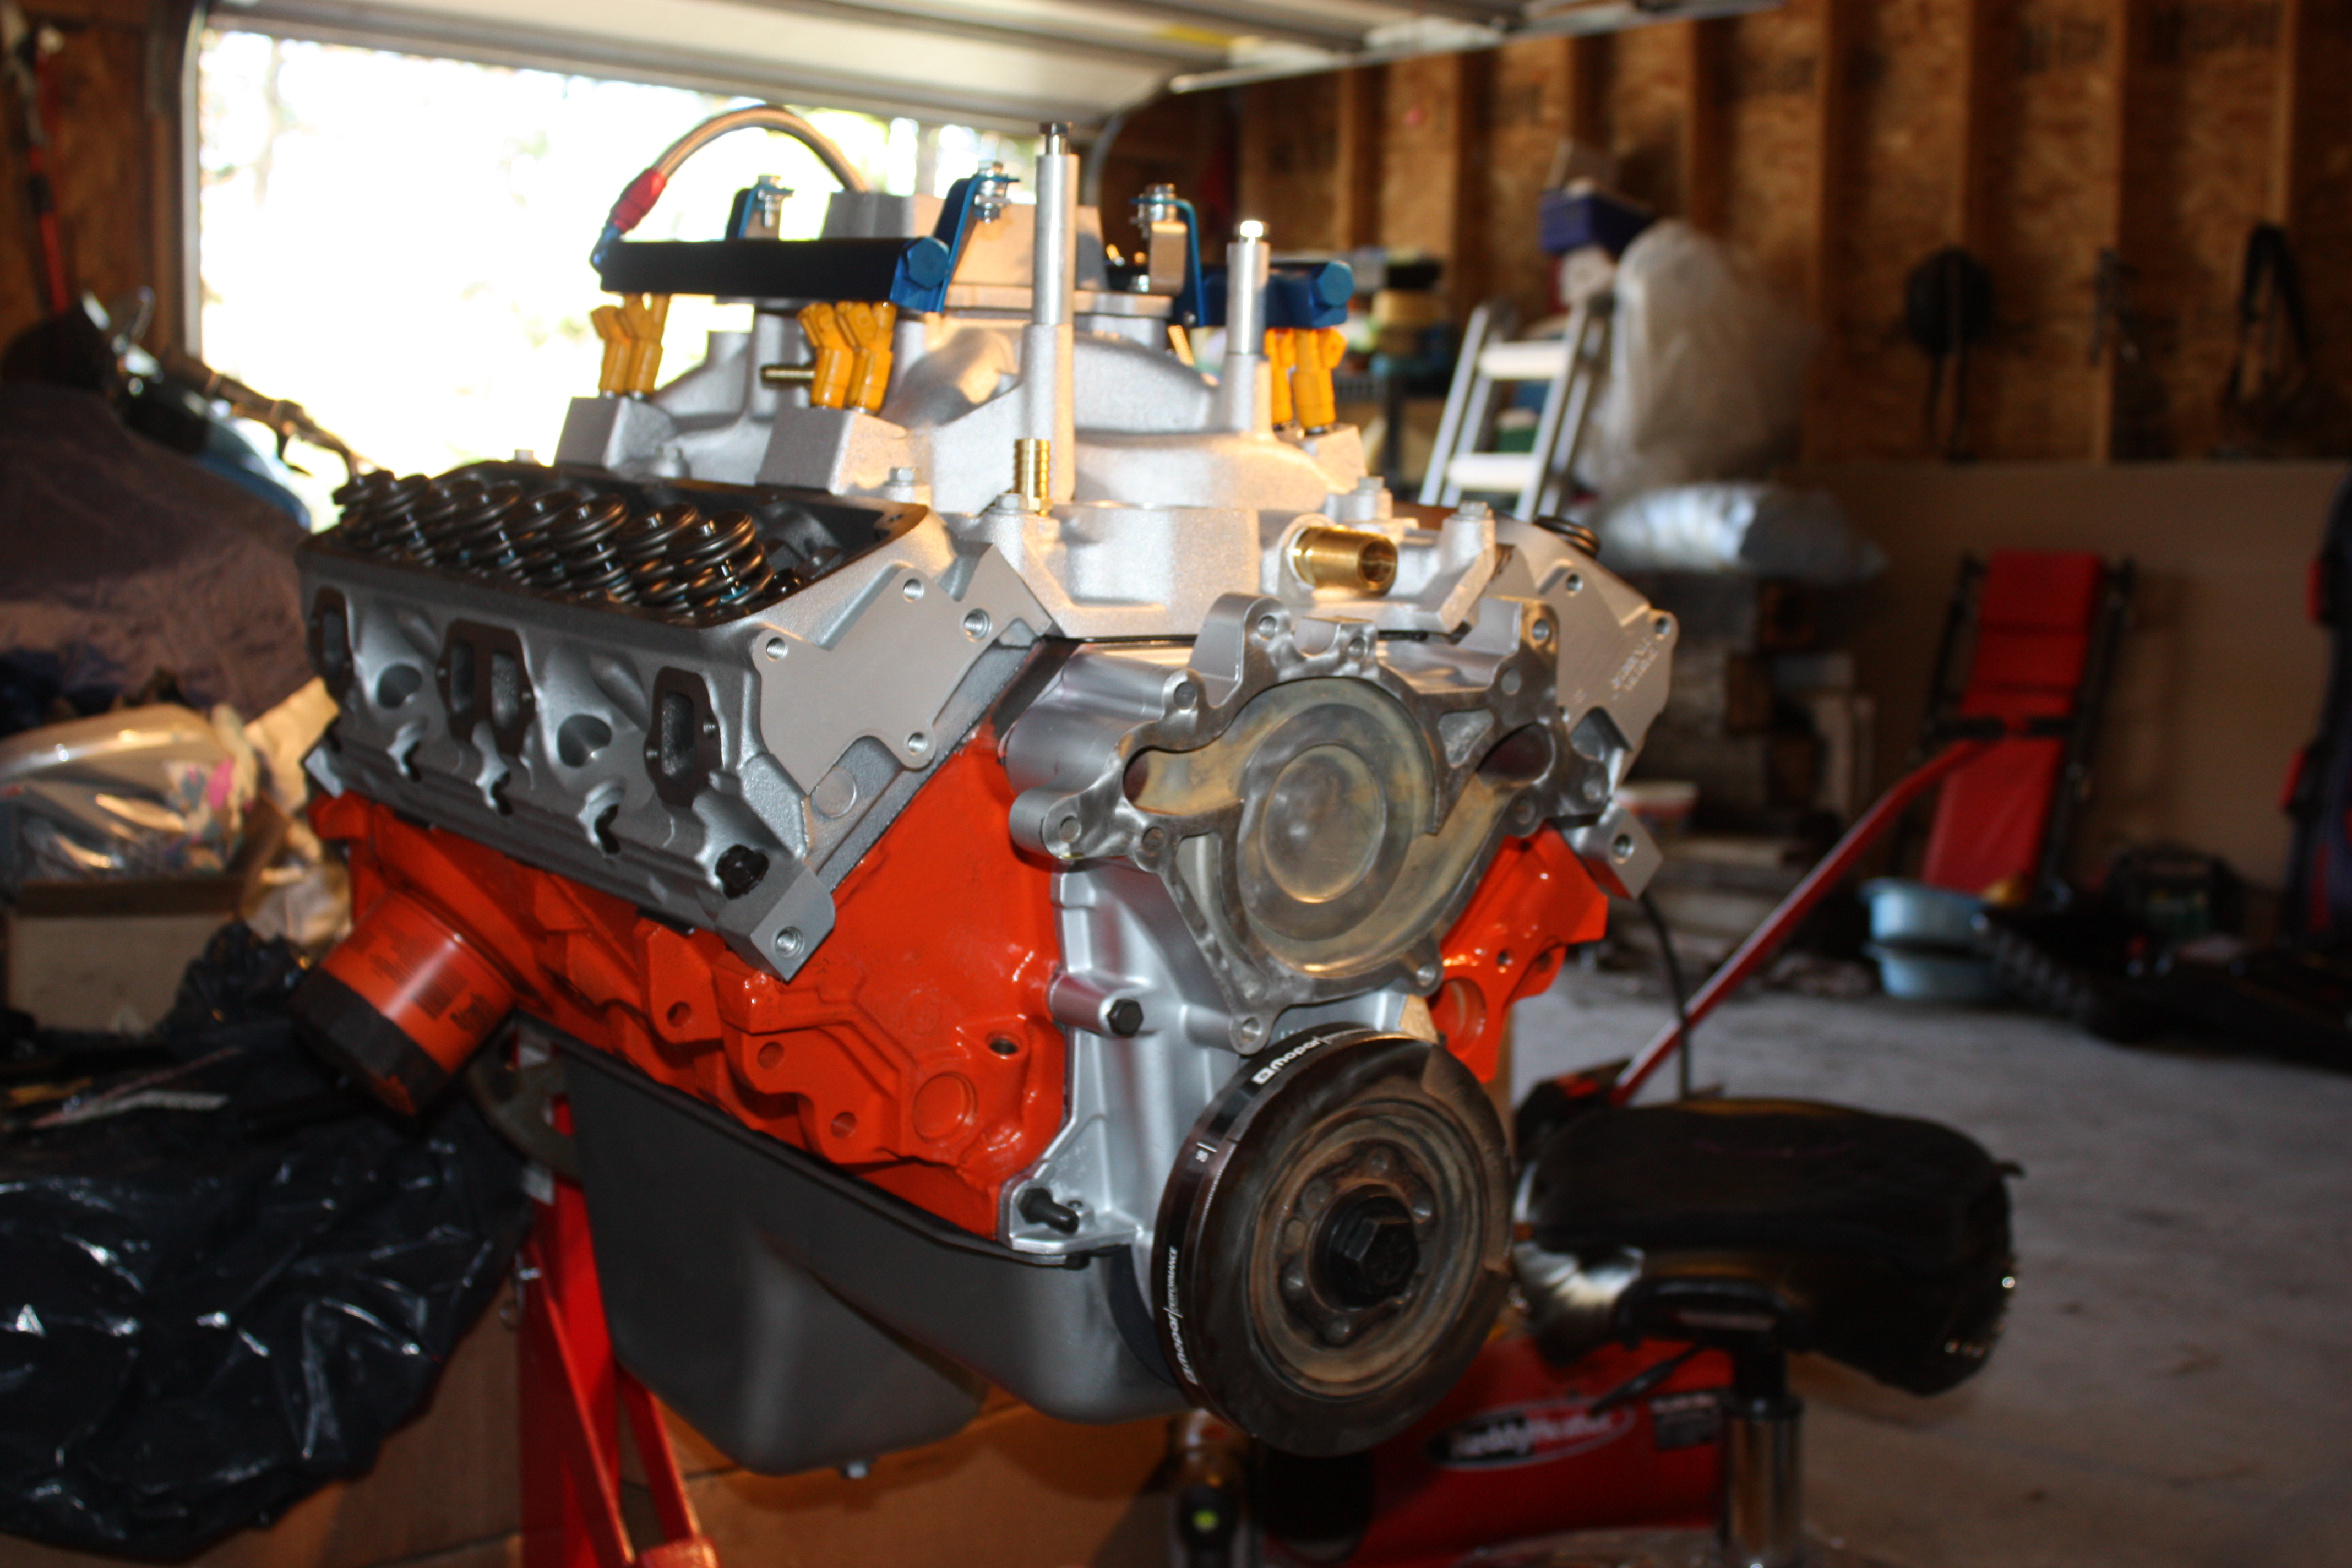
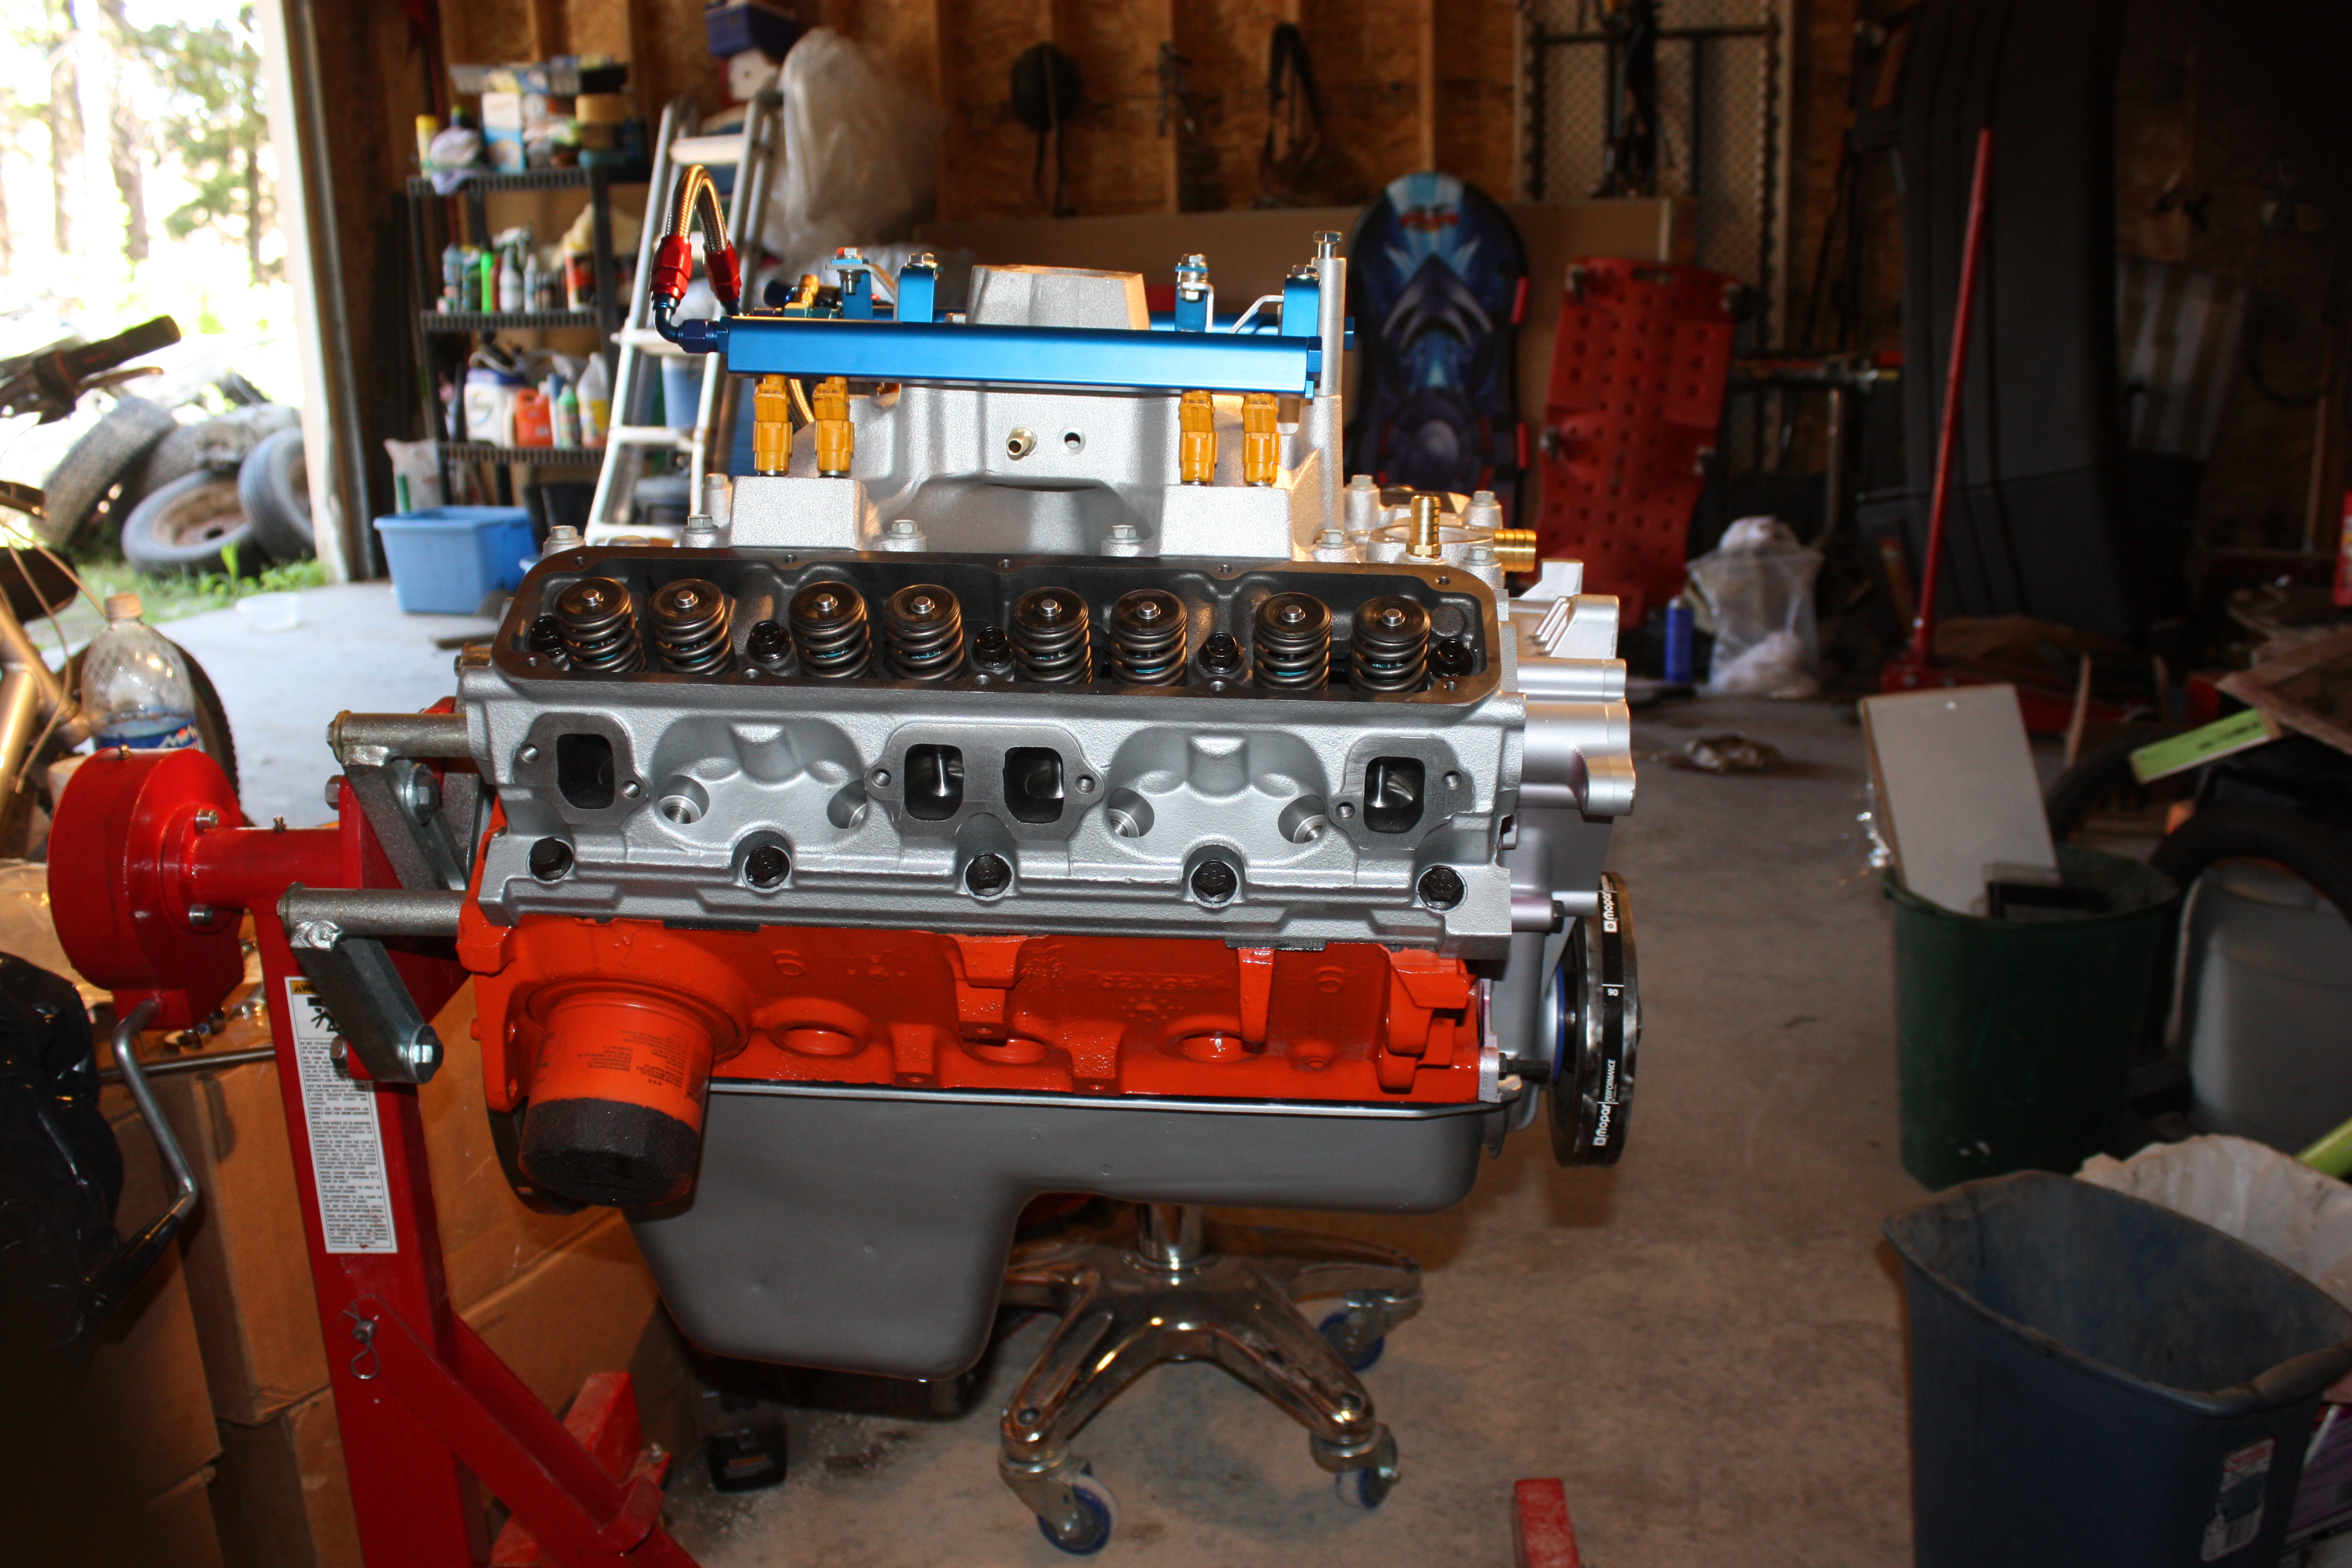
Then I got out my angle grinder and cleaned up the spark plug protectors. I can't believe just how good these things cleaned up. They look real good.
Well I m pretty much done with the engine at this point. I have got all the parts I could install done at this point. I have ordered some more parts to finish things off with. Got a new thermostat housing coming, a distributor clamp, plugs for the unused plugs on the intake & a temp sensor for the second water passage hole for my electric fans.
So today I got the intake manifold torqued down & the fuel injector & fuel rails installed. So here are some pictures of the finished engine. Once the pushrods get here I can install them and the rocker arms. Then I can get the valve covers installed too.
Then I got out my angle grinder and cleaned up the spark plug protectors. I can't believe just how good these things cleaned up. They look real good.

Thread Starter
|
Record Breaker
Joined: Nov 2011
Posts: 1,898
Likes: 162
From: Cle Elum, WA
Gaius,
It started out being a low buck rebuild but didn't stay that way. Also a lot of the parts I bought last year or the year before so I don't count them in the cost.
Redneck,
I got the fuel rails from Richard @ HiPoTek. He sells them in clear, black, blue, red.
It started out being a low buck rebuild but didn't stay that way. Also a lot of the parts I bought last year or the year before so I don't count them in the cost.
Redneck,
I got the fuel rails from Richard @ HiPoTek. He sells them in clear, black, blue, red.
Thread Starter
|
Record Breaker
Joined: Nov 2011
Posts: 1,898
Likes: 162
From: Cle Elum, WA
Well just a quick update. I am waiting for the pushrods to get here and then I will finish putting the engine together. I have some work to do to my wife's Sportster today and tomorrow. Saturday my daughter is having her birthday party so I will be out in the garage working. I hope to pull the Jeep into the garage on Saturday to start taking it a part. So next week I should be pulling the old engine and then working on installing the new engine.
Thread Starter
|
Record Breaker
Joined: Nov 2011
Posts: 1,898
Likes: 162
From: Cle Elum, WA
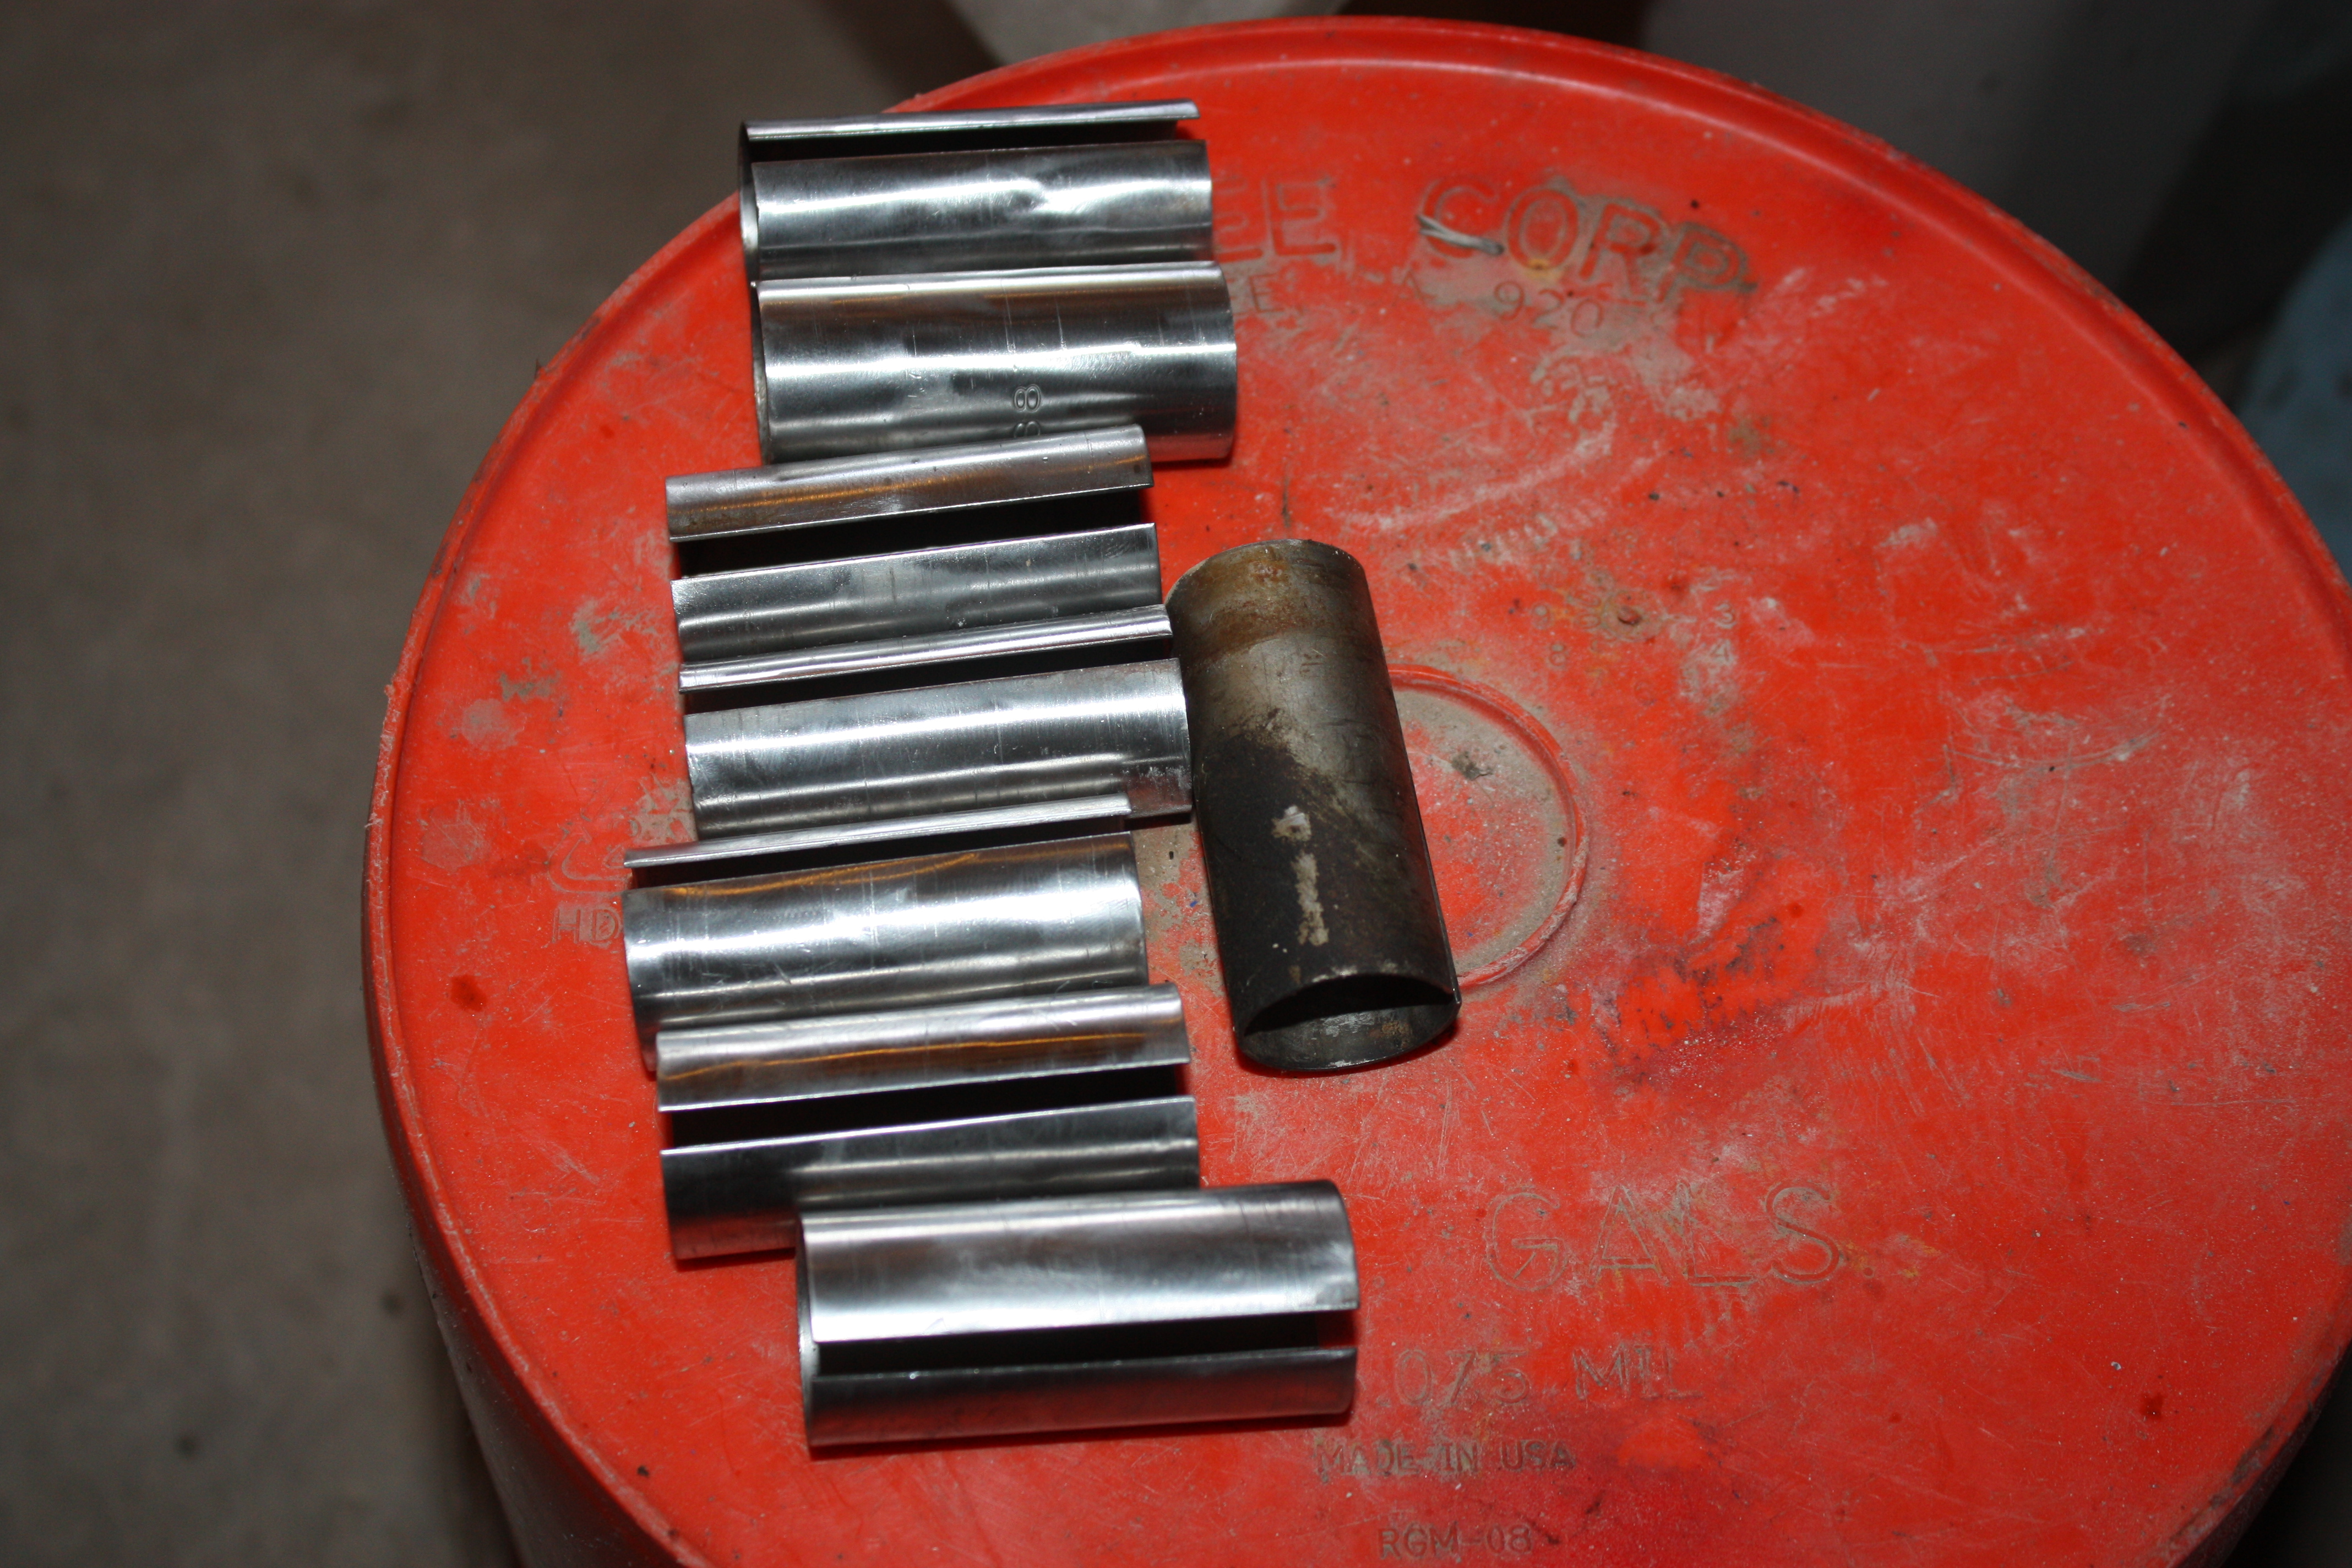
No good things to report...............I went to install my HS rocker arms only to find out that I had gotten heads that were drilled out to 3/8ths instead of the 5/16ths that a stock head would have. So no using the rocker arms I have now. They will be for sale here real soon.
Plan is to get some 3/8th studs and rocker arms that will work and go that direction. Since I have to buy new parts I am of course going to get adjustable rockers now and then measure for correct length of the pushrods and buy new ones if the stock ones are not the right length. I have to run guide plates too but no big deal. So it will be a few days before I get any parts. Once I do I will update the thread.
Plan is to get some 3/8th studs and rocker arms that will work and go that direction. Since I have to buy new parts I am of course going to get adjustable rockers now and then measure for correct length of the pushrods and buy new ones if the stock ones are not the right length. I have to run guide plates too but no big deal. So it will be a few days before I get any parts. Once I do I will update the thread.
Champion

Joined: Sep 2012
Posts: 4,869
Likes: 434
From: Central VA
Just FYI, I wouldn't put the spark plug shields back on the heads. They tend to collect trash around the spark plugs (making the plugs harder to remove over time) and cause more trouble than they are worth.. If a good set of spark plug wires are used, all will be good.
The fuel rails are works of art. Did the braided lines come from Hi-PoTek, too, or did you make those up yourself?
The fuel rails are works of art. Did the braided lines come from Hi-PoTek, too, or did you make those up yourself?

Veteran
Joined: Oct 2010
Posts: 251
Likes: 0
From: Beaverton, OR
I second AtomicDog. My first set of MSD Streetwires (inexpensive) would actually arc to them. I removed them and now have since swapped to a nice set of Taylors.
On the 5.2 I got for my Wagoneer, they were full of dried mud. Had to scrape and vacuum out the holes before I could remove the plugs themselves.
On the 5.2 I got for my Wagoneer, they were full of dried mud. Had to scrape and vacuum out the holes before I could remove the plugs themselves.

