

Cab Clearance Lights install
#1
 02-05-2017, 09:24 PM

Join Date: Nov 2016
Location: Omaha NE
Posts: 344
Likes: 0
Received 0 Likes
on
0 Posts
So im going to get straight and to the point with this write up. In no way though am I claiming I am a professional with this wiring or install, just try to do the best I can.  . Enjoy.
So I got a 1994 Dodge Ram 1500. I've always liked the commercial or heavy duty rig look with the cab lights so I started looking Around. Found the recons and the pacers. Recons came in led and I've heard iffy reviews on them. Pacers came in led and incandescent, so I went with the pacer incandescent from Amazon, good price too. Very high quality.
https://www.amazon.com/Pacer-Perform.../dp/B00029X0HO
Needed stuff:
Philips and Flat screw driver
10 mm Socket and ratchet
Drill
Electrical tape
Crimper pliers(wire strippers)
14-16 guage crimp and seal connectors
7/8" or 1" hole saw
1/8 drill bit
Clear Silicone Sealant
Light kit
5 #8 1/2" sheet metal screws
Starting with tear down.
1: We need to remove the headliner, so start by removing the front pillars on left and right sides. They need to pull out towards the DOOR, NOT in towards the cab. They can break very easy. 2 clips holding the drivers in. I have the blue interior so my interior parts are hard to find, and my pasanger was not coming, so I left it in in fear of breaking it. Drivers pillar has to come off(for wiring).
2. Next remove the hanger behind the drivers seat. Gat a screw driver and pull the center clip out. Once the clip is pulled out all the way, pull on the clip and it should pull out of the roof/headliner.
3. Next remove the HOLY CRAP BAR (passanger roof handle). Pull off the covers on both sides, and remove the 10mm bolts on the strap.
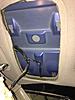
4. Next remove the visors. Both sides are the same. 3 screws on the visor assembly itself, and the. 1 screw on the clip.
Attachment 28073
Attachment 28074
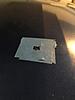
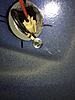
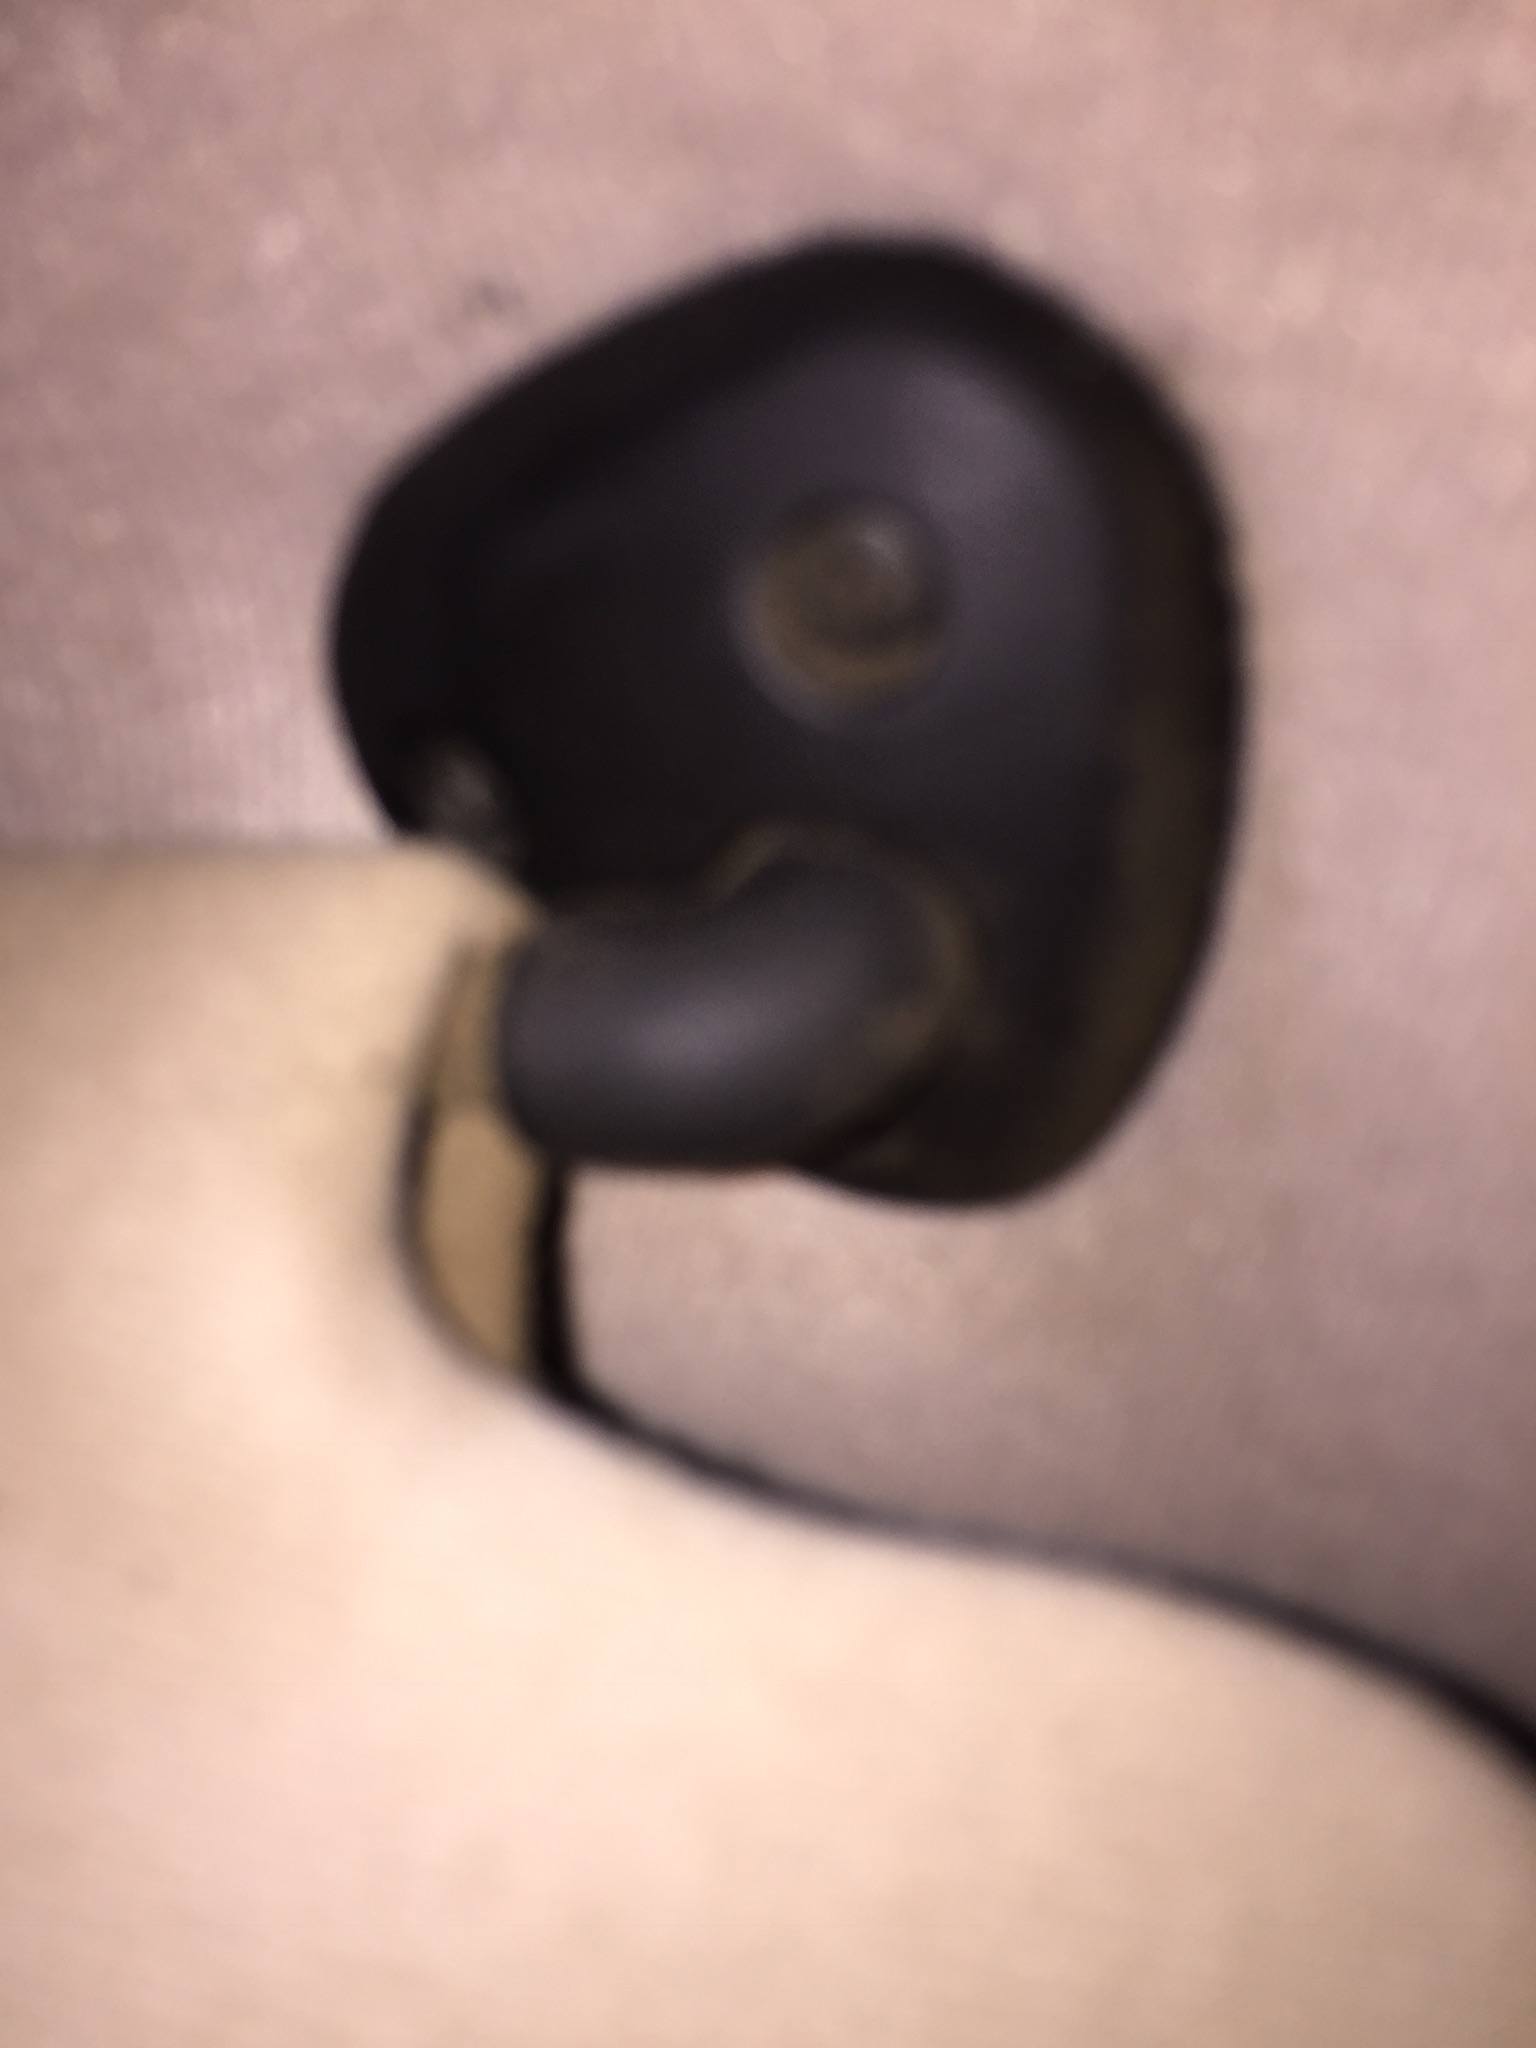
5. Next remove the compass/temp display. Two screws on the front of the unit, and then it pulls back, towards rear window, and then it drops down.
Attachment 28038
You can see the screw holes on the front, and the slide holes the clips slide into.
Remove the one connector like shows the the picture below.
Attachment 28039
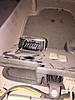
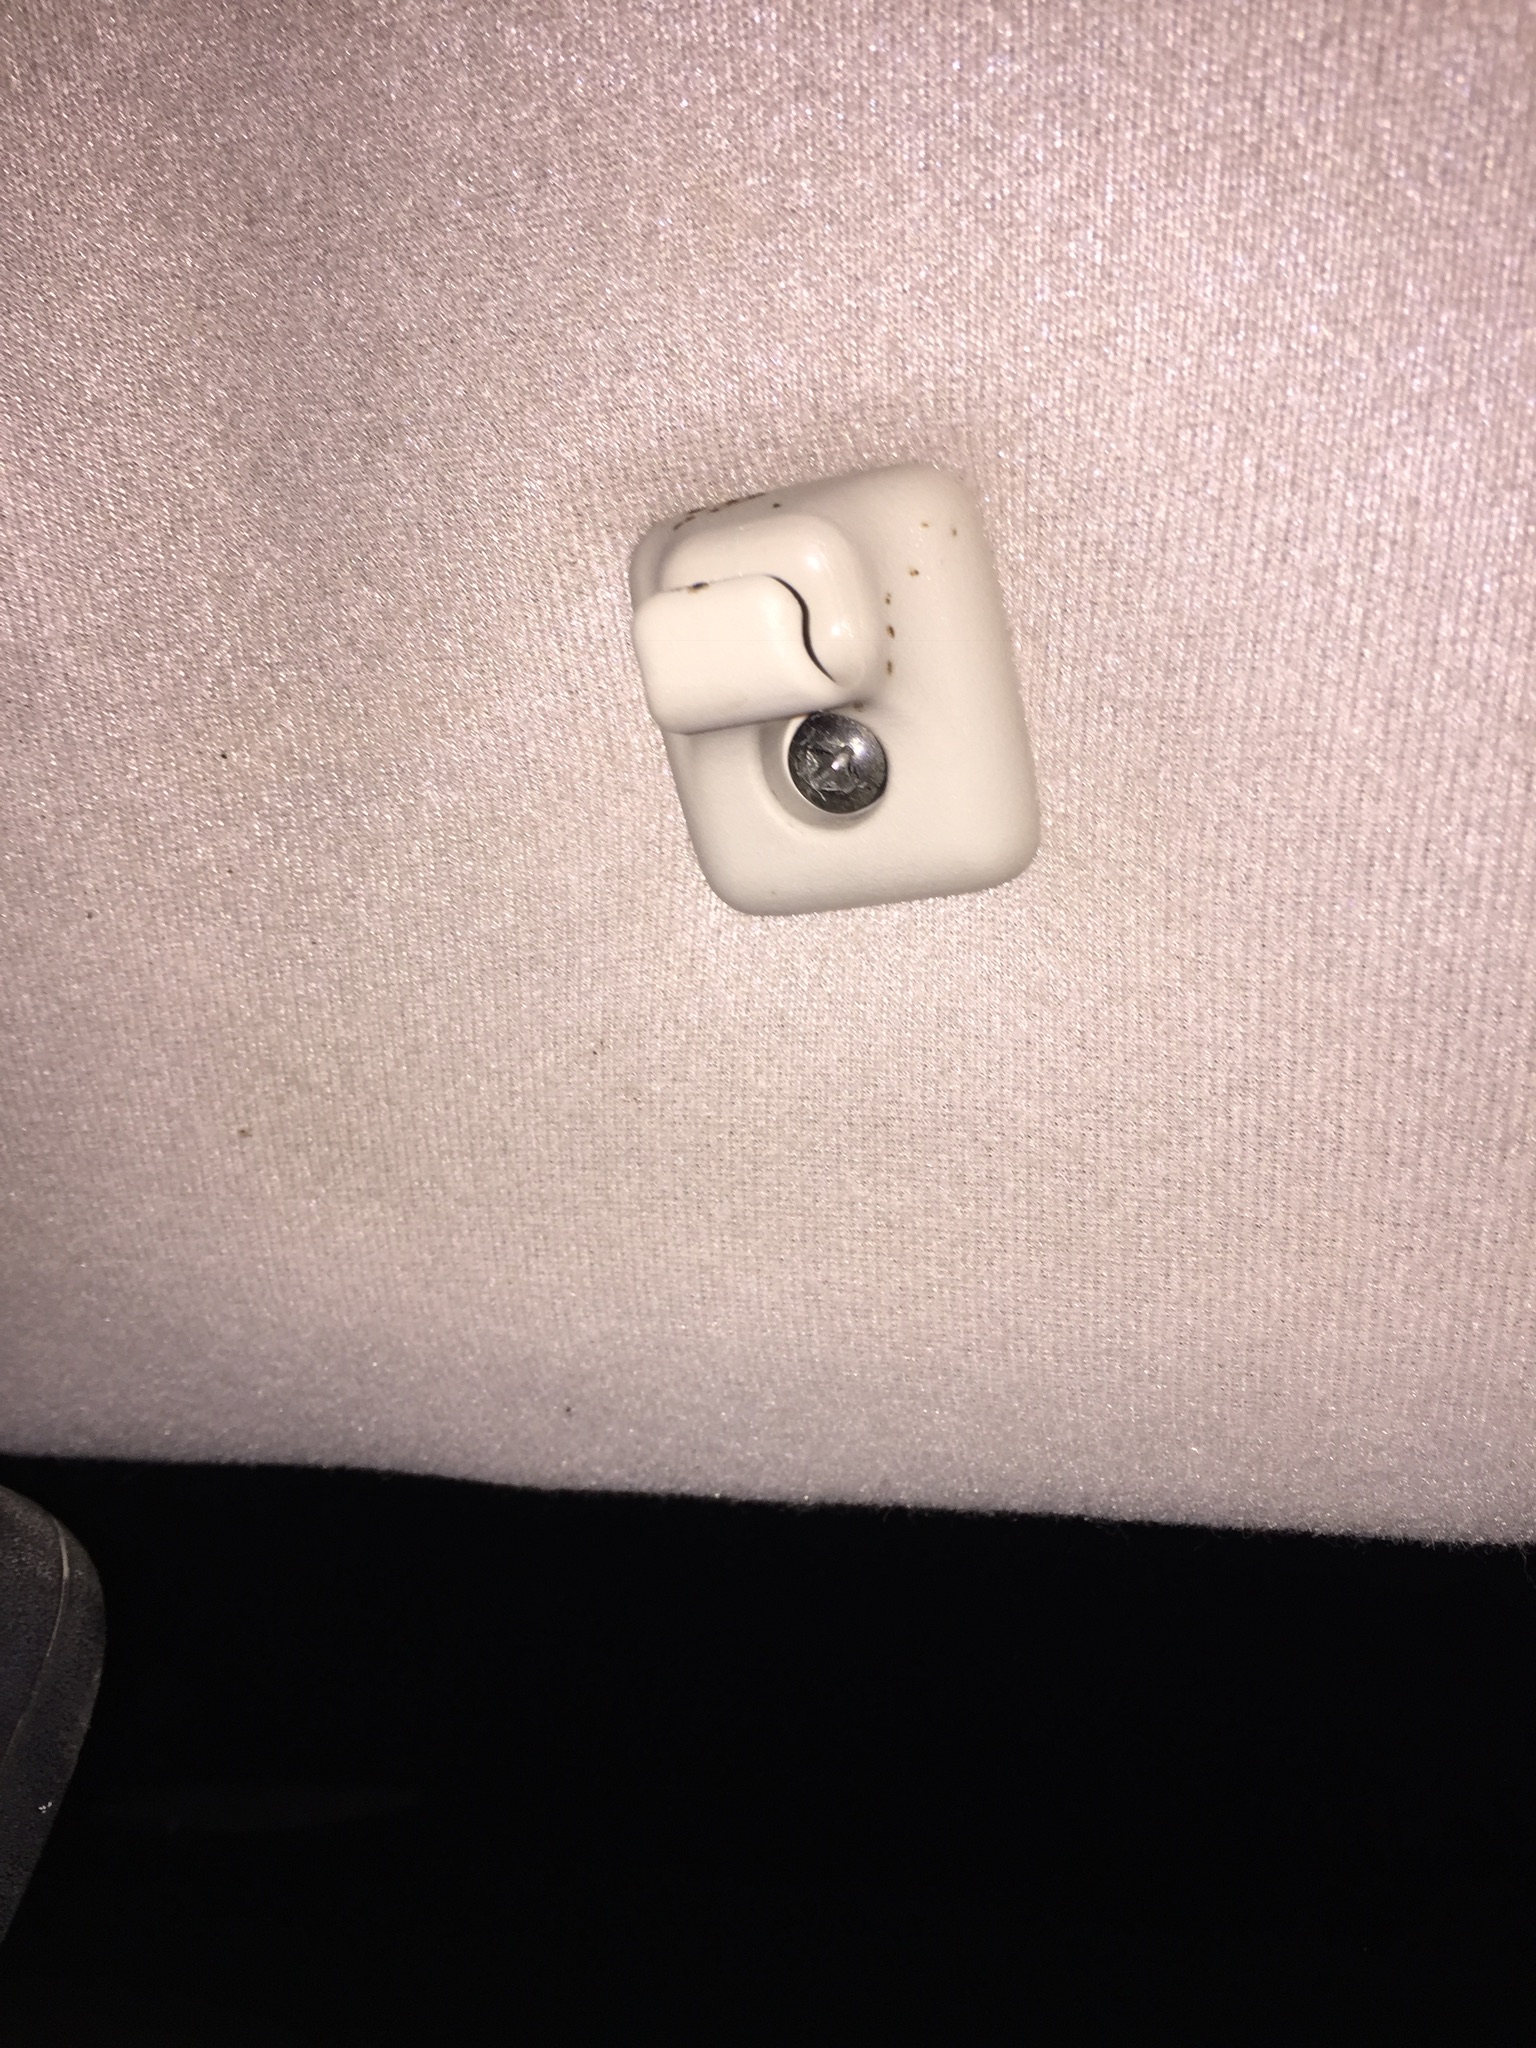
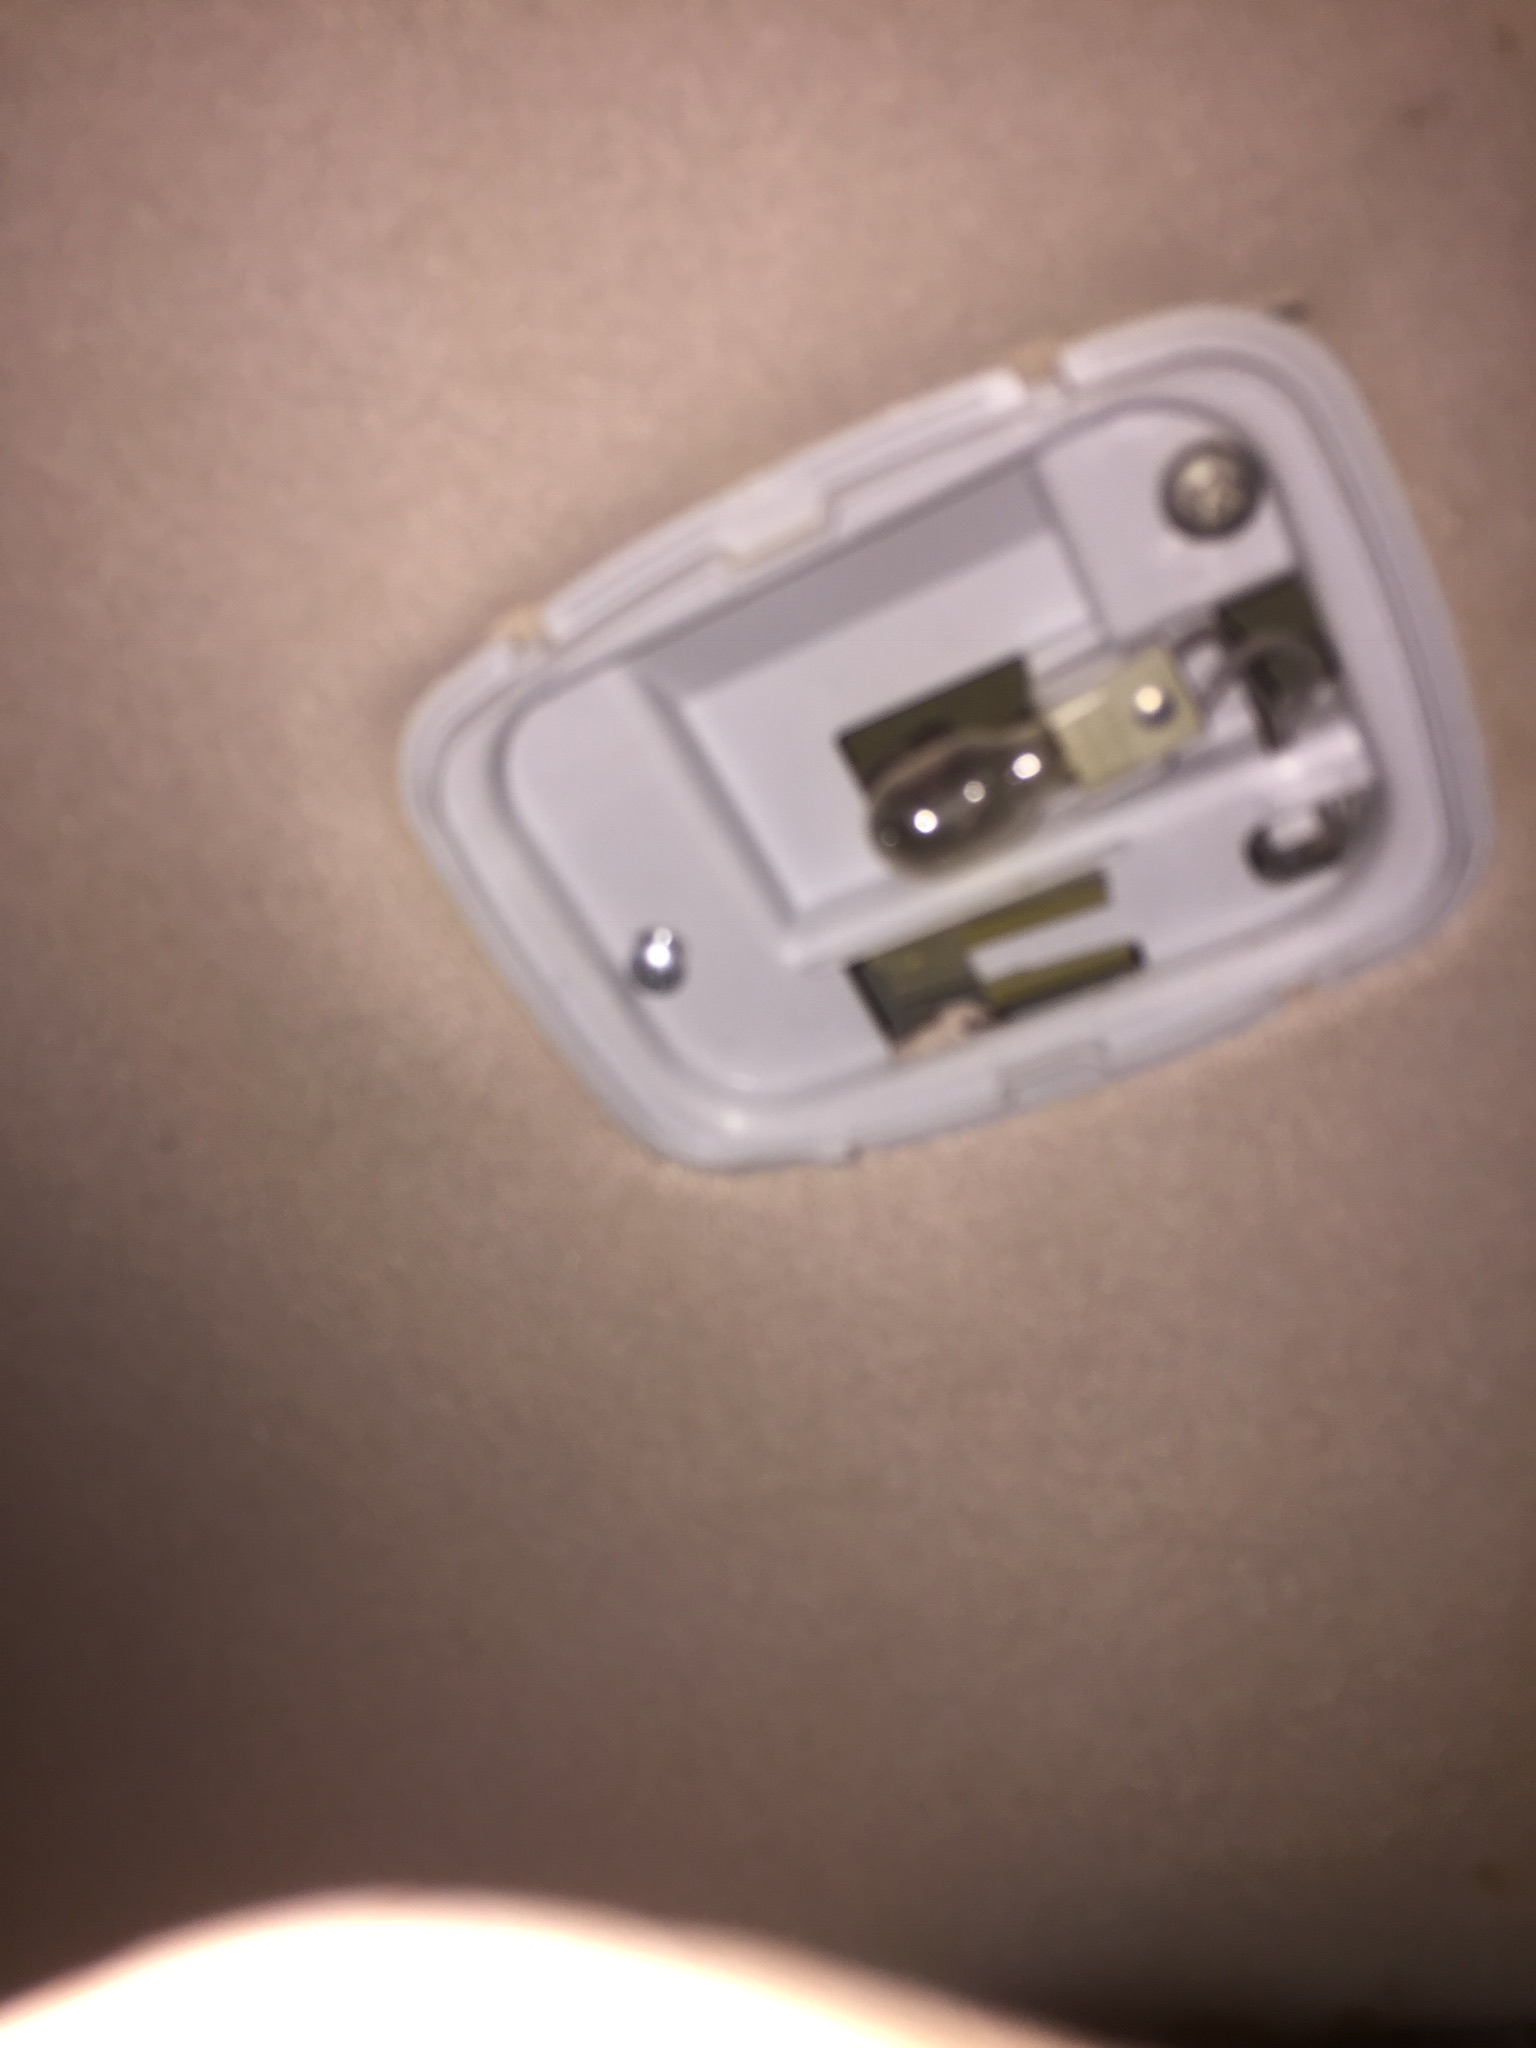
6. Remove the dome light cover, and then pull off the two screws holding it on. Then remove the connector on the back.
Attachment 28040
Attachment 28041
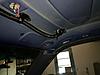
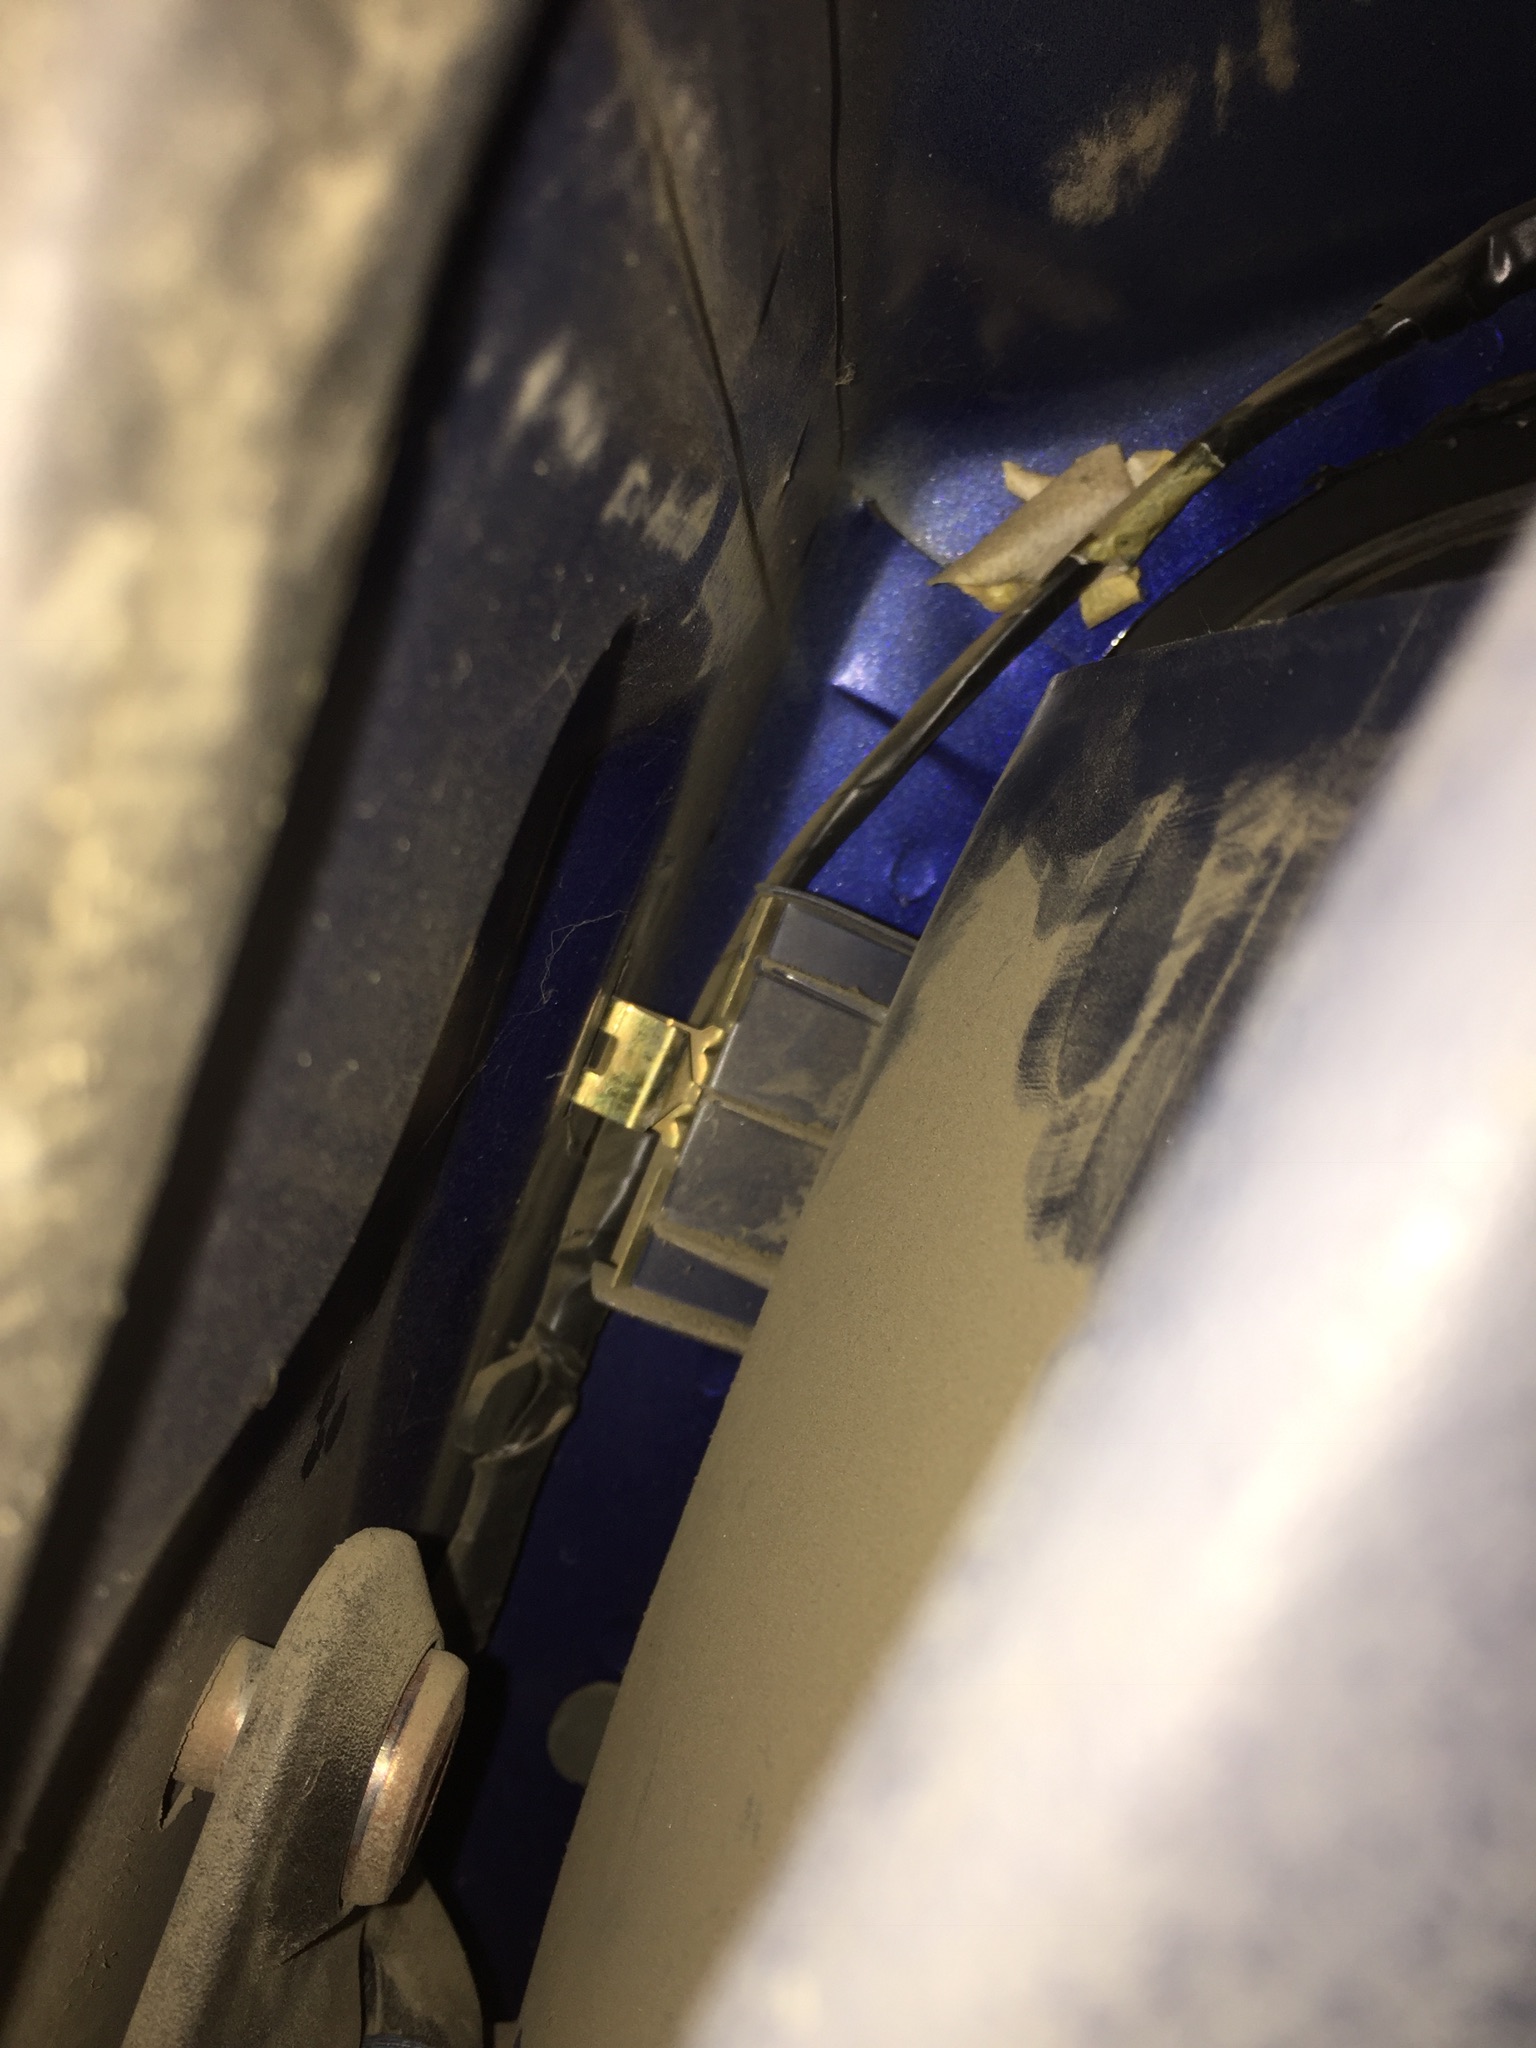
7. Next Losen, don't remove, the rear pillars. If you can, work your fingers down the top of the piller until you feel the clip, then pull straight back, towards center of the cab, and it should unclip. Don't pry side to side or you risk breaking the plastic, like I did on my drivers side (trying to finger out how to losen the pillars lol) just losen the top clip and you'll be good.
Attachment 28042
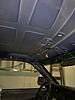
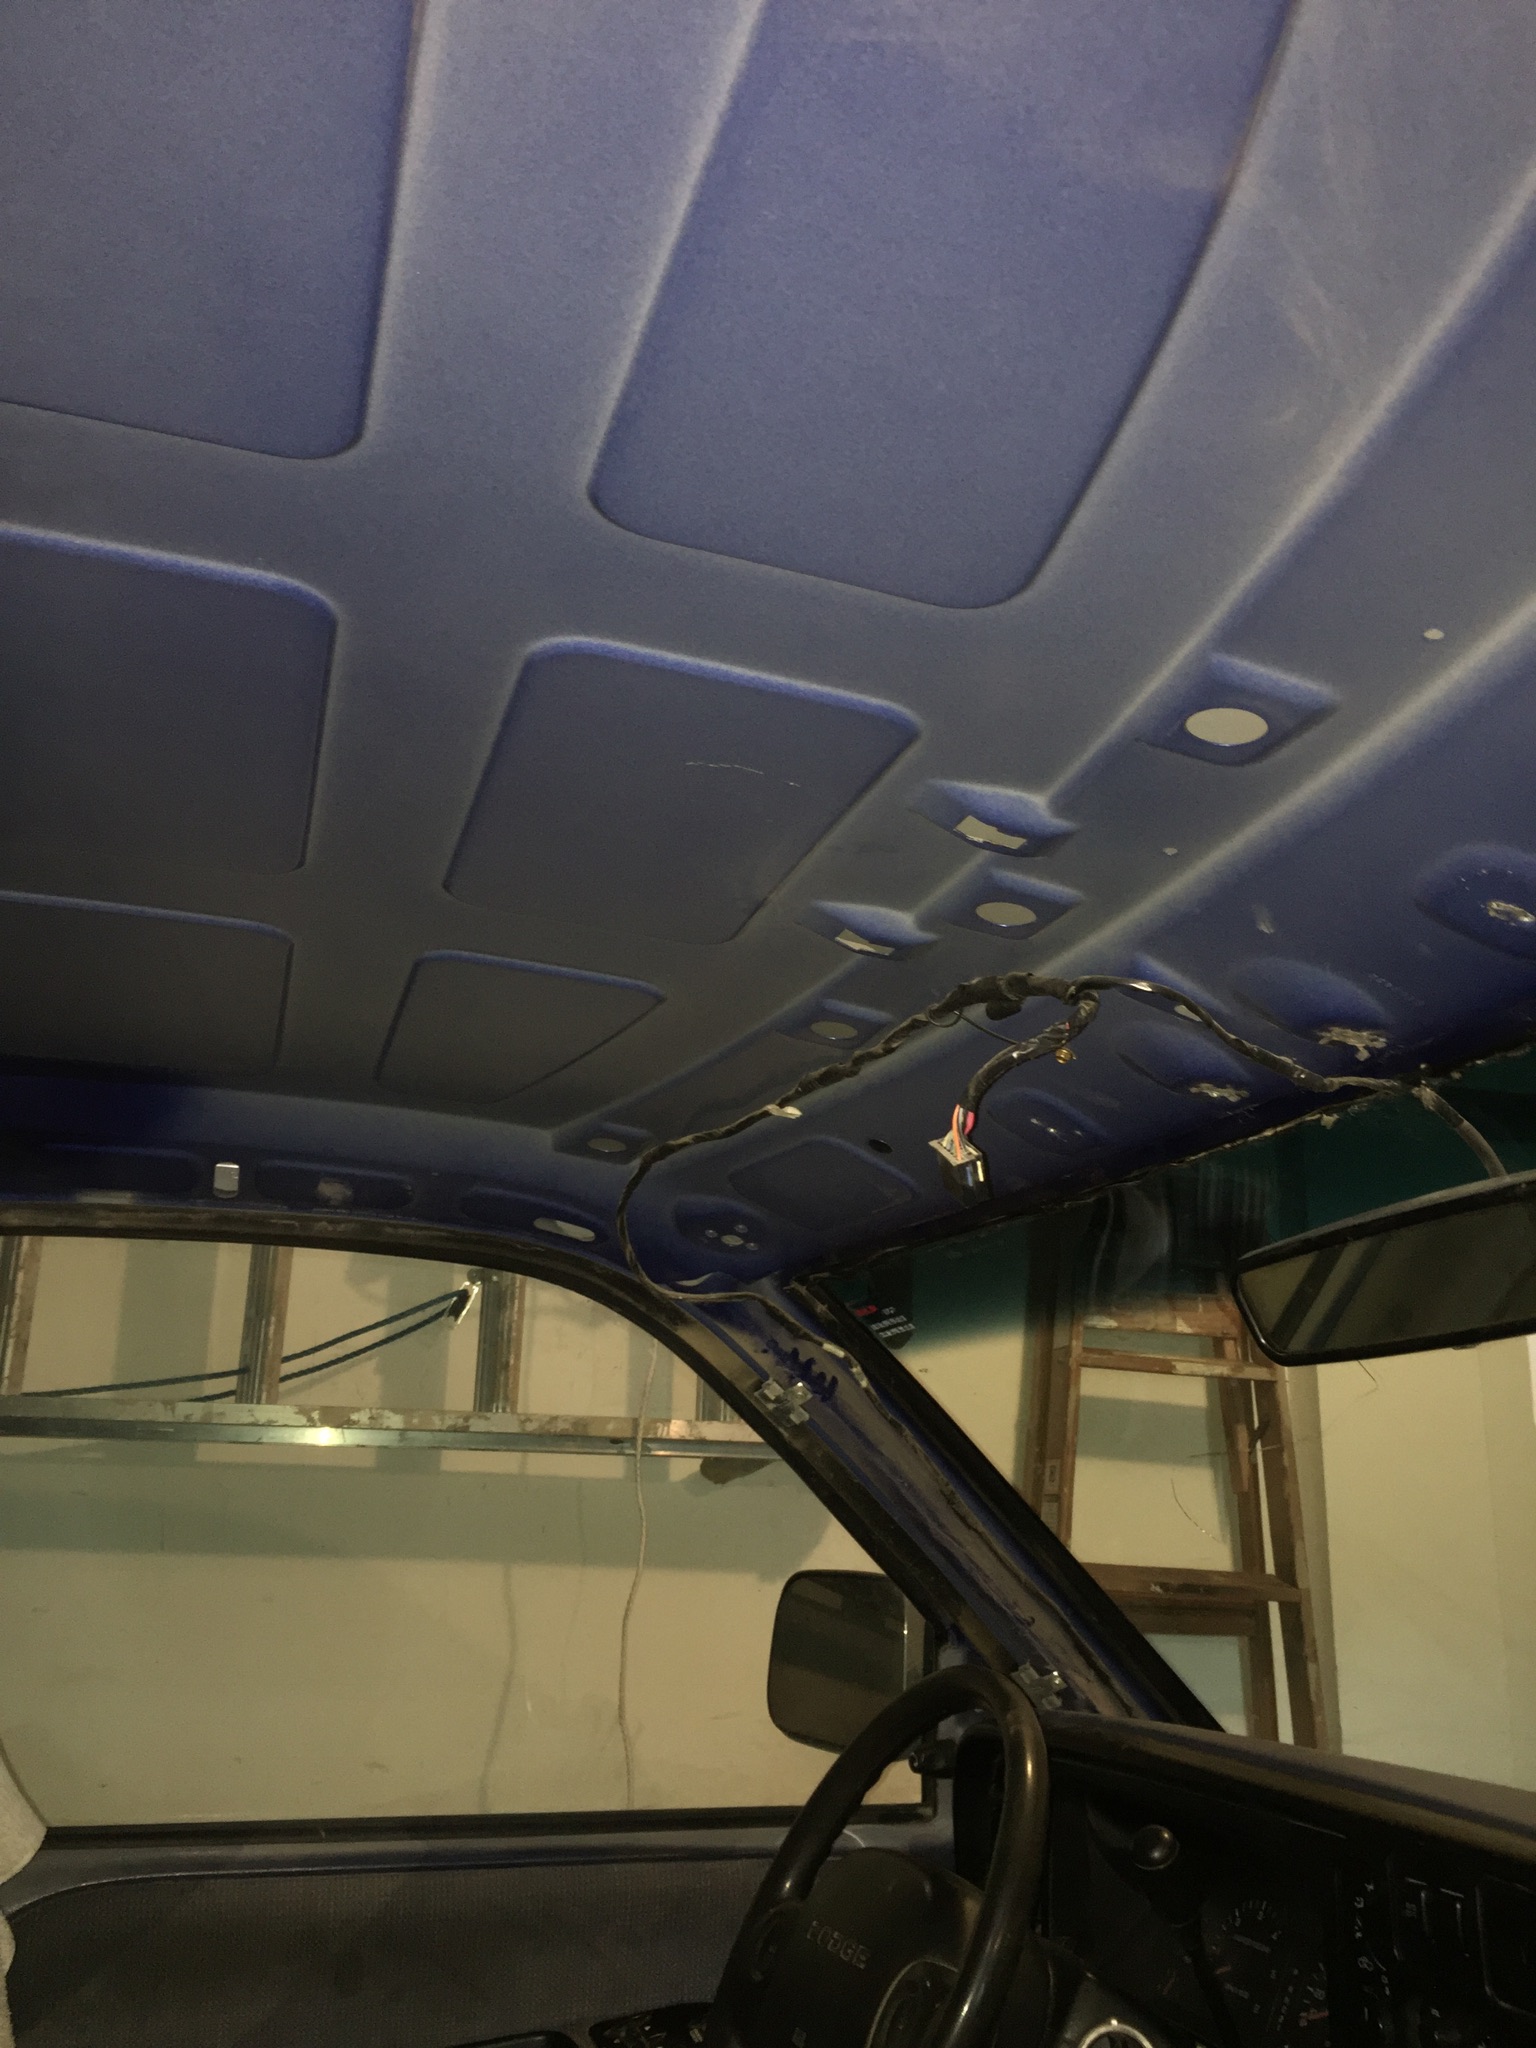
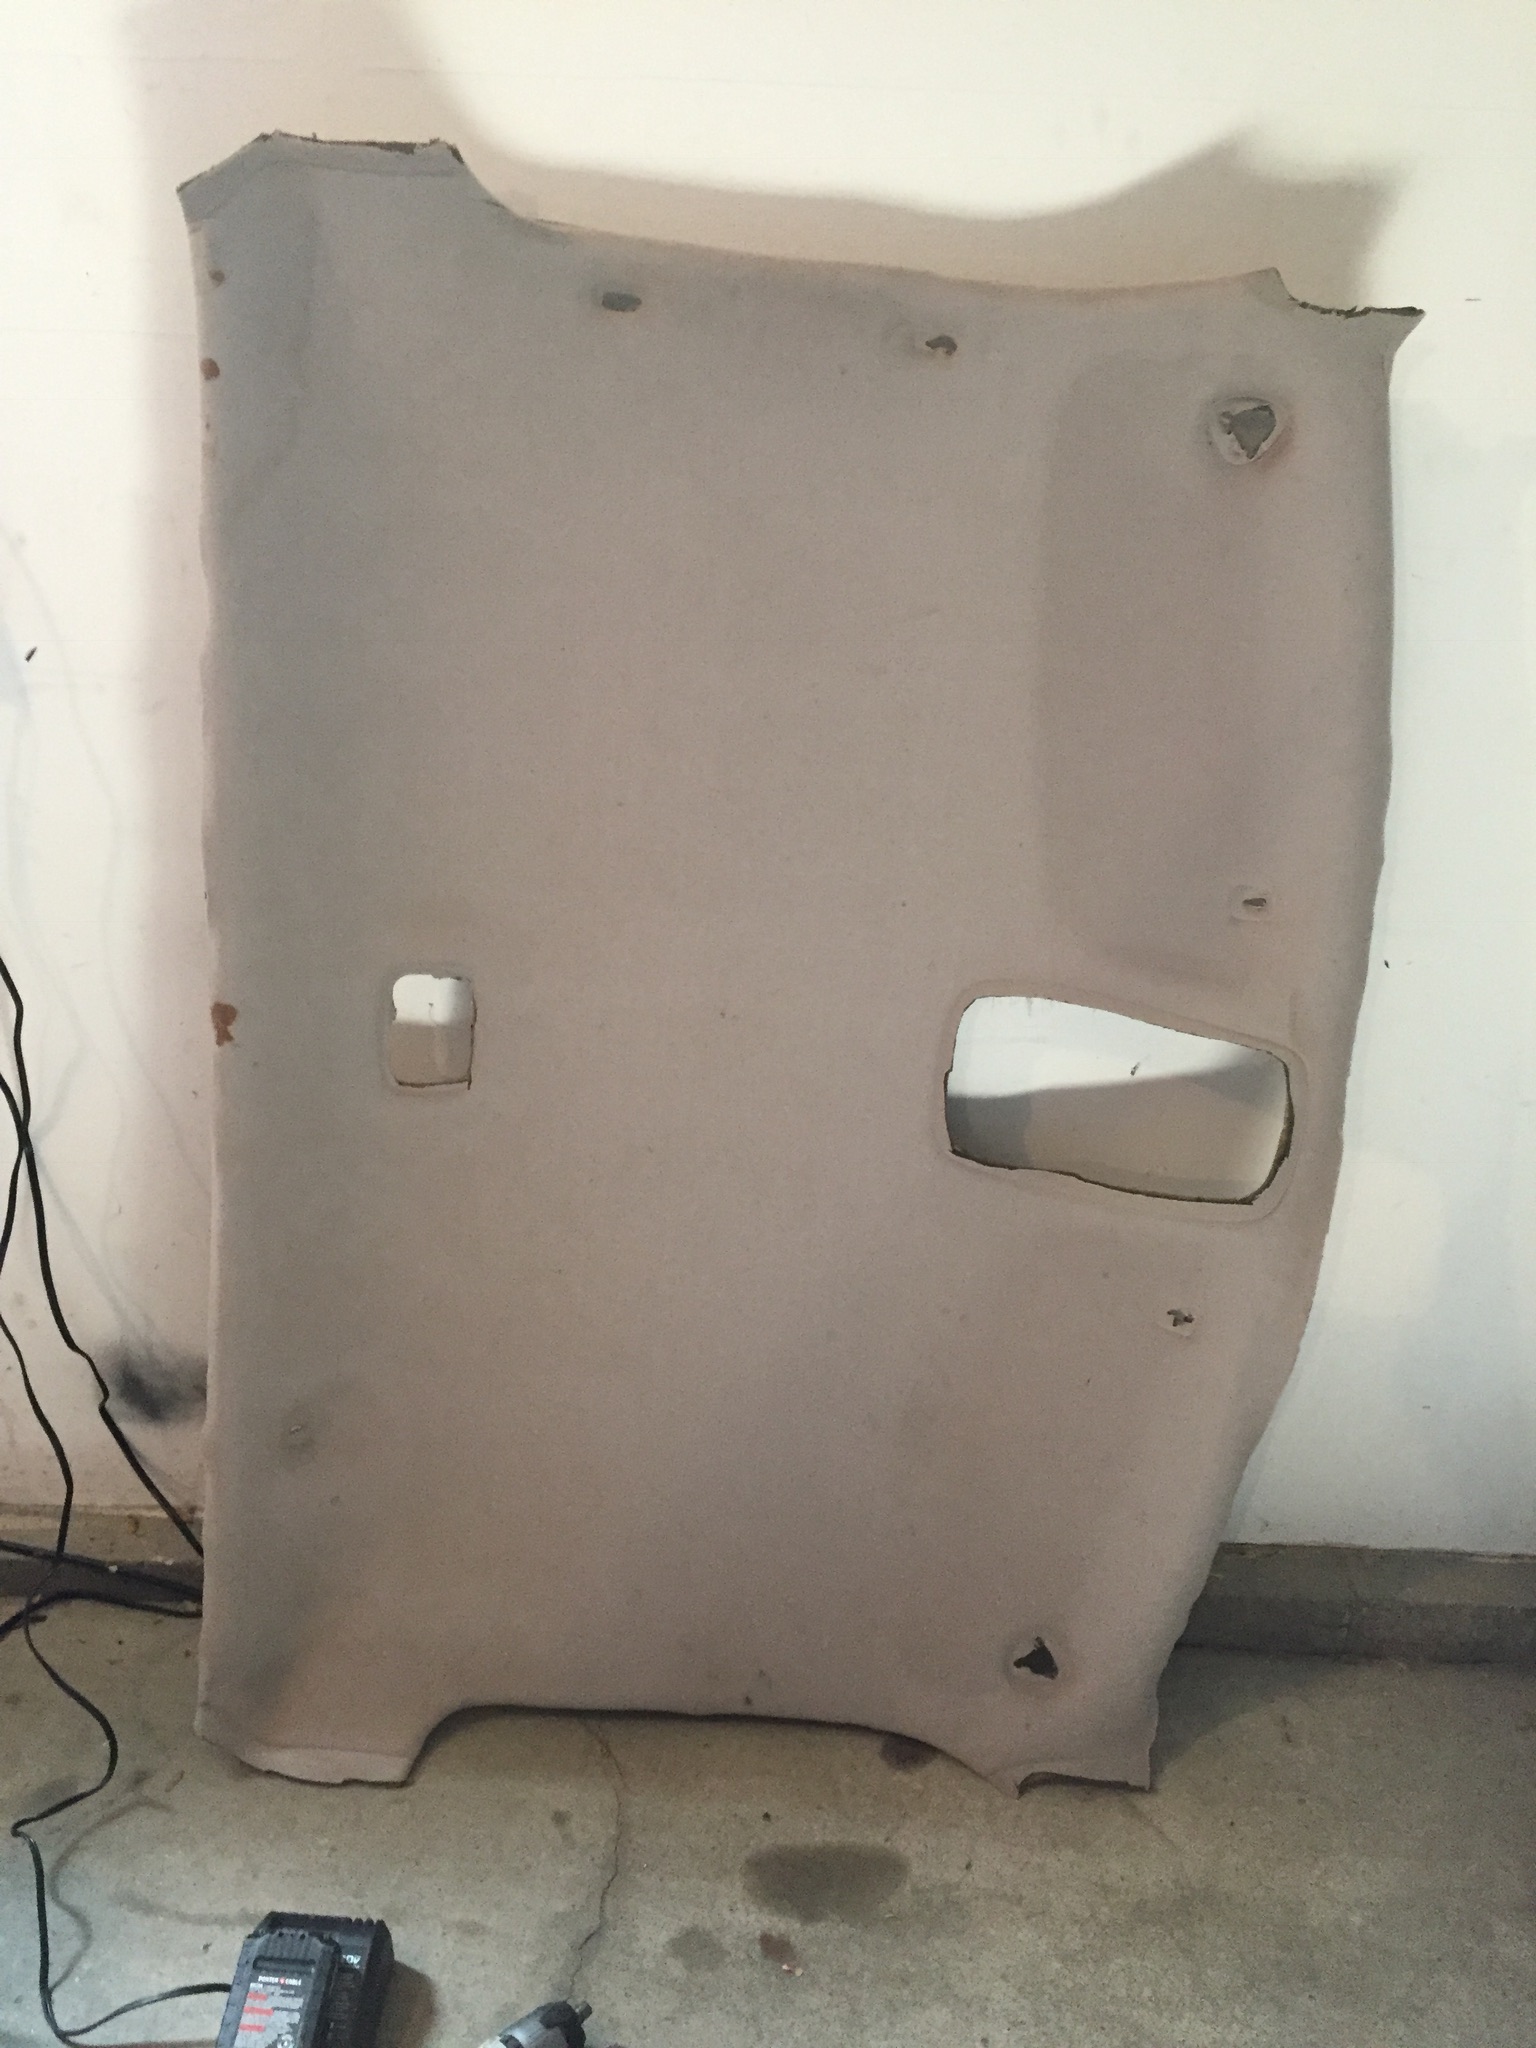
8. Now push the headliner forward to release them from the rear pillars, and then push it back, and then foreword again towards the top of the dash, and pull the headliner out.
Attachment 28043
Attachment 28044
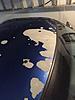
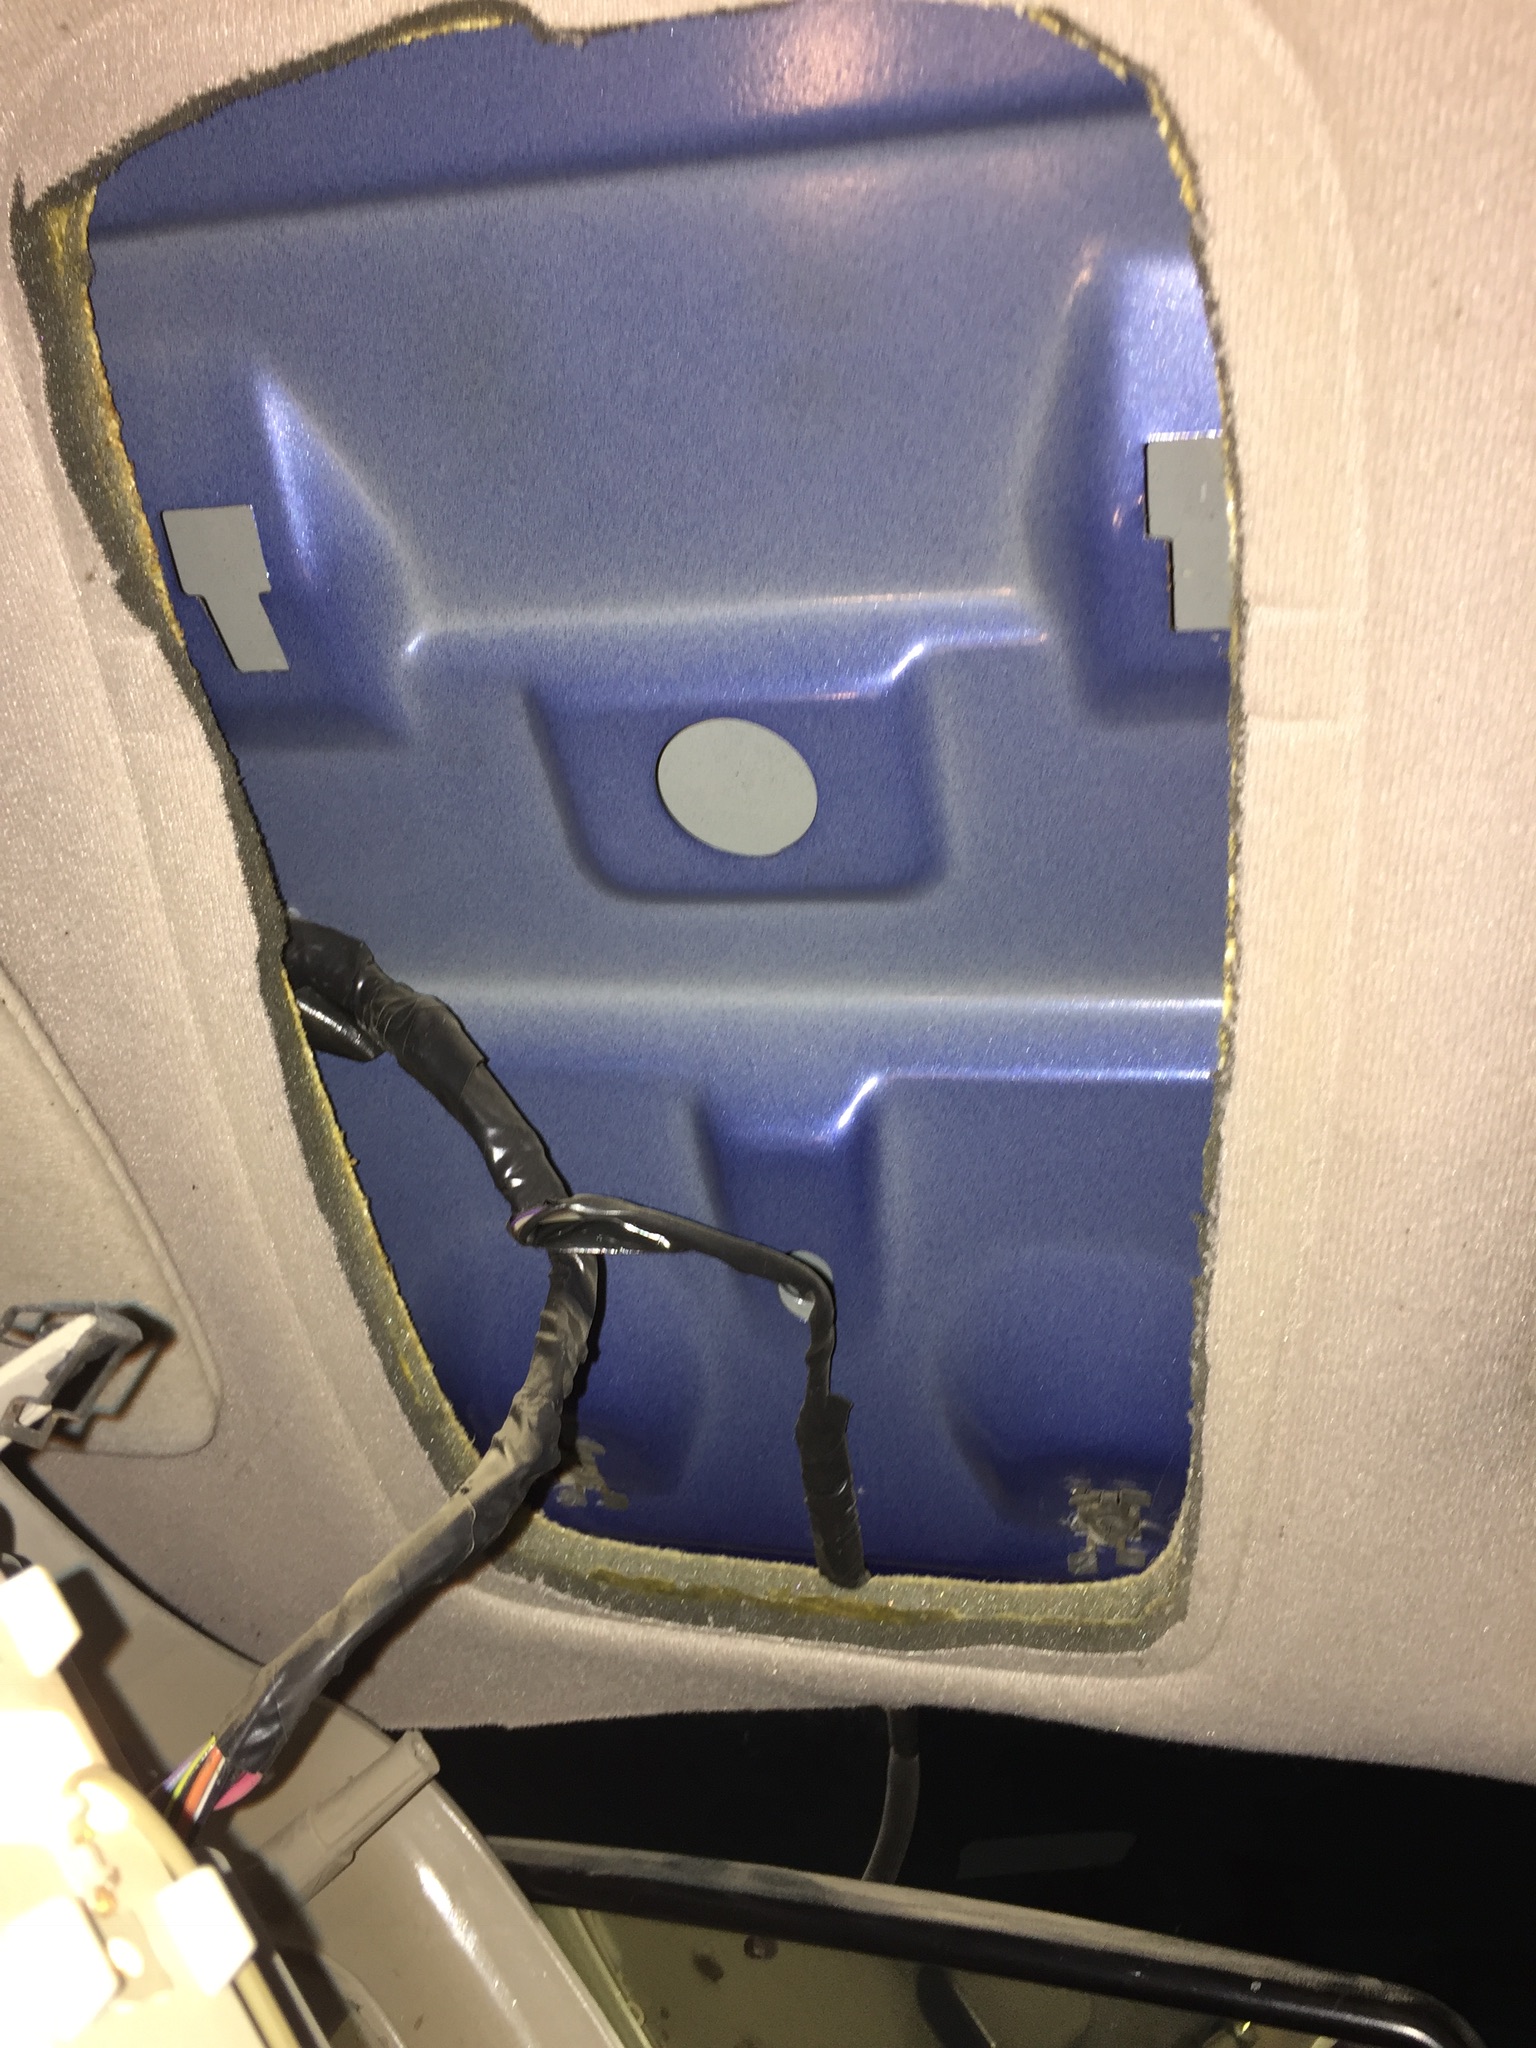
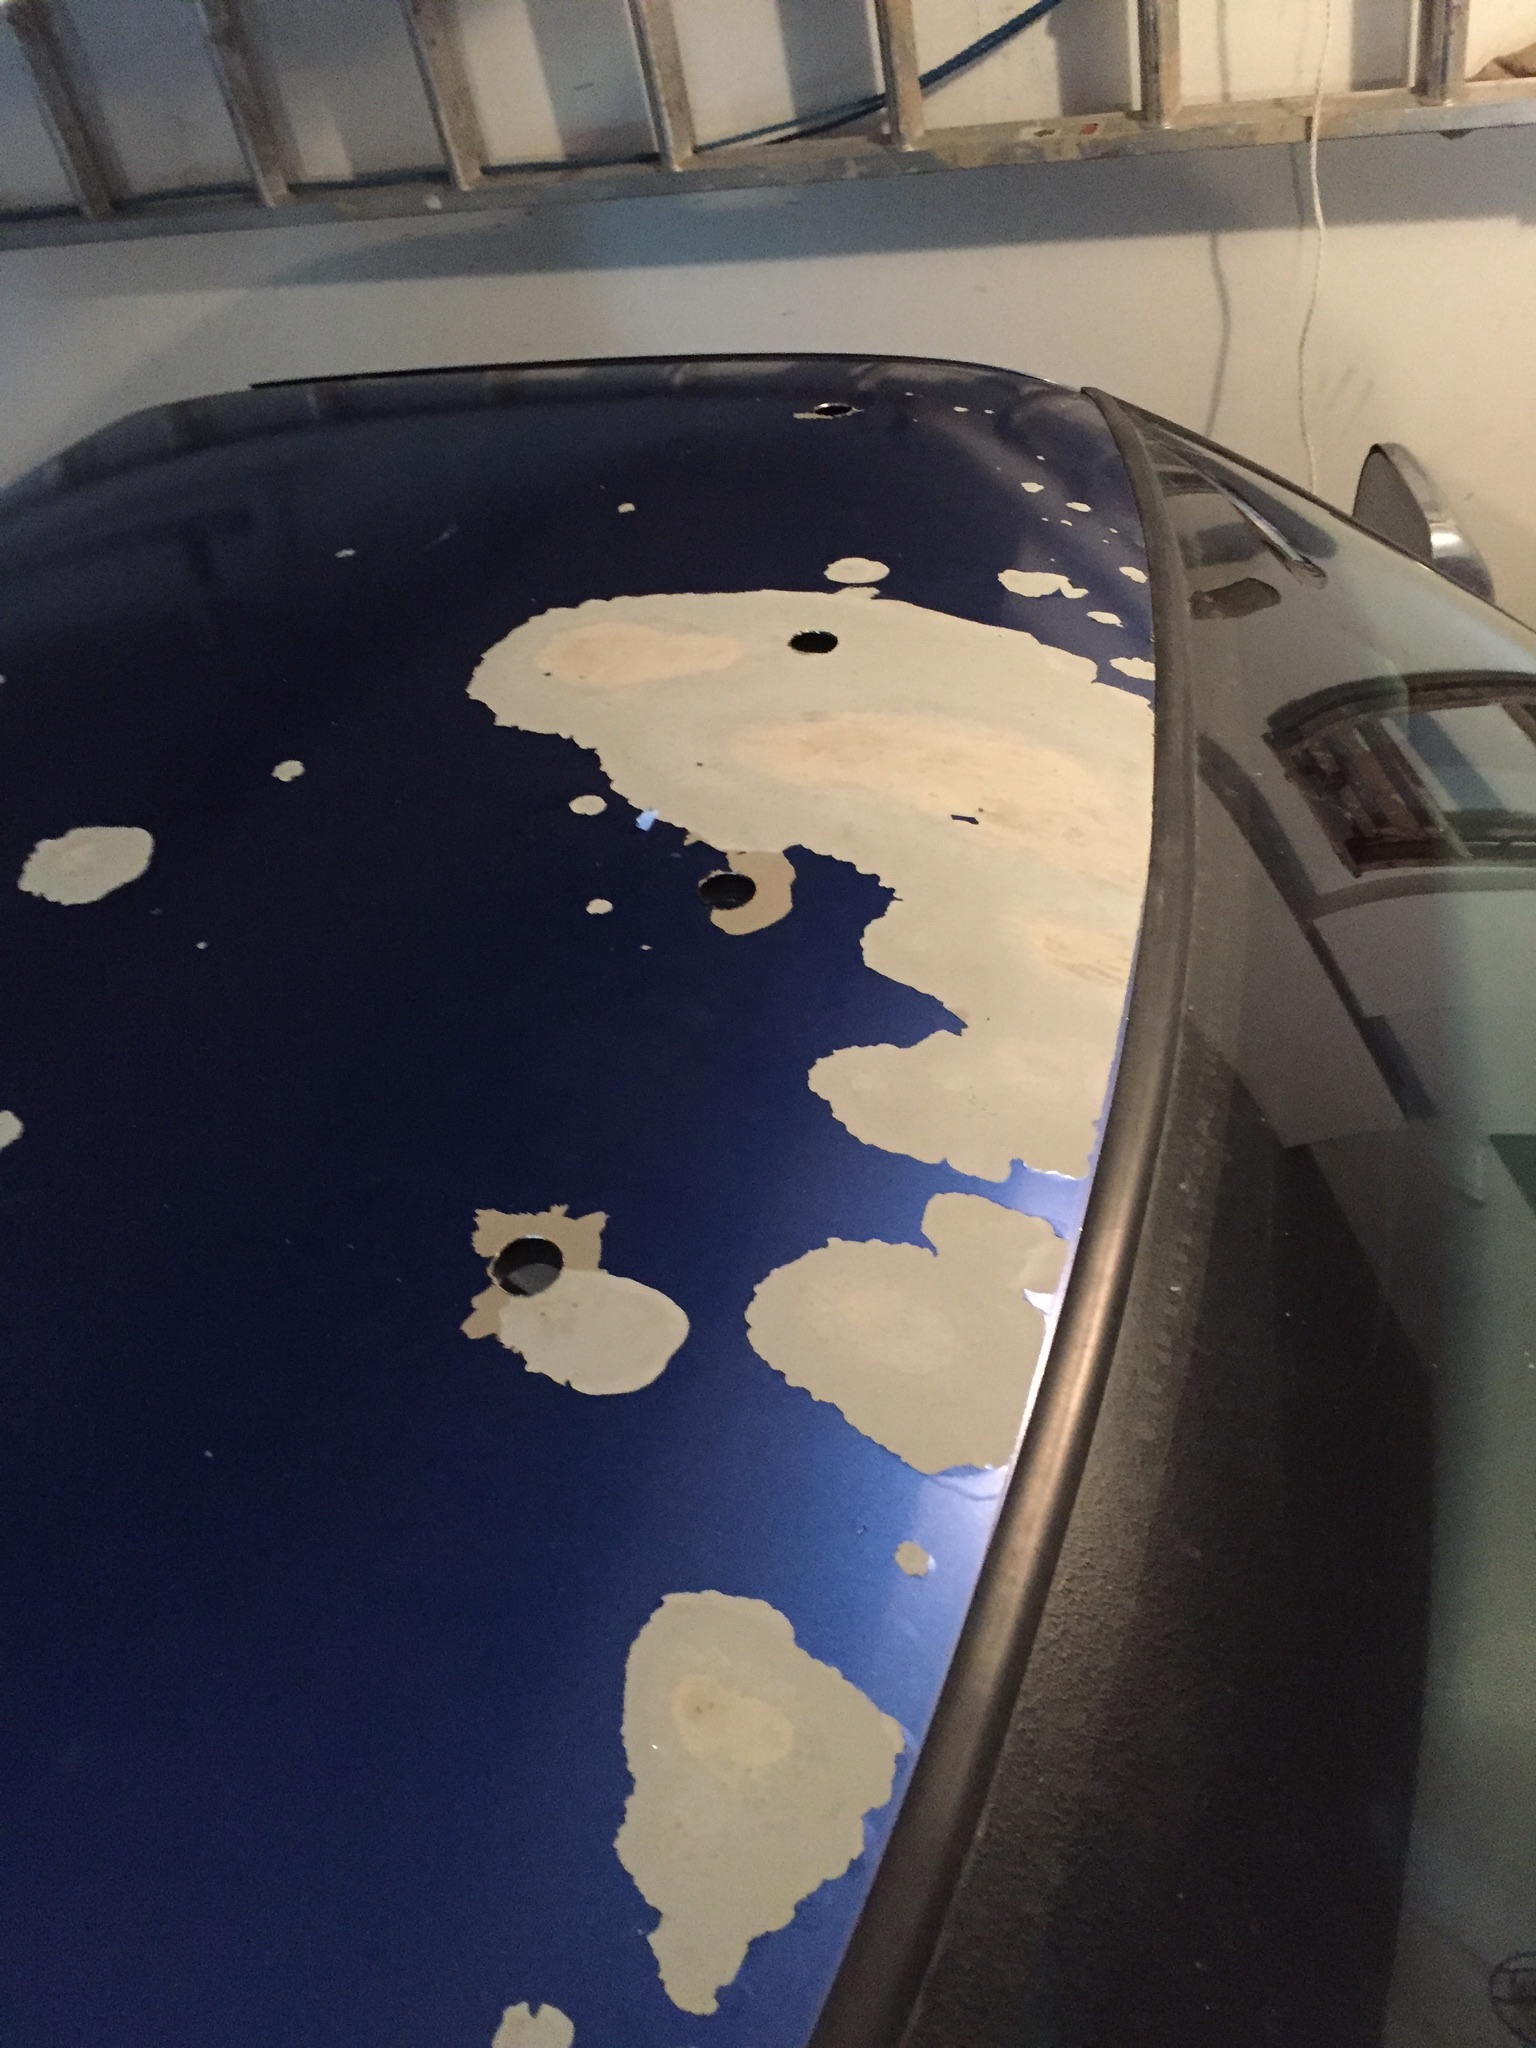
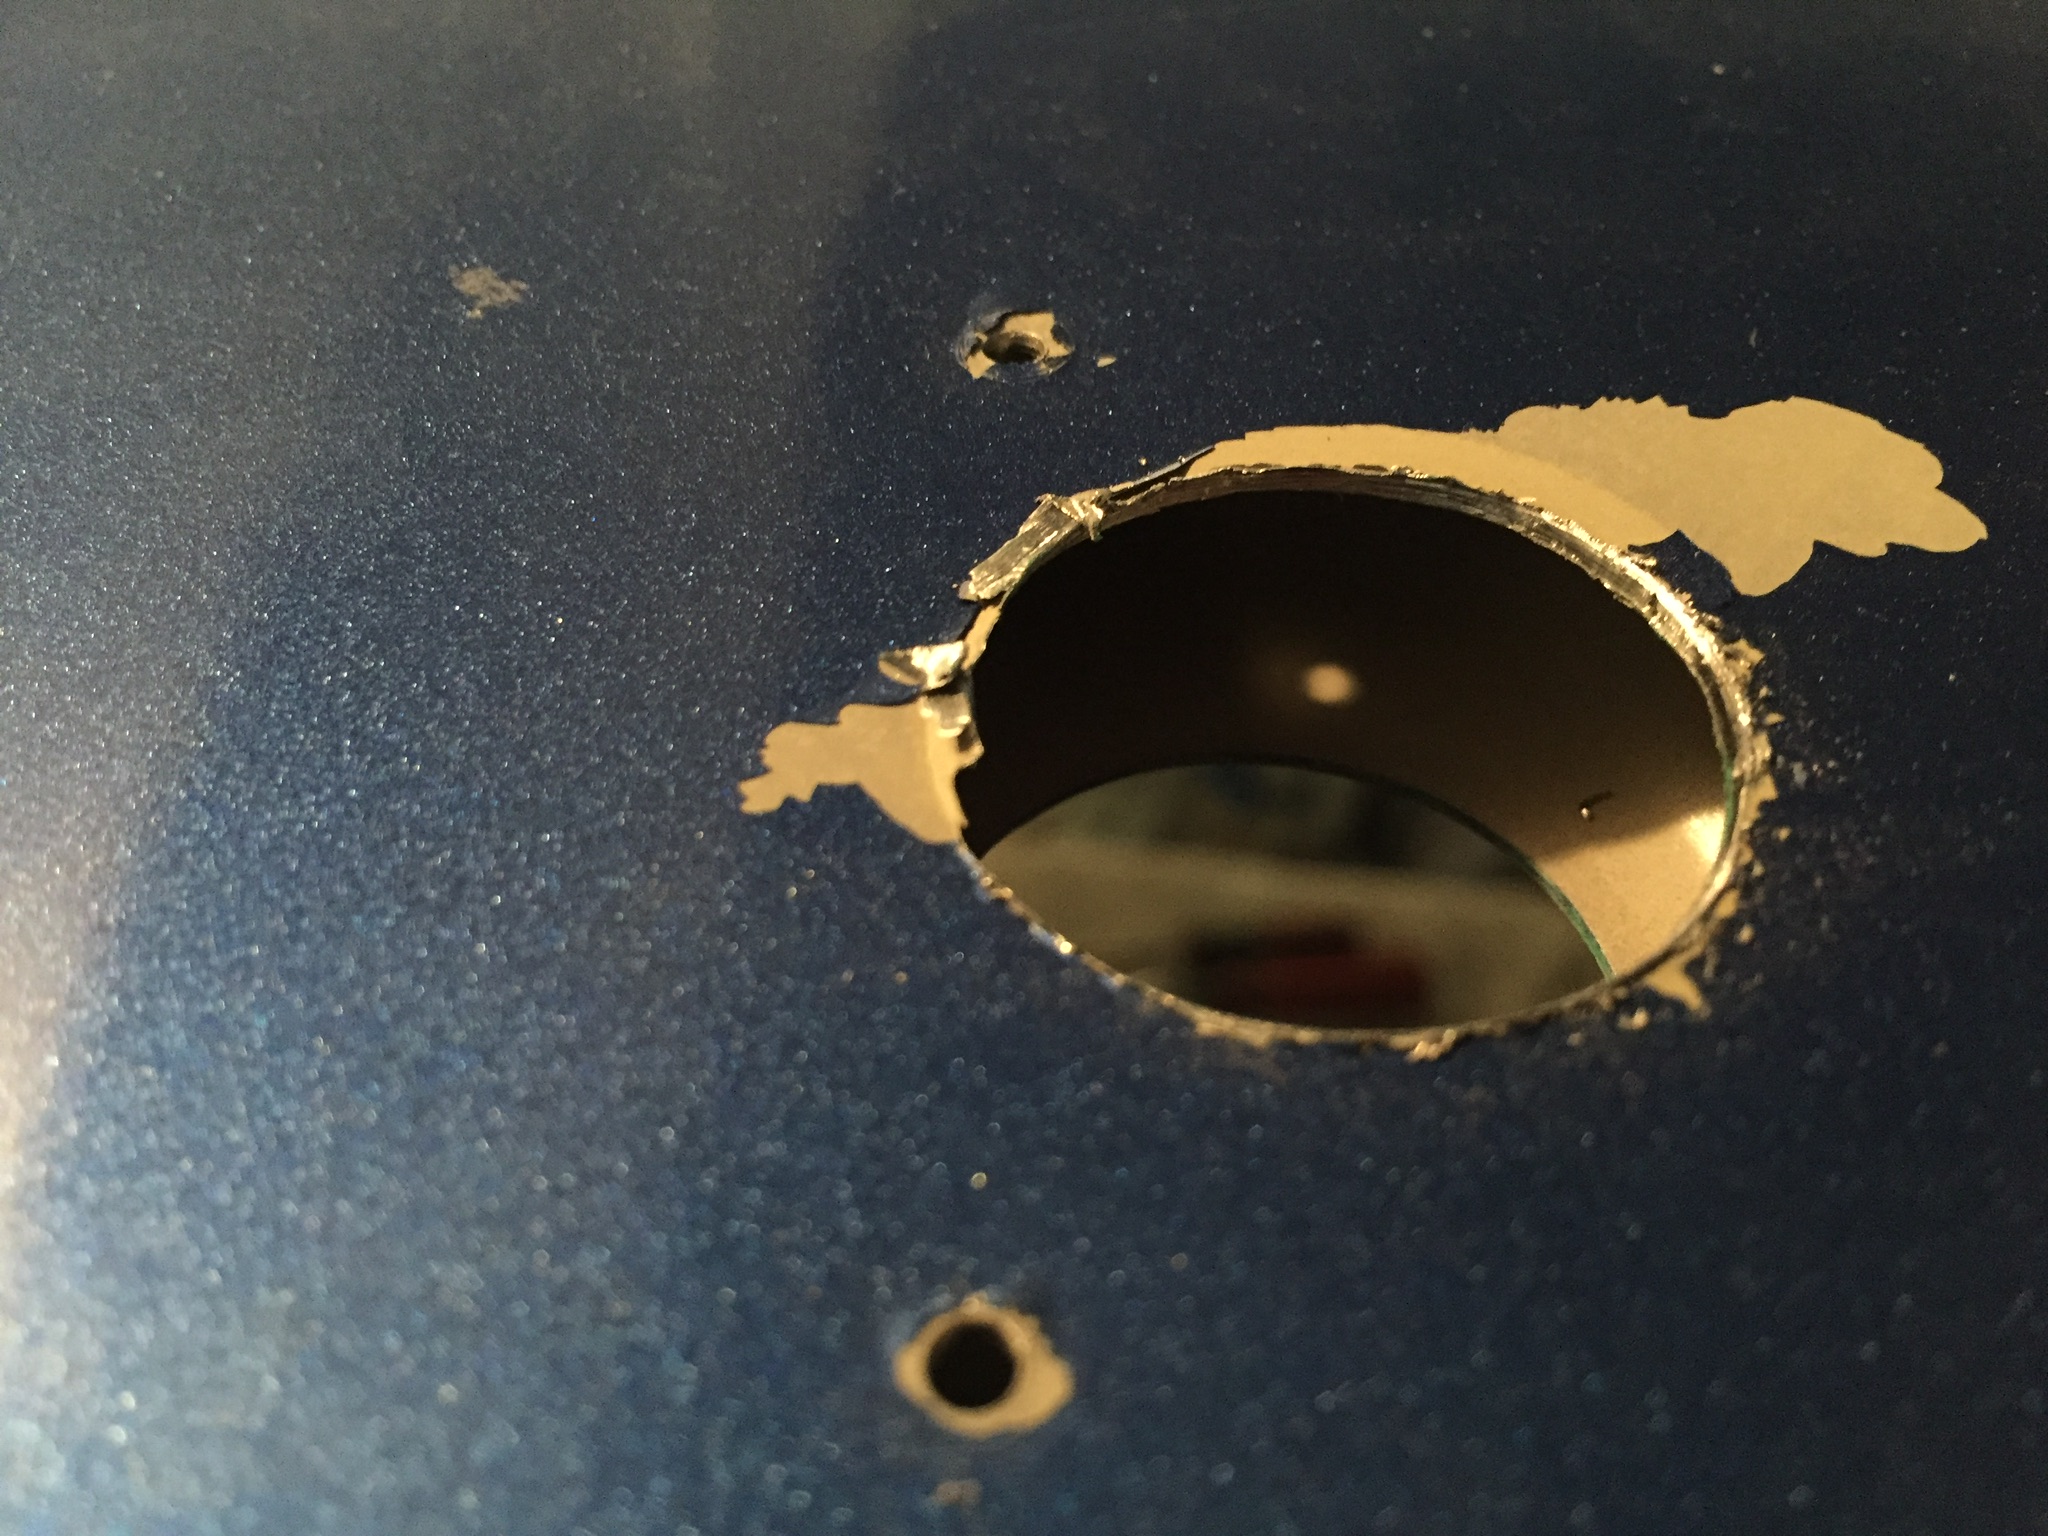
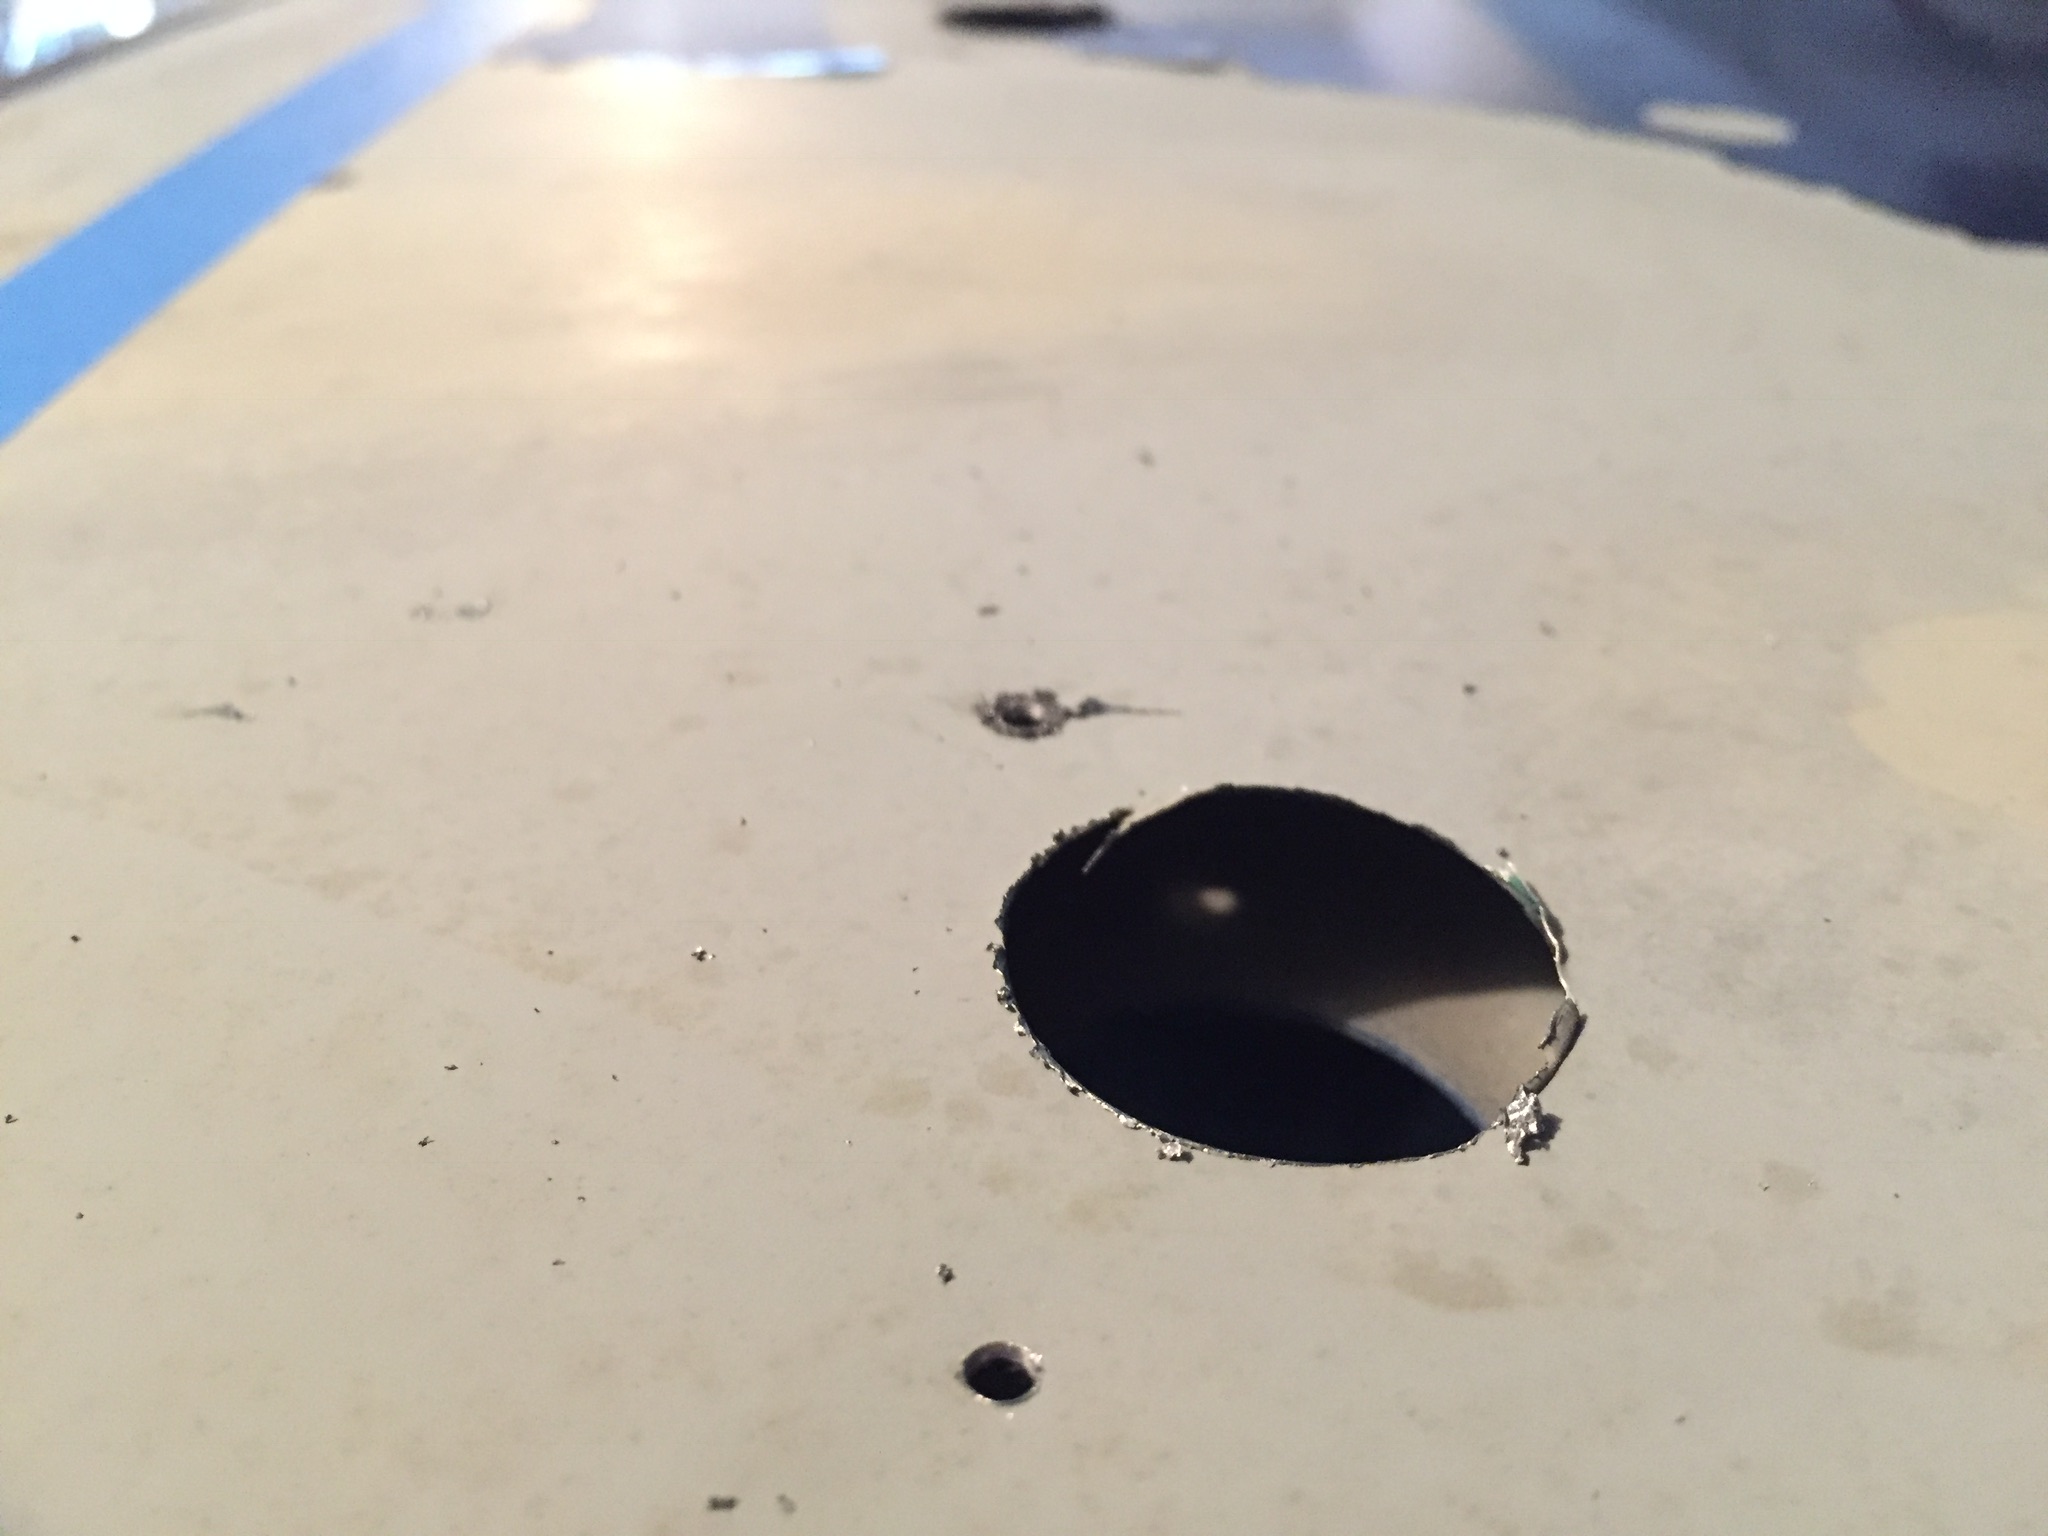
9. Now you can see the holes for the lights. 3 in the center, and two on either side. Take your center punch, and center punch the roof, inside the lower roof. Take a smaller drill bit drill out the center of each hole.
Attachment 28045
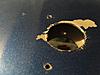
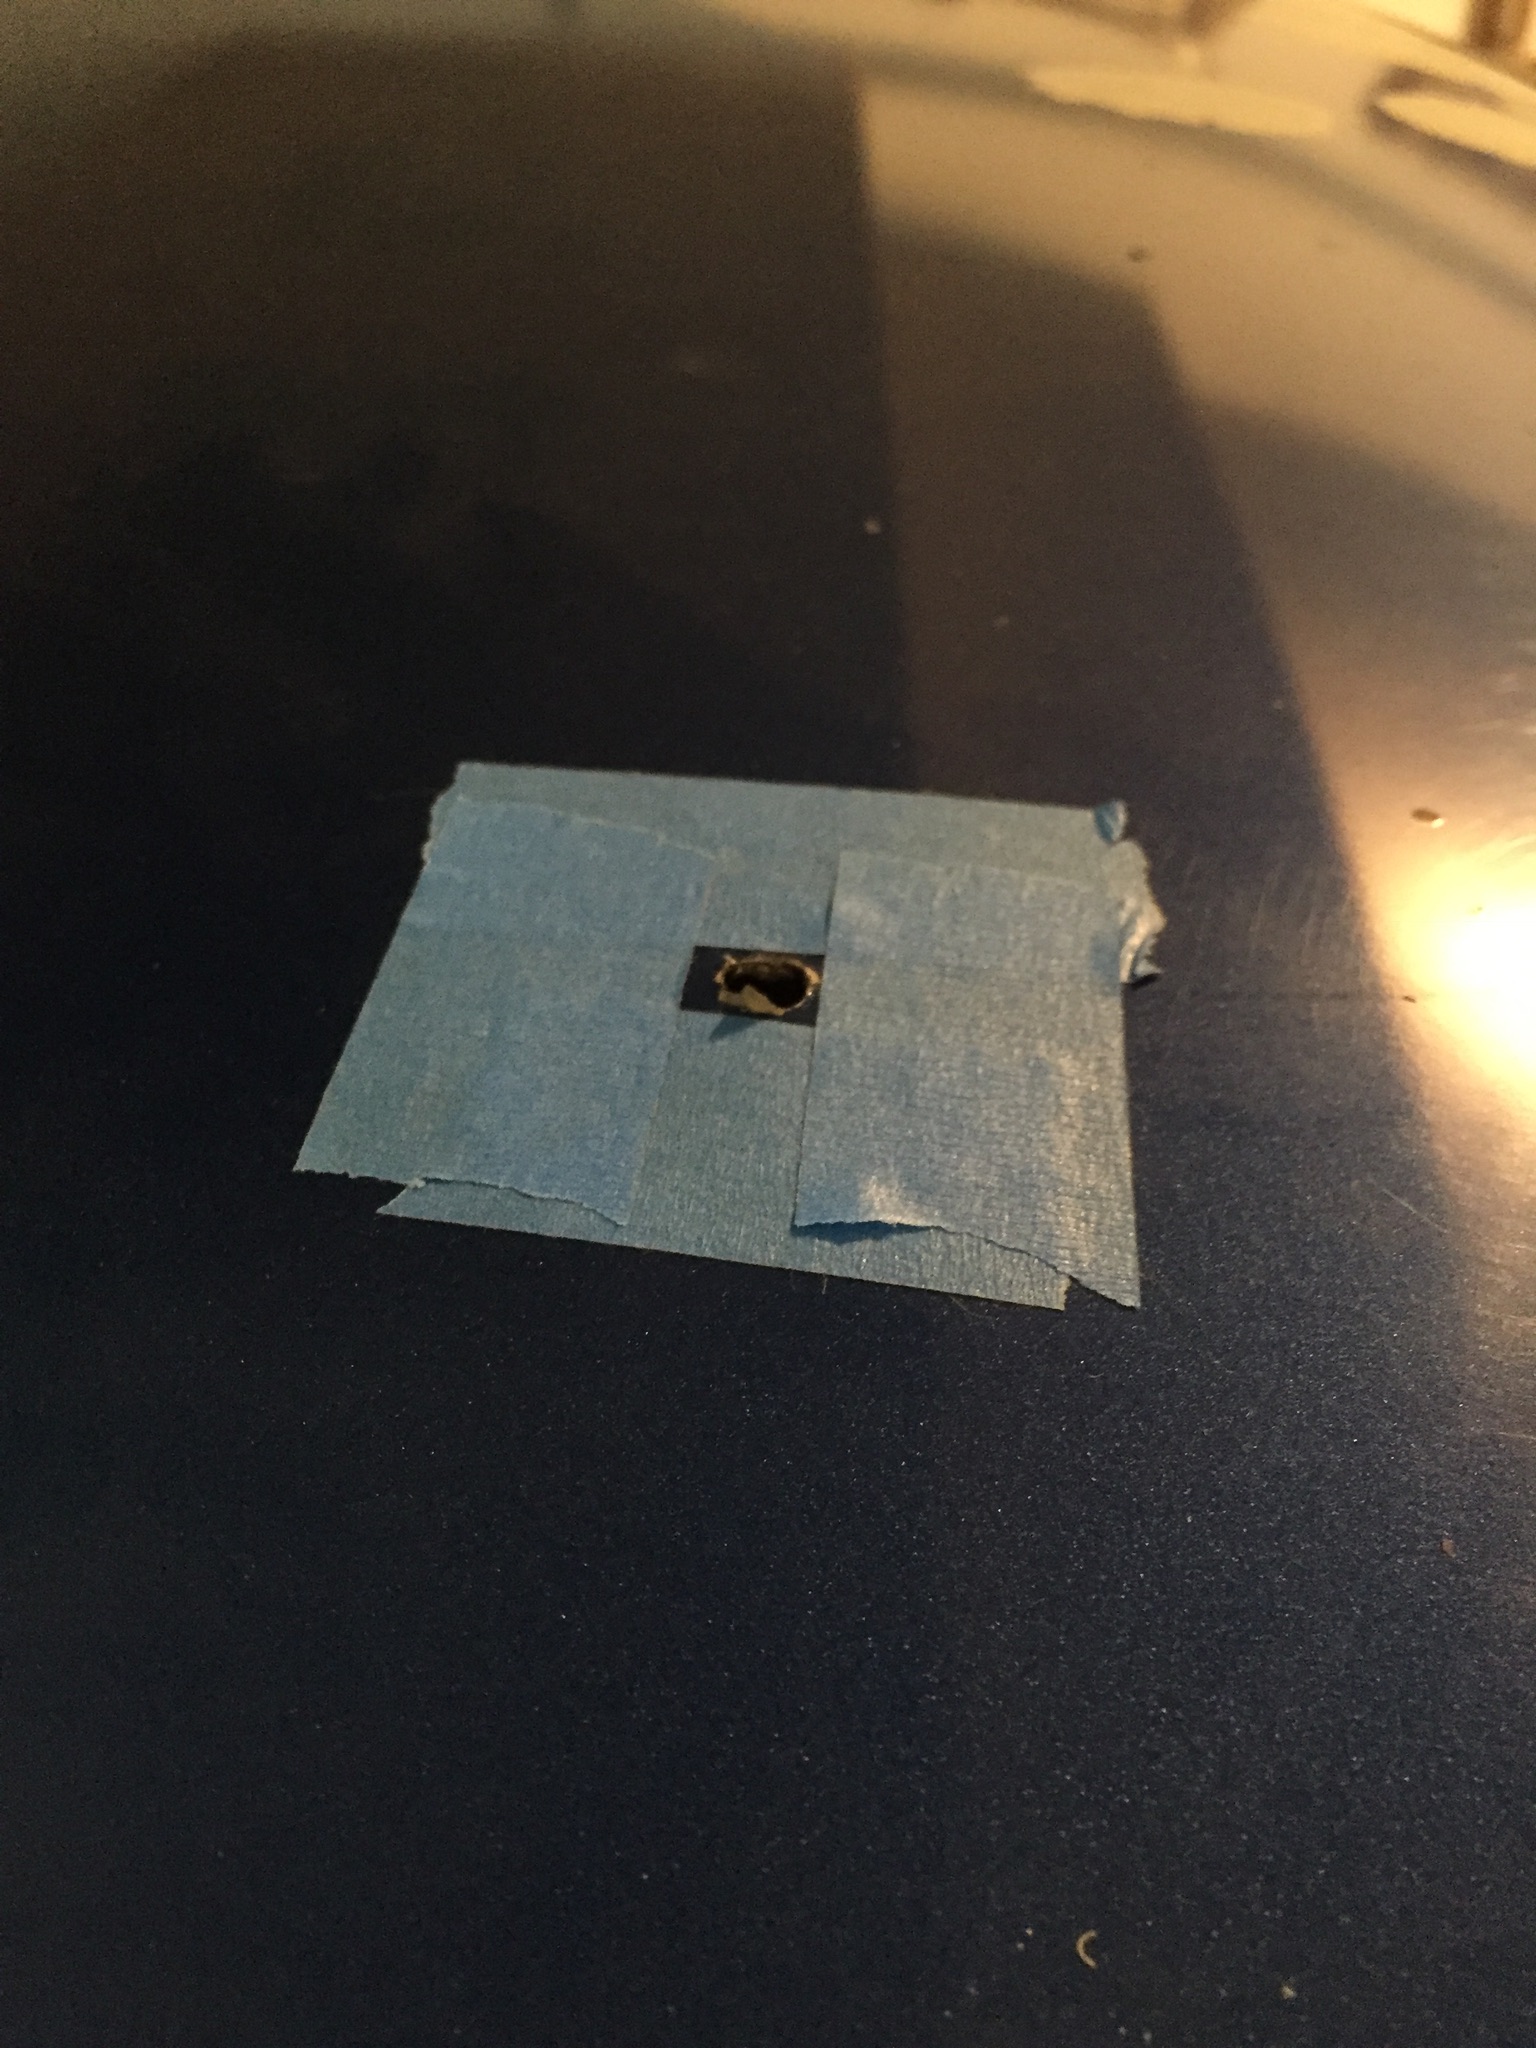
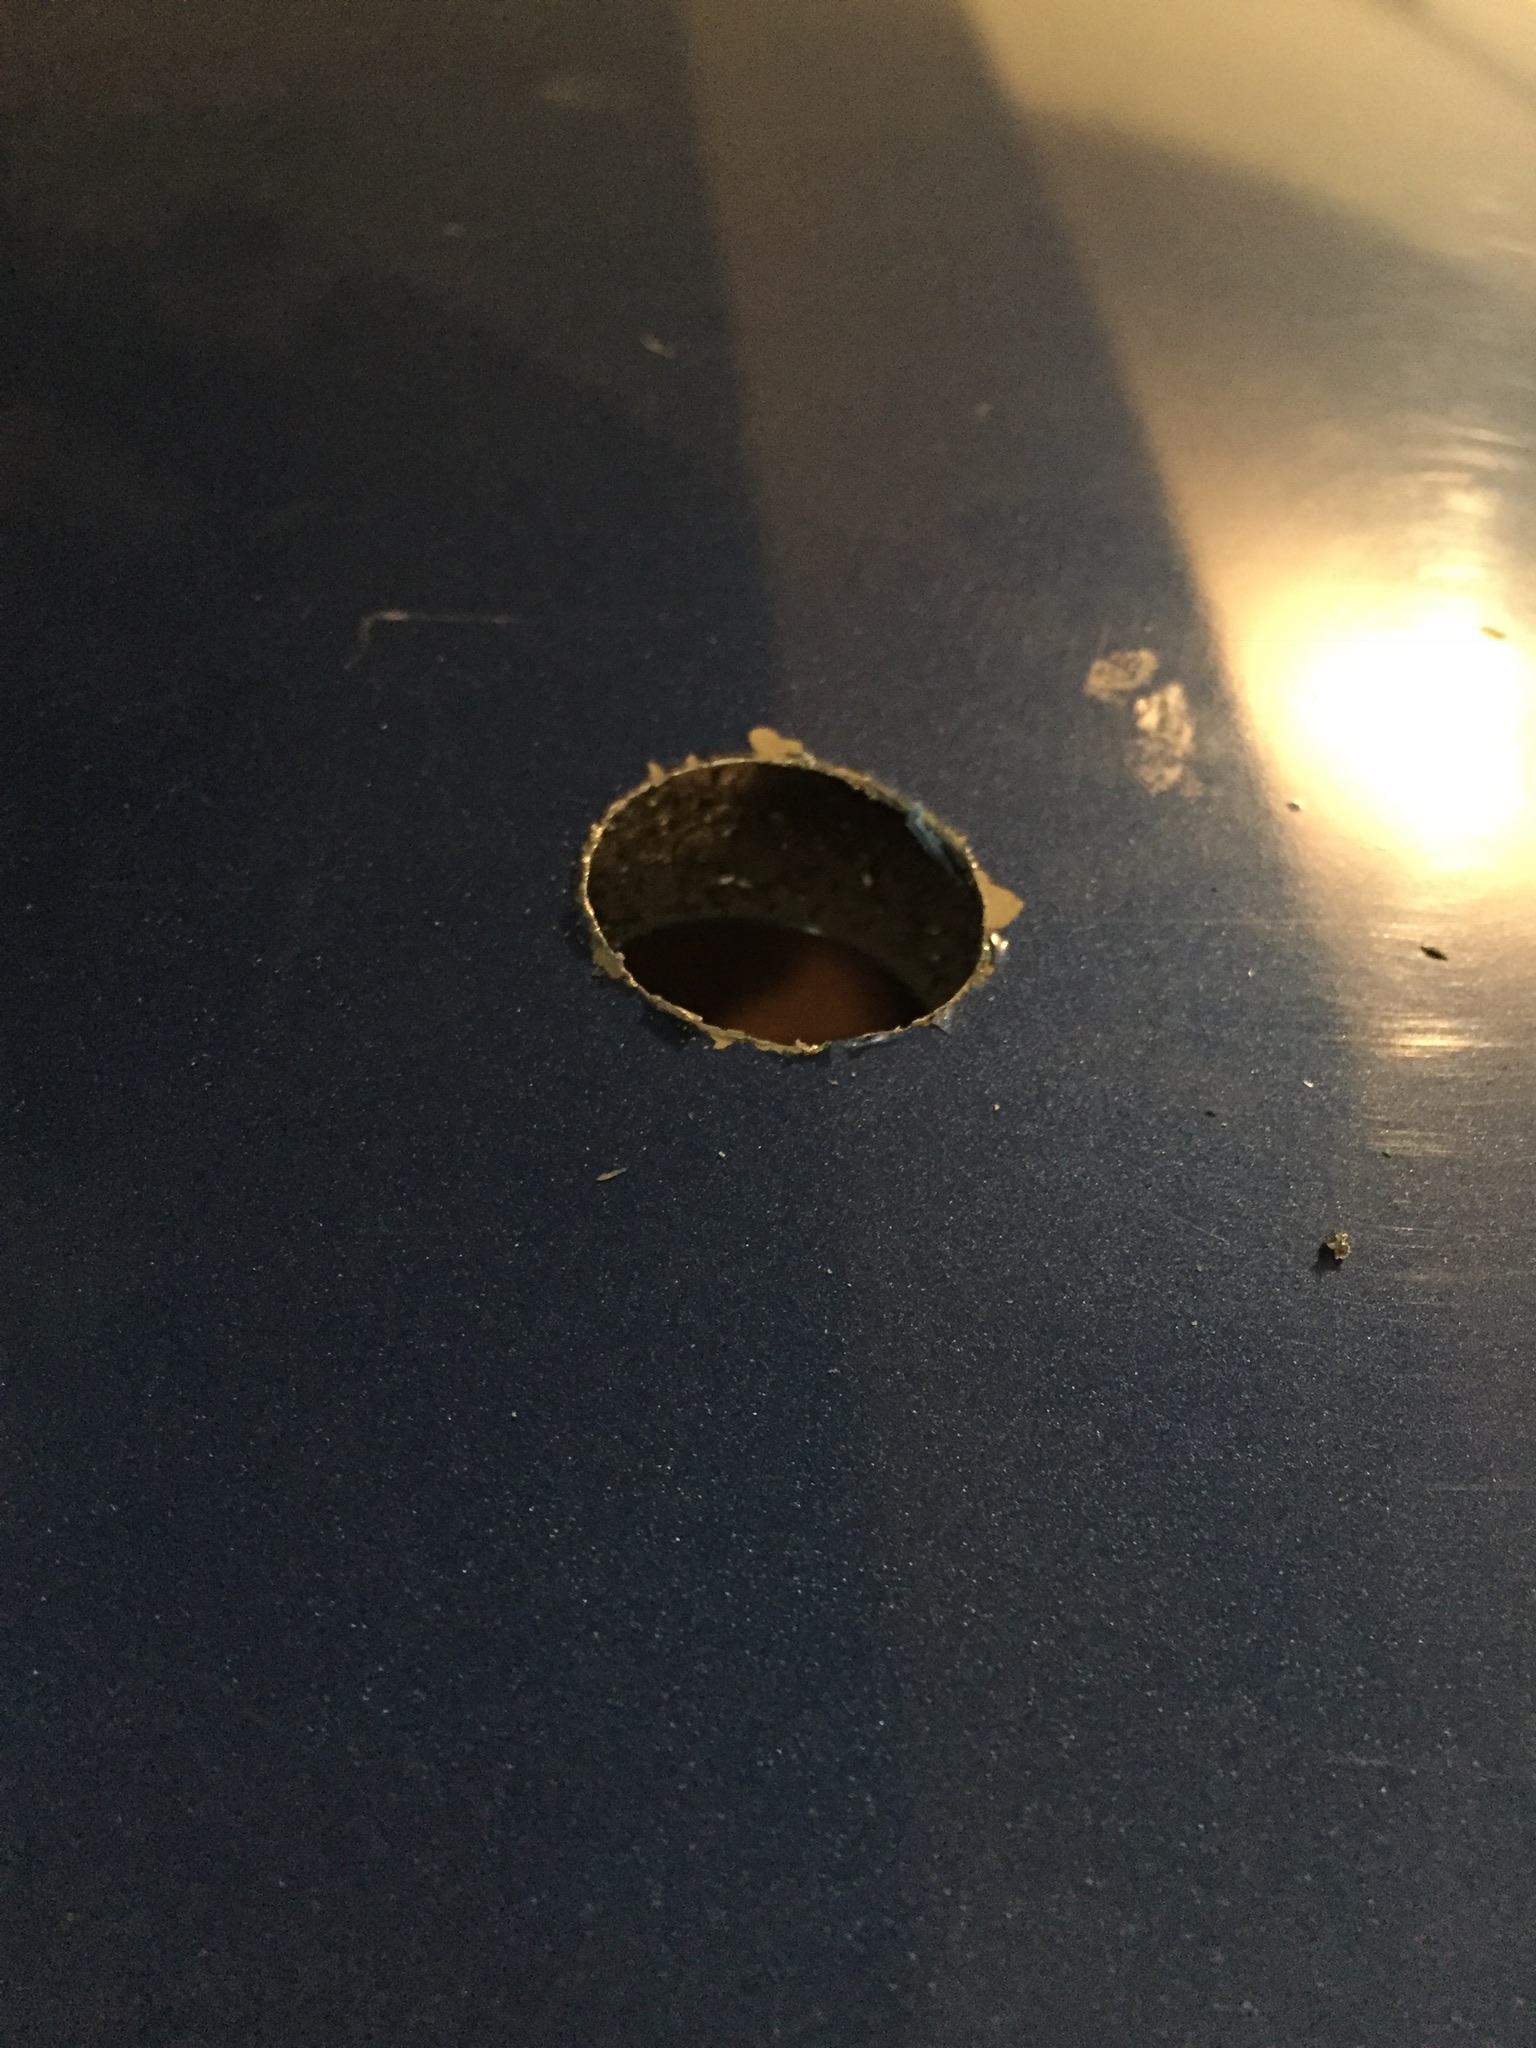
10. In the previous picture I have tape around the hole, if you want to try to preserve as much paint as you can, do this. There are better ways I'm sure, look those up and try those. I don't have much paint anyway so this is as far as I went. Once you happy with how you preserved your paint, take your hole saw, whatever size you need, I used 1", and drill from the inside. If you drill from the outside, your paint is toast, if you care.
Attachment 28046
Attachment 28047
Attachment 28048
11. Now you can measure your lights so their straight by putting a tape line across the roof from windshield corner to corner. Measure up from there to make sure your screw holes are the same length from the tape line.
OR just put on your light so it looks straight, and drill the holes. Do this by taking the gasket for the light and set it over the wiring hole, and mark the screw holes, and then drill them with the tape over the area to help preserve paint. If they look straight, no one will notice if they aren't off unless you get out the ruler and actually measure them. The hardest part is done for you already which is centering the lights side to side on the roof.
Attachment 28049
Attachment 28050
12. Now prepare your lights and screws. Put your light bulb in the socket, an de then put the socket into th light, it just twists in. Put the little rubber o-ri g washers on the screws and get them ready for install.
13. Take your silicone and glob some on the bottom of the light(don't be light on the globbing, last thing we want is leak), then put the foam gasket on over the wires onto the light, letting the silicone hold it in place. Then glob more silicone on the bottom of the gasket. Then take your light and screws and set them on ghe roof. Glob drops of silicone over the screw holes, and then around the wiring holes. Then place the screws in the light, and then put the wires through the hole and then screw down the light until you see some silicone ooze out. Don't worry about cleaning up the silicone, it's easier to clean when it drys as it just peels off. DO THIS STEP ONE LIGHT AT A TIME SO YOUR NOT RUSHING YOURSELF.
(Sorry no pictures of the silicone application, I did all the lights at a time and was rushing myself, hence the above statement)

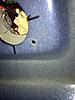
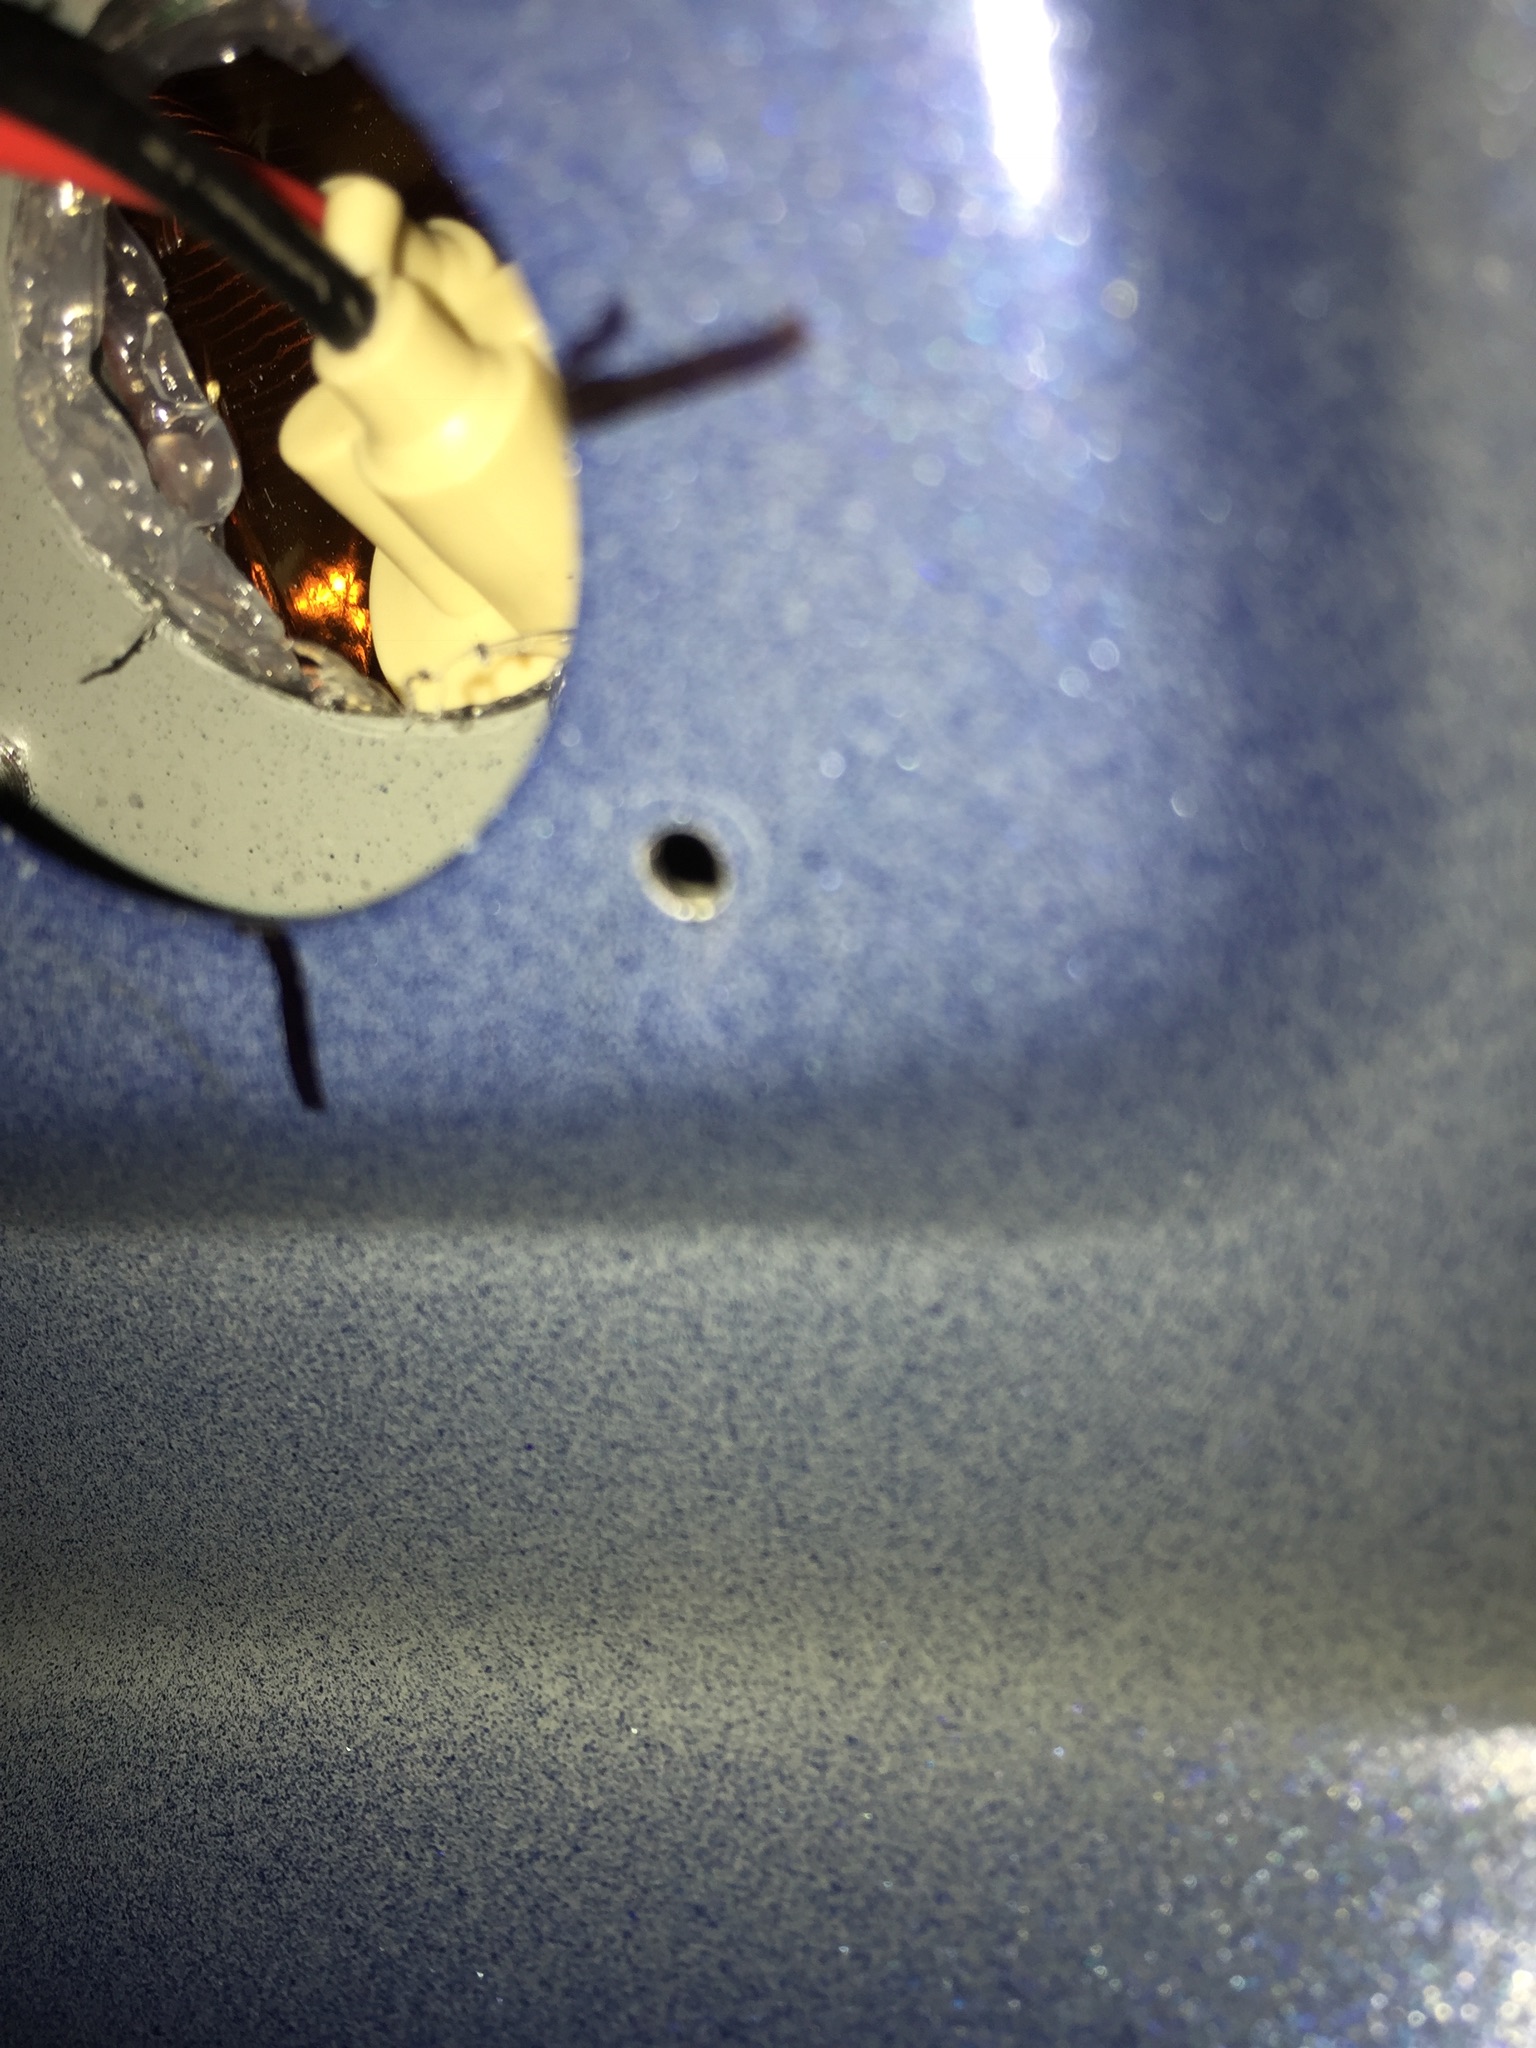
14. Take your drill and drill bit again and drill a hole in the lower roof for your ground. Do this next to each light. Then take your #8 sheet metal screws and screw down the ground steps on each light. Try to position the wires so they aren't chafing against the sharp metal hole in the lower roof.
Attachment 28052
Attachment 28051
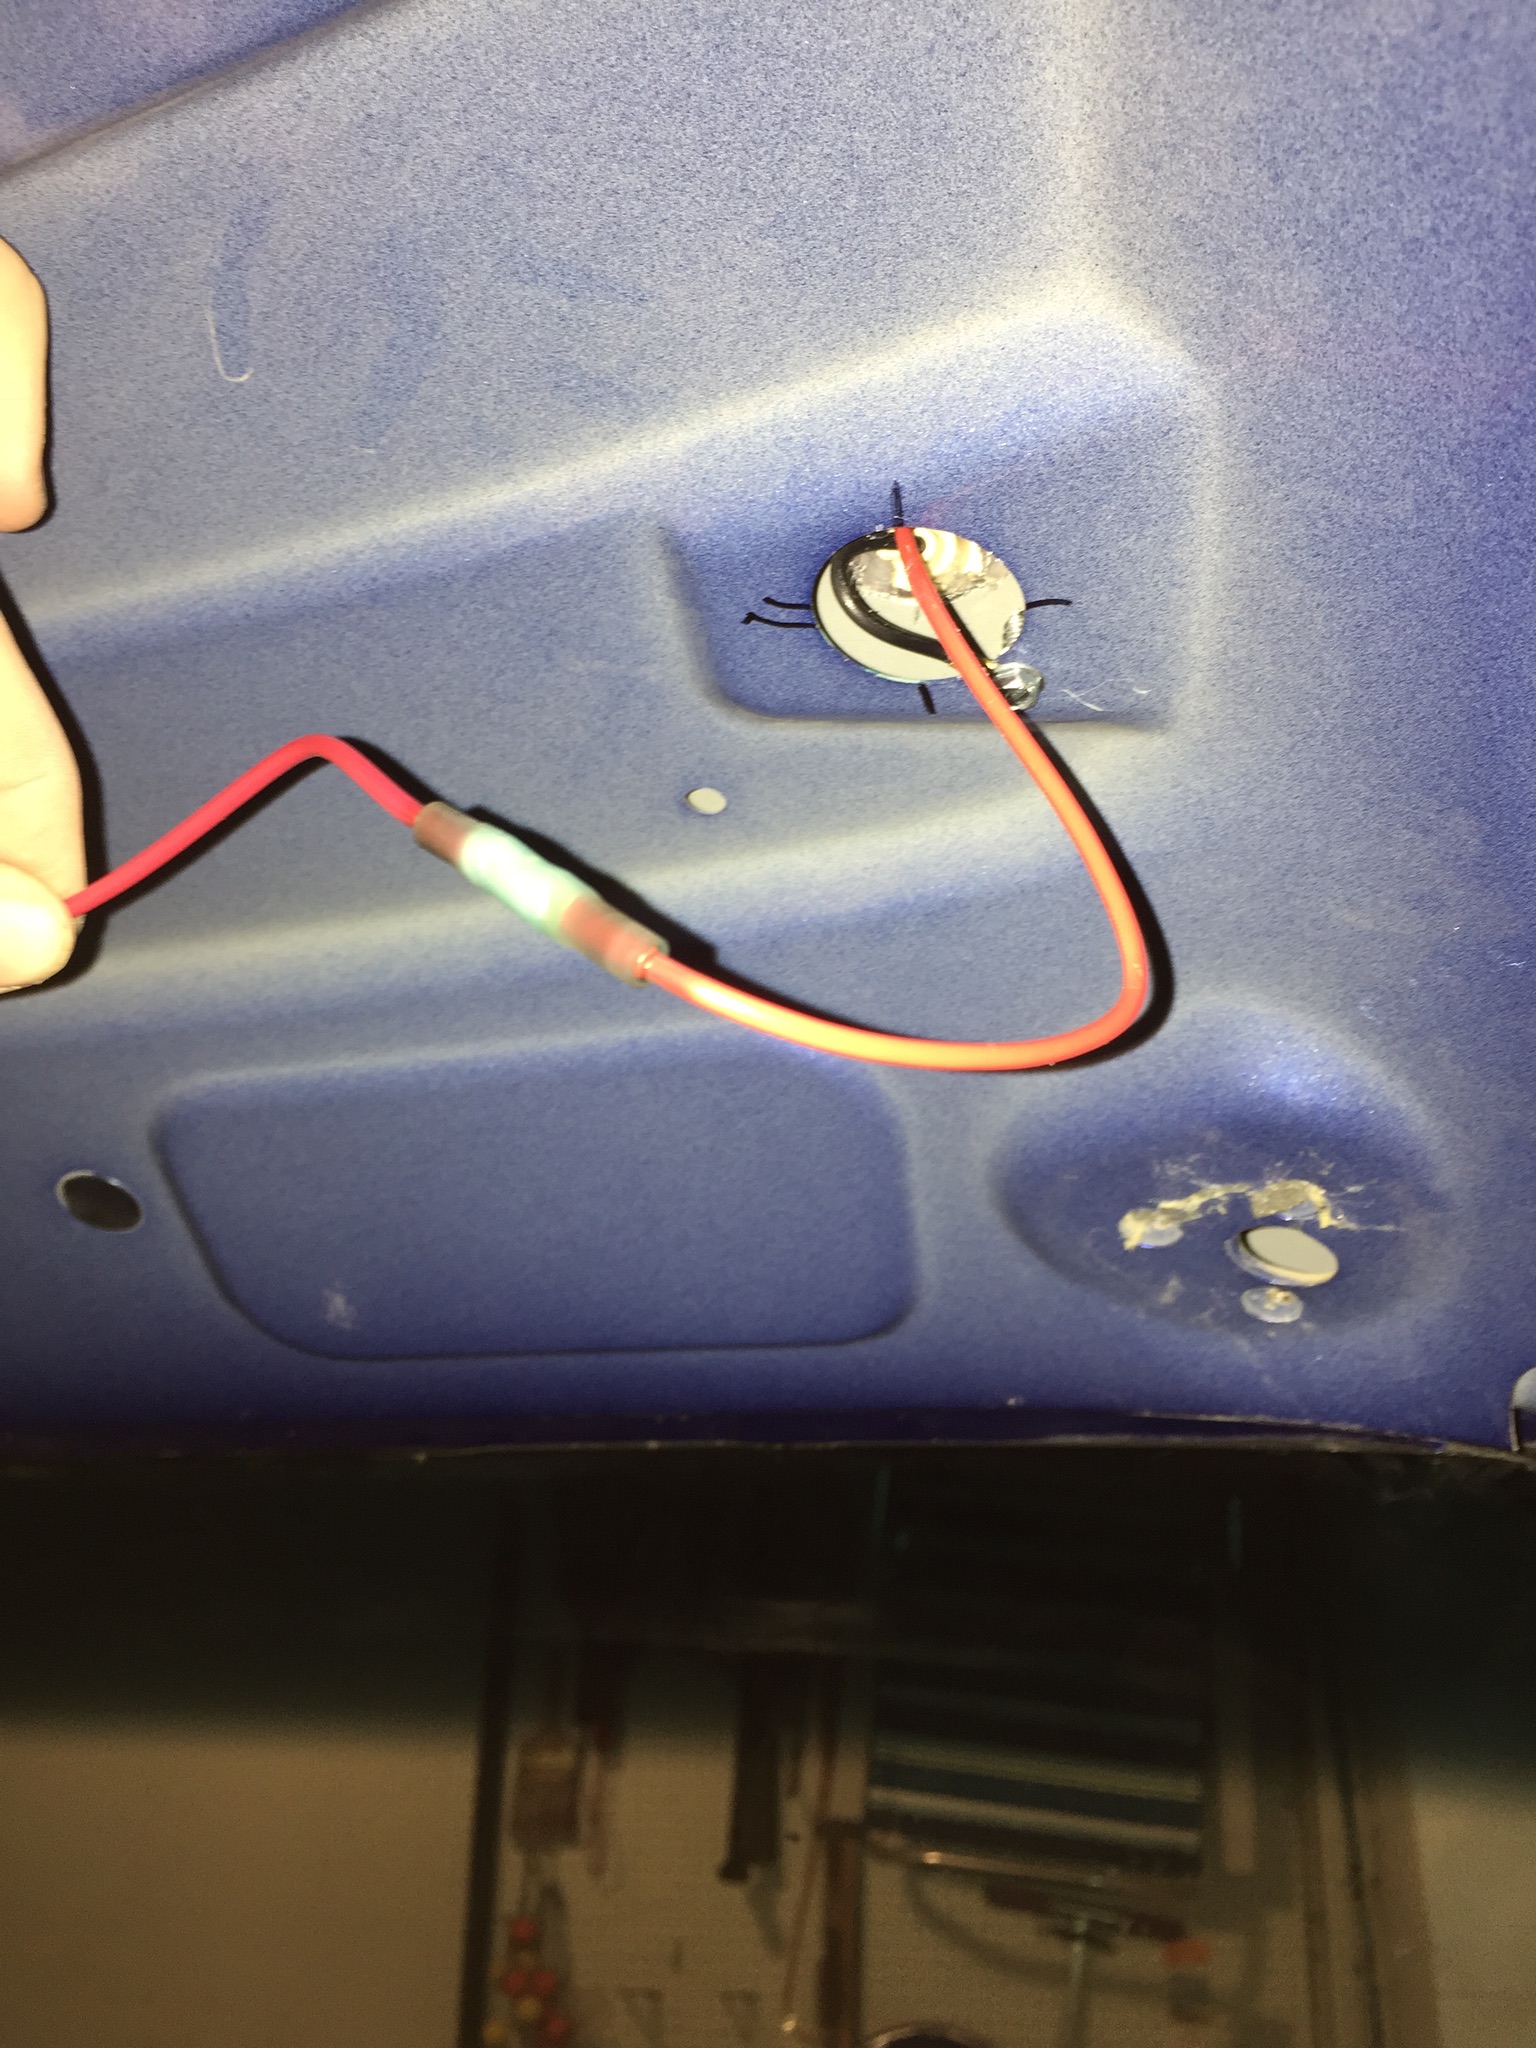
15. Now you can start wiring. Take the long wire reel found in the kit, and wire the farthest passanger side light first with a crimp and seal connector. Then run your wire along the roof, next to the other harness once you reach the center, and use the supplied splice connectors to wire the other lights. Be mindful so the wire isn't chafing against the sharp metal hole on the lower roof part. Do this with all the lights until you reach the driver side pillar/colum.
Attachment 28053
Attachment 28054
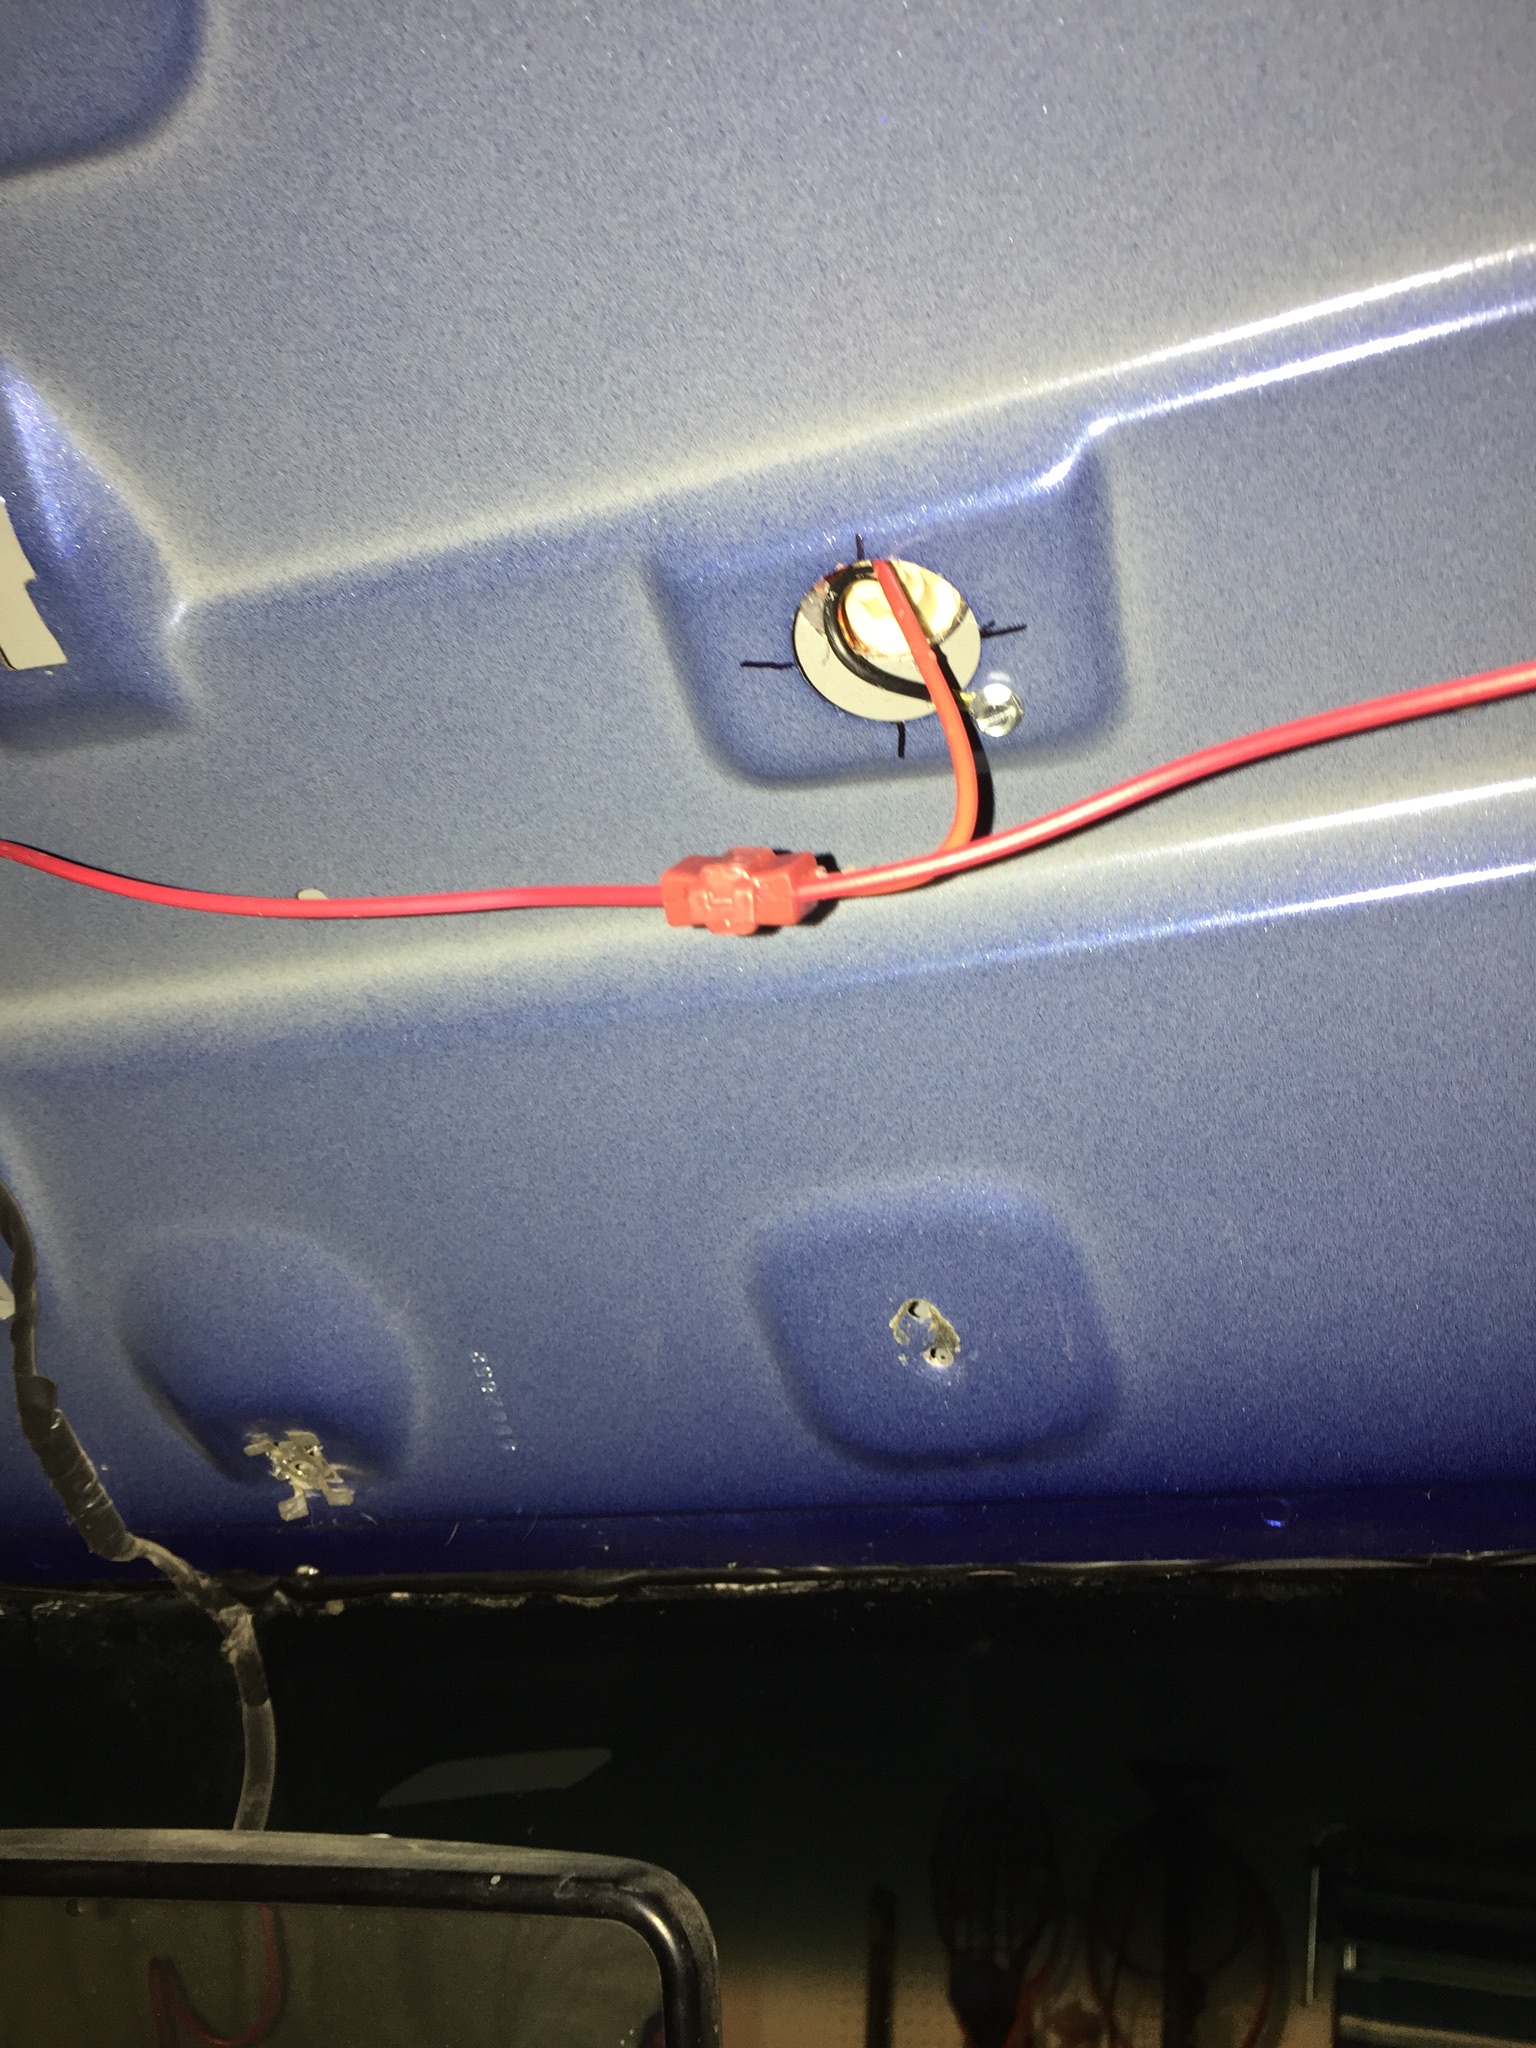
16. Once you have all the lights wired, run your power wire halfway down the column with the other factory harness(don't tape it or hold it down, just measuring the length), and cut it, so you can splice in your fuse that is supplied in the kit. Use 2 more crimp and seal connectors and put the portion of wire you cut in half on the other connector and continue it down the column.
Attachment 28055
Attachment 28056
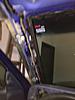
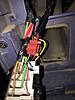
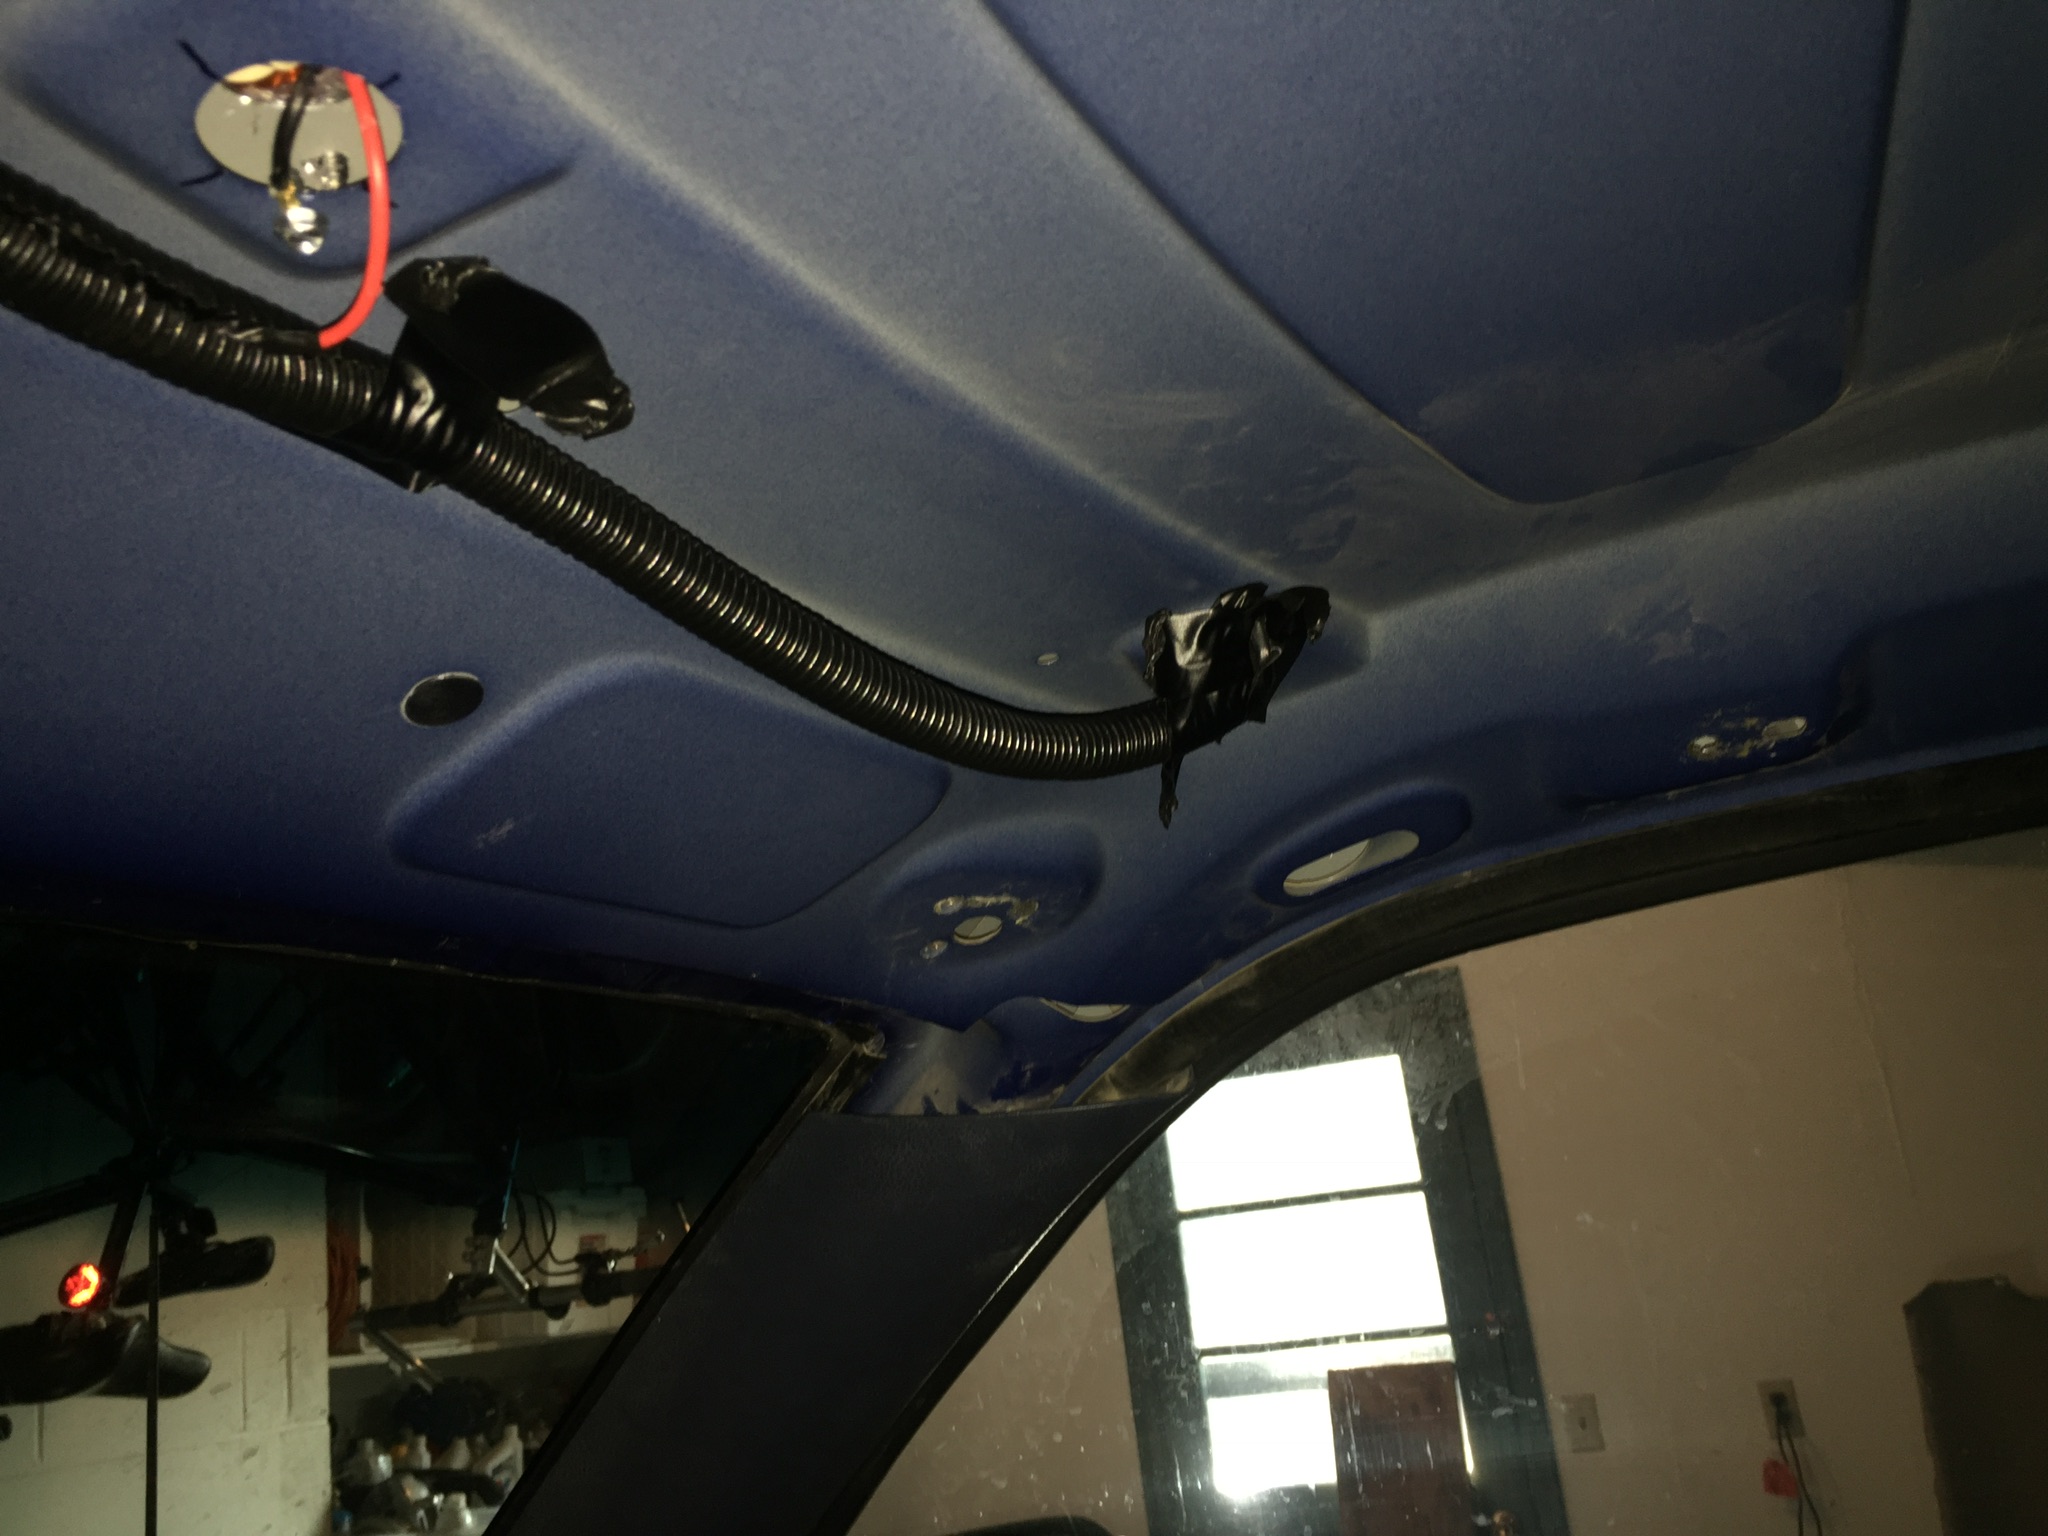
Once it's in place, you can then tape It down, as that's all we will need to do for the wiring above.
17. OPTIONAL you can take some wiring conduit, I had some black 1/2 conduit laying around from another project, and conduit the harness as it goes above your head. It helps with chafing, especially if you cut some small sections and place it where it goes to the light through the lower roof.
Attachment 28057
Attachment 28058
Hold some of the harness in place with some electrical tape.
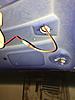
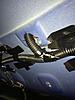
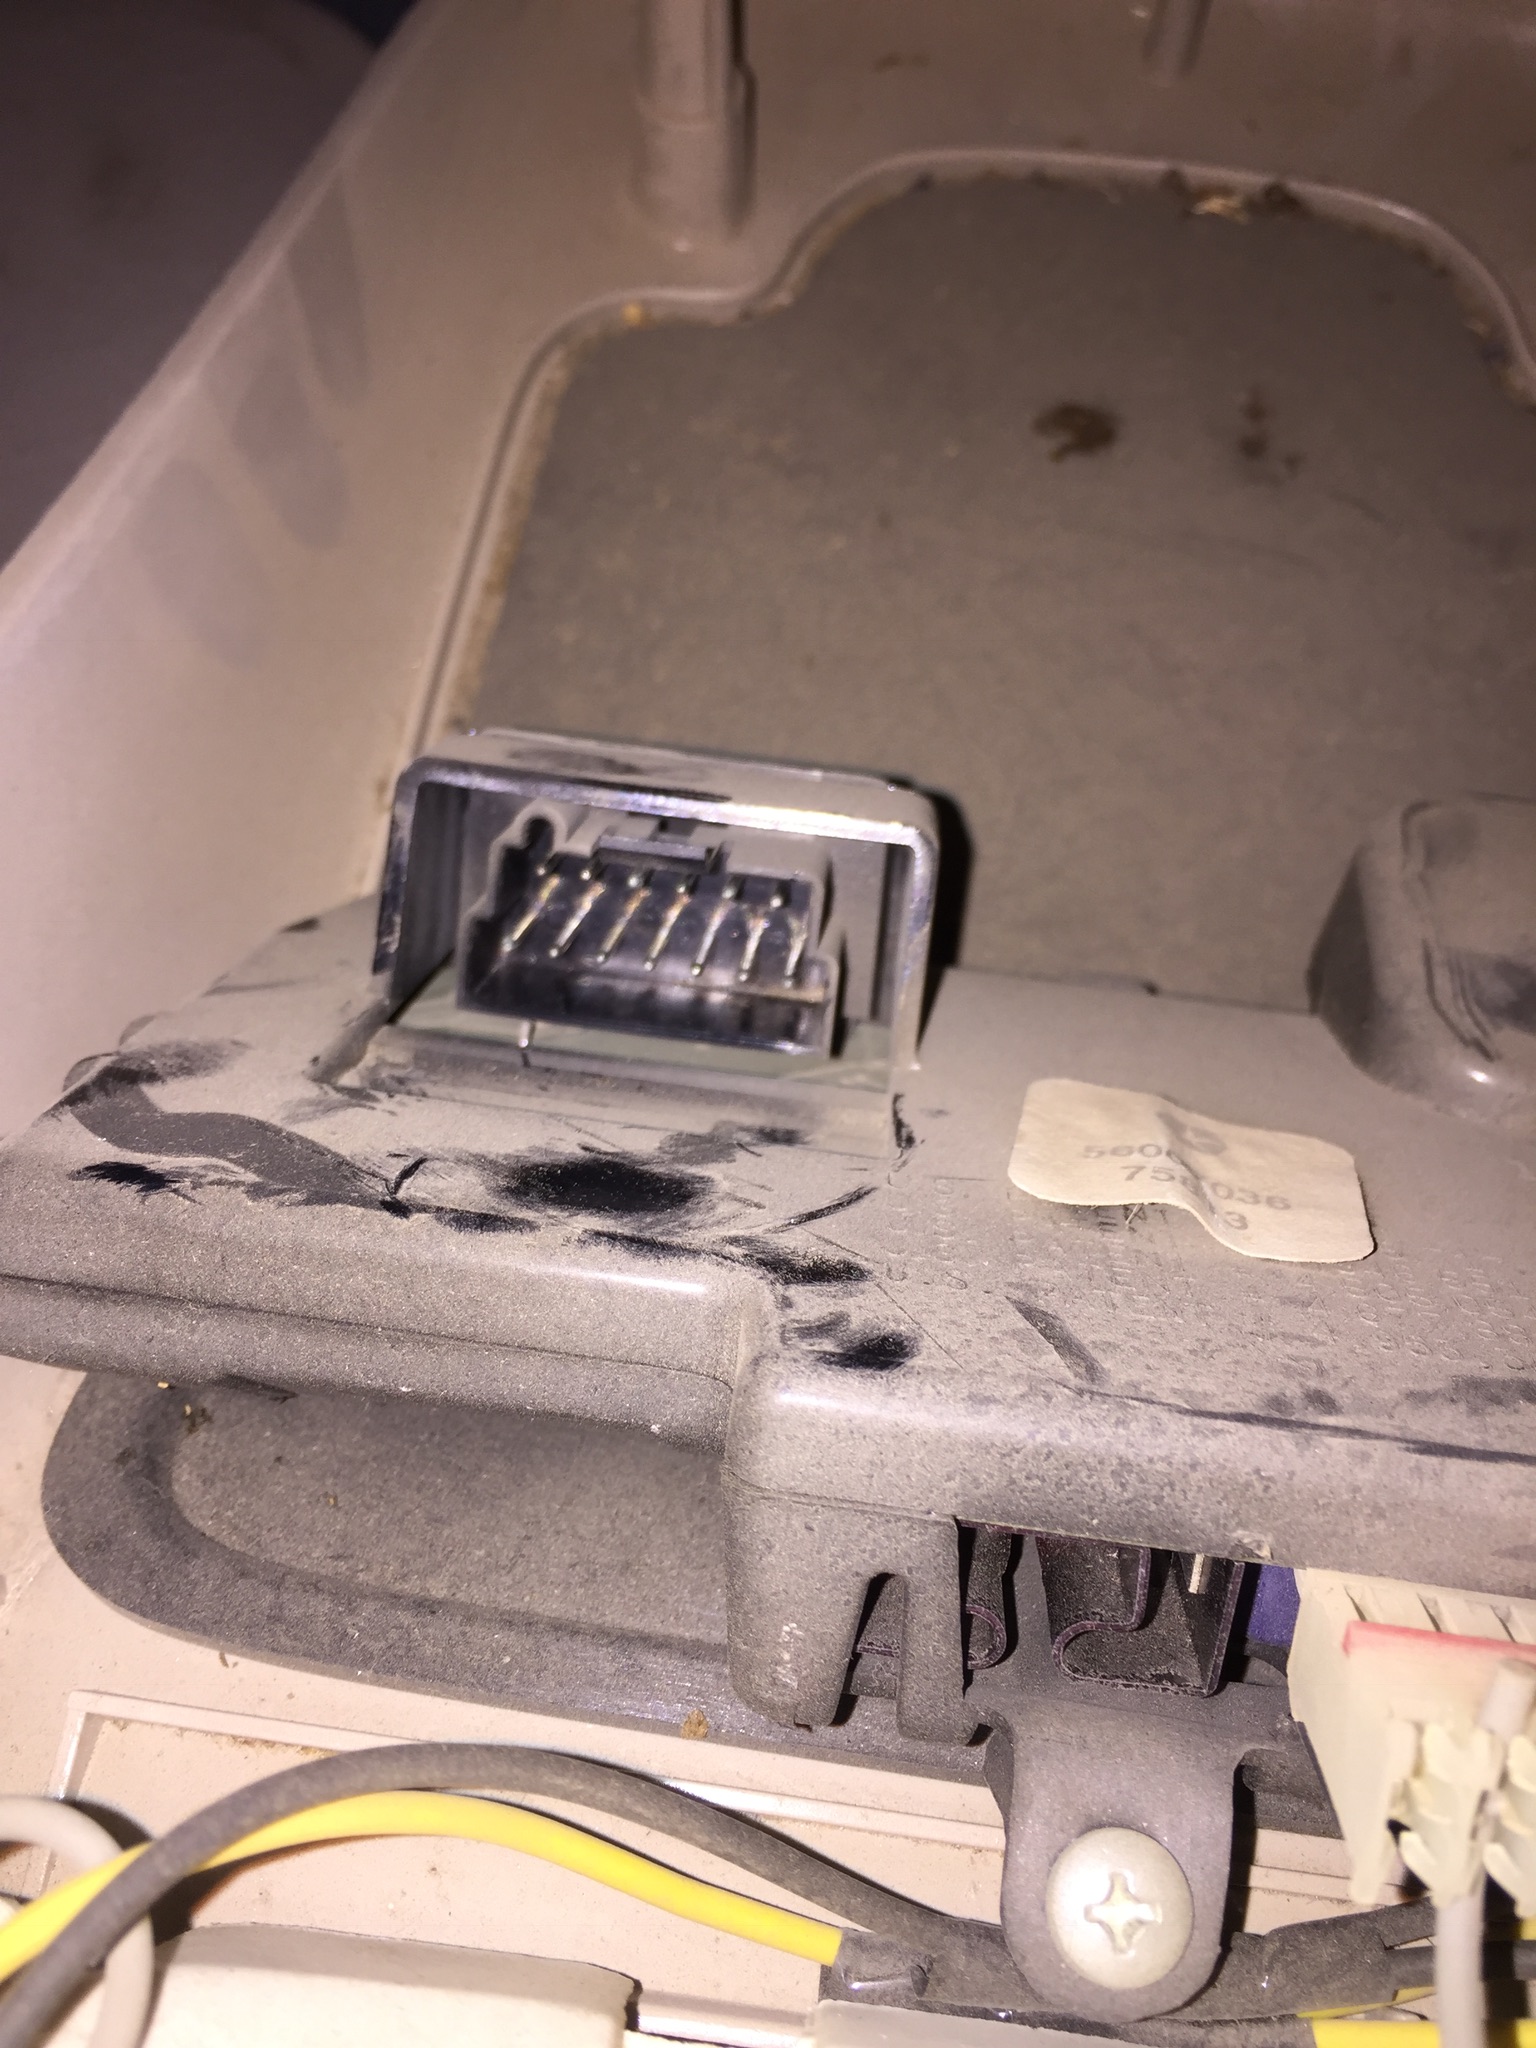
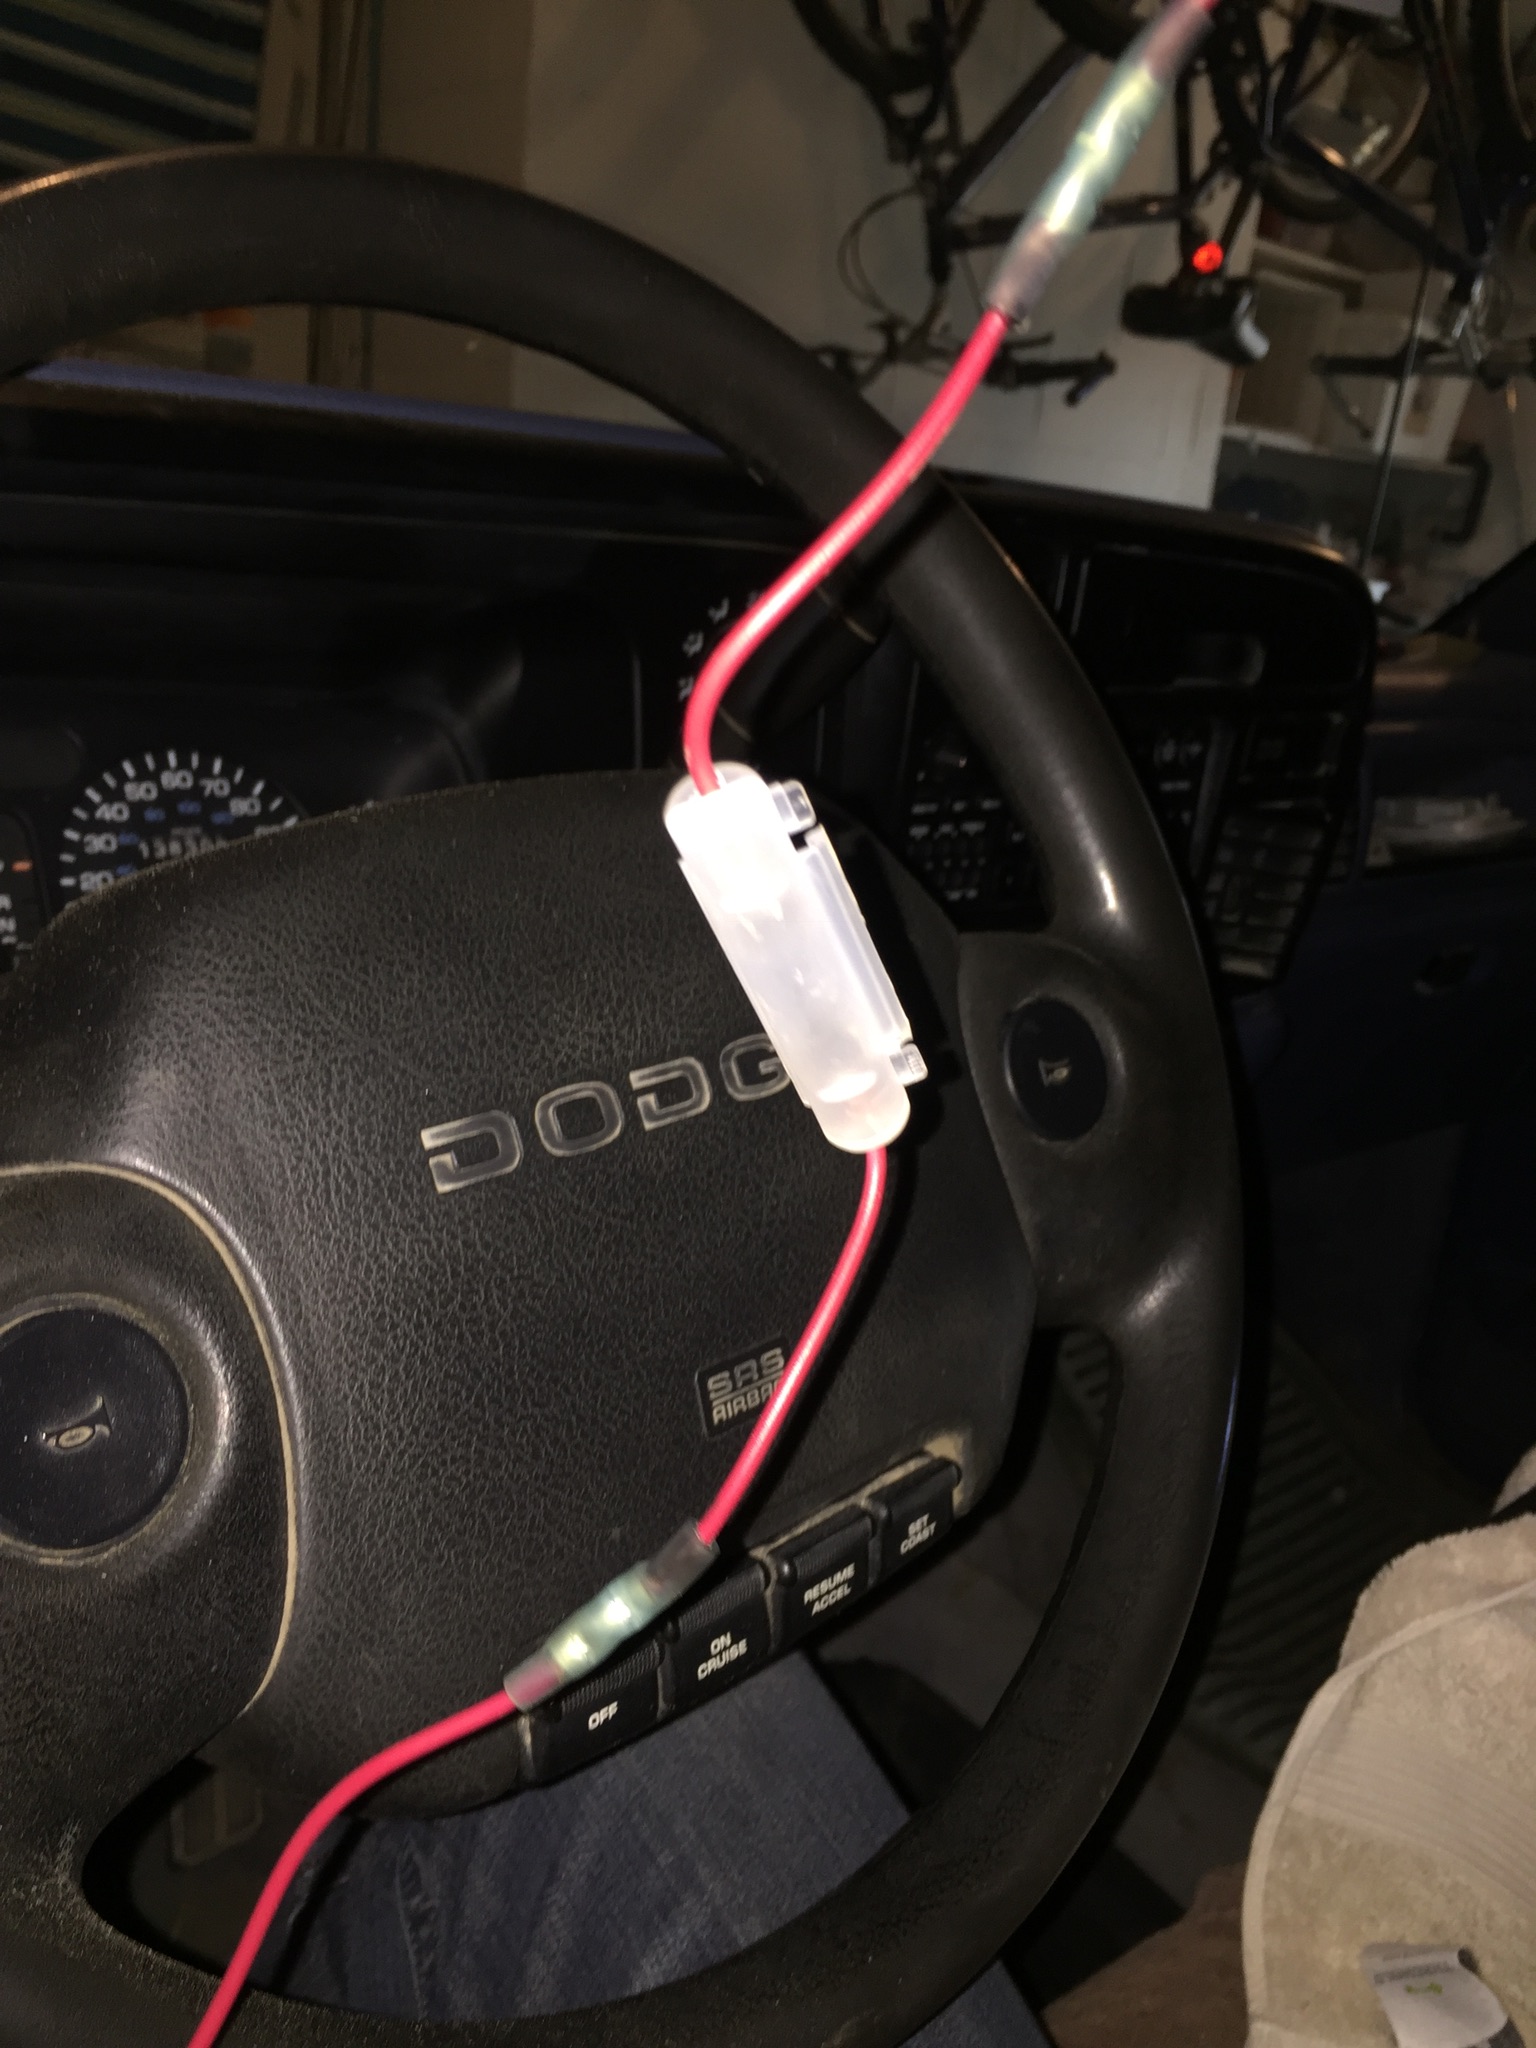
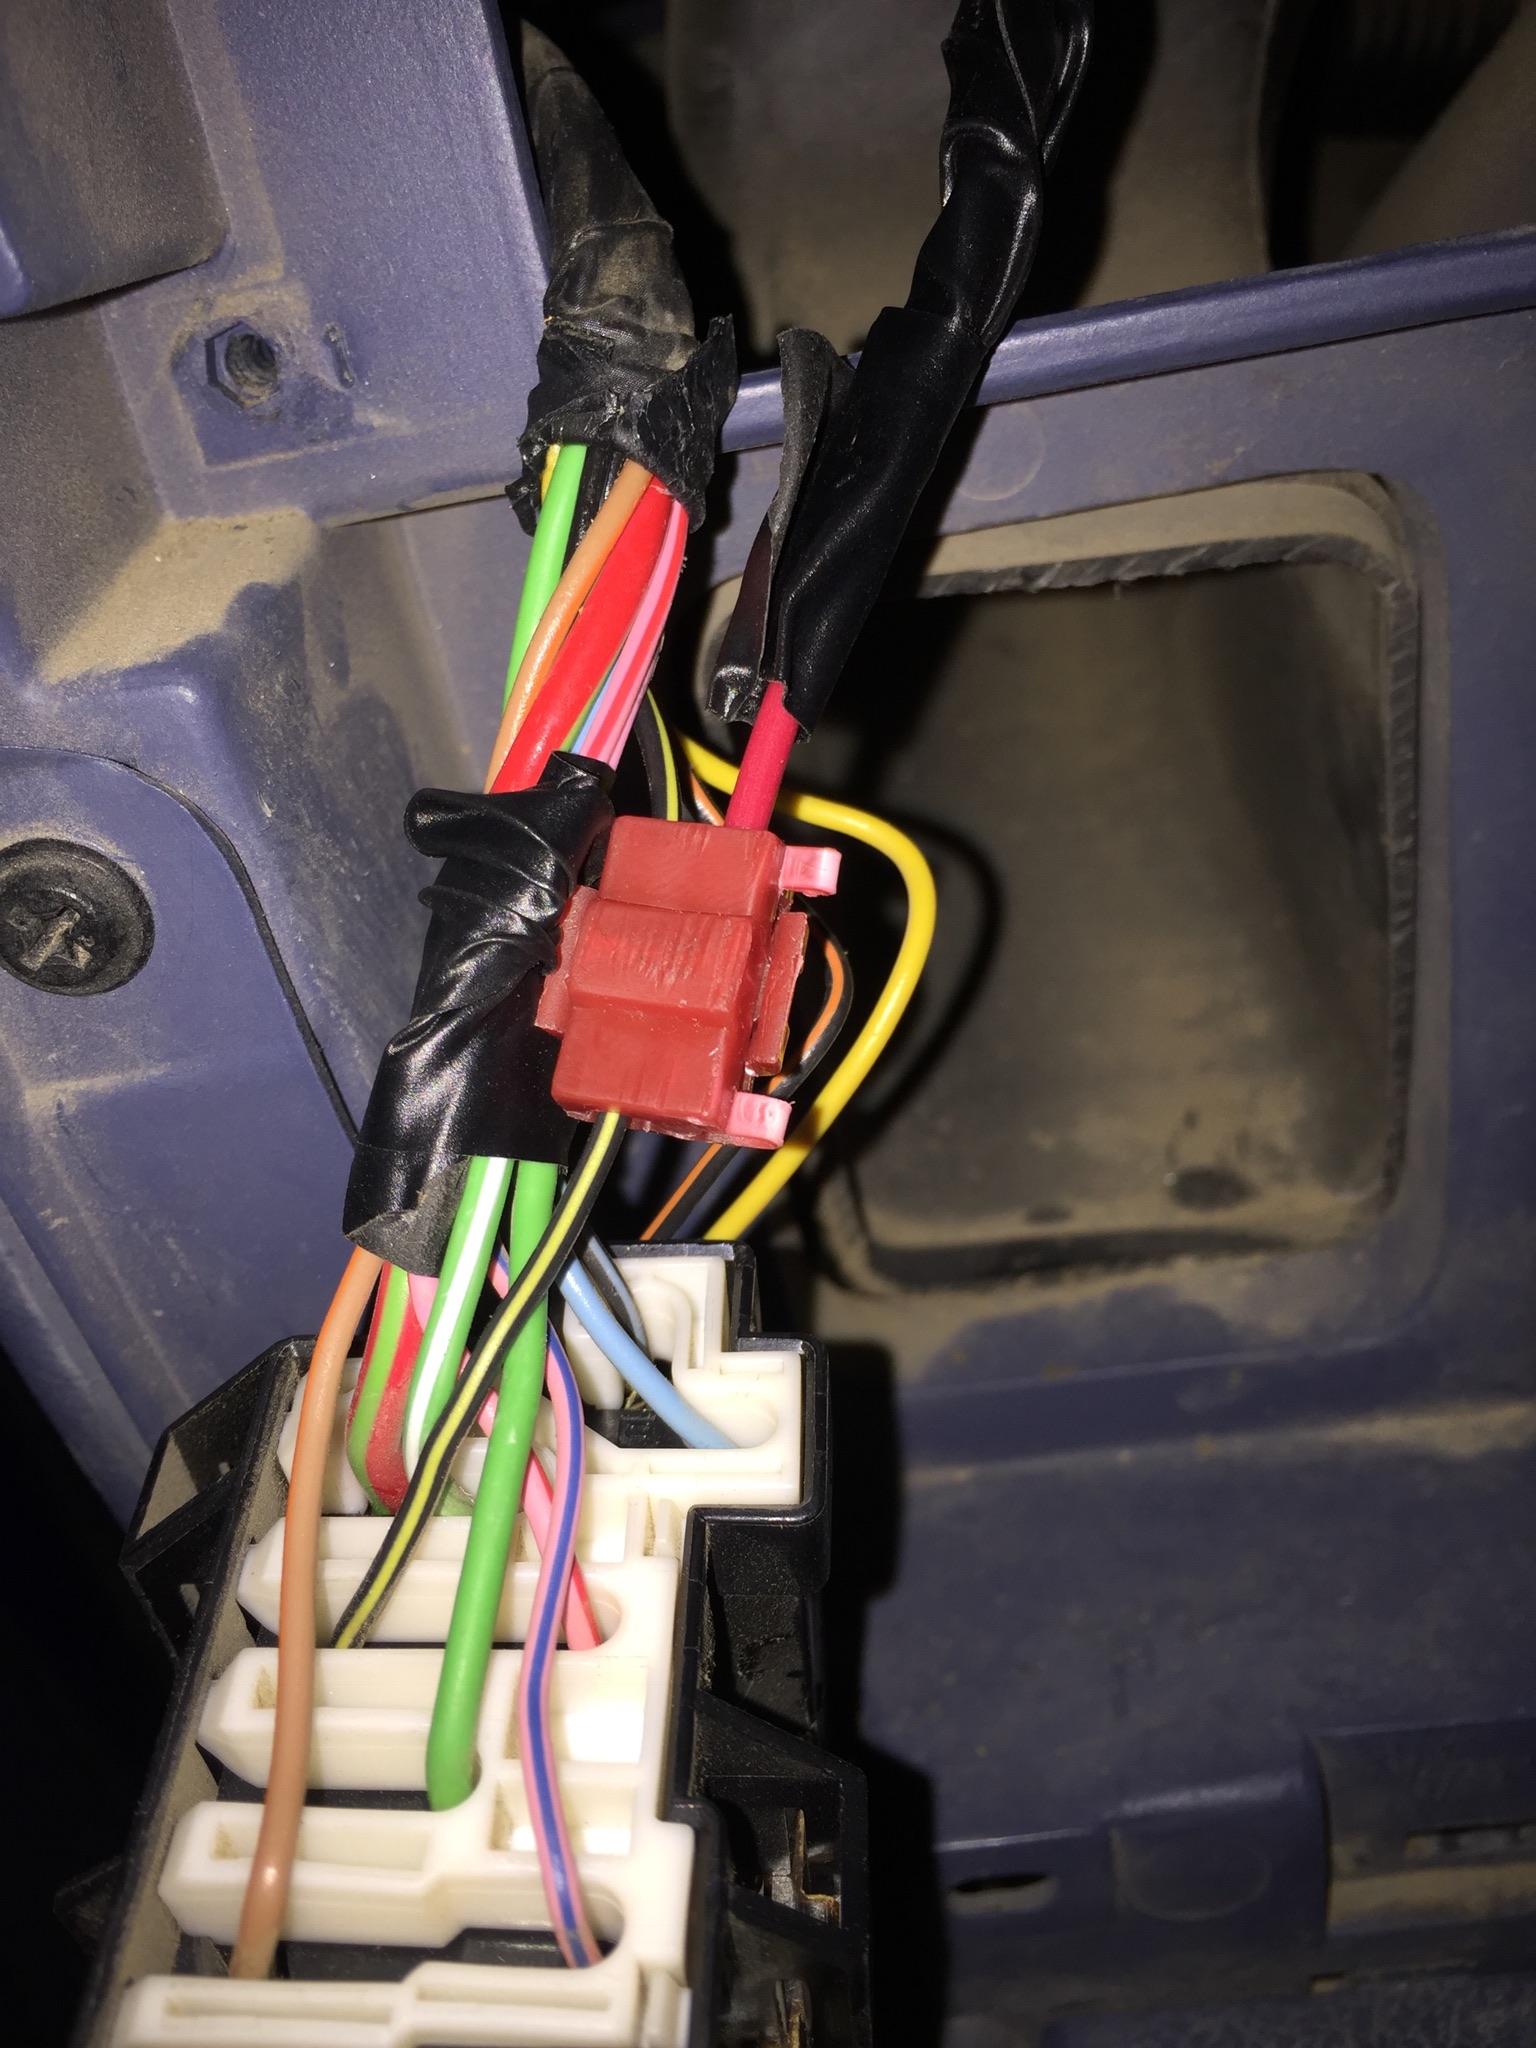
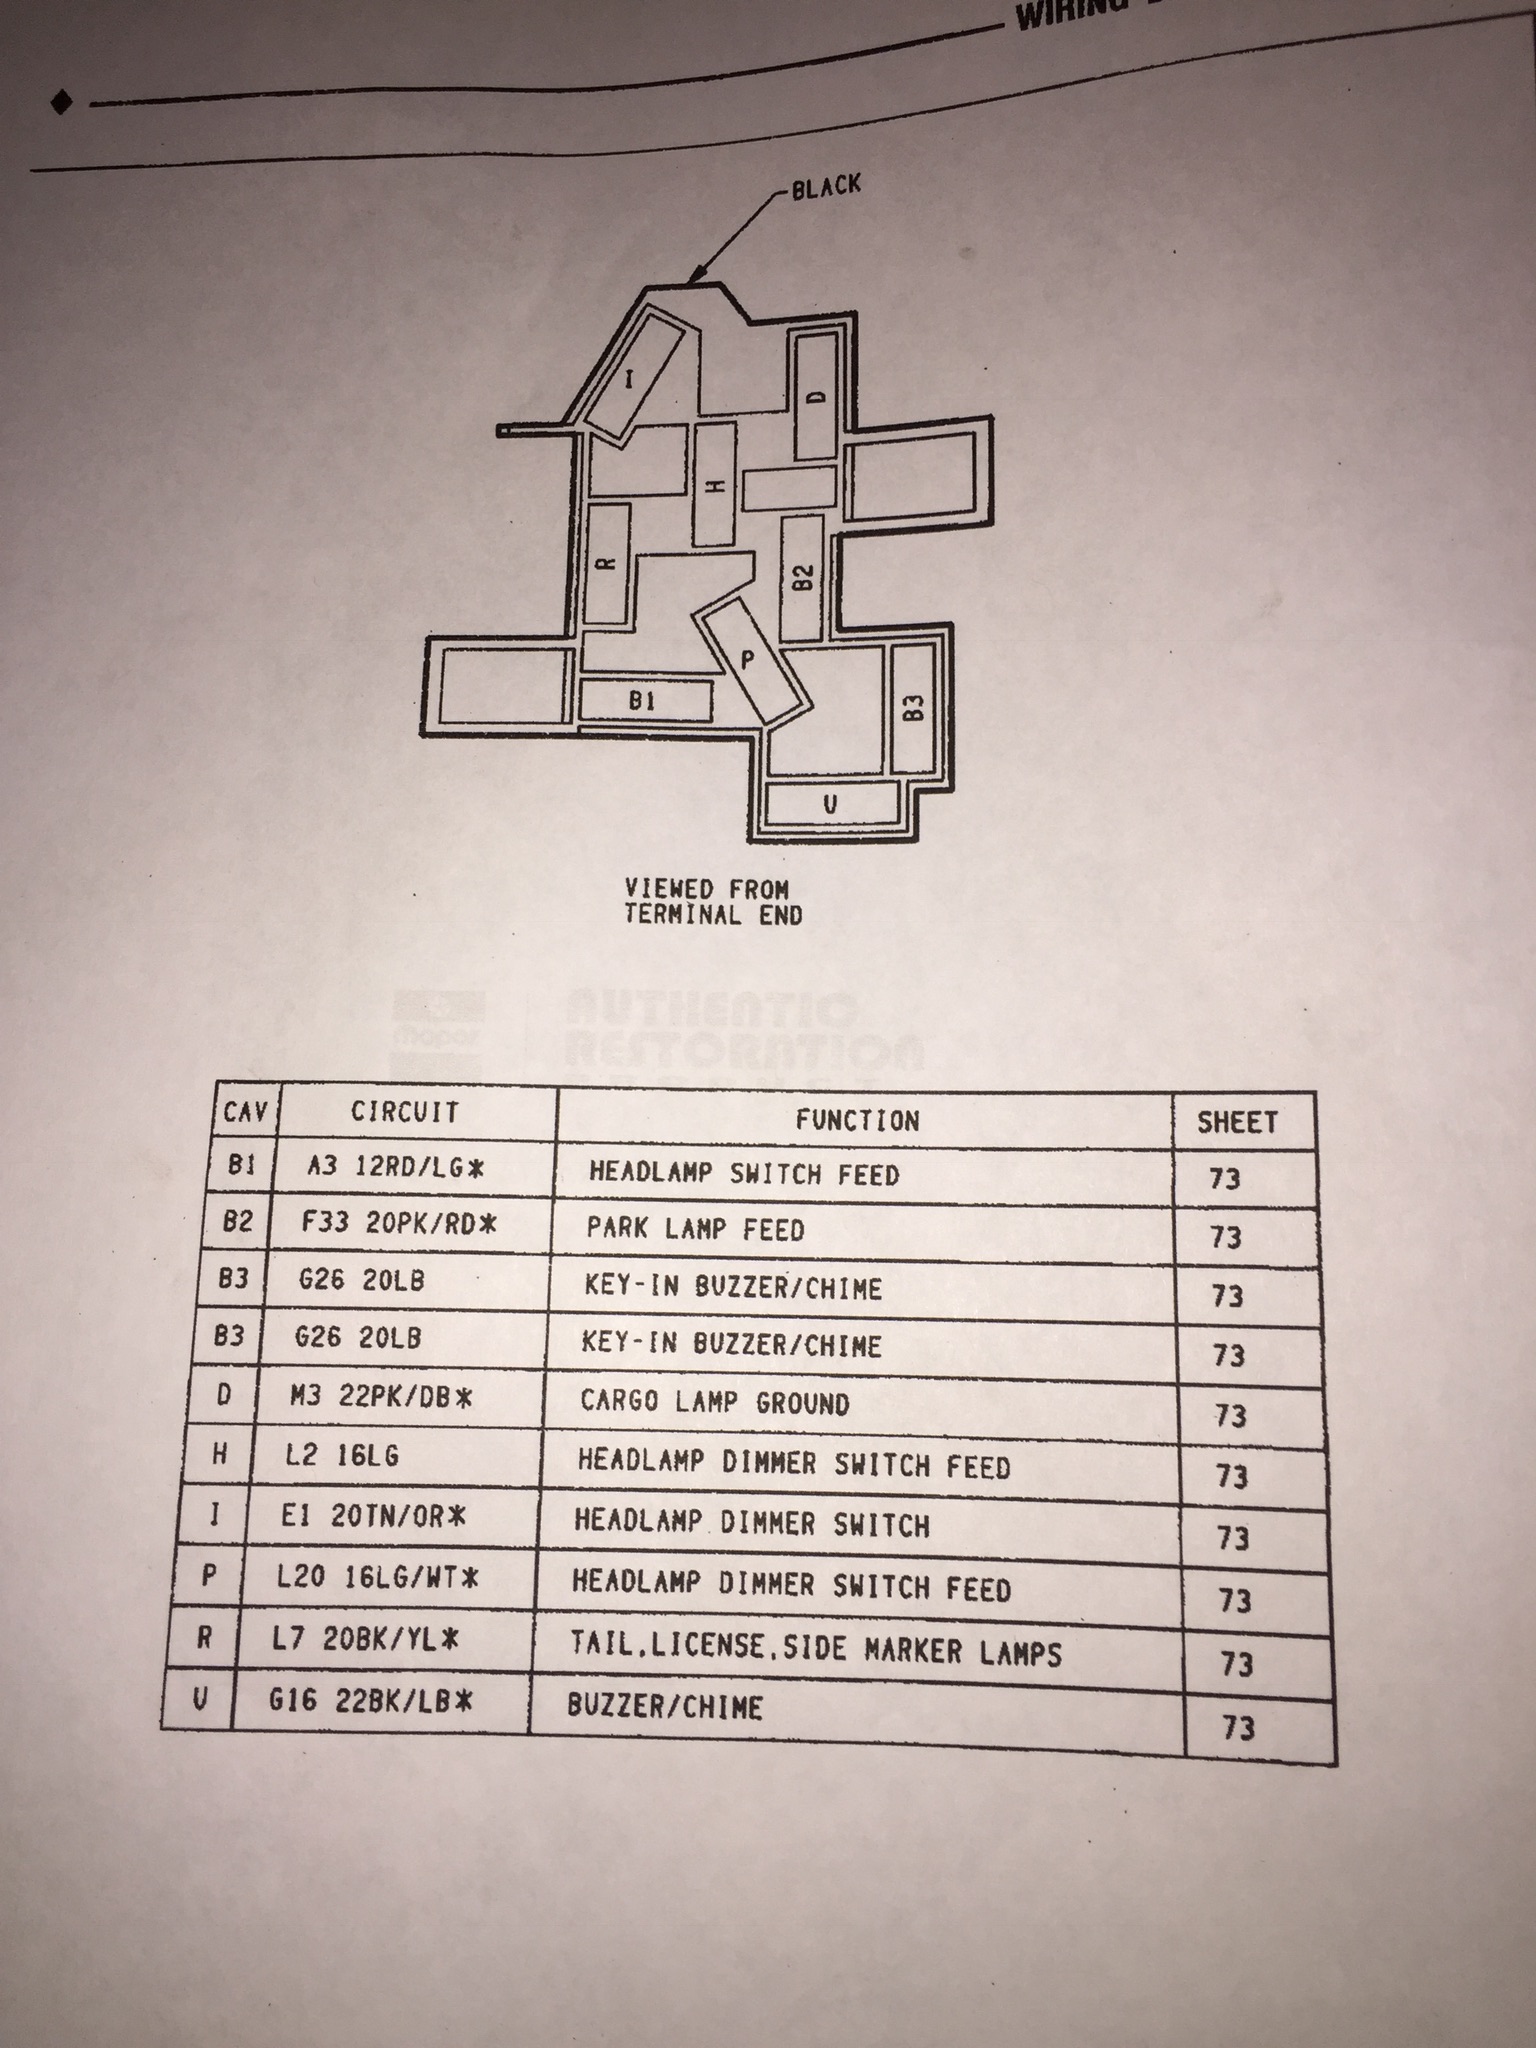
18. Now remove the Ash tray and cup holder, which are held in with 2 screws each, and then lower the tilt wheel and put the shifer(if automatic) in 1, and then pull the dashboard bezel. Just pulls straight out with some metal tabs, don't worry it's not hard, not easy to break either so your good. Then remove the cigar lighter plug and 12v power port plug, and put the bezel aside. Remove the 3 screws to the headlight switch. Find the black wire with yellow stripe, and splice into it with one of the red quick splice connectors supplied in the kit.
Attachment 28059
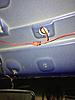
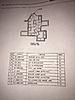
If unsure refer to the wireing diagram of the plug. The wire we want is in the "R" Position. If you test the power to this wire, it should turn on in the park lamp position, and stay on in headlight position, and NOT dim when you turn the switch. If it dims you have the wrong wire.
Attachment 28060
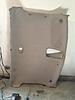
19. Test your lights. If everything works, hooray!!  If it doesn't retarce your steps. A good tool with this job too is the multimiteter. Use it. Once they all work, complete any finishing touches on the harness, and then reverese your steps reinstalling the interior panels. Good luck!
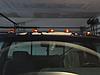
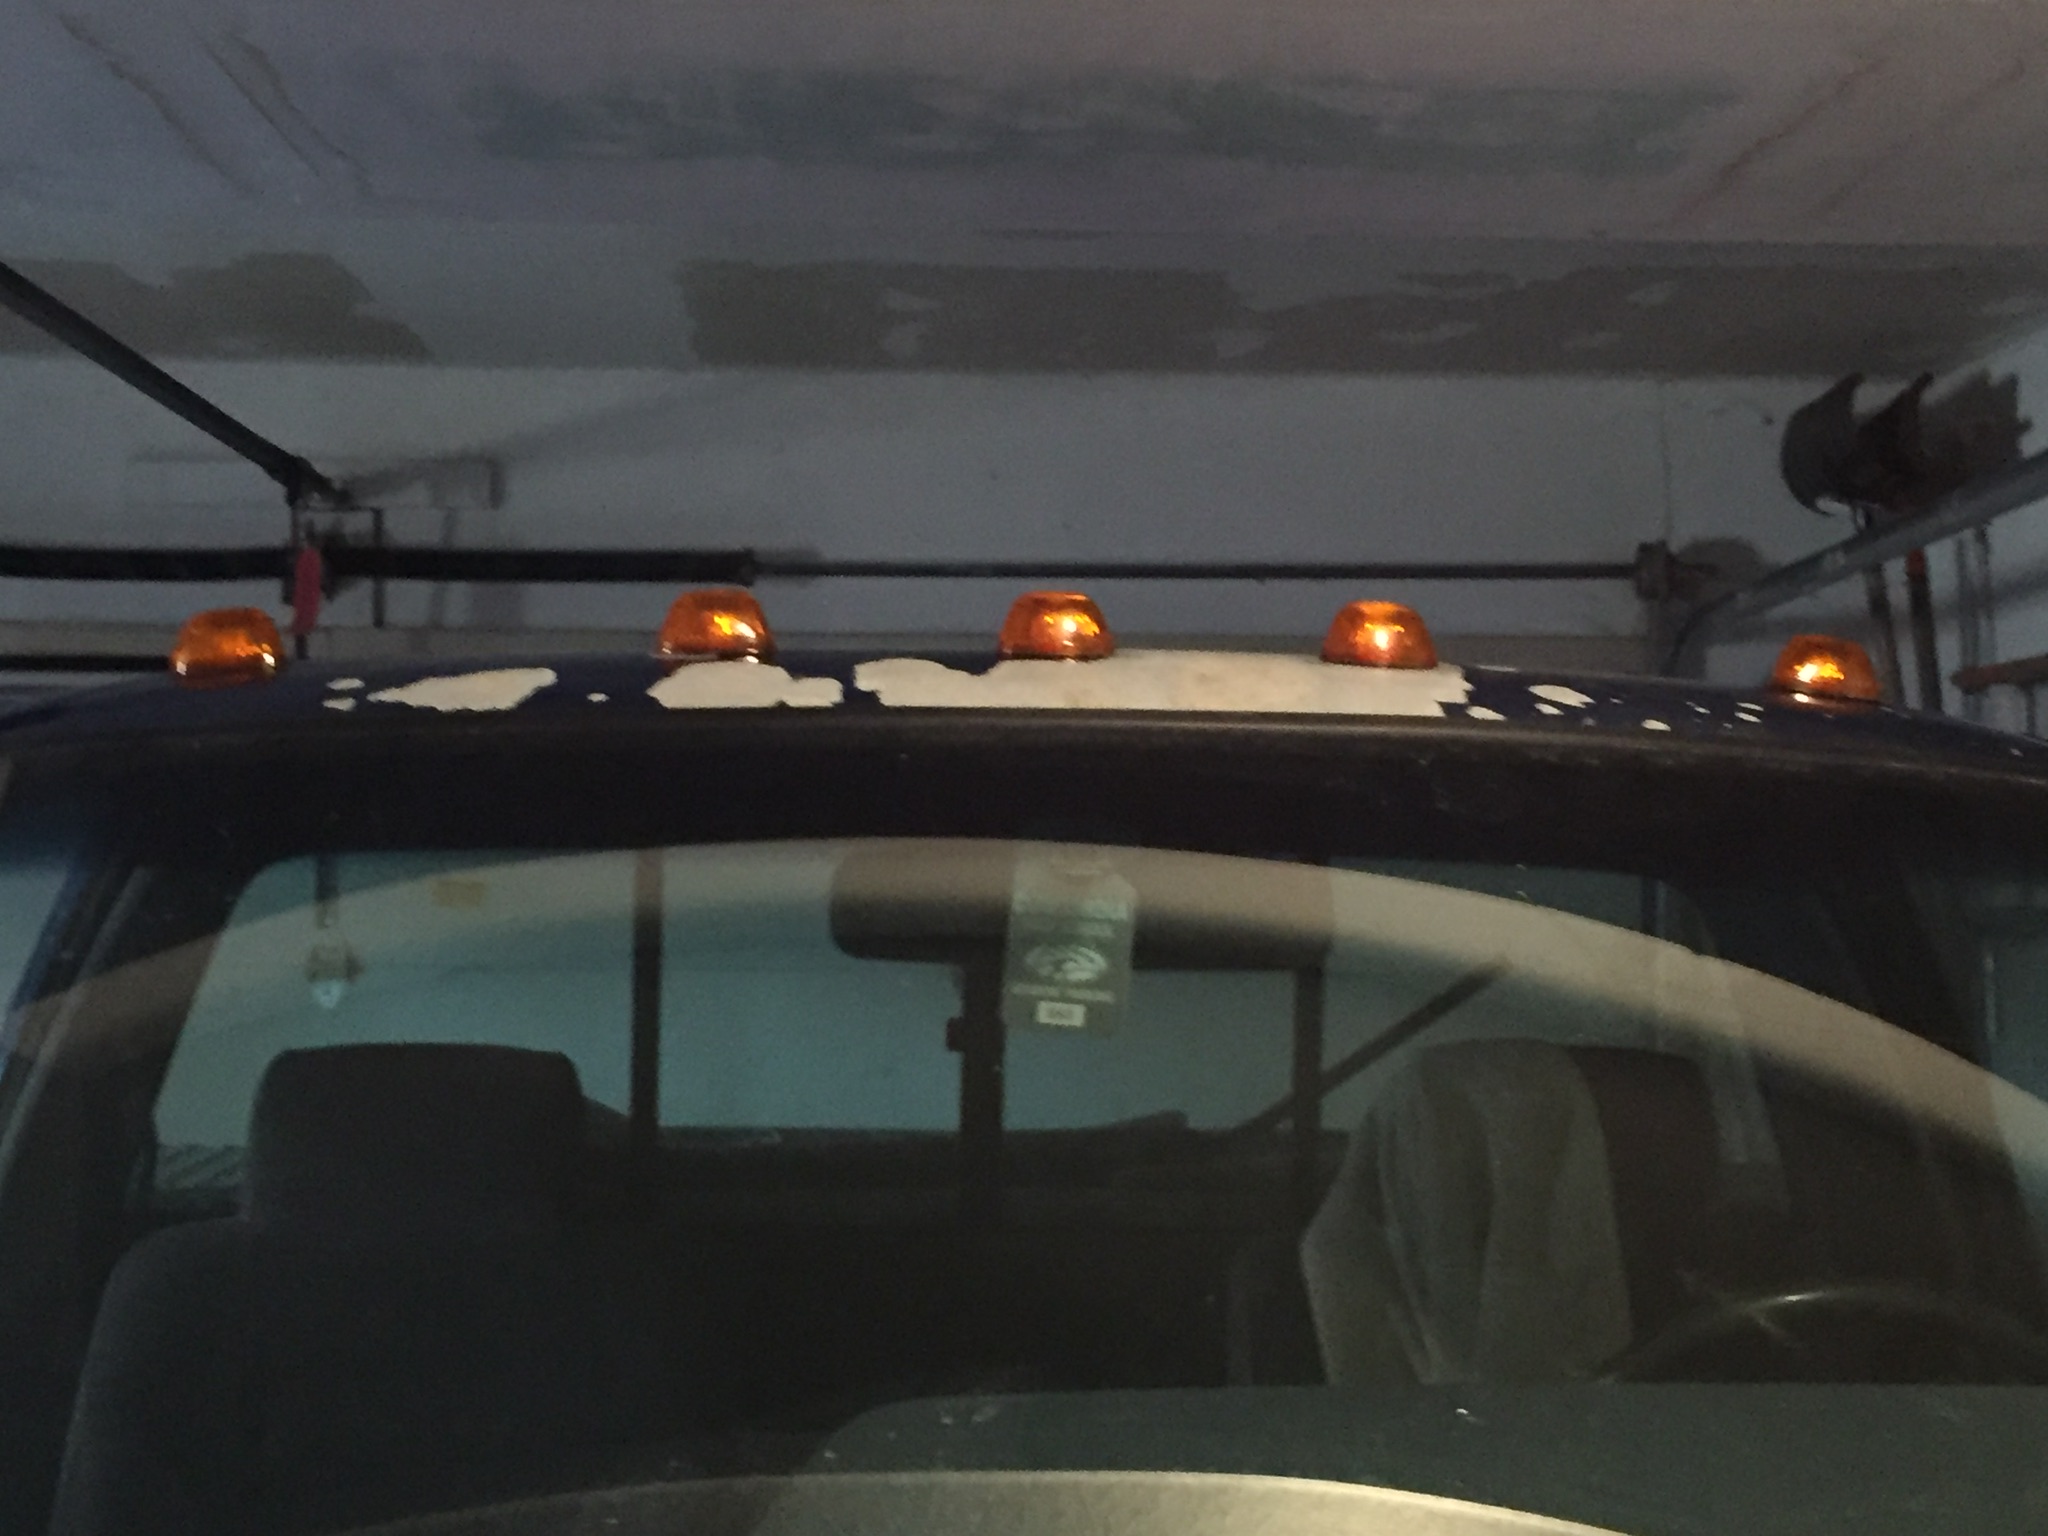
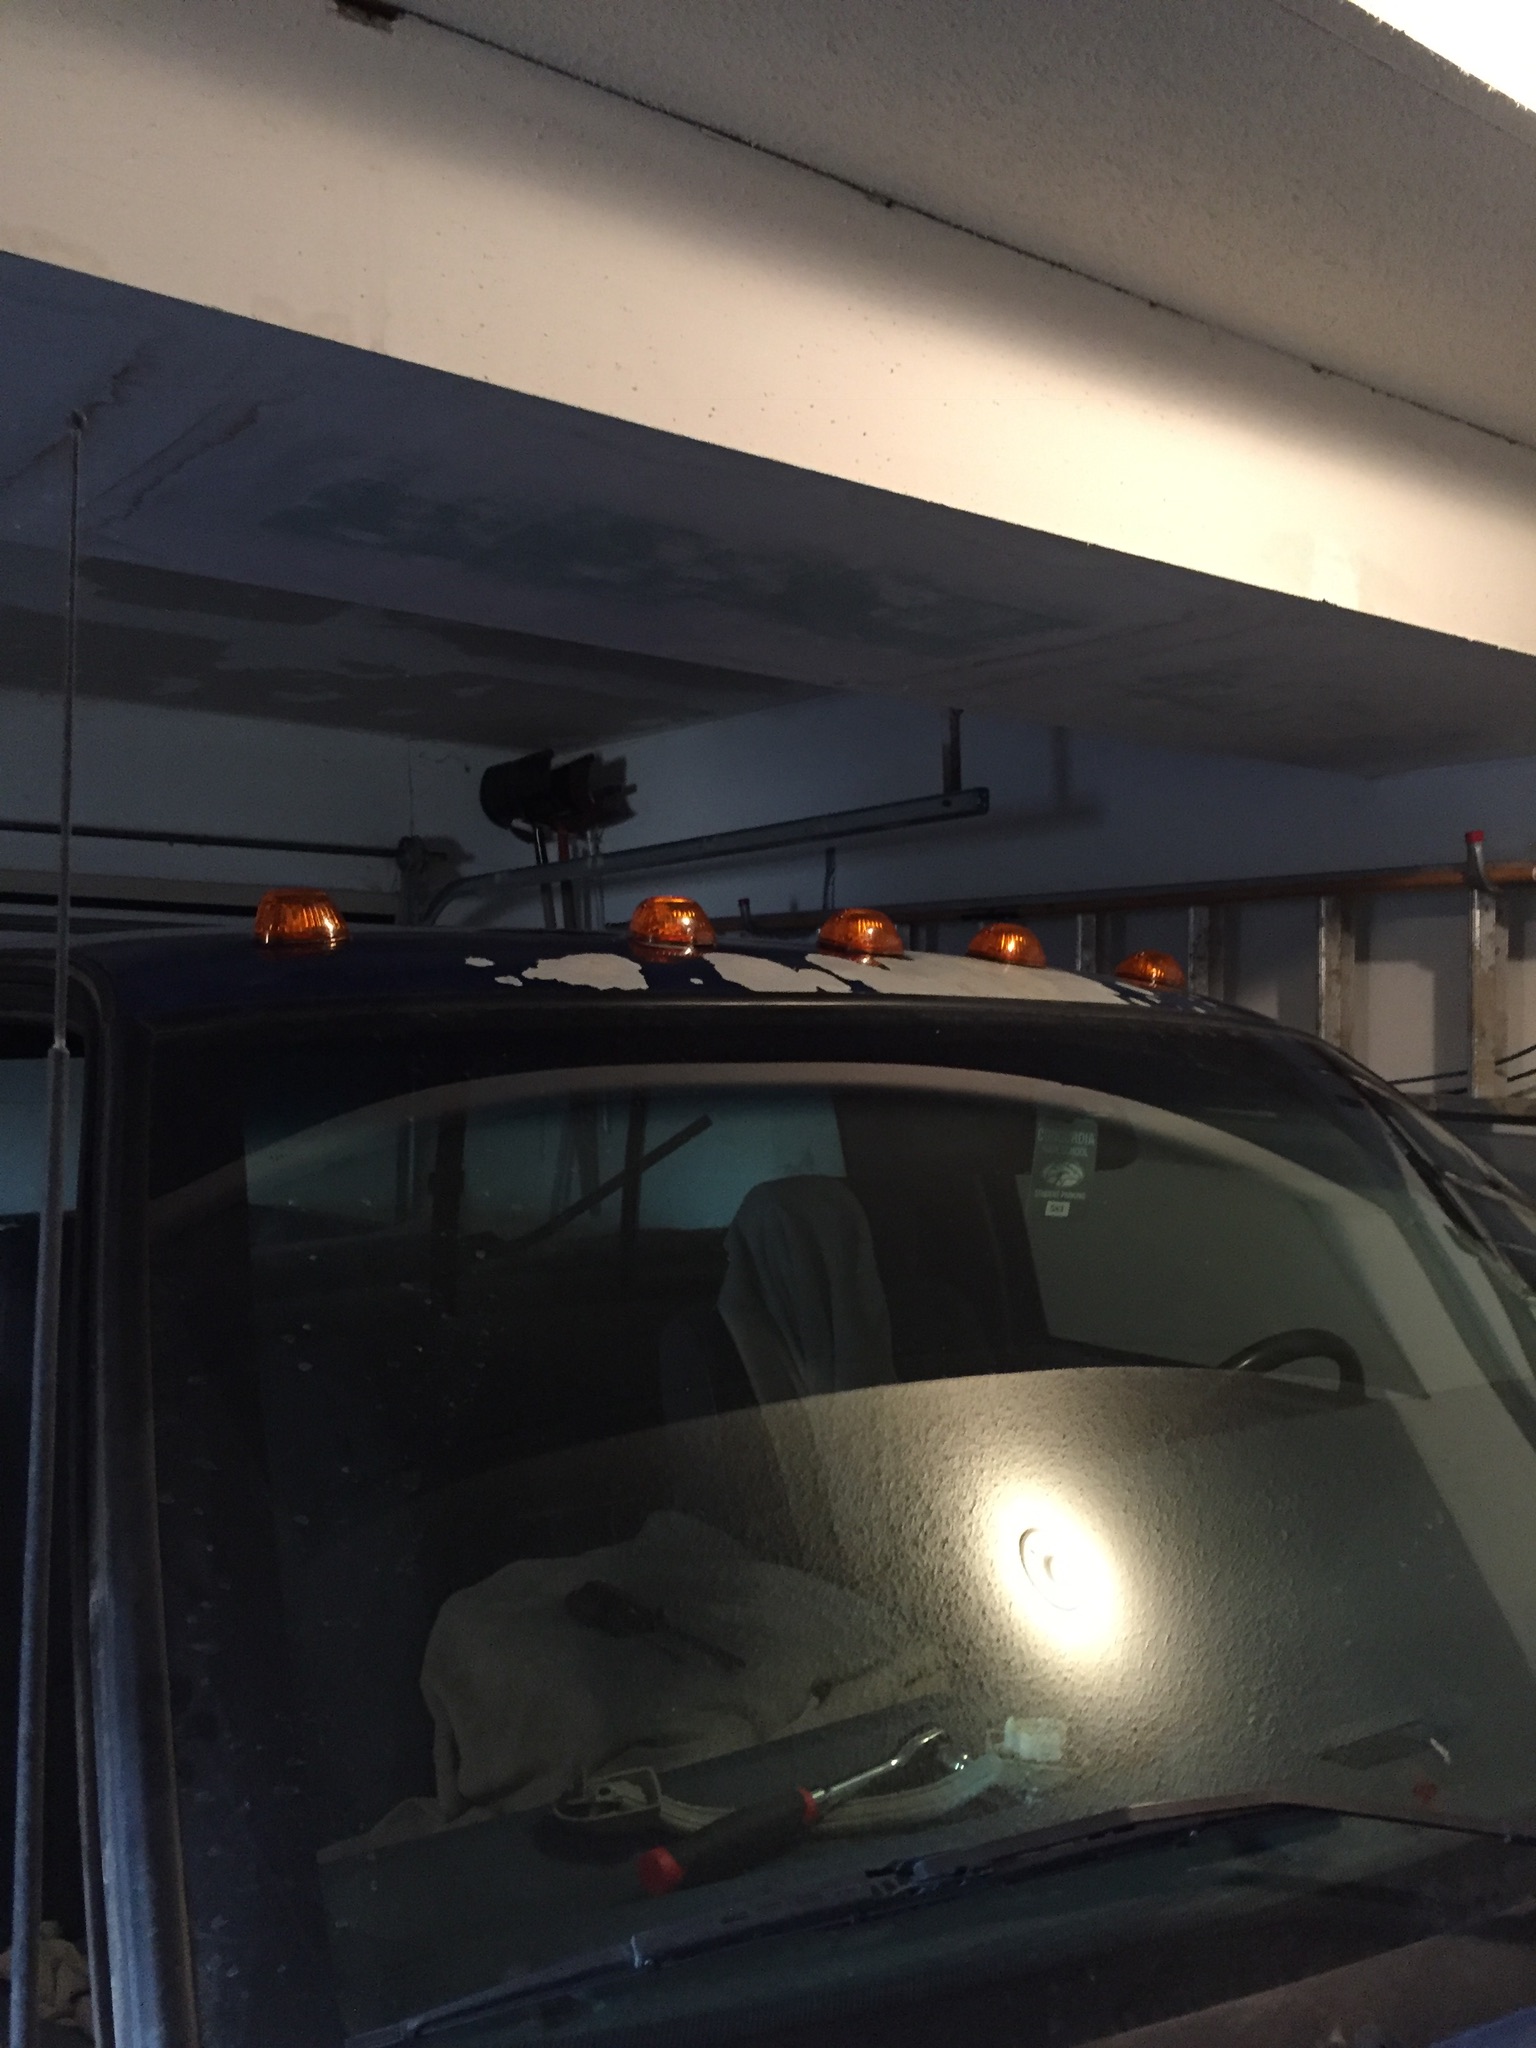
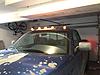
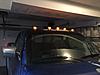
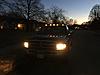
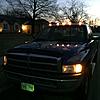
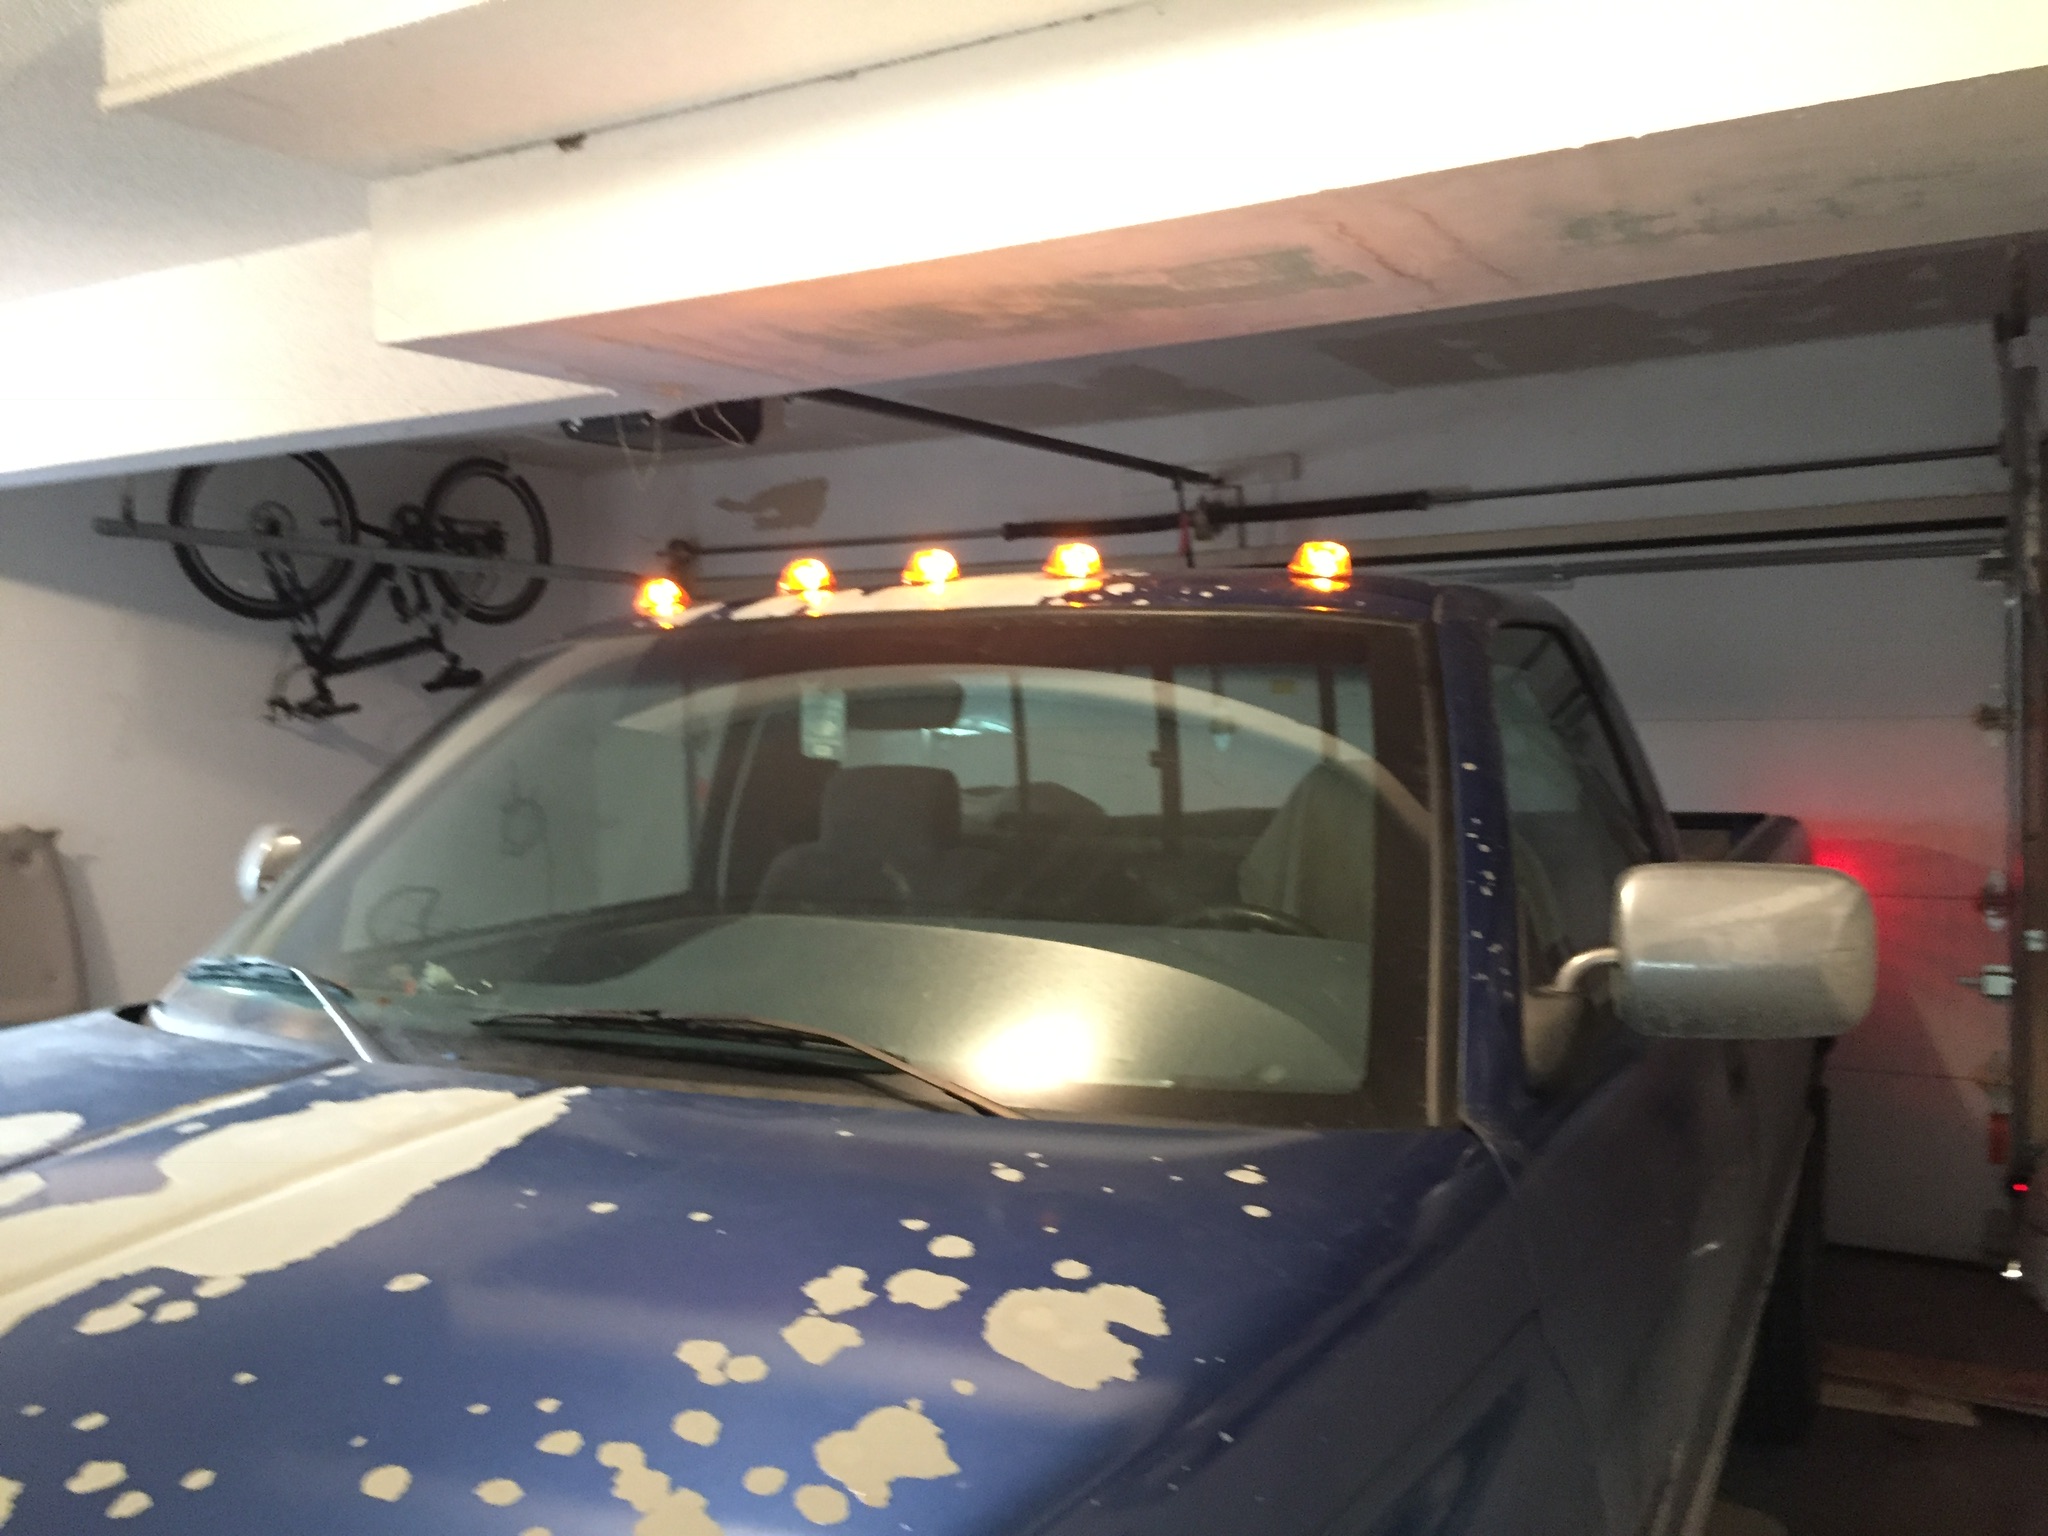
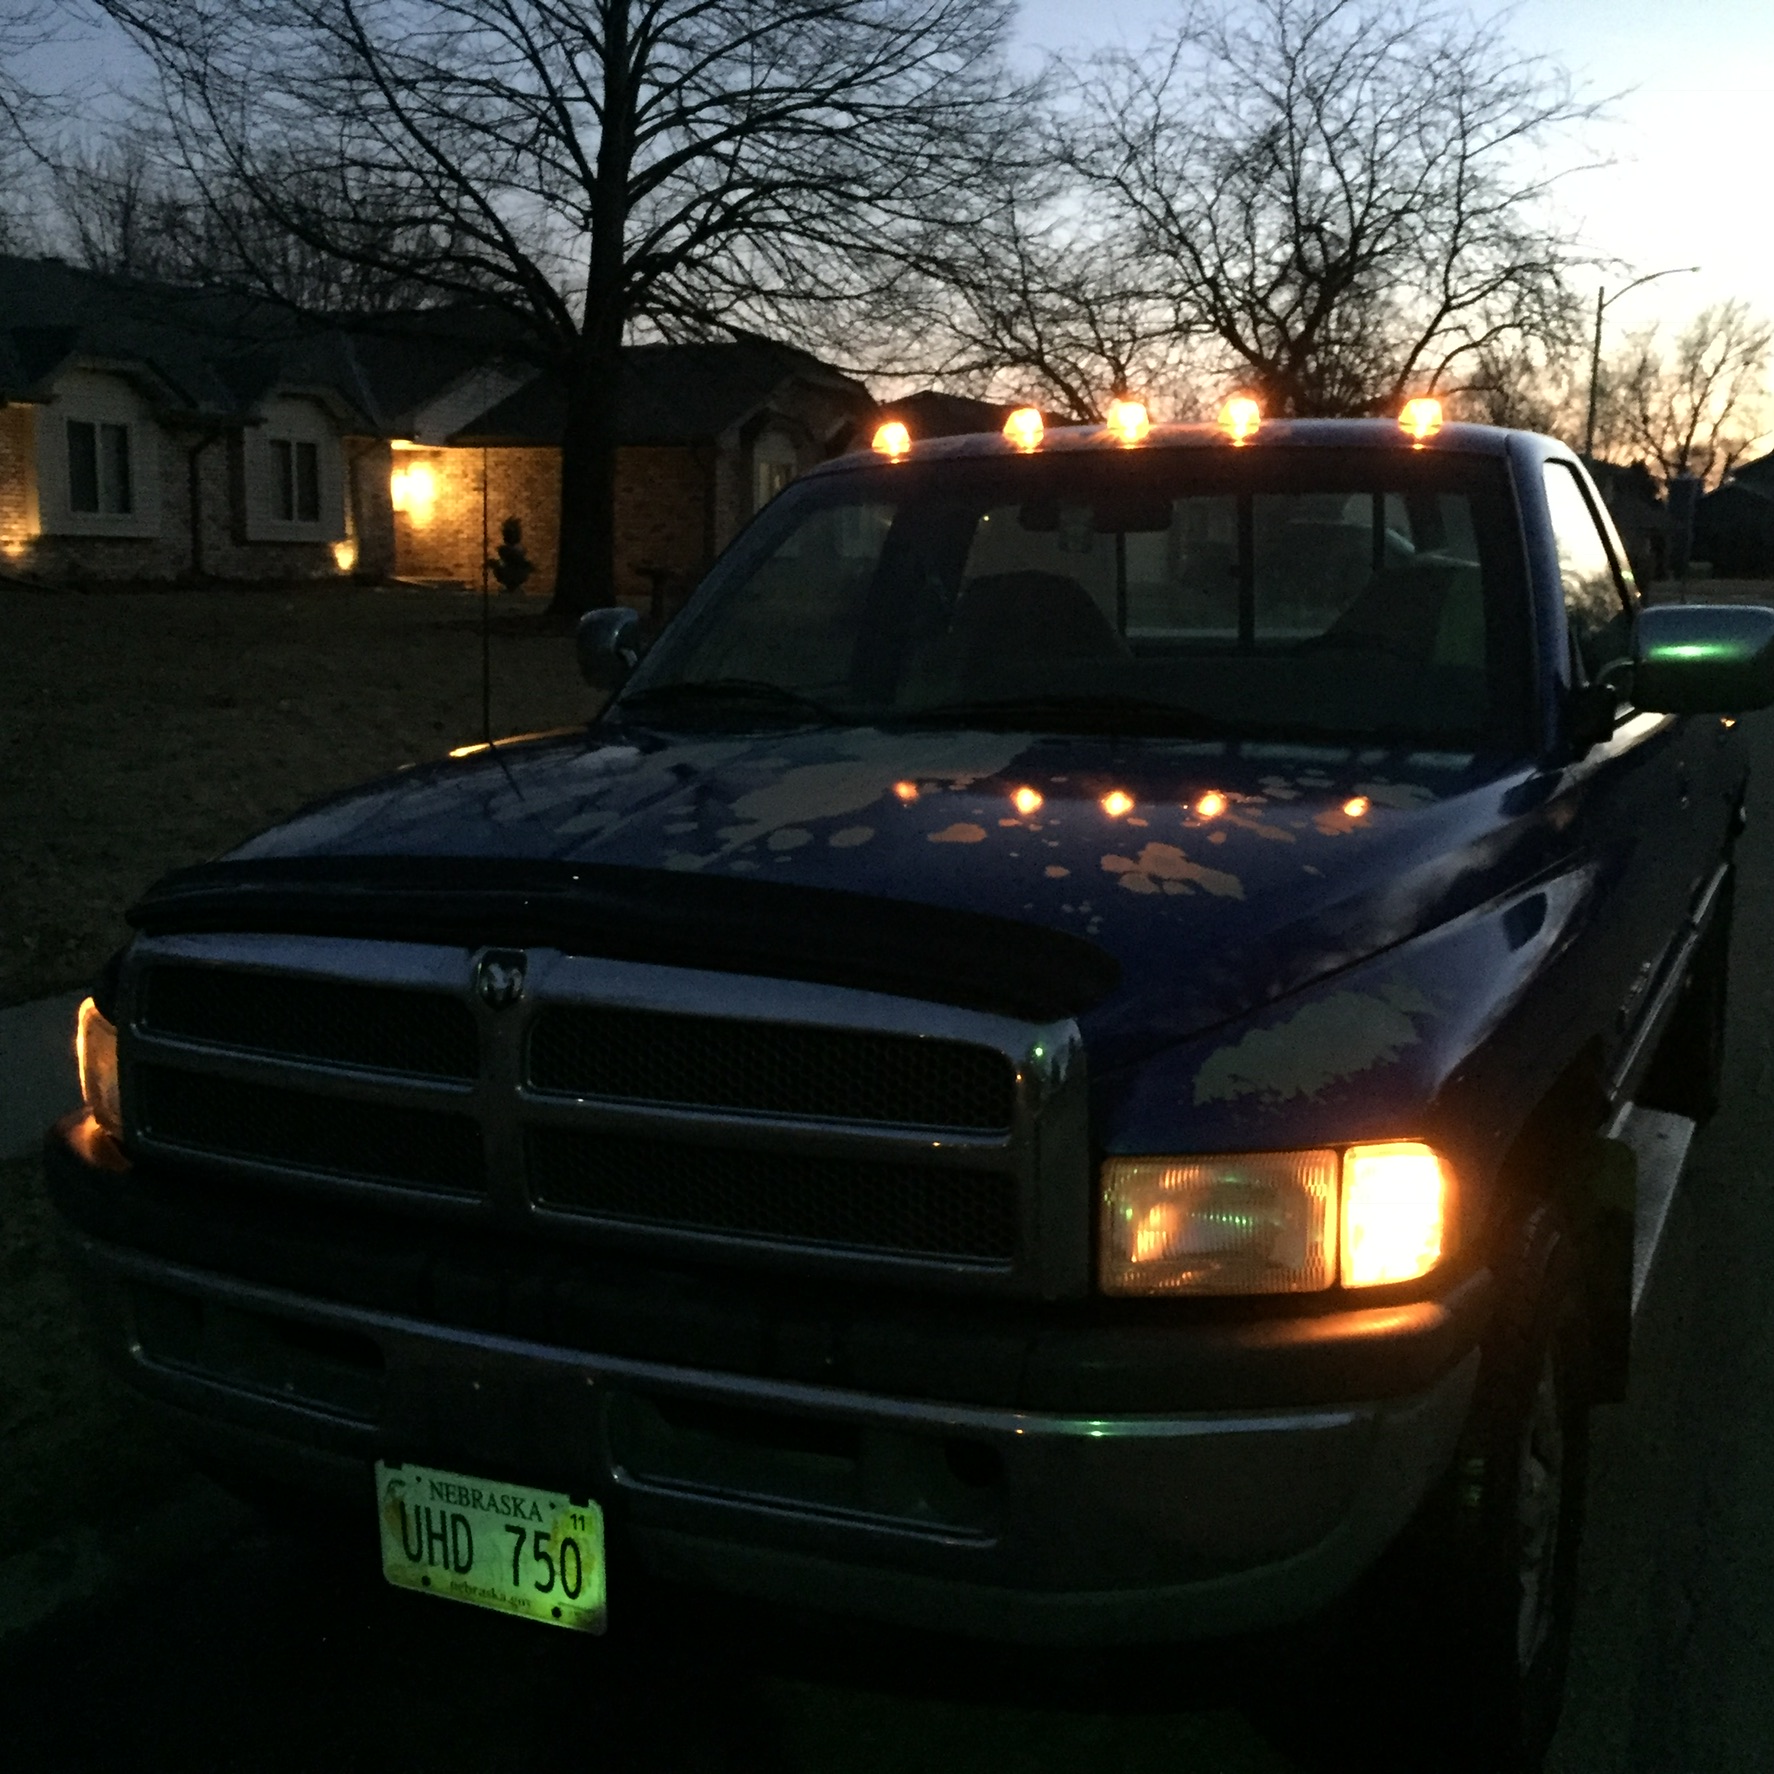
20. Once everything is reinstalled it should look great, like this! (Don't mind the missing paint, this but a scratch).
Attachment 28061
Attachment 28062
Attachment 28063
Attachment 28064
. Enjoy. So I got a 1994 Dodge Ram 1500. I've always liked the commercial or heavy duty rig look with the cab lights so I started looking Around. Found the recons and the pacers. Recons came in led and I've heard iffy reviews on them. Pacers came in led and incandescent, so I went with the pacer incandescent from Amazon, good price too. Very high quality.
https://www.amazon.com/Pacer-Perform.../dp/B00029X0HO
Needed stuff:
Philips and Flat screw driver
10 mm Socket and ratchet
Drill
Electrical tape
Crimper pliers(wire strippers)
14-16 guage crimp and seal connectors
7/8" or 1" hole saw
1/8 drill bit
Clear Silicone Sealant
Light kit
5 #8 1/2" sheet metal screws
Starting with tear down.
1: We need to remove the headliner, so start by removing the front pillars on left and right sides. They need to pull out towards the DOOR, NOT in towards the cab. They can break very easy. 2 clips holding the drivers in. I have the blue interior so my interior parts are hard to find, and my pasanger was not coming, so I left it in in fear of breaking it. Drivers pillar has to come off(for wiring).
2. Next remove the hanger behind the drivers seat. Gat a screw driver and pull the center clip out. Once the clip is pulled out all the way, pull on the clip and it should pull out of the roof/headliner.
3. Next remove the HOLY CRAP BAR (passanger roof handle). Pull off the covers on both sides, and remove the 10mm bolts on the strap.
4. Next remove the visors. Both sides are the same. 3 screws on the visor assembly itself, and the. 1 screw on the clip.
Attachment 28073
Attachment 28074
5. Next remove the compass/temp display. Two screws on the front of the unit, and then it pulls back, towards rear window, and then it drops down.
Attachment 28038
You can see the screw holes on the front, and the slide holes the clips slide into.
Remove the one connector like shows the the picture below.
Attachment 28039
6. Remove the dome light cover, and then pull off the two screws holding it on. Then remove the connector on the back.
Attachment 28040
Attachment 28041
7. Next Losen, don't remove, the rear pillars. If you can, work your fingers down the top of the piller until you feel the clip, then pull straight back, towards center of the cab, and it should unclip. Don't pry side to side or you risk breaking the plastic, like I did on my drivers side (trying to finger out how to losen the pillars lol
) just losen the top clip and you'll be good.Attachment 28042
8. Now push the headliner forward to release them from the rear pillars, and then push it back, and then foreword again towards the top of the dash, and pull the headliner out.
Attachment 28043
Attachment 28044
9. Now you can see the holes for the lights. 3 in the center, and two on either side. Take your center punch, and center punch the roof, inside the lower roof. Take a smaller drill bit drill out the center of each hole.
Attachment 28045
10. In the previous picture I have tape around the hole, if you want to try to preserve as much paint as you can, do this. There are better ways I'm sure, look those up and try those. I don't have much paint anyway so this is as far as I went. Once you happy with how you preserved your paint, take your hole saw, whatever size you need, I used 1", and drill from the inside. If you drill from the outside, your paint is toast, if you care.
Attachment 28046
Attachment 28047
Attachment 28048
11. Now you can measure your lights so their straight by putting a tape line across the roof from windshield corner to corner. Measure up from there to make sure your screw holes are the same length from the tape line.
OR just put on your light so it looks straight, and drill the holes. Do this by taking the gasket for the light and set it over the wiring hole, and mark the screw holes, and then drill them with the tape over the area to help preserve paint. If they look straight, no one will notice if they aren't off unless you get out the ruler and actually measure them. The hardest part is done for you already which is centering the lights side to side on the roof.
Attachment 28049
Attachment 28050
12. Now prepare your lights and screws. Put your light bulb in the socket, an de then put the socket into th light, it just twists in. Put the little rubber o-ri g washers on the screws and get them ready for install.
13. Take your silicone and glob some on the bottom of the light(don't be light on the globbing, last thing we want is leak), then put the foam gasket on over the wires onto the light, letting the silicone hold it in place. Then glob more silicone on the bottom of the gasket. Then take your light and screws and set them on ghe roof. Glob drops of silicone over the screw holes, and then around the wiring holes. Then place the screws in the light, and then put the wires through the hole and then screw down the light until you see some silicone ooze out. Don't worry about cleaning up the silicone, it's easier to clean when it drys as it just peels off. DO THIS STEP ONE LIGHT AT A TIME SO YOUR NOT RUSHING YOURSELF.
(Sorry no pictures of the silicone application, I did all the lights at a time and was rushing myself, hence the above statement)
14. Take your drill and drill bit again and drill a hole in the lower roof for your ground. Do this next to each light. Then take your #8 sheet metal screws and screw down the ground steps on each light. Try to position the wires so they aren't chafing against the sharp metal hole in the lower roof.
Attachment 28052
Attachment 28051
15. Now you can start wiring. Take the long wire reel found in the kit, and wire the farthest passanger side light first with a crimp and seal connector. Then run your wire along the roof, next to the other harness once you reach the center, and use the supplied splice connectors to wire the other lights. Be mindful so the wire isn't chafing against the sharp metal hole on the lower roof part. Do this with all the lights until you reach the driver side pillar/colum.
Attachment 28053
Attachment 28054
16. Once you have all the lights wired, run your power wire halfway down the column with the other factory harness(don't tape it or hold it down, just measuring the length), and cut it, so you can splice in your fuse that is supplied in the kit. Use 2 more crimp and seal connectors and put the portion of wire you cut in half on the other connector and continue it down the column.
Attachment 28055
Attachment 28056
Once it's in place, you can then tape It down, as that's all we will need to do for the wiring above.
17. OPTIONAL you can take some wiring conduit, I had some black 1/2 conduit laying around from another project, and conduit the harness as it goes above your head. It helps with chafing, especially if you cut some small sections and place it where it goes to the light through the lower roof.
Attachment 28057
Attachment 28058
Hold some of the harness in place with some electrical tape.
18. Now remove the Ash tray and cup holder, which are held in with 2 screws each, and then lower the tilt wheel and put the shifer(if automatic) in 1, and then pull the dashboard bezel. Just pulls straight out with some metal tabs, don't worry it's not hard, not easy to break either so your good. Then remove the cigar lighter plug and 12v power port plug, and put the bezel aside. Remove the 3 screws to the headlight switch. Find the black wire with yellow stripe, and splice into it with one of the red quick splice connectors supplied in the kit.
Attachment 28059
If unsure refer to the wireing diagram of the plug. The wire we want is in the "R" Position. If you test the power to this wire, it should turn on in the park lamp position, and stay on in headlight position, and NOT dim when you turn the switch. If it dims you have the wrong wire.
Attachment 28060
19. Test your lights. If everything works, hooray!!
If it doesn't retarce your steps. A good tool with this job too is the multimiteter. Use it. Once they all work, complete any finishing touches on the harness, and then reverese your steps reinstalling the interior panels. Good luck! 20. Once everything is reinstalled it should look great, like this! (Don't mind the missing paint, this but a scratch).
Attachment 28061
Attachment 28062
Attachment 28063
Attachment 28064
Last edited by CJSuhr; 02-05-2017 at 10:39 PM.
#3
02-05-2017, 09:40 PM
Join Date: Nov 2016
Location: Omaha NE
Posts: 344
Likes: 0
Received 0 Likes
on
0 Posts
4.
5.
6.
7.
8.
9.
10.
11.

14.
15.
16.
17.
18.
20.
*just an update for info, if you notice your headlight switch/plug is melted or burned, replace it at this time. ALSO if you splice directly into your headlight switch, splice as close as you can to the connector, so if you ever have to replace the switch, you tap into the new harness. (Most new switches come with new harness and connectors)*
5.
6.
7.
8.
9.
10.
11.
14.

15.
16.
17.

18.
20.


*just an update for info, if you notice your headlight switch/plug is melted or burned, replace it at this time. ALSO if you splice directly into your headlight switch, splice as close as you can to the connector, so if you ever have to replace the switch, you tap into the new harness. (Most new switches come with new harness and connectors)*
Last edited by CJSuhr; 02-06-2017 at 02:12 PM.
#4
02-05-2017, 09:42 PM
Join Date: Nov 2016
Location: Omaha NE
Posts: 344
Likes: 0
Received 0 Likes
on
0 Posts
#5
02-05-2017, 10:09 PM
It's actually better if you host the pics someplace like photobucket, and then link to them here. (use the image tags) I think you have limited space for attachments.... 
Good write up though. Thanks.
If you want to clean it up, get the images where they need to be, I'll move a copy to the DIY section.
Good write up though. Thanks.
If you want to clean it up, get the images where they need to be, I'll move a copy to the DIY section.
#6
02-05-2017, 10:43 PM
Join Date: Nov 2016
Location: Omaha NE
Posts: 344
Likes: 0
Received 0 Likes
on
0 Posts
Well I've spent enough time on this project today
If I get a chance tomorrow, I'll see what I can do with the images.
The only reason I don't like photobucket and such is that a lot of times the image gets deleted or moved. And then it doesn't show up in the original write up or post. In the middle of uploading images, for the write up part my internet crashed, and that's most likely why. Some stupid crap.
#7
02-06-2017, 09:11 AM
Trending Topics
#8
02-06-2017, 09:27 AM
Join Date: Nov 2016
Location: Omaha NE
Posts: 344
Likes: 0
Received 0 Likes
on
0 Posts
#9
02-06-2017, 09:36 AM