


DIY Front Brake Pads
#1
 04-22-2010 | 04:56 PM
Thread Starter
|
Grand Champion
Joined: Dec 2008
Posts: 6,556
Likes: 1
From: TX
I know this is a difficult task but I thought might as well make one for some of the new guys that have never tried to change them before. I also painted my calipers since I thought it was a good time to do this too. 
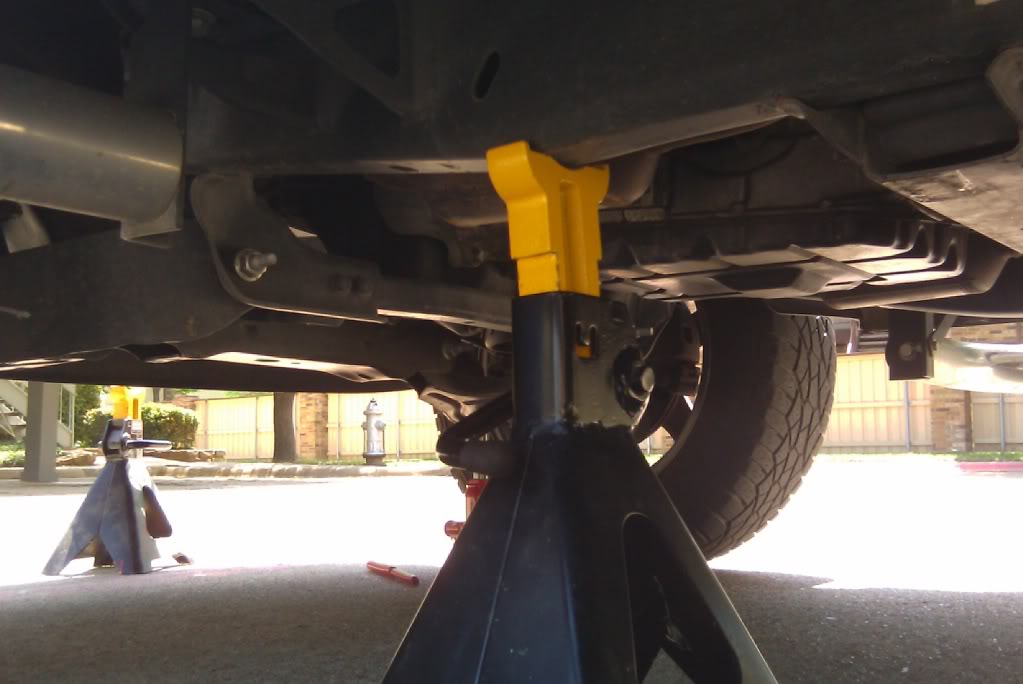
1. Jack the front of your truck up so you can remove both front wheels. I put two jack stands under the frame to help support the truck. And no I didnt jack up the truck on the nerf bar, the stock jack was just there. Never used it lol
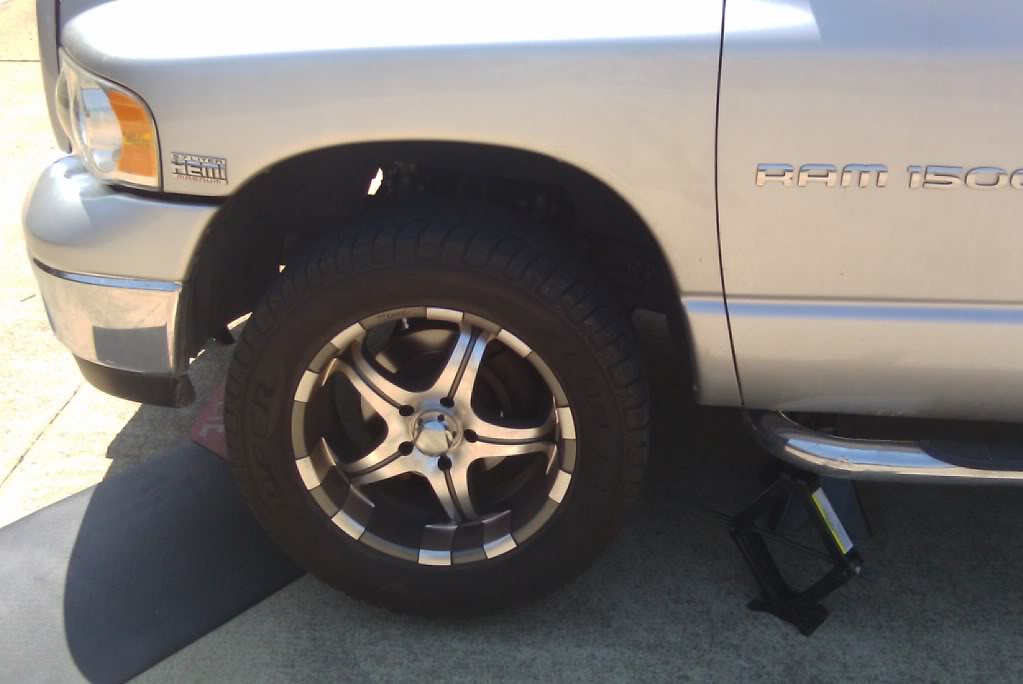
2. Remove Wheels
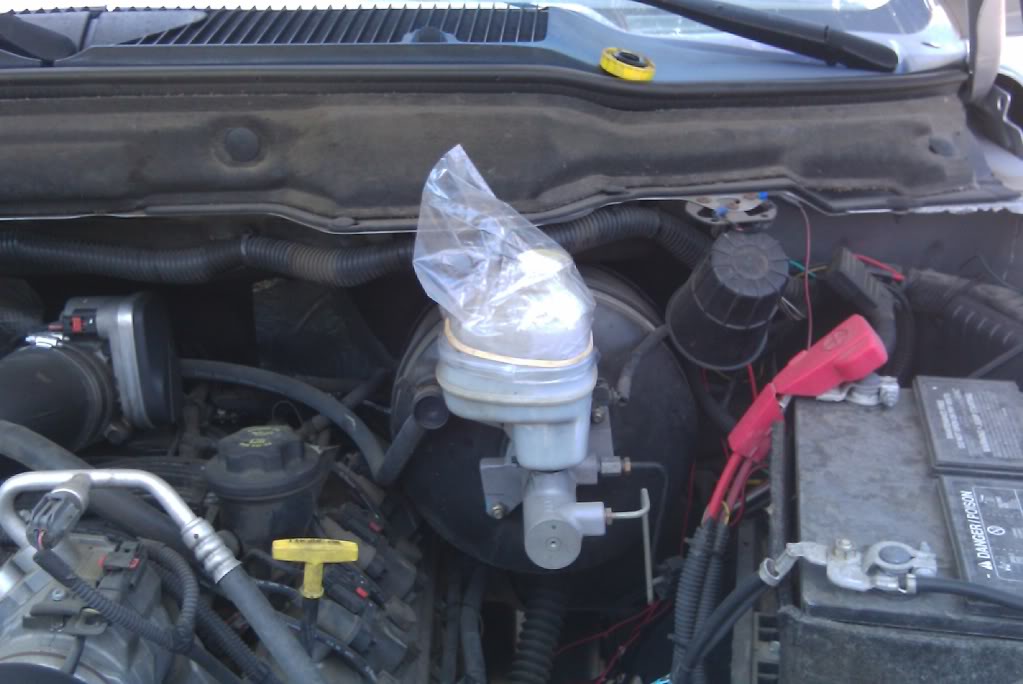
3. Remove Cap on master cylinder so that it wont overflow with brake fluid when you take apart the caliper. You can put a shop rag or plastic baggie to catch the overflow. Mine did not overflow fyi
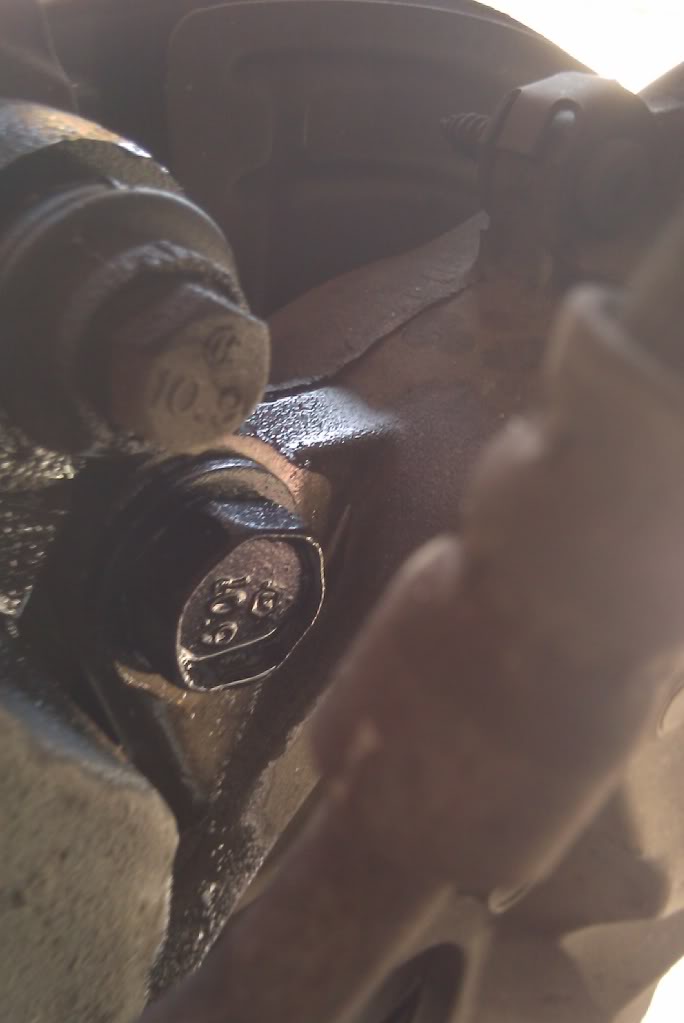
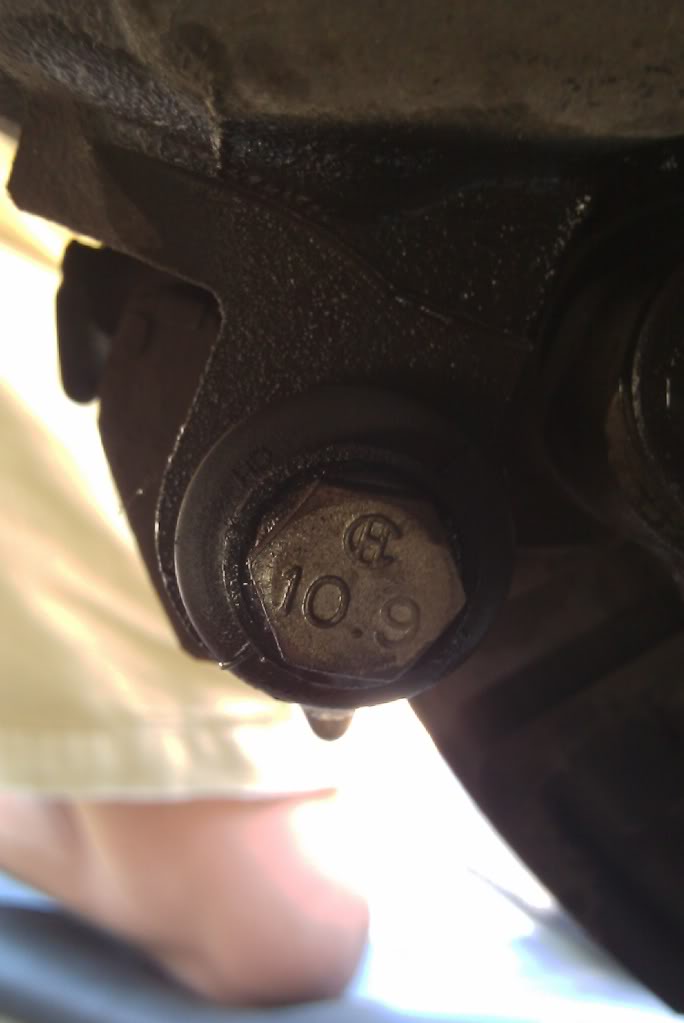
4. Remove the 4 bolts that hold the caliper in place. The bigger bolts are 21mm and the smaller ones are 13mm. Soak good with wd-40 for about 15 minutes so its easier to take them off because they are super tight.
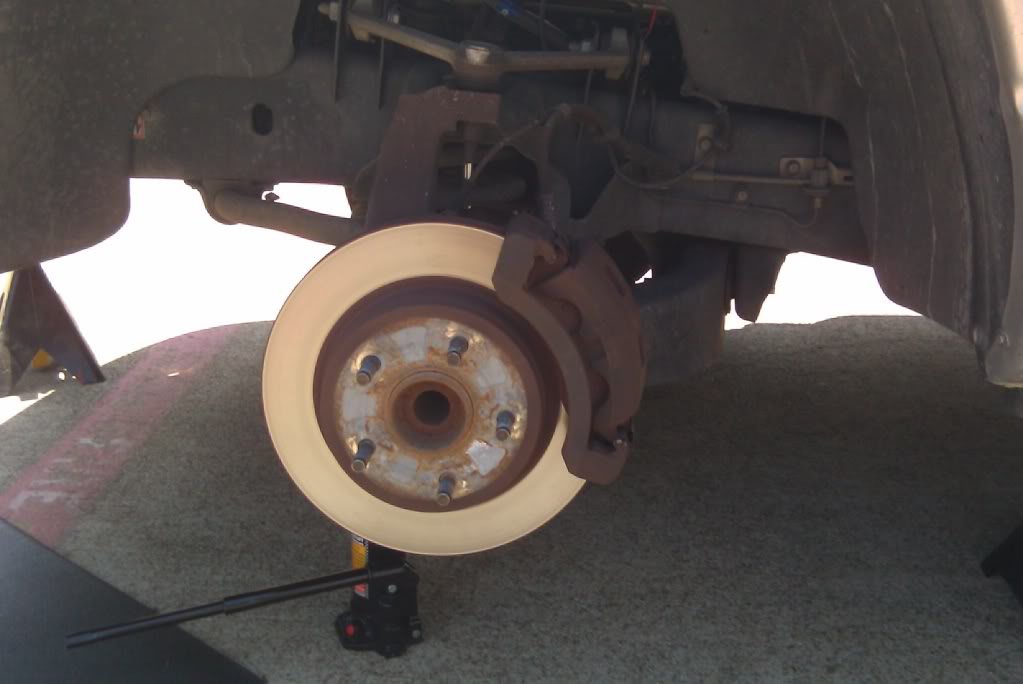
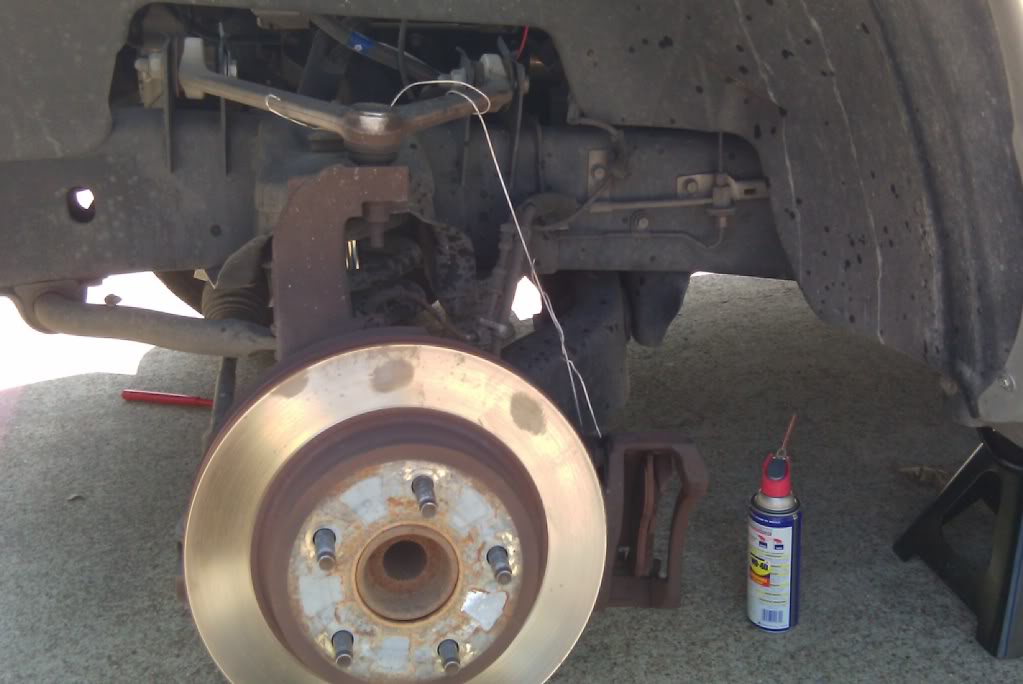
5. Remove the bolts and pull the caliper of the rotor. Be careful because it is heavy and u dont want to mess up the brake fluid line. I used a wire hanger and rigged it up so it would hold it up.
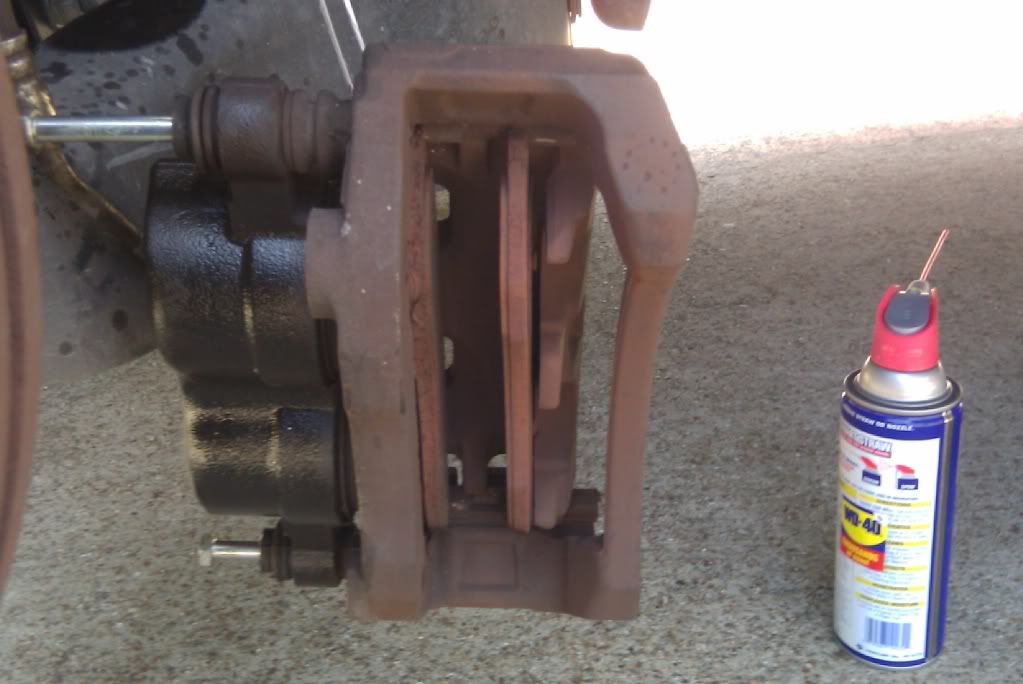
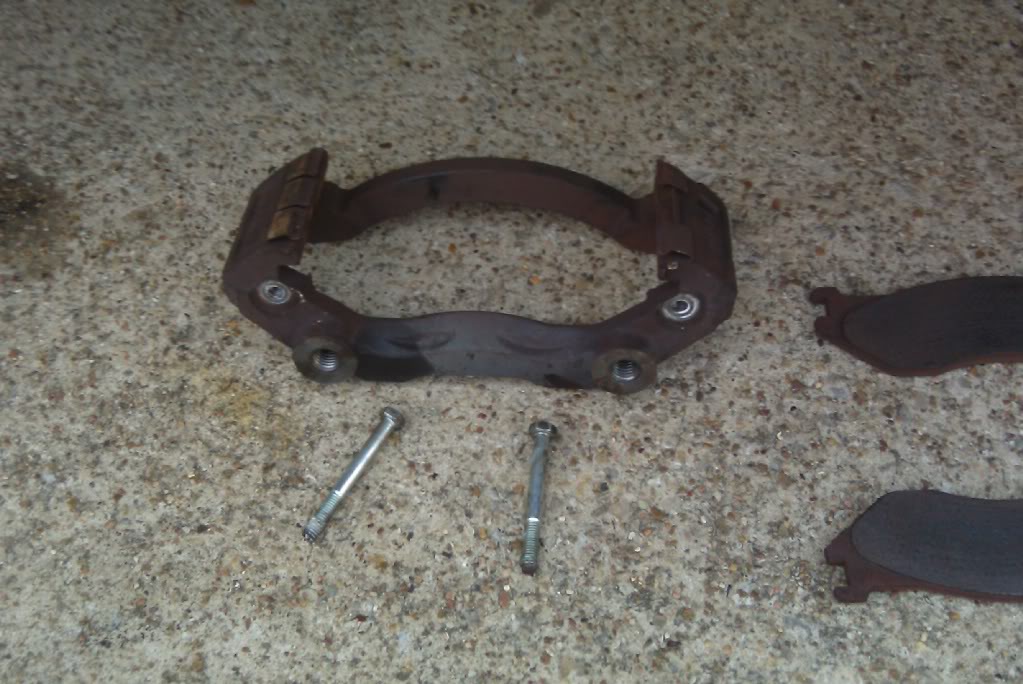
6. Separate the caliper and Remove the old brake pads. they just push out the sides.
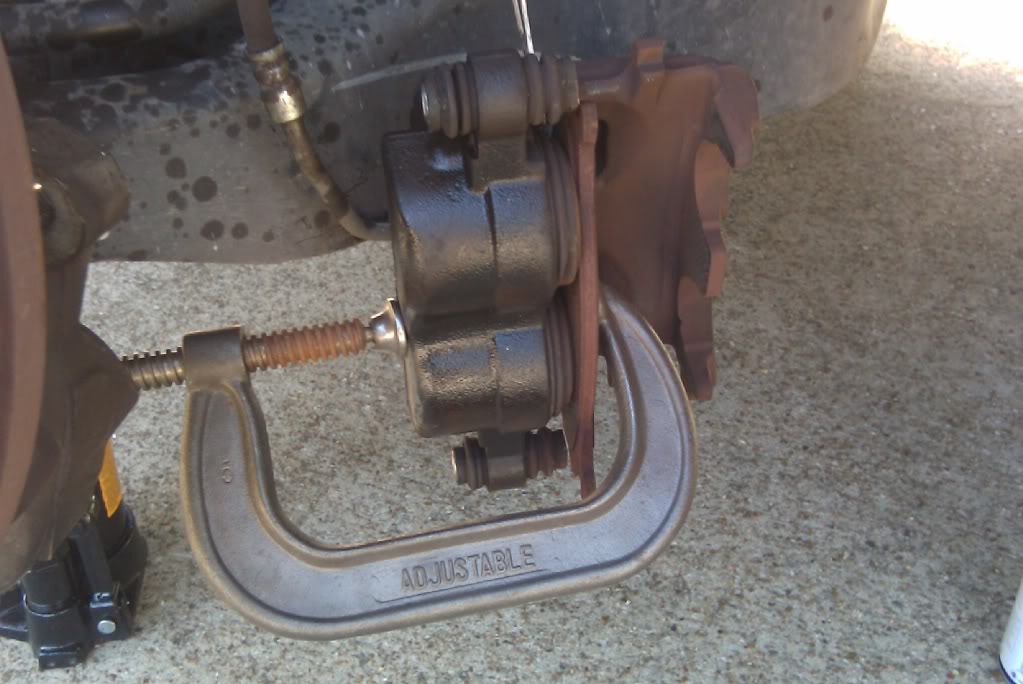
7. Now you need to compress the piston. Get a c-clamp and one of the old pads. Start to tighten the clamp so the pistons compresses.
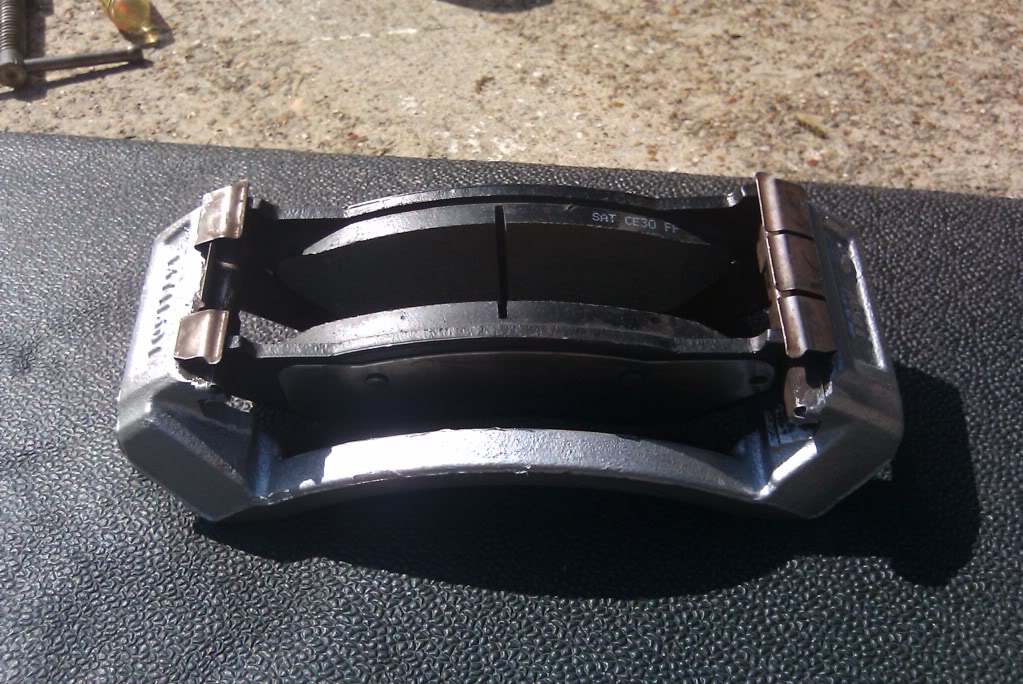
8. Put the new pads in the caliper. I got ceramic pads so you would want to grease the back of them before you put them in so they wont squeal when you drive them.
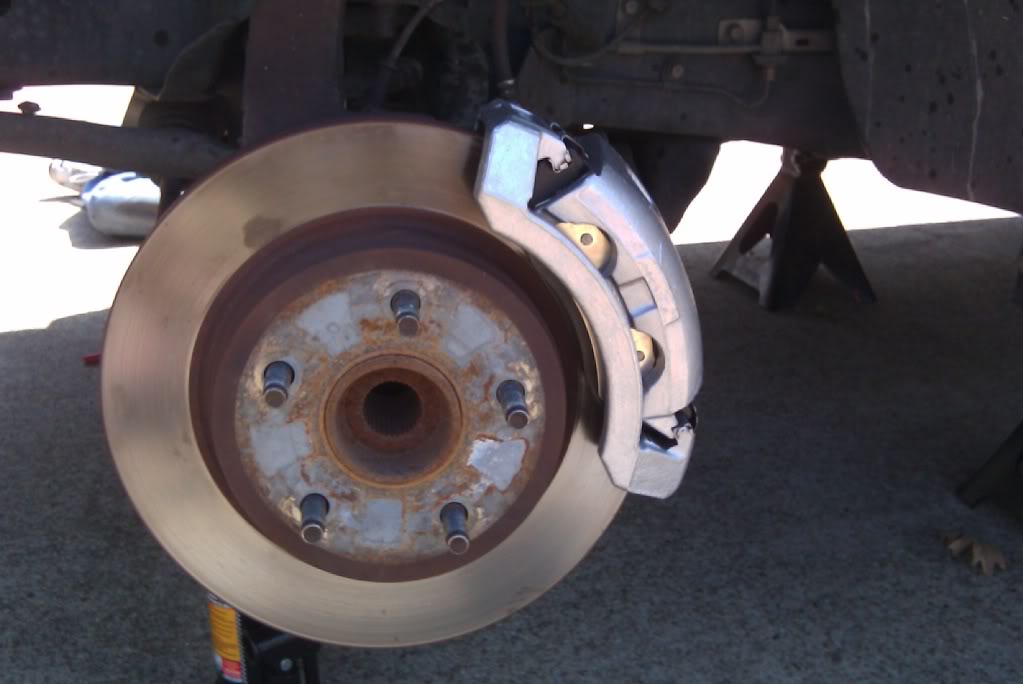
9. Put it all back together and tighten all your bolts tight.
Next steps is what I did to make sure the new pads mated to the rotors well.
10. Start the truck and press on your brakes 5-6 times. Then I went to a emptied parking lot and did runs from 45-5, pressing on the brakes 5-6 times and repeated the process from 35-5. Then I drove around for 15 minutes. This worked for me as I have zero squealing and my truck stops great now.
Hope this diy helps some people out. Enjoy! Silver
1. Jack the front of your truck up so you can remove both front wheels. I put two jack stands under the frame to help support the truck. And no I didnt jack up the truck on the nerf bar, the stock jack was just there. Never used it lol
2. Remove Wheels
3. Remove Cap on master cylinder so that it wont overflow with brake fluid when you take apart the caliper. You can put a shop rag or plastic baggie to catch the overflow. Mine did not overflow fyi
4. Remove the 4 bolts that hold the caliper in place. The bigger bolts are 21mm and the smaller ones are 13mm. Soak good with wd-40 for about 15 minutes so its easier to take them off because they are super tight.
5. Remove the bolts and pull the caliper of the rotor. Be careful because it is heavy and u dont want to mess up the brake fluid line. I used a wire hanger and rigged it up so it would hold it up.
6. Separate the caliper and Remove the old brake pads. they just push out the sides.
7. Now you need to compress the piston. Get a c-clamp and one of the old pads. Start to tighten the clamp so the pistons compresses.
8. Put the new pads in the caliper. I got ceramic pads so you would want to grease the back of them before you put them in so they wont squeal when you drive them.
9. Put it all back together and tighten all your bolts tight.
Next steps is what I did to make sure the new pads mated to the rotors well.
10. Start the truck and press on your brakes 5-6 times. Then I went to a emptied parking lot and did runs from 45-5, pressing on the brakes 5-6 times and repeated the process from 35-5. Then I drove around for 15 minutes. This worked for me as I have zero squealing and my truck stops great now.
Hope this diy helps some people out. Enjoy! Silver
#3
04-22-2010 | 05:25 PM
Moderate User
Joined: Oct 2008
Posts: 17,003
Likes: 19
From: Albany, NY
Nice write-up, but FYI...you don't need to remove the master cylinder cap. Just compress the calipers slowly and you'da been fine. I have NEVER removed the cap and don't understand why anyone does.
I just did my exploder front and back...never removed the cap.
I'll copy and put theis in the DIY section for ya.
and WOW, those stock pads were thin!OMG
I just did my exploder front and back...never removed the cap.
I'll copy and put theis in the DIY section for ya.
and WOW, those stock pads were thin!OMG

#5
04-22-2010 | 05:30 PM

Banned
Joined: Jun 2008
Posts: 5,343
Likes: 0
Nice write-up, but FYI...you don't need to remove the master cylinder cap. Just compress the calipers slowly and you'da been fine. I have NEVER removed the cap and don't understand why anyone does.
I just did my exploder front and back...never removed the cap.
I'll copy and put theis in the DIY section for ya.
and WOW, those stock pads were thin!OMG
I just did my exploder front and back...never removed the cap.
I'll copy and put theis in the DIY section for ya.
and WOW, those stock pads were thin!OMG
looking good bullet !!
#7
04-22-2010 | 06:41 PM

Champion
Joined: Apr 2007
Posts: 4,829
Likes: 3
From: Olathe, KS
Trending Topics
#10
04-22-2010 | 07:59 PM

Champion
Joined: May 2008
Posts: 4,210
Likes: 0
From: Shreveport, LA