


How to remove dash, replace heater core and AC evaporator core

I'm posting my recent heater core job since there doesn't seem to be any good guides that I could find. I have been looking into it for about 3 years and only found general discussion about it. Nothing at all gave me a good idea of what to expect. So here it is.
The repair was done on a 2001 model year.
EDIT: Some members have reported the cheap non aluminum cores have leaked within a year and had to do the repair all over again. It is recommended to use high quality aluminum for both heater and AC cores. I got mine retail from Oreillys, they were about $100 for both. I used a non flexible tube core and it requires removal of the heater box. There's another style with flexible inlet tubes that allow installing without removal of the heater box but still requires dash removal.
It was also mentioned that some cores have less vertical tubes causing less heat transfer, so make sure you new core has at minimum same number of vertical tubes. Would be a real downer to have mediocre heat in the winter with a brand new core.
REMOVAL:
Recover AC refrigerant. I had shop do mine free, they can resell the R134a (may not be necessary if replacing heater core only, and not removing heater box)
Disconnect battery
Remove 2 front screws on corner kick panels, remove corner panels
Remove gauge bezel, tilt steering wheel down, e brake on, pull gear lever down to 1st, remove gauge bezel, set back to park
Remove drink holder 6 screws (2 hidden under gauge bezel)
Remove glove box, pulls up and unclips
Remove 1 10mm nut above air box with ground wire using long extension and deep socket
Remove ground wire and remove 2nd nut from under ground wire
Remove 1 10mm nut in upper right corner above blower motor (facing downward/ upper right)
Remove ash tray, pulls straight out
Remove cubby pocket 3 screws
Remove lower steering kick panel 3 screws
Remove gear indicator cable
Remove 2 10mm bolts from steering column and drop steering wheel
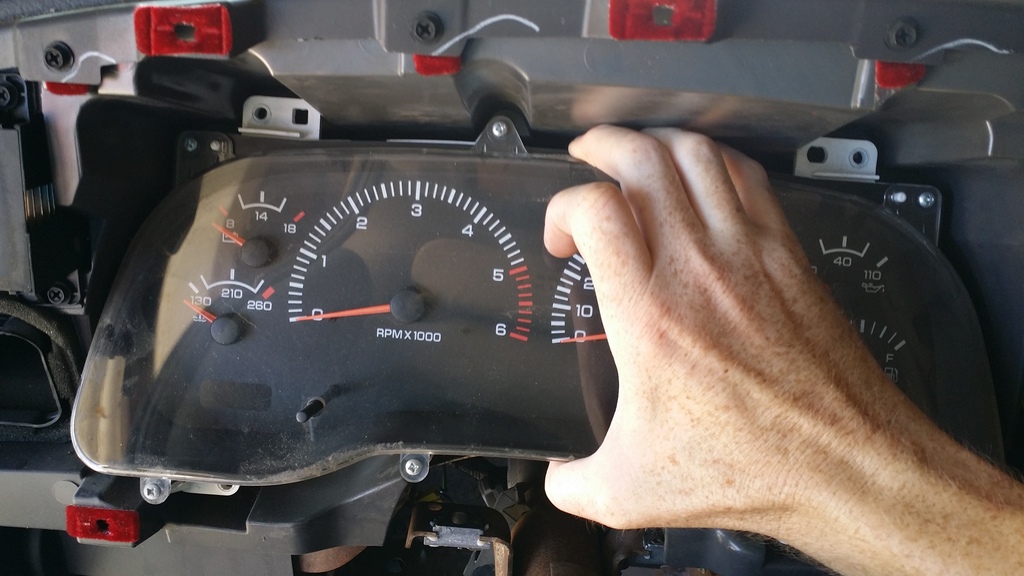
Remove gauge cluster, 4 screws, unplugs itself from harnesses as it's pulled outward, careful the gear indicator cable is attached and comes out with it.
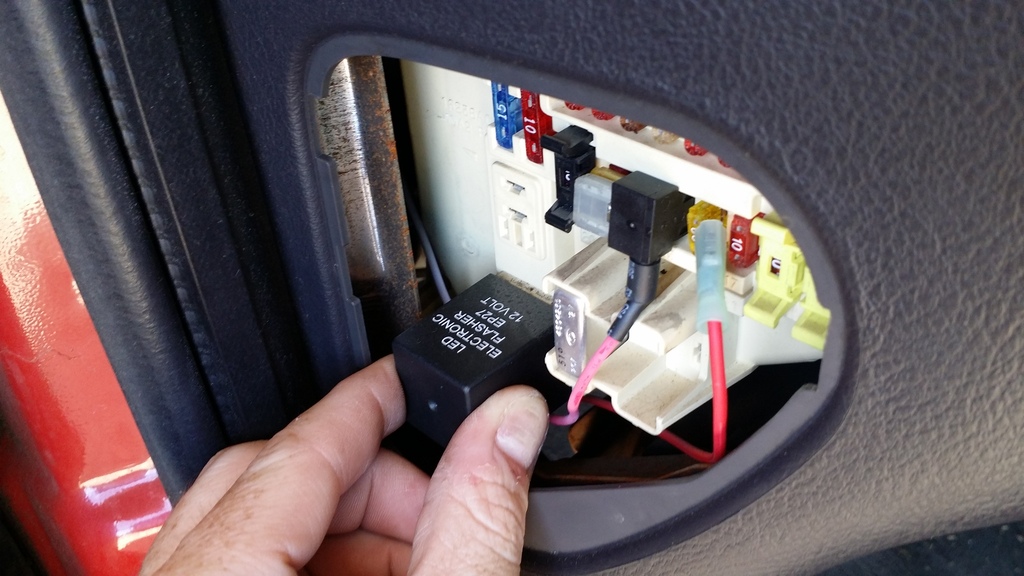
Remove fuse box cover and remove flasher module and anything else that'll be in the way
Remove lower center cover 2 screws
Unplug center harness
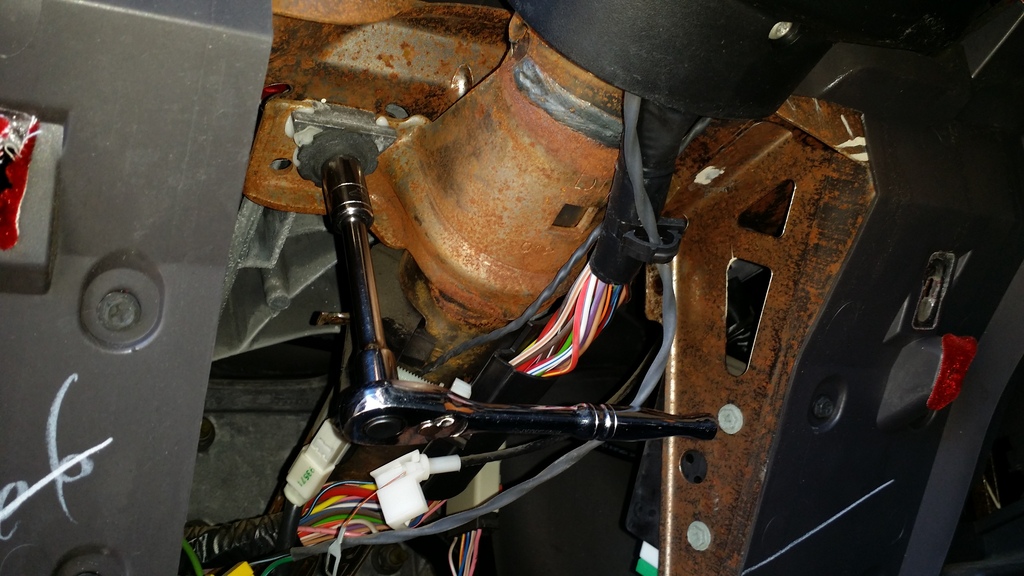
Remove 2 10mm side bolts from center bracket
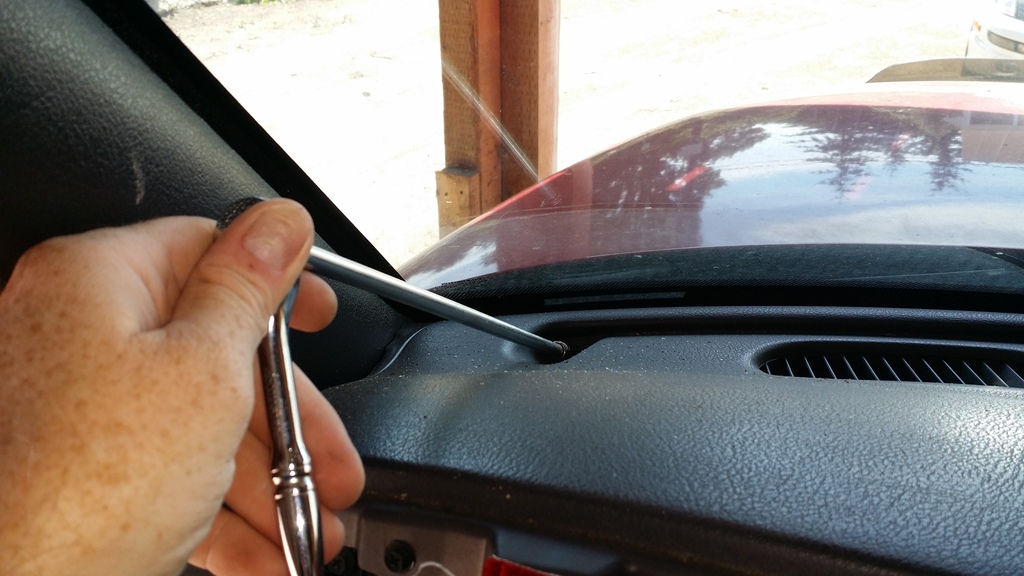
Remove 5 screws along windshield, use long extension, 5/16 socket
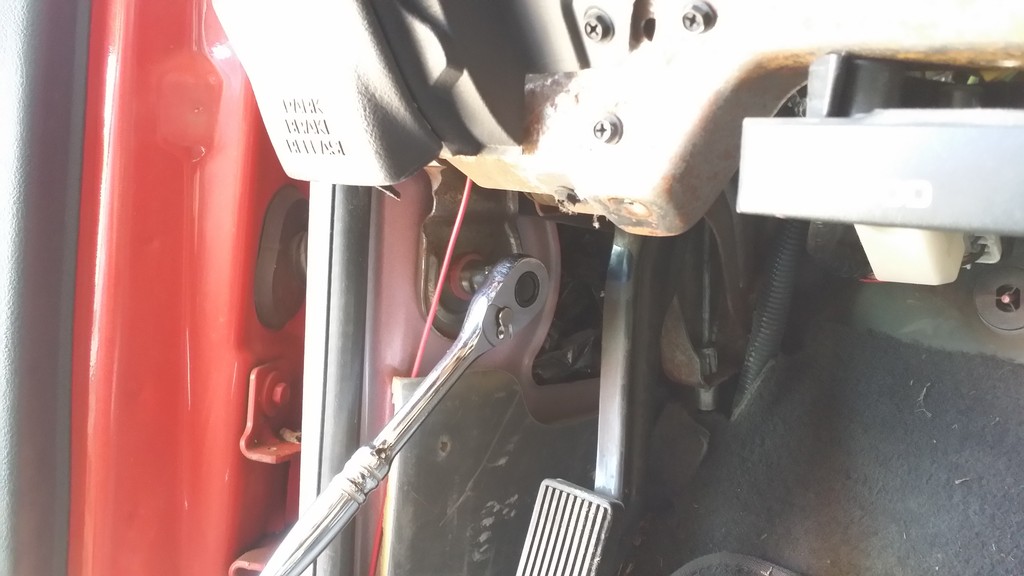
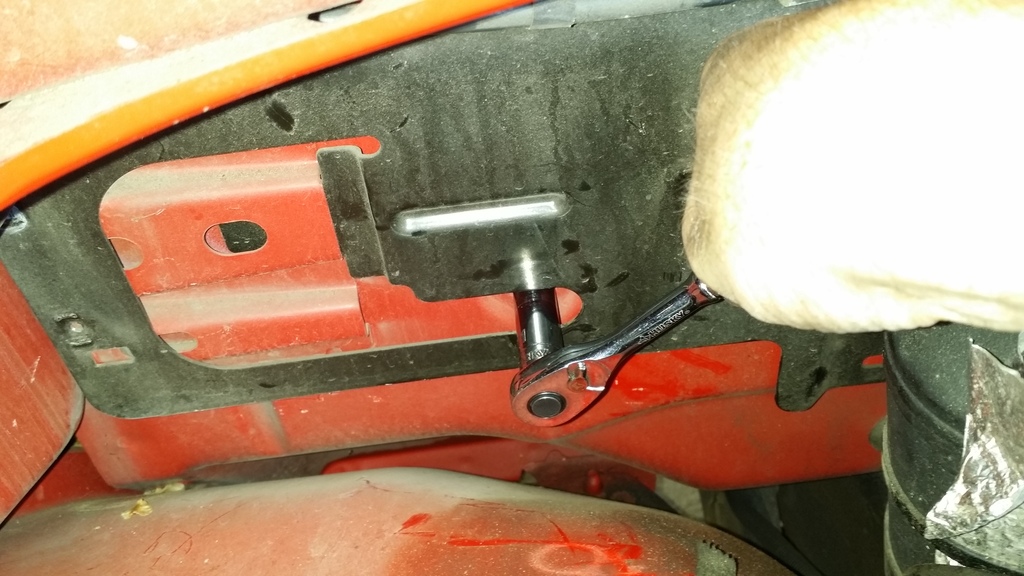
Remove 2 large bolts on side wall using 1/2in socket, 1 each side, be ready to catch and tie up dash to overhead handle
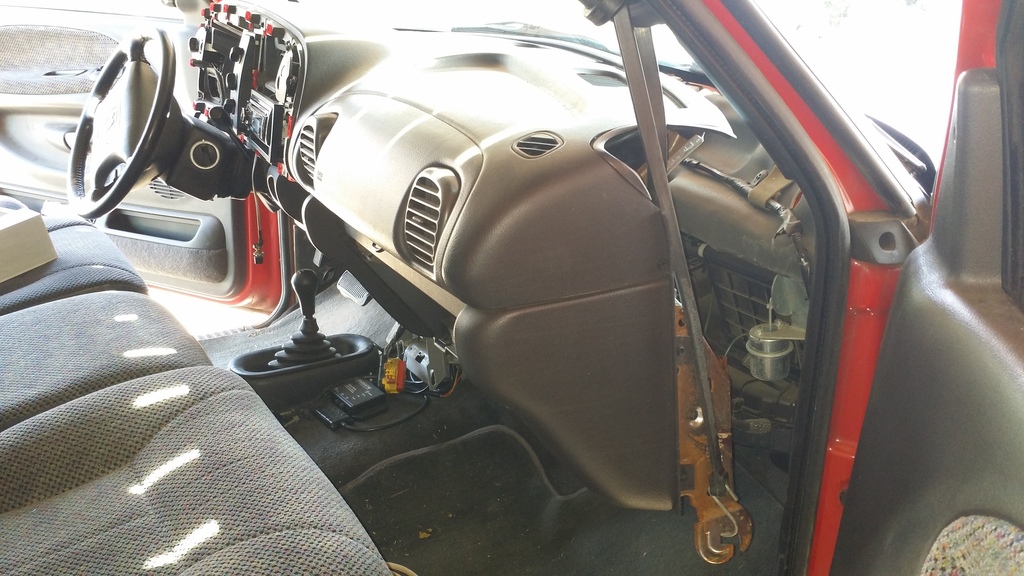
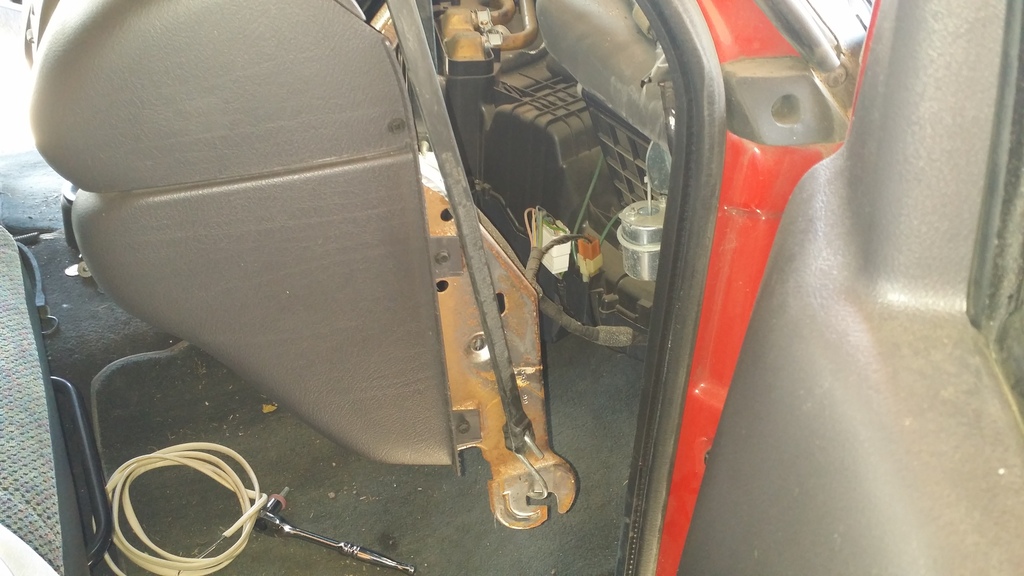
Go ahead and pull dash away from firewall, have a friend support the middle to prevent cracking. Use a bungee cord to support the end while you work.
Unclip the 2 electrical harnesses from ac box
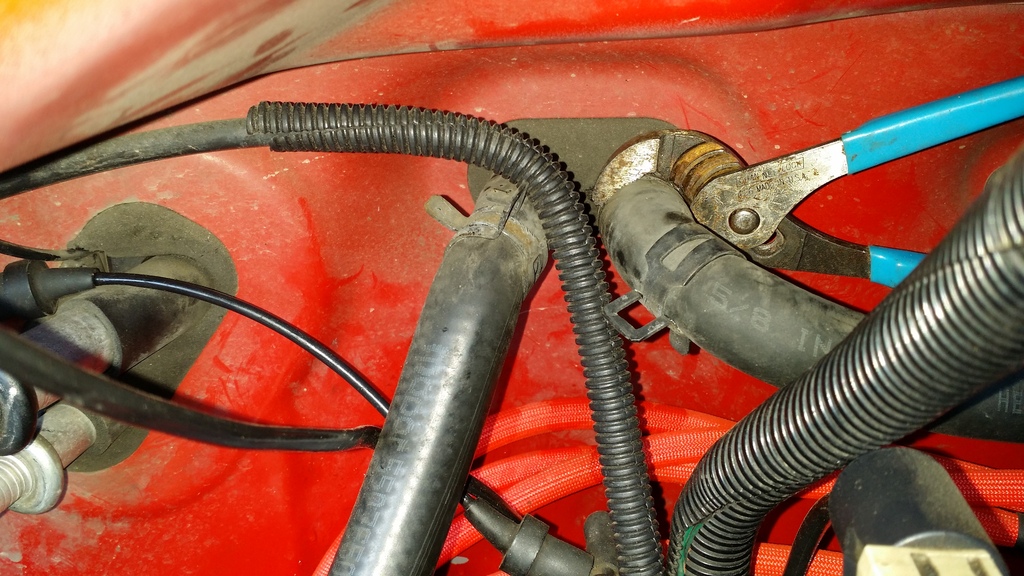
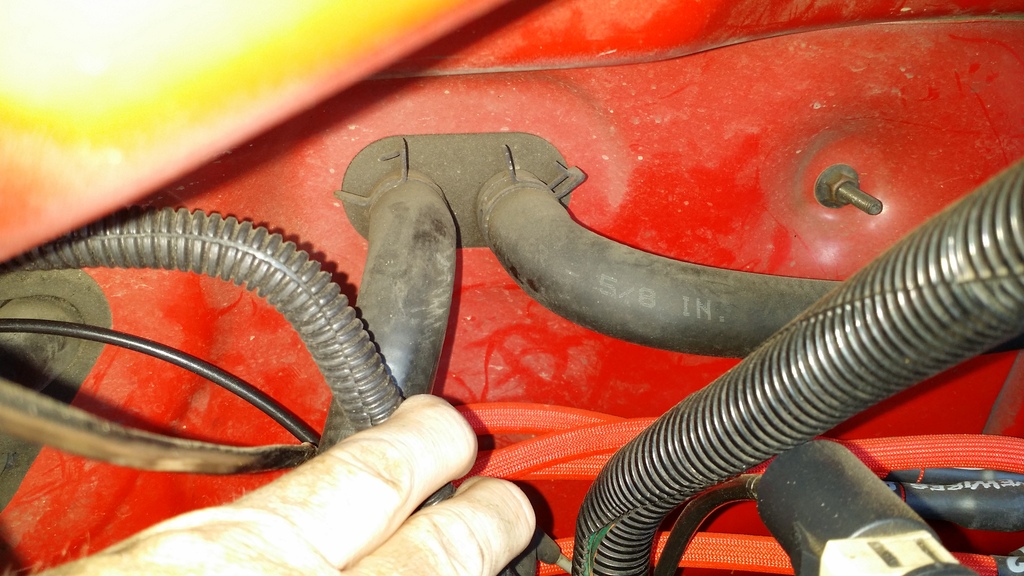
Remove heater hose clamps, I used long needle nose pliers to remove the clamps
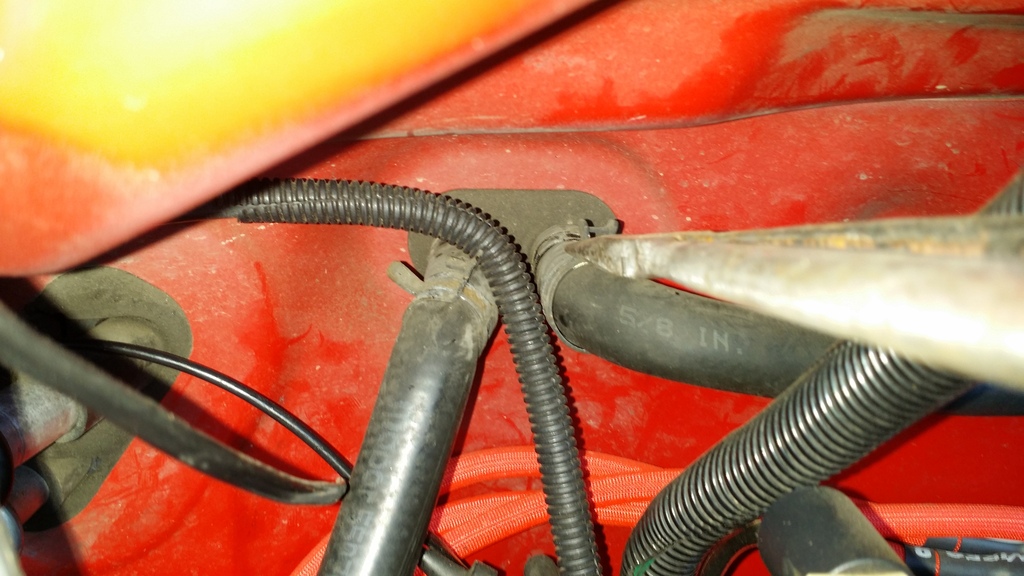
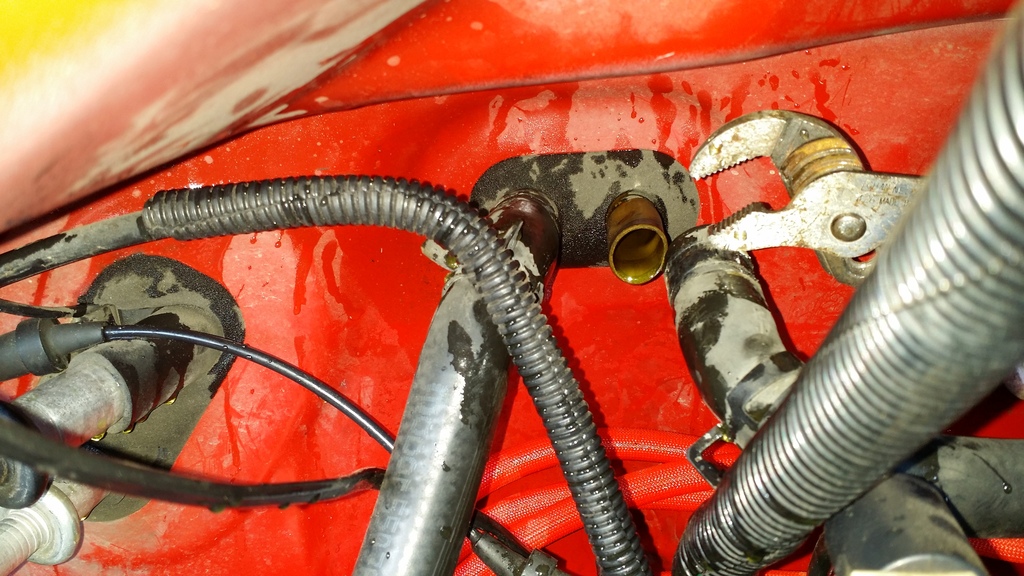
Pull and twist hose with small channel lock pliers to break them loose and remove. Remove air hat if more room is needed. Stuff a small rag in the ends of the pipes or cap them off to prevent spills, also pull carpet back and put some rags to catch any spills. I suggest replacing the heater hoses as they will be loose after breaking them off the heater core tubes
From here you can choose to continue and remove the heater box or replace heater core only with the heater box still in truck.
OPTION 1:
To replace just the heater core without removing the heater box and without recovering AC refrigerant: remove heater hoses from under hood, cut the coolant tubes on top of the heater box, remove screws and pull core strait upward, you might need to loosen the nuts from under the hood to give box some wiggle room, you'll need a new heater core that has flexible bendable or rotating tubes so you can fit it back in through the firewall.
OPTION 2:
To remove both cores with the entire heater box:
Recover refrigerant
Remove ac lines using 3/4 and 5/8 line tools, push tool in to release lock then twist and pull out hard. I had to remove the canister and disconnect the rigid line at the accumulator to give me wiggle room to pull the line off.
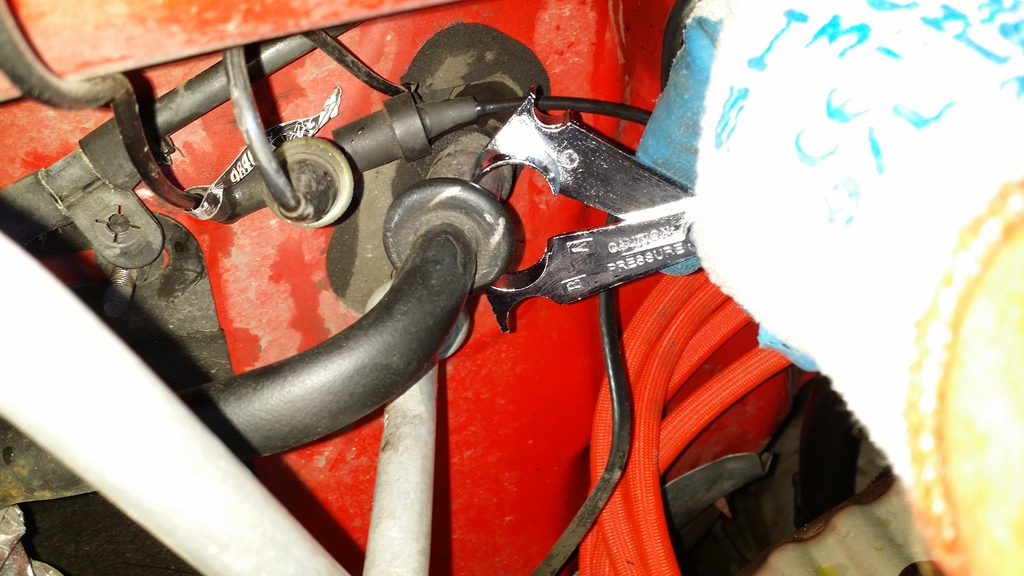
Removed condenser line to have more wiggle room and to prevent breaking it, bending too many times will cause a crack.
Replace all o-rings and lubricate all o-rings and fittings with mineral oil b4 assembly.
In engine bay there are 4 nuts securing heater box
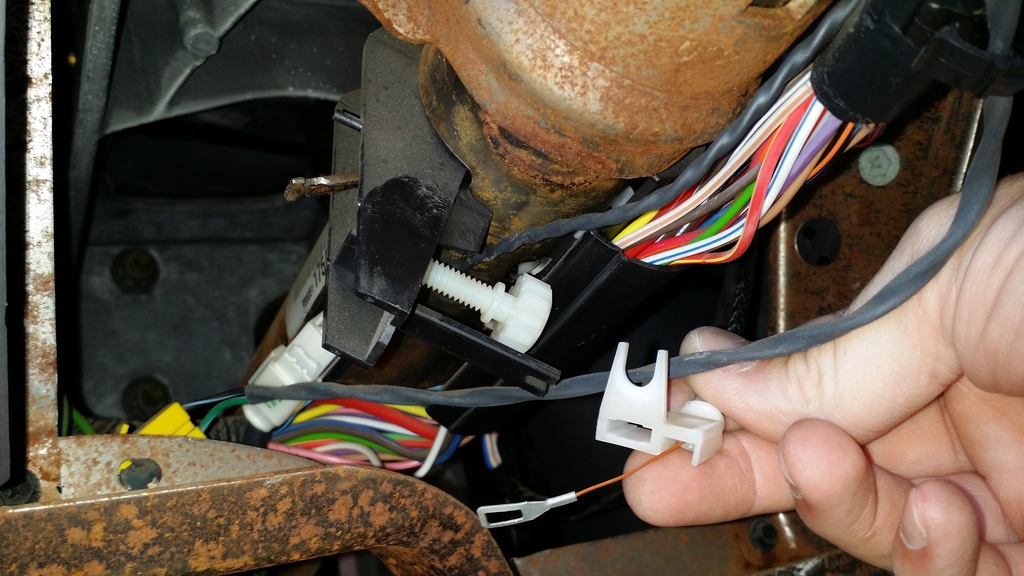
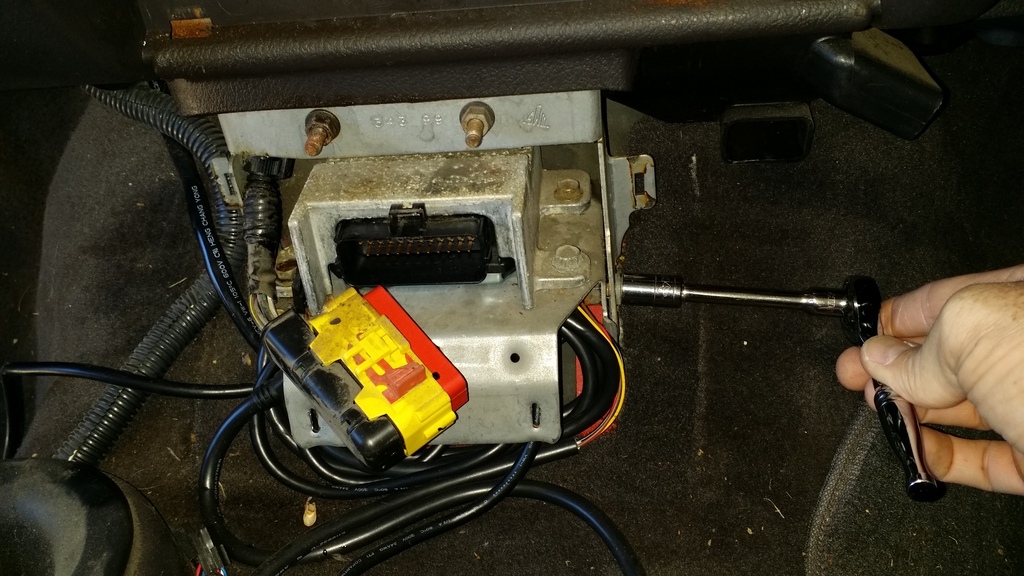
1 is under ECM, remove 3 plugs from ECM (don't bend or flex these wires and connectors more than needed, a broken wire can be a real bad day) Remove 3 5/16 screws from ECM then remove ECM, remove nut using 10mm socket
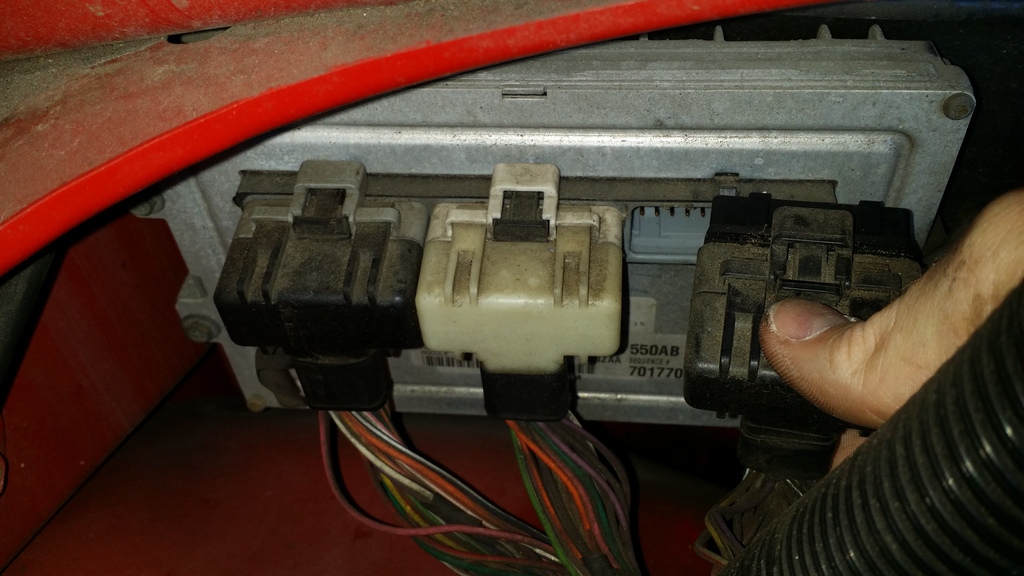

NUT 1 Under ECM
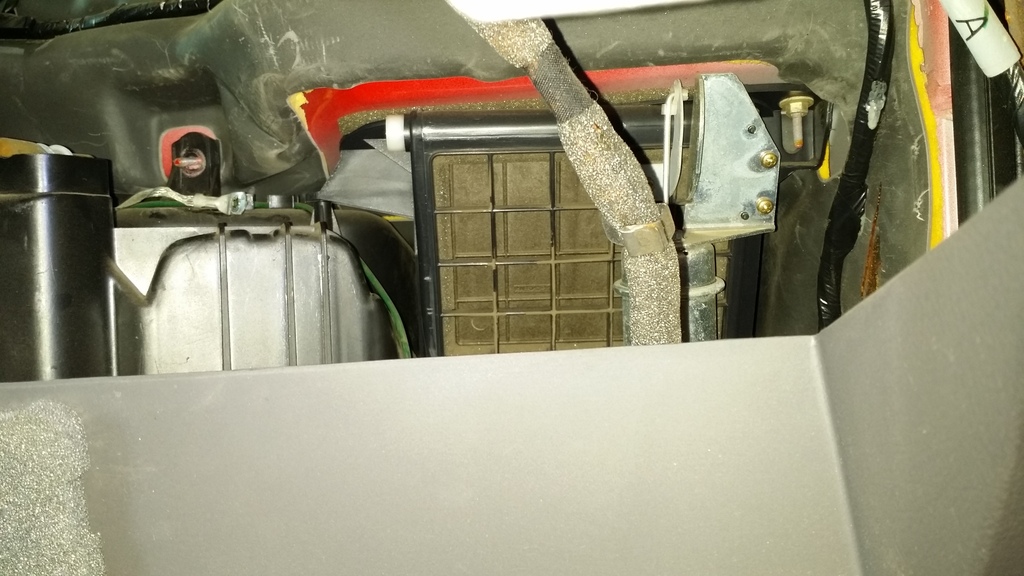
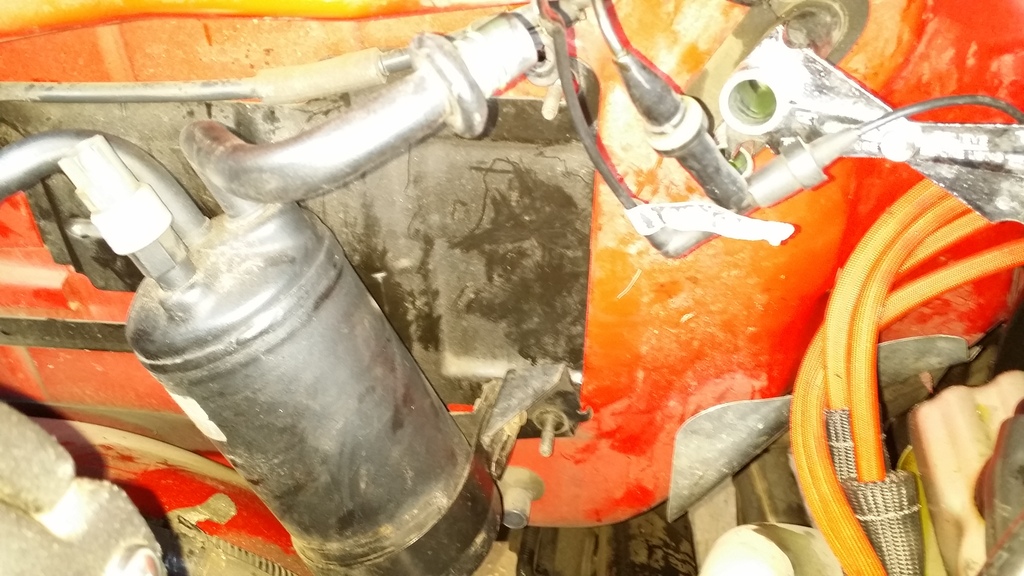
NUT 2 is clamping the accumulator canister to the firewall
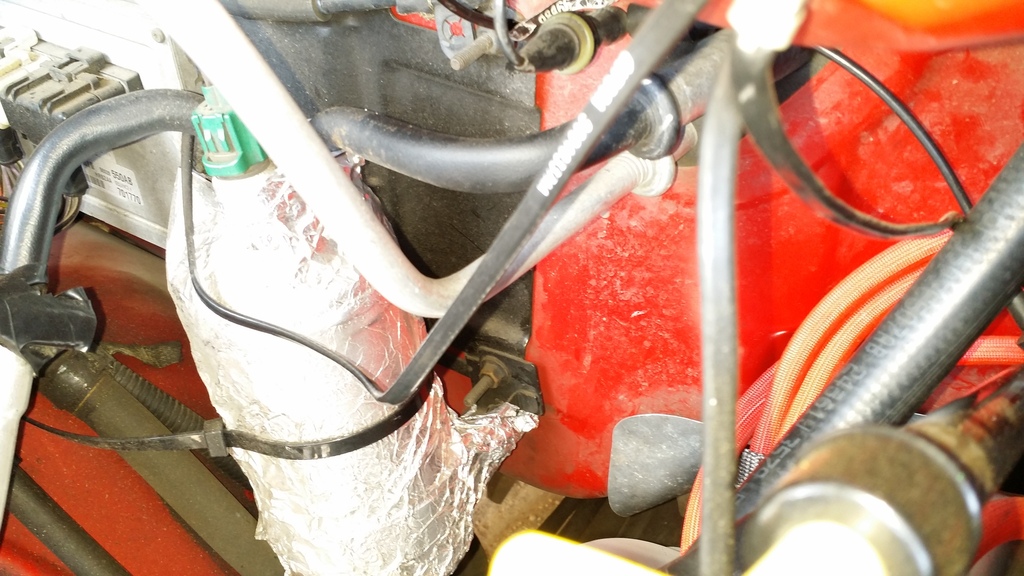
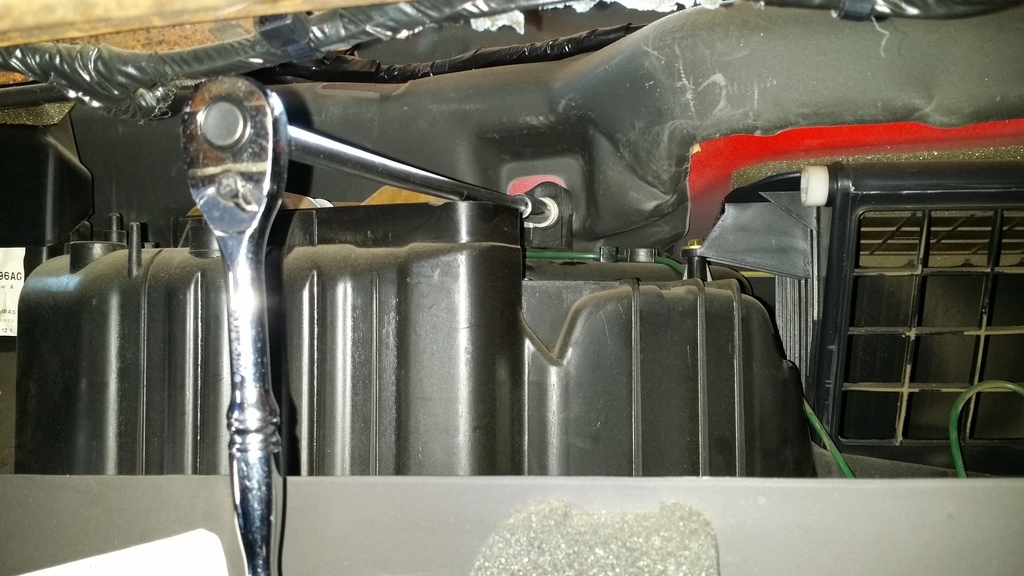
NUT 3 upper right corner of the black plate behind accumulator
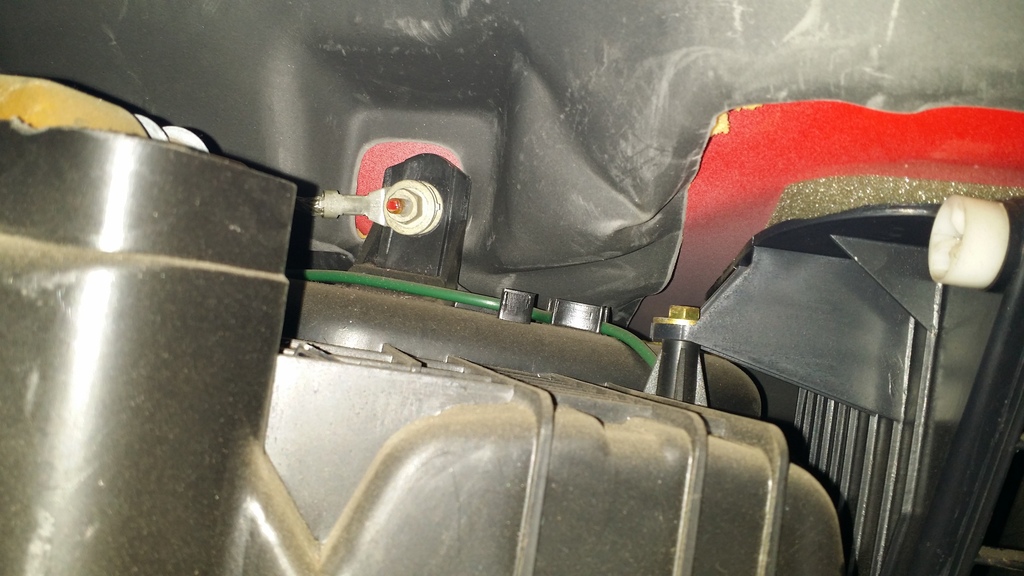
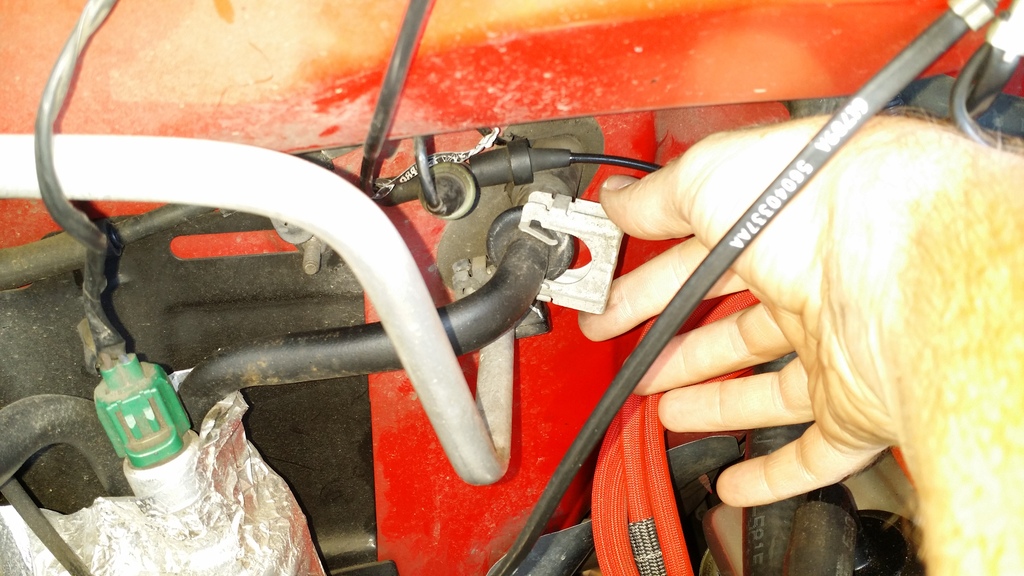
NUT 4 Behind air cleaner, next to heater core inlet/oulet
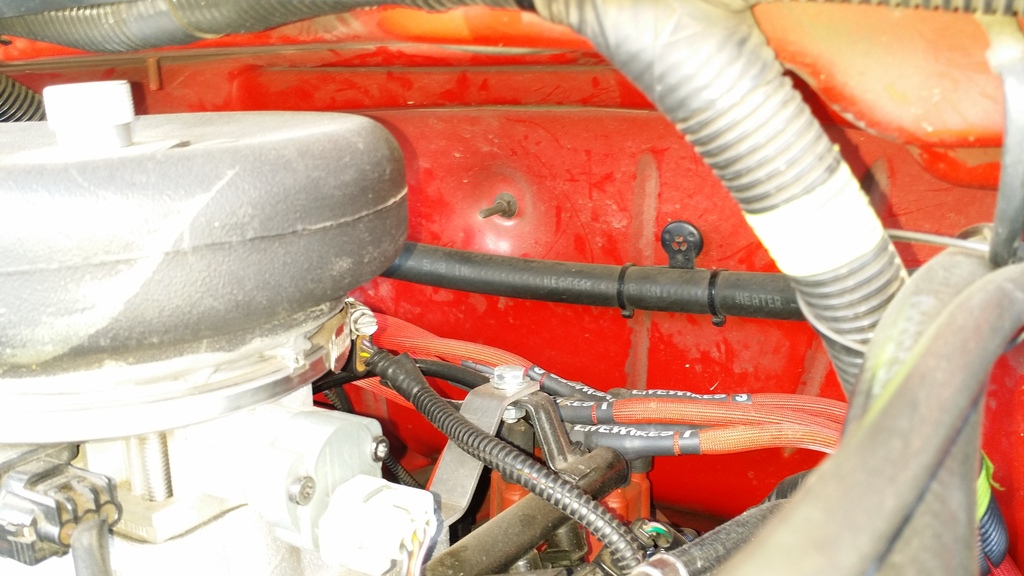
NUT 4 second angle
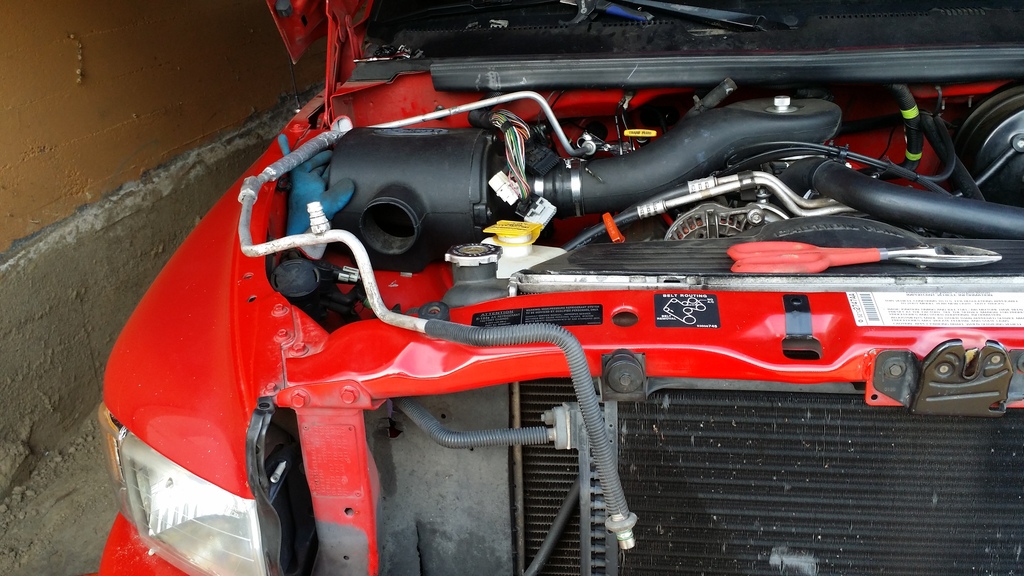
Pull air box out and let it rest on floor, it's heavy, a friend will be helpful here.
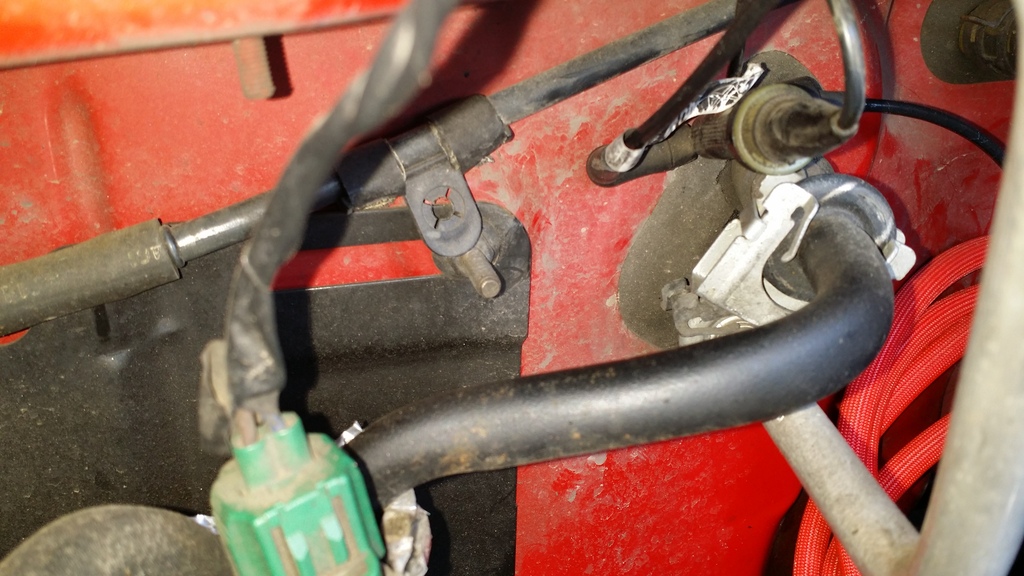
Cut the black 1/8 in vacuum line that comes though the firwall, you'll need a 1/8th in coupler when re- installing so give yourself room to install coupler, found at Autozone in variety pack.
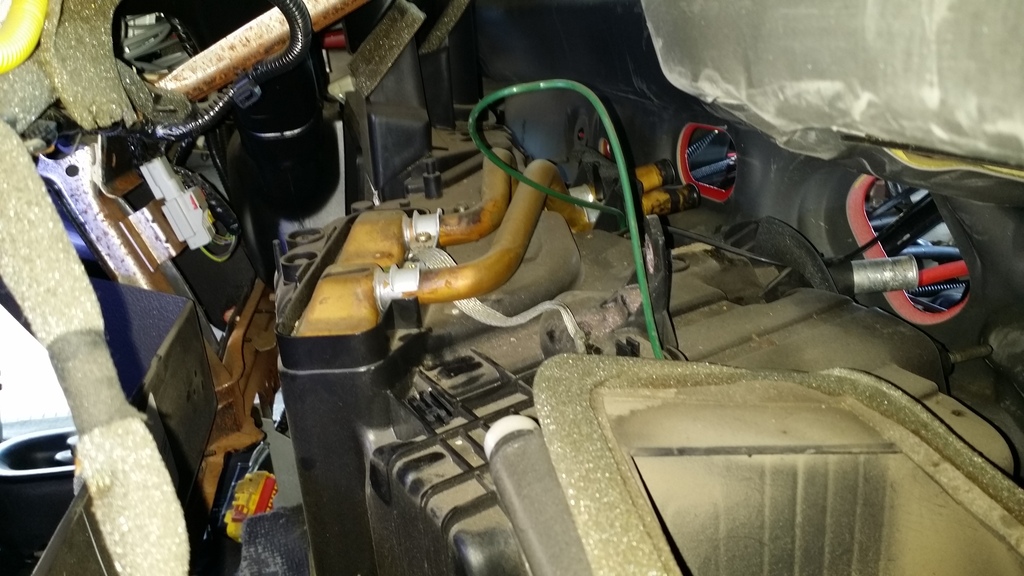
Unplug green vacuum line from lower right actuator
Remove black and green vacuum lines from clip on back of air box and peel tape away to free the line from the air box
Unplug the red, yellow and brown vacuum lines from lower left actuators.
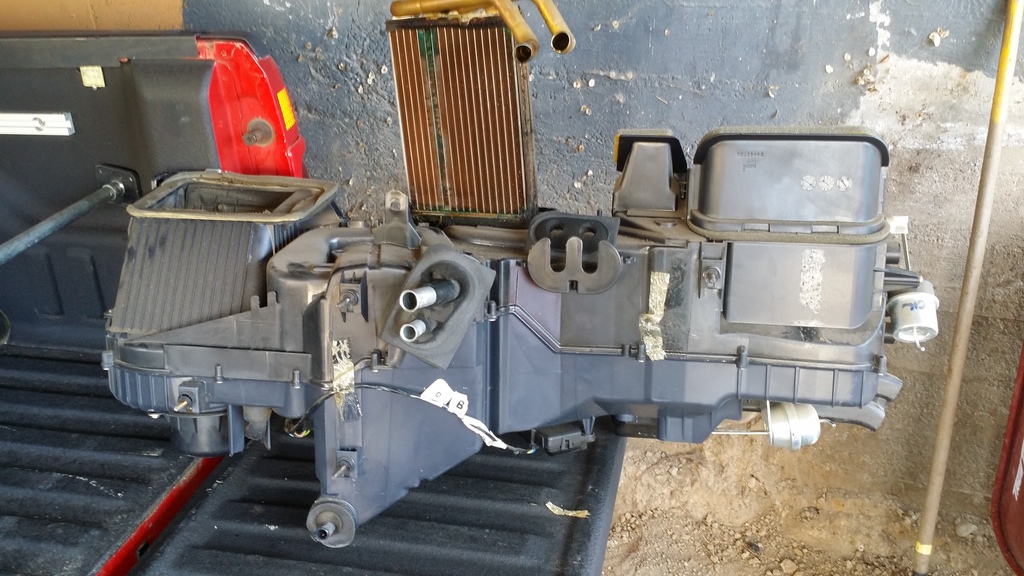
Slowly work air box out from under dash and out passenger door being careful to make sure all lines are released.
Box is now out, couple screws and heater core comes out.
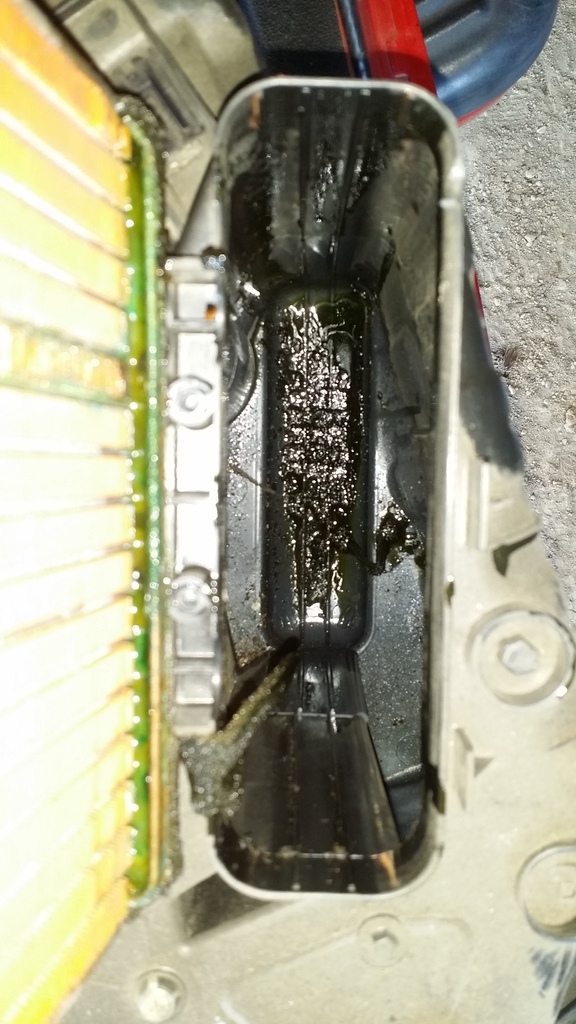
Here's what's inside the box, that's the AC evaporator completely clogged up. It's worse than it looks in the photo, those fins are clogged 2/3rds the way to the top, be nice to that foam liner, you'll need to clean it up and reuse it.
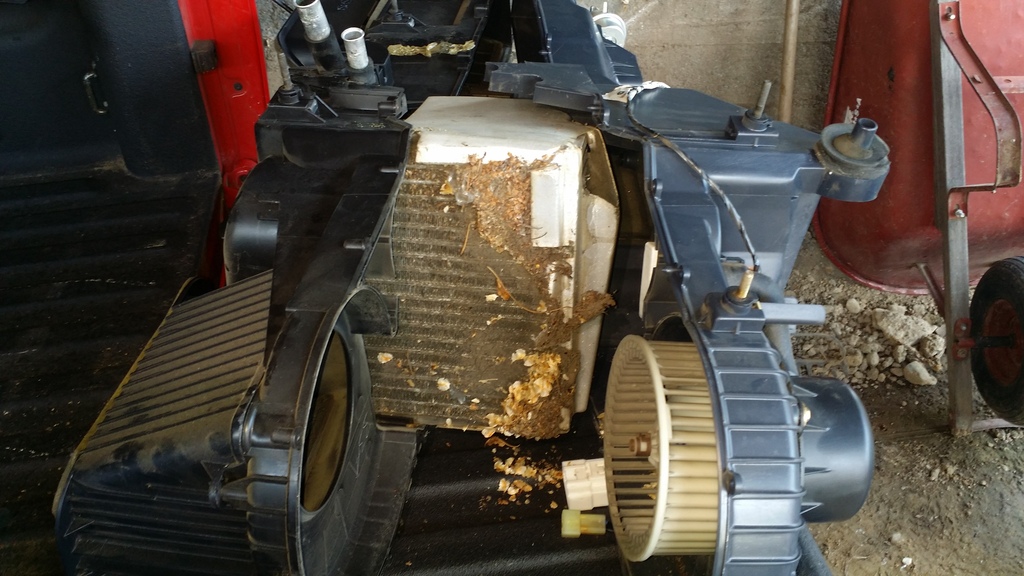
And the leaking heater core
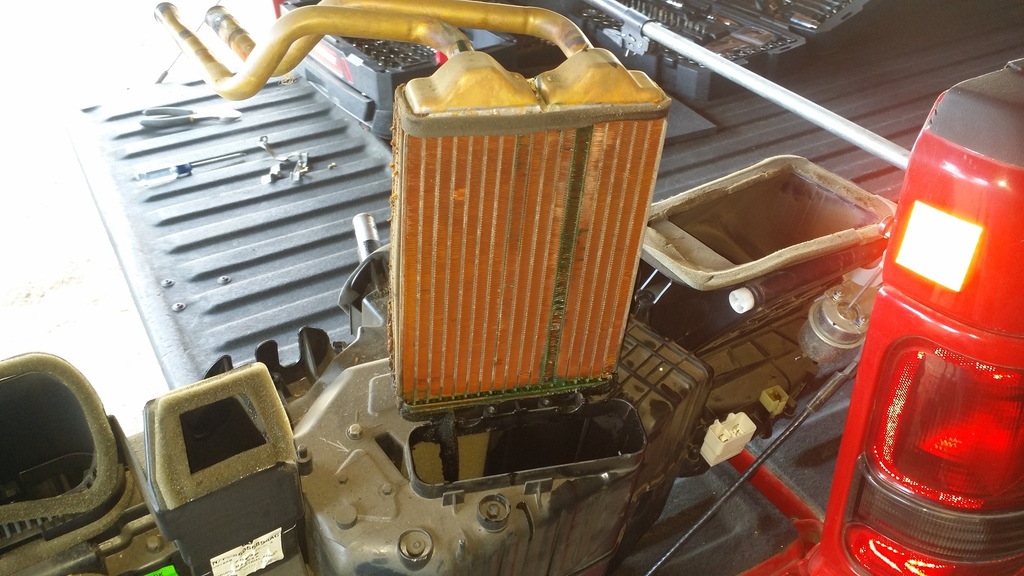
This is where I stopped, but to remove the dash out of the truck there are still some connectors to the gauge cluster that need to be removed and then it should be free.
Have a friend help support the dash from both sides, it will crack even when being very careful, try to support the middle keeping the top from flexing or bowing.
INSTALLATION TIPS
1. Suggest running the black and green vacuum lines over the top of the air box after it is bolted back in rather than sandwiched between box and firewall to prevent pinching a line. All other lines connect underneath on left side of box and won't get pinched
2. Don't tighten the windshield screws beyond snug, the plastic will crack!
3. Use new heater hoses if yours were original, mine wouldn't seal up as they were too loose.
4. Replace the crappy factory dash with better aftermarket.
5. Have AC system leak tested and recharged. Mine cost $196, about twice what it should cost, call around first.
6. Have a friend help with the dash removal to minimize damage but don't blame him if it cracks cause no matter what it's gonna crack.
7. Taking apart the heater box is pretty simple, use care to not damage any foam gaskets. Get some foam tape from the hardware store and wrap all the way around the cores to completely seal them so air does not slip around the sides, top and bottom of the cores. thick for the AC and thin for the Heater Core. Can always double up and layer it if thicker is needed.
Vacuum hoses:
Red Lower Left actuator 1of2
Brown Lower Left actuator 2of2
Yellow Mid-Left actuator
Green Right actuator
Black from engine
That's it, pretty big job and that's why I put up with the foggy windows and coolant smell for so long. My heat is now almost instantly warm when starting engine and that's a huge improvement, and my AC is way colder. I cracked my dash in two spots all the way from front to rear but it's still intact, and I was being extremely careful but working alone.
This job took me 2 days of taking my time and taking long breaks, and several trips to the auto parts stores. I'm glad I did it myself because I would hate any shop that cracked my dash and I know for sure it was done carefully, done right, and everything cleaned up good and sealed properly. I priced it out and it was worth $750 to my local shop. The dealership did one of our work trucks a few years ago and it was over $1000 and the already cracked dash came back in pieces with a giant hole front and center.
Another note: I had no problems with air gurgling in the core or air pockets. I simply topped off the coolant and the core seemed to fill just fine. If you are worried about it you could probably fill the core and cap it off before installing.
It's also a good idea to add at least some screen over or under the cowl to block all the leaves from getting in the vent system. I added an after market filter that fits over the cowl. You can check out my install in another post here https://dodgeforum.com/forum/2nd-gen...2001-pics.html
Best of luck with your dash and cores, take your time and don't rush.
The repair was done on a 2001 model year.
EDIT: Some members have reported the cheap non aluminum cores have leaked within a year and had to do the repair all over again. It is recommended to use high quality aluminum for both heater and AC cores. I got mine retail from Oreillys, they were about $100 for both. I used a non flexible tube core and it requires removal of the heater box. There's another style with flexible inlet tubes that allow installing without removal of the heater box but still requires dash removal.
It was also mentioned that some cores have less vertical tubes causing less heat transfer, so make sure you new core has at minimum same number of vertical tubes. Would be a real downer to have mediocre heat in the winter with a brand new core.
REMOVAL:
Recover AC refrigerant. I had shop do mine free, they can resell the R134a (may not be necessary if replacing heater core only, and not removing heater box)
Disconnect battery
Remove 2 front screws on corner kick panels, remove corner panels
Remove gauge bezel, tilt steering wheel down, e brake on, pull gear lever down to 1st, remove gauge bezel, set back to park
Remove drink holder 6 screws (2 hidden under gauge bezel)
Remove glove box, pulls up and unclips
Remove 1 10mm nut above air box with ground wire using long extension and deep socket

Remove ground wire and remove 2nd nut from under ground wire

Remove 1 10mm nut in upper right corner above blower motor (facing downward/ upper right)

Remove ash tray, pulls straight out
Remove cubby pocket 3 screws
Remove lower steering kick panel 3 screws
Remove gear indicator cable

Remove 2 10mm bolts from steering column and drop steering wheel

Remove gauge cluster, 4 screws, unplugs itself from harnesses as it's pulled outward, careful the gear indicator cable is attached and comes out with it.

Remove fuse box cover and remove flasher module and anything else that'll be in the way

Remove lower center cover 2 screws
Unplug center harness
Remove 2 10mm side bolts from center bracket

Remove 5 screws along windshield, use long extension, 5/16 socket

Remove 2 large bolts on side wall using 1/2in socket, 1 each side, be ready to catch and tie up dash to overhead handle

Go ahead and pull dash away from firewall, have a friend support the middle to prevent cracking. Use a bungee cord to support the end while you work.

Unclip the 2 electrical harnesses from ac box

Remove heater hose clamps, I used long needle nose pliers to remove the clamps

Pull and twist hose with small channel lock pliers to break them loose and remove. Remove air hat if more room is needed. Stuff a small rag in the ends of the pipes or cap them off to prevent spills, also pull carpet back and put some rags to catch any spills. I suggest replacing the heater hoses as they will be loose after breaking them off the heater core tubes


From here you can choose to continue and remove the heater box or replace heater core only with the heater box still in truck.
OPTION 1:
To replace just the heater core without removing the heater box and without recovering AC refrigerant: remove heater hoses from under hood, cut the coolant tubes on top of the heater box, remove screws and pull core strait upward, you might need to loosen the nuts from under the hood to give box some wiggle room, you'll need a new heater core that has flexible bendable or rotating tubes so you can fit it back in through the firewall.
OPTION 2:
To remove both cores with the entire heater box:
Recover refrigerant
Remove ac lines using 3/4 and 5/8 line tools, push tool in to release lock then twist and pull out hard. I had to remove the canister and disconnect the rigid line at the accumulator to give me wiggle room to pull the line off.


Removed condenser line to have more wiggle room and to prevent breaking it, bending too many times will cause a crack.

Replace all o-rings and lubricate all o-rings and fittings with mineral oil b4 assembly.
In engine bay there are 4 nuts securing heater box
1 is under ECM, remove 3 plugs from ECM (don't bend or flex these wires and connectors more than needed, a broken wire can be a real bad day) Remove 3 5/16 screws from ECM then remove ECM, remove nut using 10mm socket


NUT 1 Under ECM

NUT 2 is clamping the accumulator canister to the firewall

NUT 3 upper right corner of the black plate behind accumulator

NUT 4 Behind air cleaner, next to heater core inlet/oulet

NUT 4 second angle

Pull air box out and let it rest on floor, it's heavy, a friend will be helpful here.

Cut the black 1/8 in vacuum line that comes though the firwall, you'll need a 1/8th in coupler when re- installing so give yourself room to install coupler, found at Autozone in variety pack.
Unplug green vacuum line from lower right actuator
Remove black and green vacuum lines from clip on back of air box and peel tape away to free the line from the air box
Unplug the red, yellow and brown vacuum lines from lower left actuators.
Slowly work air box out from under dash and out passenger door being careful to make sure all lines are released.
Box is now out, couple screws and heater core comes out.

Here's what's inside the box, that's the AC evaporator completely clogged up. It's worse than it looks in the photo, those fins are clogged 2/3rds the way to the top, be nice to that foam liner, you'll need to clean it up and reuse it.

And the leaking heater core


This is where I stopped, but to remove the dash out of the truck there are still some connectors to the gauge cluster that need to be removed and then it should be free.
Have a friend help support the dash from both sides, it will crack even when being very careful, try to support the middle keeping the top from flexing or bowing.
INSTALLATION TIPS
1. Suggest running the black and green vacuum lines over the top of the air box after it is bolted back in rather than sandwiched between box and firewall to prevent pinching a line. All other lines connect underneath on left side of box and won't get pinched
2. Don't tighten the windshield screws beyond snug, the plastic will crack!
3. Use new heater hoses if yours were original, mine wouldn't seal up as they were too loose.
4. Replace the crappy factory dash with better aftermarket.
5. Have AC system leak tested and recharged. Mine cost $196, about twice what it should cost, call around first.
6. Have a friend help with the dash removal to minimize damage but don't blame him if it cracks cause no matter what it's gonna crack.
7. Taking apart the heater box is pretty simple, use care to not damage any foam gaskets. Get some foam tape from the hardware store and wrap all the way around the cores to completely seal them so air does not slip around the sides, top and bottom of the cores. thick for the AC and thin for the Heater Core. Can always double up and layer it if thicker is needed.
Vacuum hoses:
Red Lower Left actuator 1of2
Brown Lower Left actuator 2of2
Yellow Mid-Left actuator
Green Right actuator
Black from engine
That's it, pretty big job and that's why I put up with the foggy windows and coolant smell for so long. My heat is now almost instantly warm when starting engine and that's a huge improvement, and my AC is way colder. I cracked my dash in two spots all the way from front to rear but it's still intact, and I was being extremely careful but working alone.
This job took me 2 days of taking my time and taking long breaks, and several trips to the auto parts stores. I'm glad I did it myself because I would hate any shop that cracked my dash and I know for sure it was done carefully, done right, and everything cleaned up good and sealed properly. I priced it out and it was worth $750 to my local shop. The dealership did one of our work trucks a few years ago and it was over $1000 and the already cracked dash came back in pieces with a giant hole front and center.
Another note: I had no problems with air gurgling in the core or air pockets. I simply topped off the coolant and the core seemed to fill just fine. If you are worried about it you could probably fill the core and cap it off before installing.
It's also a good idea to add at least some screen over or under the cowl to block all the leaves from getting in the vent system. I added an after market filter that fits over the cowl. You can check out my install in another post here https://dodgeforum.com/forum/2nd-gen...2001-pics.html
Best of luck with your dash and cores, take your time and don't rush.
Last edited by beeker; Aug 30, 2016 at 02:11 AM.


I hope to replace the dash too now that mine is cracked.
Maybe a moderator can place this in the "how to" section or even make it a sticky for a while.
Administrator


Joined: Apr 2010
Posts: 87,479
Likes: 4,223
From: Clayton MI
 Just wanna make sure you don't have any additional edits you want to do. Then I'll copy the first post over.
Trending Topics
It was 90* here in the northwest but I had a covered area to work so it was just about perfect. Needed to do mine b4 it gets too cold.
 We'll leave this thread going here.