

Ram Body work

Thread Starter
|
Legend
Joined: Jul 2011
Posts: 8,259
Likes: 4
From: Austin, TX
up in canada we get hammered hard on paint cost. i totally agree on ppg product more hype than anything. i was told that the only differnce between omni and ppg was the voc rating not sure how correct that info is. thats going to be a sharp looking truck when your done. are you putting the bumper back on or a roll pan? when your doing the final blocking guide coat works good to find any low spots
Omni is one of PPG's product line. There are several different lines for different uses/customers all made by PPG. Branding, costs, etc. are part of it, and VOC issues is probably another.
I have not decided on bumper vs roll pan yet. Trying to guess whether a roll pan will look silly with a hitch hanging out the back or not. May jsut go back with the bumper for now.
Freezing rain yesterday, cowboys choked, and snow today so I didn't get anythign done yesterday. Rest of week is probably not a good opportunity either.
Got most of the dents out and filled and used a guide coat to check. Then I found another tiny ding on the hood after this afternoon. Hope to be able to at least cut bad sections out of rear panels this week, but not sure. Good thing is I am not in a hurry...
May put the gauge pod in this evening....if I don't park my a** in front of the fireplace as soon as I get home!
Retired Moderator - RIP
Joined: May 2008
Posts: 18,729
Likes: 17
From: NH
I already snapped it in and out a couple of times with the "practice pillar" - it helps out a bunch as I am not as worried about breaking a clip off while going in and out with it (thanks!). Existing pillar cover is pretty brittle so I was careful drilling a hole for the wires. Also using velcro instead of screws due to being afraid plastic will crack. Between the velcro and the lip on door seal, it appears to hold very firm. Going to give it a day or so for paint to cure before gluing velcro on pillar. Probably did not need to paint the existing pillar, but wanted to be sure in case an edge showed.....one of those retentive things I suppose.
Pulled the wiring from the pillar to down below the dash. Haven't decided where to penetrate into engine bay yet. Will probably do this when I figure relays for headlights and trailer brake controller.
It is 39 and rainy today, so that pretty much kills the idea of dropping bumper outside and cutting panels out. Something about mig welding in the rain is not appealing......guess I'll watch football instead!
Thread Starter
|
Legend
Joined: Jul 2011
Posts: 8,259
Likes: 4
From: Austin, TX
Great. I will check that out. I also plan to run a few spare wires through and seal up tight. I normally install a small screw type junction block in the engine bay for things I may add later. I know I will be adding a brake controller and due to the threads I have seen, will be putting trailer tail lights on a relay to keep from meltin headlight switch. I'll also convert headlights to relays as well as a prventative strike. Bought a dozen relays at $1.20 each from Rock Auto about a month ago on closeout.
Thread Starter
|
Legend
Joined: Jul 2011
Posts: 8,259
Likes: 4
From: Austin, TX
Haven't been able to do anything in the last week and a half. It has been too cold and now, rainy for the last 6 days. Finally backed truck into garage after work today and dropped the rear bumper and pulled tail lights. I need to cut off lower panel behind the wheels on the bed - both sides.
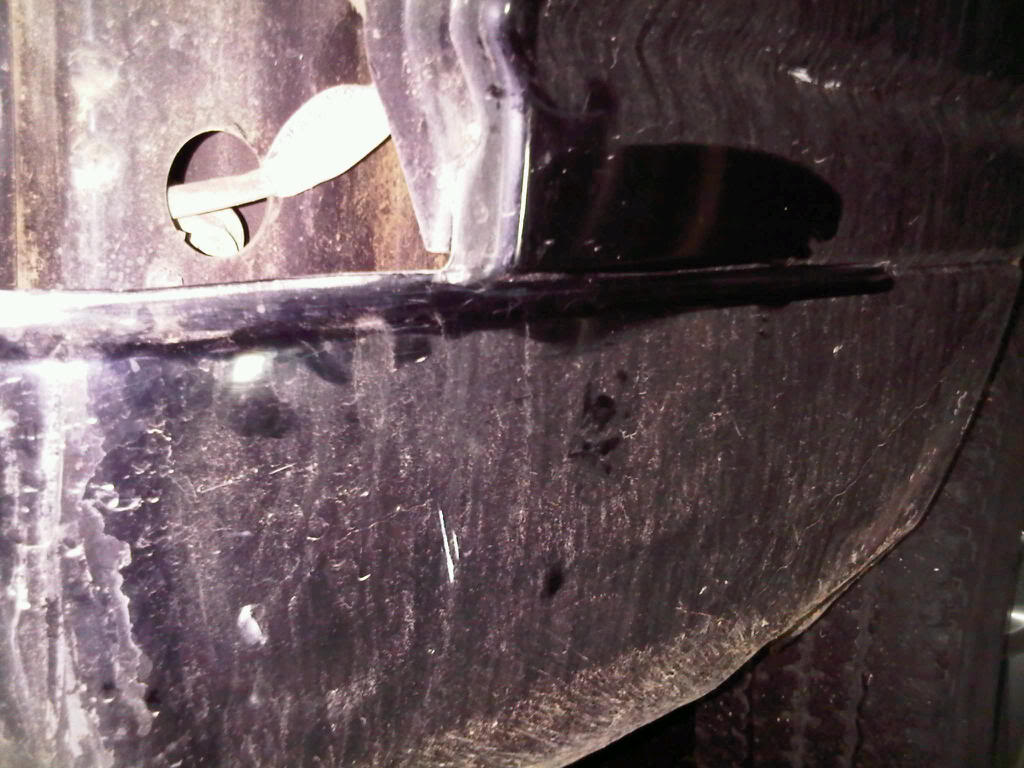
Cannot decide where to cut panels. Should I butt weld with strip behind the seam, or trim and form a lip on existing panel for new panel to rest on for strenght? Or do I cut at the deepest pint of crease and weld there?
Any ideas or suggestions?
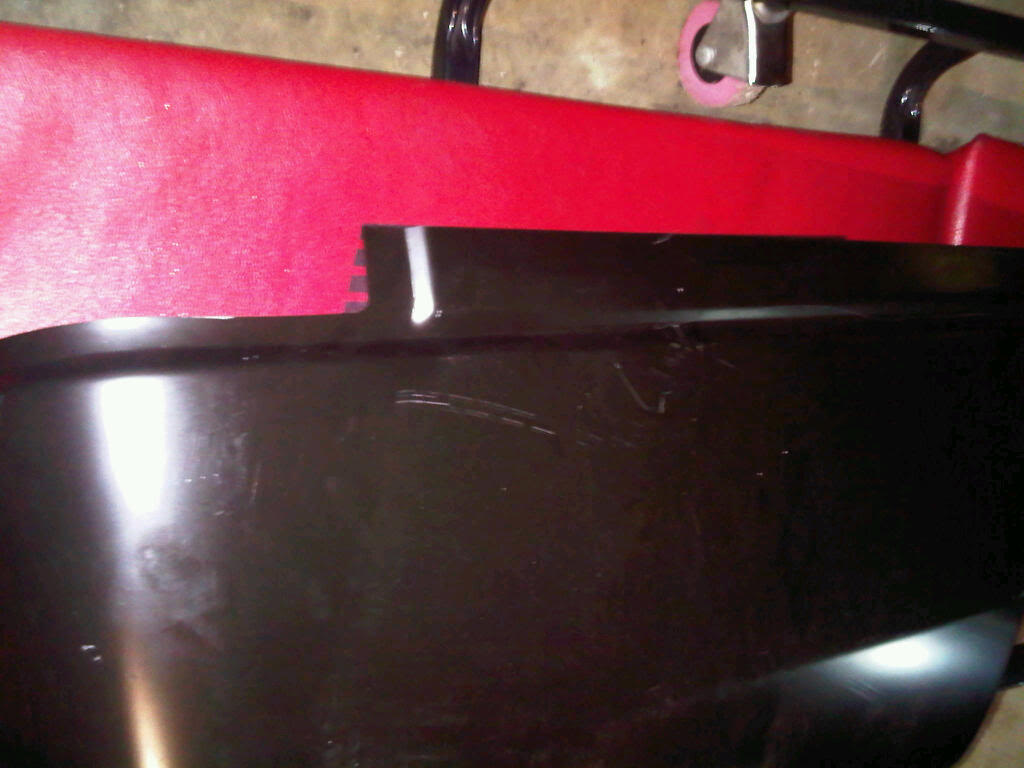
Replacement panel to be installed:
Damaged (and dirty) body panel:
I get to try out the new welder I bought - just for this project.....boy, how my tool inventory has grown since I bought this Ram! Need a bigger garage now!
Cannot decide where to cut panels. Should I butt weld with strip behind the seam, or trim and form a lip on existing panel for new panel to rest on for strenght? Or do I cut at the deepest pint of crease and weld there?
Any ideas or suggestions?
Replacement panel to be installed:
Damaged (and dirty) body panel:
I get to try out the new welder I bought - just for this project.....boy, how my tool inventory has grown since I bought this Ram! Need a bigger garage now!

Professional
Joined: Sep 2011
Posts: 101
Likes: 0
the best place would be between the two body lines, where the facory trim usualy is. this gives you a flat area to block out and make a nice job. does your replacement panel wrap around under the tail lights? if it does i would drill the tack welds off the factory panel and spot weld in the new one. take your time welding in the panel it will warp very easy. a half inch of over lap should be lots.
Thread Starter
|
Legend
Joined: Jul 2011
Posts: 8,259
Likes: 4
From: Austin, TX
the best place would be between the two body lines, where the facory trim usualy is. this gives you a flat area to block out and make a nice job. does your replacement panel wrap around under the tail lights? if it does i would drill the tack welds off the factory panel and spot weld in the new one. take your time welding in the panel it will warp very easy. a half inch of over lap should be lots.
When I cut the existing panel, can I bend part of the edge back to allow new panel to lay on top of it before welding, leaving two alyers of sheet metal below joint? Seems that it would be easier to tack together and then grind and fill at weld to make smooth.
This body work thing is new for me. I have replaced fenders, but dents, paint and such are new. good news....I have lots of sand paper as I will probably paint, snad, repaint, sand, repain....you kind of get the idea. Probably a couple do overs in the process.
Anyone want to come help...free beer!
Administrator


Joined: Apr 2010
Posts: 87,393
Likes: 4,213
From: Clayton MI
Thread Starter
|
Legend
Joined: Jul 2011
Posts: 8,259
Likes: 4
From: Austin, TX
Use a panel crimper to give you a nice 'flange' to weld to.
That looks like what I need......and no one carries anything like that here in Podunk......I was hoping to cut and weld this weekend, but I guess I'll have to wait.
Yep, thin sheet metal has to weld slow and lower temp. Using 0.03" mig, but will be using small spots spaced out to prevent warping panel. Will probably take the cut out sectiuon and practice on a couple pieces to get setting for wire feed right and get the feel. Previous experience welding has been 1" to 3" plate, and down to 11 ga. this is pretty thin.
Record Breaker
Joined: Aug 2010
Posts: 2,241
Likes: 12
From: Ohio
The panel crimpers are nice. But, you can also do a butt weld and be fine. If you do just make sure you take your time cutting also. The better the fit the better the final "product". Plus it'll be easier to weld without blowing through.
Welding the rear and corner won't be so bad. The side long, flat part....yup, time is of the essence.
I had to weld a piece on my rocker/cab corner on the drivers side. I made my own patch panel from flat sheet metal. It actually turned out a hell of a lot better than I had thought it would. Mine is used more for work that anything so I didn't use any filler after grinding the weld. I used oil based Rustolleum and a brush to paint over. Unless you really look for it you can't tell there's even a patch there.
Now the sad part of this? I'm ASE certified for body repair and paint. But, I don't feel bad about it. Ever notice the vehicles bodymen drive? There normally rustbuckets.